8-16
8. Using the On-Screen Menus
Digital Projection
MERCURY HD
Selecting Operation Mode
Set the operation mode of the USB mouse connected to the
USB port (MOUSE/HUB) on the projector
Auto ............ Depending on connection of the USB port
(PC) on the projector and a USB port (type A)
on your PC, the USB mouse is operated in the
following way:
* When connecting the projector to your PC
The USB mouse connected to the projector
can be used as a PC mouse.
* When not connecting the projector to your
PC
The USB mouse connected to the projector
can perform menu operation of the
projector.
Projector ...... The USB mouse connected to the projector
can perform menu operation of the projector.
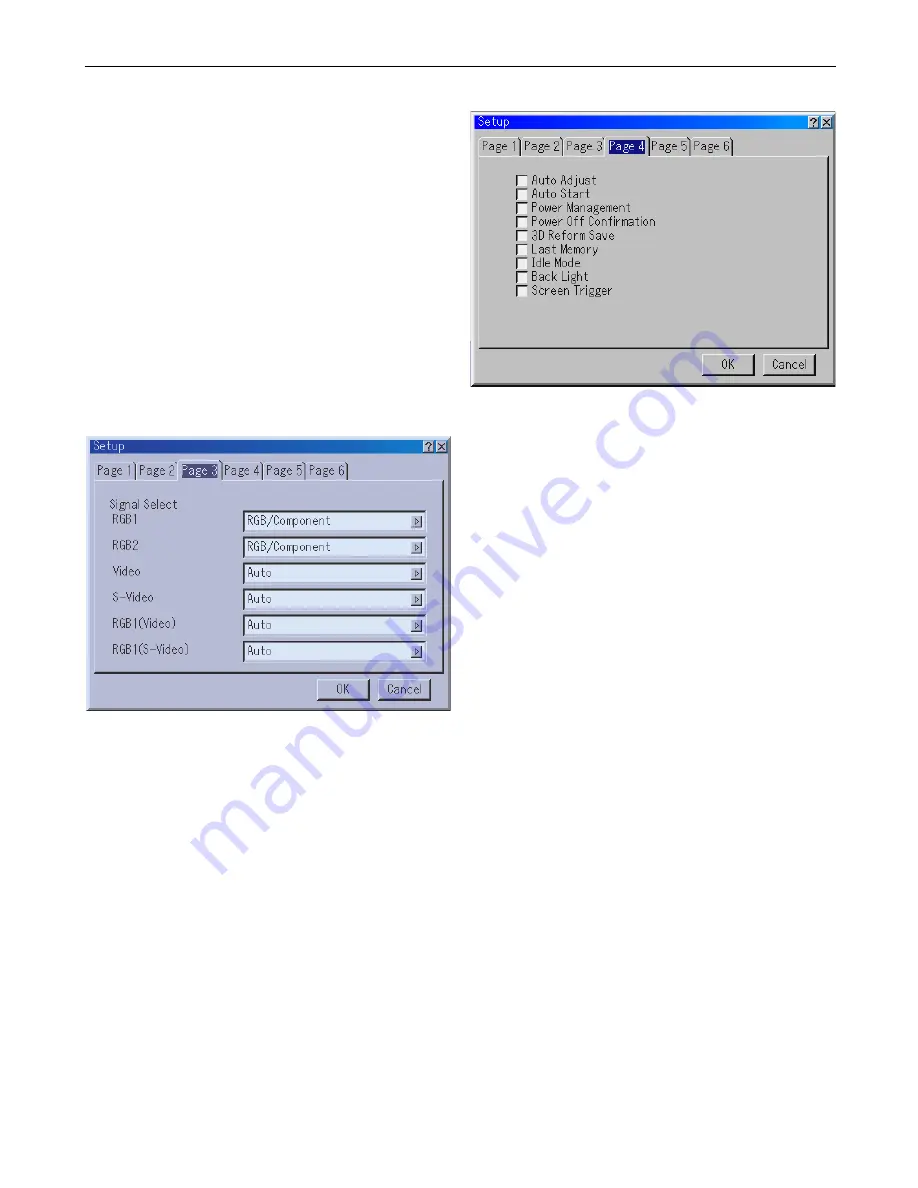
Setup Page 3
Selecting Signal Format
RGB1/2
Allows you to choose "RGB" for an RGB source such as a
computer, or "Component" for a component video source
such as a DVD player.
Normally select "RGB/Component" and the projector
automatically detects an either incoming signal. However
there may be some component signals that the projector is
unable to detect. If this is the case, select "Component".
Select "Scart" in RGB 1 or 2 for the European Scart.
VIDEO, S-VIDEO and RGB1 (Video and S-Video)
This feature enables you to select composite video
standards manually.
Normally select "Auto". Select the video standard from the
pulldown menu. This must be done for Video and S-Video
separately and "VIDEO" or "S-VIDEO" for RGB1 connector.
Setup Page 4
Enabling Auto Adjust [Auto Adjust]
When "Auto Adjust" is set to "On", the projector
automatically determines the best resolution for the current
RGB input signal to project an image using Digital
Projection's DigiScale Intelligent Pixel Blending Technology.
The image can be automatically adjusted for position and
stability; "Horizontal Position", "Vertical Position", "Clock",
"Phase", and "Resolution".
On ............... Automatically adjusts image "Horizontal
Position", "Vertical Position", "Clock", "Phase"
and "Resolution".
Off ............... User can adjust the image display functions
("Horizontal Position", "Vertical Position",
"Clock", "Phase" and "Resolution") manually.
Enabling Auto Start [Auto Start]
Turns the projector on automatically when the power cable
is inserted into an active power outlet and the main power
switch is turned on.
This eliminates the need to always use the "Power" button
on the remote control or projector cabinet.
Enabling Power Management [Power Management]
When this option is on and there is no input for five minutes
or more, the projector will automatically turn itself off.
Enabling Power Off Confirmation [Power Off Confirmation]
This option determines whether a confirmation dialog for
turning off the projector will appear or not.
Enabling Horizontal and Vertical Keystone Correction Save
[3D Reform Save]
This option enables you to save your current 3D Reform
settings. Saving your change once affects all sources. The
changes are saved when you turn off the projector.
Summary of Contents for Mercury HD
Page 2: ...ii...
Page 6: ...vi Digital Projection MERCURY HD...
Page 8: ...viii Digital Projection MERCURY HD...
Page 32: ...2 12 2 Installation Digital Projection MERCURY HD...
Page 40: ...3 8 3 Projecting an Image Digital Projection MERCURY HD...
Page 50: ...5 6 5 Using the Viewer Digital Projection MERCURY HD...
Page 60: ...6 10 6 Using the Projector in a Network Digital Projection MERCURY HD...
Page 98: ...9 4 9 Routine Maintenance Digital Projection MERCURY HD...


