7-2
7. Double Stacking and Link Mode
Digital Projection
MERCURY HD
1
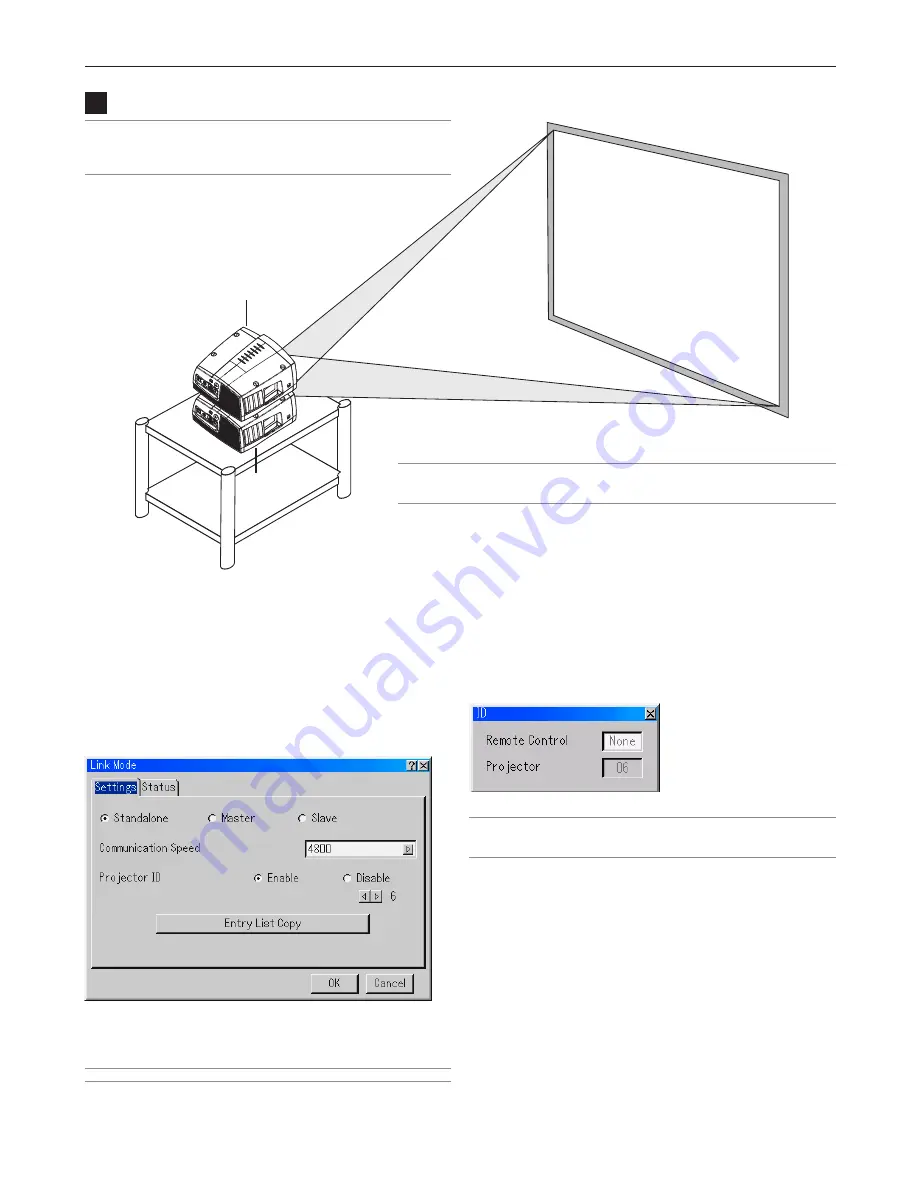
Stacking and Connecting the Projectors
Master projector
Slave projector
NOTE: Up to three units can be gravity stacked without external
support. In some cases, however, two images will not align on the
screen correctly. This will become more apparent when displaying small
text and detailed graphics.
CAUTION: To prevent the projectors from falling, install them in a place and fasten
them in a way with sufficient strength to support the two projectors plus the weight of
the lens. (See weight specification in:
10. Appendix
.)
Assigning Projector IDs
You can operate multiple projectors with the same remote
control.
To do so:
1. Select [Projector Options]
→
[Link Mode]
→
[Settings]
→
[Projector ID] and assign an ID number to each projector.
See also page 8-18.
2. Select the same communication speed for both the
projector.
NOTE: Do not turn on [Master] or [Slave] at this time.
3. On the remote control specify the ID number of the
projector to be adjusted. Press and hold the CTL and press
MENU (ADDRESS) button to enter the ID number.
You can operate the projector assigned the same ID
number as the remote control.
NOTE: Specifying "None" for projector ID allows you to operate multiple
projectors concurrently. However, some projectors may not synchronize
to the other projectors.
Summary of Contents for Mercury HD
Page 2: ...ii...
Page 6: ...vi Digital Projection MERCURY HD...
Page 8: ...viii Digital Projection MERCURY HD...
Page 32: ...2 12 2 Installation Digital Projection MERCURY HD...
Page 40: ...3 8 3 Projecting an Image Digital Projection MERCURY HD...
Page 50: ...5 6 5 Using the Viewer Digital Projection MERCURY HD...
Page 60: ...6 10 6 Using the Projector in a Network Digital Projection MERCURY HD...
Page 98: ...9 4 9 Routine Maintenance Digital Projection MERCURY HD...


