26
••••
SunScan Tutorial
Document code: SS1-UM-1.05
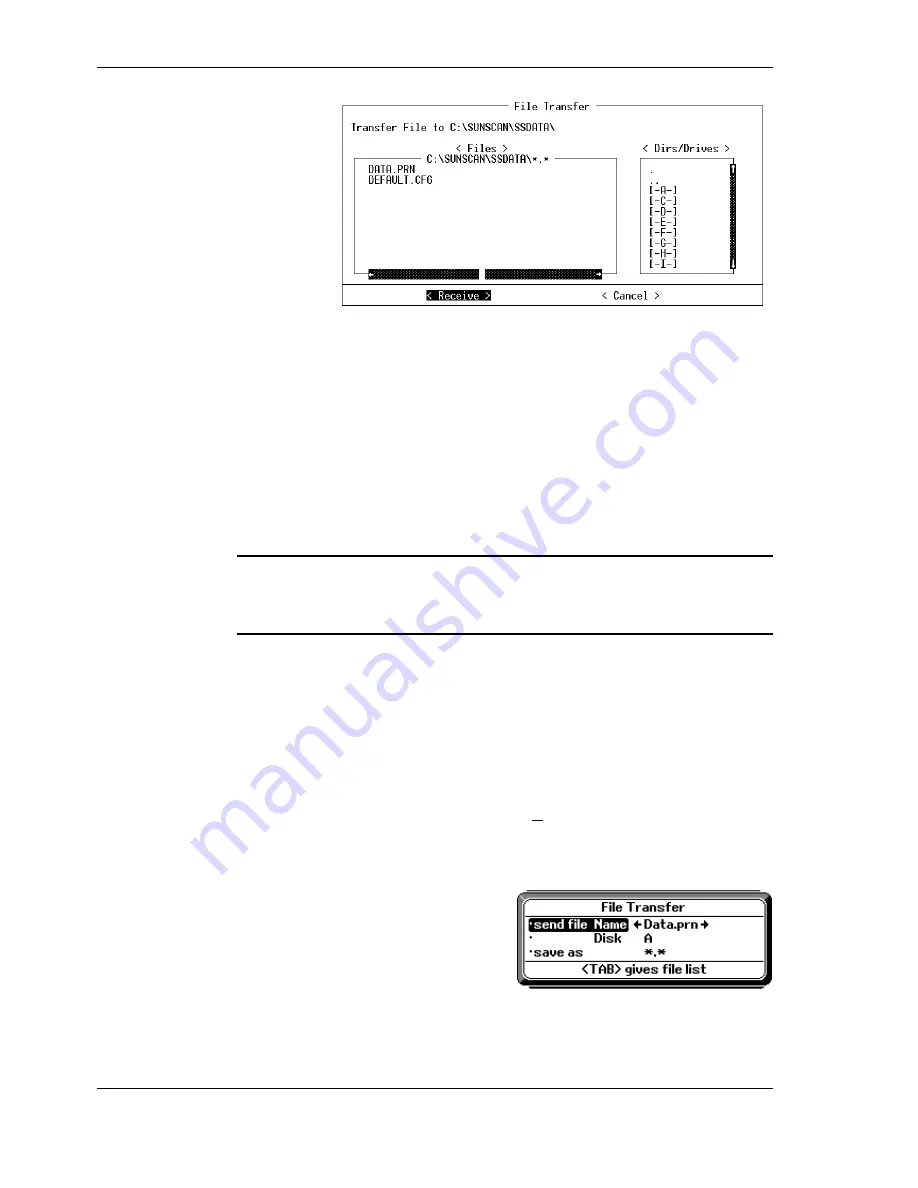
Navigating in the File Transfer box
•
The
Tab
key (
➙
➙
➙
➙❘❘❘❘
) will move you from one
<field>
to the next, in sequence.
Shift+Tab
takes you back a step.
•
The
<Dirs/Drives>
area shows you other drives that can be accessed. Use the
↑↑↑↑↓↓↓↓
arrows and press
↵
↵↵
↵
to select the drive or directory you want.
•
"Sliders" on the side of the box give you an indication of where you are in the
complete list.
•
"
. .
" takes you to the parent directory.
•
"
.
" Returns you to the current directory File box.
•
The
<Files>
area shows you the filenames that are already used in that directory.
Use the
↑↑↑↑↓↓↓↓
or
←
←
←
←→
→
→
→
arrows to view the complete file listing.
You can't select or change these filenames here - they are listed so that you can see
what files you already have. Specifying the filename you want to save is done in the
next steps on the Workabout. Don't worry about over-writing an existing file, you
will be warned if this is about to happen.
You can quit this process at any stage by pressing
Esc
on your PC, or by selecting
<Cancel>
and
↵
↵↵
↵
.
♦
When satisfied with your choice of directory, select
<Receive>
and press
↵
↵↵
↵
.
A "Waiting for Data . . " message will appear in the files box.
Now move back to the Workabout for the final stage.
Initiating the file transfer from the Workabout
With SunData running in the Workabout:
♦
Press
Menu, File, File Transfer, Enter
or (
∪
∪
∪
∪
+R
), for the file transfer dialog box.
You will be prompted with the current data file Name and Disk, but you could
choose any data file in the Workabout by following the on-screen prompts. For this
example we will continue with the
A:\Data.prn
file illustrated.
Now is your chance to specify the
filename you want the file saved as. If you
are happy with the
send file Name
, then
leave the
save as
showing
✳
✳
✳
✳
.
✳
✳
✳
✳
.
♦
If you want to change the name, use the
↑↑↑↑↓↓↓↓
arrows to select
save as
, and type in
your preferred filename.
♦
Press
Enter
.


