background image

98  |  SRA 6.0 Administrator’s Guide

Step 1

Navigate to the 

System > Time

 page.

Step 2

Select the 

Automatically synchronize with an NTP server

 check box.

Step 3

In the NTP Settings section, enter the time interval in seconds to synchronize time settings with 
the NTP server in the 

Update Interval

 field. If no period is defined, the appliance will select the 

default update interval, 3600 seconds.

Step 4

Enter the NTP server IP address or fully qualified domain name (FQDN) in the 

NTP Server 1 

field.

Step 5

For redundancy, enter a backup NTP server address in the 

NTP Server Address 2 (Optional)


and 

NTP Server Address 3 (Optional)

 fields.

Step 6

Click 

Accept

 to update the configuration.

System > Settings

This section provides an overview of the 

System > Settings

 page and a description of the 

configuration tasks available on this page.

“System > Settings Overview” section on page 98

“Managing Configuration Files” section on page 99

“Managing Firmware” section on page 101

System > Settings Overview

The 

System

 > 

Settings

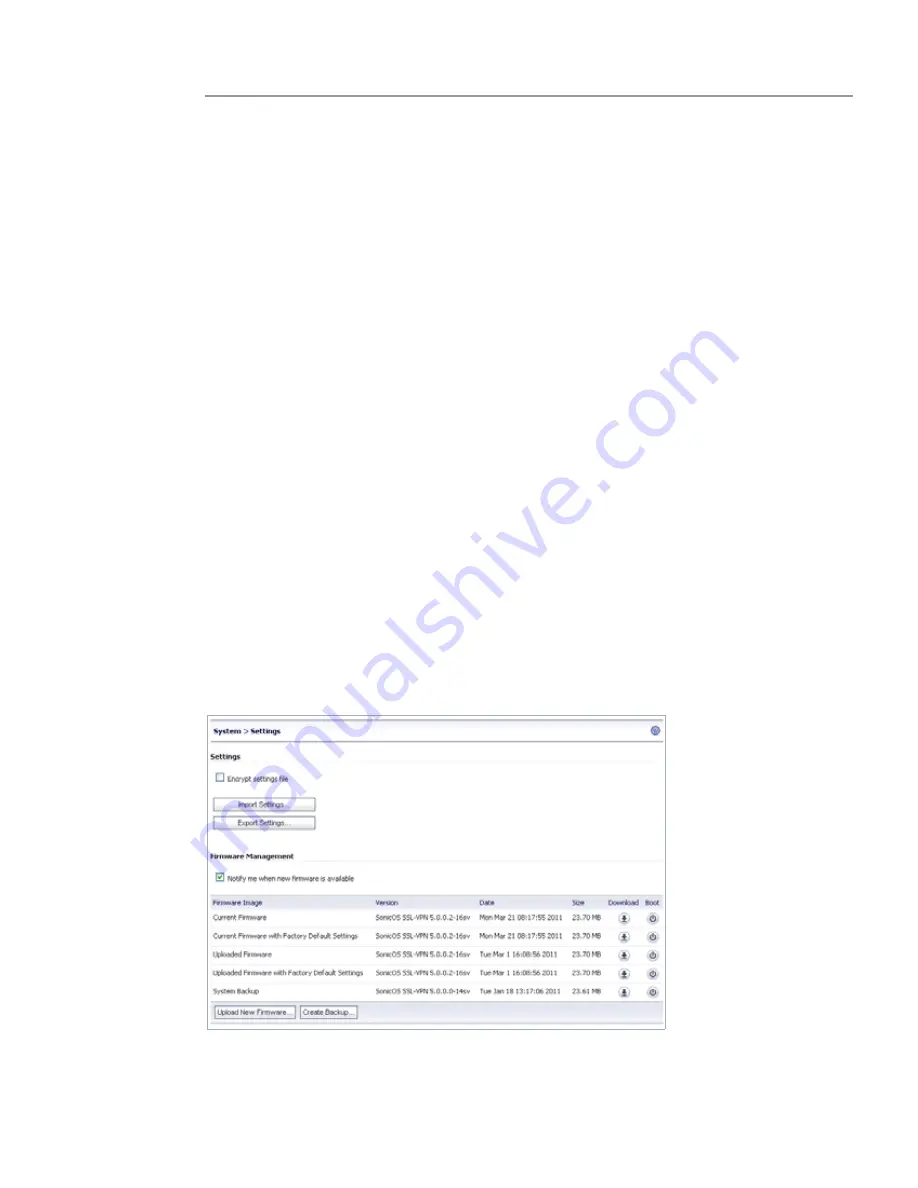
 page allows the administrator to import and export the settings of the 

SRA appliance.

On a physical appliance, the 

System

 > 

Settings

 page provides a way to upload new firmware, 

and to boot either the current firmware, newly uploaded firmware, or backup firmware.

Figure 11

System > Settings Page - Physical Appliance

Summary of Contents for PowerEdge 4200 Series

Page 1: ... 1 SRA 6 0 Administrator s Guide ...

Page 2: ...icWALL Aventail Smart Access SonicWALL Aventail Unified Policy SonicWALL Aventail Advanced EPC SonicWALL Clean VPN SonicWALL Clean Wireless SonicWALL Global Response Intelligent Defense GRID Network SonicWALL Mobile Connect SonicWALL SuperMassive E10000 Series and all other SonicWALL product and service names and slogans are trademarks of Dell Inc 2012 11 P N 232 002120 00 Rev D NOTE A NOTE indica...

Page 3: ...ading and HTTP S Bookmarks Overview 23 Cross Domain Single Sign On 28 ActiveSync Authentication 28 Network Resources Overview 33 SNMP Overview 39 DNS Overview 39 Network Routes Overview 39 NetExtender Overview 39 Two Factor Authentication Overview 43 One Time Password Overview 46 End Point Control Overview 48 Secure Virtual Assist Overview 49 Web Application Firewall Overview 60 Navigating the SRA...

Page 4: ...ings 105 Enabling GMS Management 105 System Certificates 106 System Certificates Overview 106 Certificate Management 107 Generating a Certificate Signing Request 108 Viewing and Editing Certificate Information 108 Importing a Certificate 109 Adding Additional CA Certificates 110 System Monitoring 110 System Monitoring Overview 110 Setting The Monitoring Period 112 Refreshing the Monitors 112 Syste...

Page 5: ...ation Offloading 142 Application Offloading Overview 142 Configuring an HTTP HTTPS Application Offloading Portal 143 Configuring Generic SSL Offloading 146 Portals Domains 148 Portals Domains Overview 148 Viewing the Domains Table 149 Removing a Domain 149 Adding or Editing a Domain 150 Adding or Editing a Domain with Local User Authentication 151 Adding or Editing a Domain with Active Directory A...

Page 6: ...dit EPC Settings 208 End Point Control Settings 210 End Point Control Log 211 Chapter 9 Secure Virtual Assist Configuration 213 Secure Virtual Assist Status 213 Secure Virtual Assist Status 214 Secure Virtual Assist Settings 214 General Settings 215 Request Settings 216 Notification Settings 217 Customer Portal Settings 218 Restriction Settings 219 Secure Virtual Assist Log 220 Secure Virtual Assi...

Page 7: ...shooting Web Application Firewall 284 Chapter 13 Users Configuration 287 Users Status 287 Access Policies Concepts 288 Access Policy Hierarchy 288 Users Local Users 289 Users Local Users Overview 289 Removing a User 290 Adding a Local User 290 Editing User Settings 291 Users Local Groups 314 Users Local Groups Overview 314 Deleting a Group 315 Adding a New Group 315 Editing Group Settings 316 Grou...

Page 8: ...Wireless Router MR814 SSL configuration 369 Check Point AIR 55 370 Setting up an SRA Appliance with Check Point AIR 55 370 Static Route 371 ARP 371 Importing CA Certificates on Windows 373 Importing a goDaddy Certificate on Windows 373 Importing a Server Certificate on Windows 376 Creating Unique Access Policies for AD Groups 377 Creating the Active Directory Domain 378 Adding a Global Deny All Po...

Page 9: ...as other Dell SonicWALL products and services documentation Guide Conventions The following conventions are used in this guide Convention Use Bold Highlights field button and tab names Also highlights window dialog box and screen names Also used for file names and text or values you are being instructed to type into the inter face Italic Indicates the name of a technical manual emphasis on certain...

Page 10: ...10 SRA 6 0 Administrator s Guide ...

Page 11: ...ssing a standard Web browser This section contains the following subsections SSL for Virtual Private Networking VPN section on page 11 SRA Virtual Appliance section on page 12 SRA Software Components section on page 12 SRA Hardware Components section on page 13 SSL for Virtual Private Networking VPN A Secure Socket Layer based Virtual Private Network SSL VPN allows applications and private network...

Page 12: ... SRA appliances provide clientless identity based secure remote access to the protected internal network Using the Virtual Office environment SRA appliances can provide users with secure remote access to your entire private network or to individual components such as File Shares Web servers FTP servers remote desktops or even individual applications hosted on Citrix or Microsoft Terminal Servers A...

Page 13: ...a secure means to access any type of data on the remote network NetExtender supports IPv6 client connections from Windows systems running Vista or newer and from Linux clients Note The SSHv2 applet requires SUN JRE 1 6 0_10 or higher and can only connect to a server that supports SSHv2 The RDP Java applet requires SUN JRE 1 6 0_10 or higher Telnet SSHv1 and VNC applets support MS JVM in Internet E...

Page 14: ...th serial connec tion 115200 Baud Provides access to command line interface for future use USB Ports Provides access to USB interface for future use Reset Button Provides access to SafeMode Power LED Indicates the SRA 4600 is powered on Test LED Indicates the SRA 4600 is in test mode Alarm LED Indicates a critical error or failure X3 Provides access to the X3 interface and to SRA resources X2 Prov...

Page 15: ...es access to console messages with serial connec tion 115200 Baud Provides access to command line interface for future use USB Ports Provides access to USB interface for future use Reset Button Provides access to SafeMode Power LED Indicates the SRA 1600 is powered on Test LED Indicates the SRA 1600 is in test mode Alarm LED Indicates a critical error or failure X1 Provides access to the X1 interf...

Page 16: ...on Provides access to SafeMode Power LED Indicates the SRA 4200 is powered on Test LED Indicates the SRA 4200 is in test mode Alarm LED Indicates a critical error or failure X3 Provides access to the X3 interface and to SRA resources X2 Provides access to the X2 interface and to SRA resources X1 Provides access to the X1 interface and to SRA resources X0 Default management port Provides connectivi...

Page 17: ...rovides access to command line interface for future use USB Ports Provides access to USB interface for future use Reset Button Provides access to SafeMode Power LED Indicates the SRA 1200 is powered on Test LED Indicates the SRA 1200 is in test mode Alarm LED Indicates a critical error or failure X1 Provides access to the X1 interface and to SRA resources X0 Default management port Provides connec...

Page 18: ...verview section on page 46 End Point Control Overview section on page 48 Secure Virtual Assist Overview section on page 49 Web Application Firewall Overview section on page 60 Encryption Overview Encryption enables users to encode data making it secure from unauthorized viewers Encryption provides a private and secure method of communication over the Internet A special type of encryption known as ...

Page 19: ...user name password and domain name Step 9 If the user s domain name requires authentication through a RADIUS LDAP NT Domain or Active Directory Server the SRA gateway forwards the user s information to the appropriate server for authentication Step 10 Once authenticated the user can access the SRA portal IPv6 Support Overview Internet Protocol version 6 IPv6 is a replacement for IPv4 that is becom...

Page 20: ...ces FTP Bookmark Define a FTP bookmark using an IPv6 address Telnet Bookmark Define a Telnet bookmark using an IPv6 address SSHv1 SSHv2 Bookmark Define an SSHv1 or SSHv2 bookmark using an IPv6 address Reverse proxy for HTTP HTTPS Bookmark Define an HTTP or HTTPS bookmark using an IPv6 address Citrix Bookmark Define a Citrix bookmark using an IPv6 address RDP Bookmark Define an RDP bookmark using a...

Page 21: ...l Assist Users and Technicians can request and provide support when using IPv6 addresses Rules Policy rule User or Group Policies Three IPv6 options in the Apply Policy To drop down list IPv6 Address IPv6 Address Range All IPv6 Address Login rule Use IPv6 for address fields Define Login From Defined Addresses using IPv6 Two IPv6 options in the Source Address drop down list IPv6 Address IPv6 Networ...

Page 22: ...ents To configure SRA appliance using the Web based management interface an administrator must use a Web browser with Java JavaScript ActiveX cookies popups and SSLv3 or TLS 1 0 enabled Browser Requirements for the SRA End User The following is a list of Web browser and operating system support for various SRA protocols including NetExtender and various Application Proxy elements Minimum browser v...

Page 23: ... to create a unique default portal URL When a user logs into a portal he or she sees a set of pre configured links and bookmarks that are specific to that portal You can configure whether or not NetExtender is displayed on a Virtual Office portal and if you want NetExtender to automatically launch when users log in to the portal The administrator configures which elements each portal displays thro...

Page 24: ...loaded application hosts from any unexpected intrusion such as Cross site scripting or SQL Injection Access to offloaded Web applications happens seamlessly as URLs in the proxied page are not rewritten in the manner used by HTTP or HTTPS bookmarks For configuration information see the Portals Application Offloading section on page 142 and the Adding or Editing User Bookmarks section on page 302 B...

Page 25: ...00 SRA 1600 SRA 1200 SRA Virtual Appliance HTTP Versions HTTP S bookmarks and application offloading portals support both HTTP 1 0 and HTTP 1 1 Certain performance optimization features such as caching compression SSL hardware acceleration HTTP connection persistence TCP connection multiplexing and transfer chunk encoding for proxies are automatically enabled depending on the usage Applications In...

Page 26: ...Access 8 0 1 8 5 1 and 8 5 2 Domino Web Access is supported on the SRA 4600 4200 1600 1200 and SRA Virtual Appliance platforms Novell Groupwise Web Access 7 0 ActiveSync with Microsoft Exchange 2010 ActiveSync with Microsoft Exchange 2007 ActiveSync with Microsoft Exchange 2003 Exchange ActiveSync is supported on the following Apple iPhone Apple iPad Android 2 3 x Gingerbread 4 0 x ICS and 4 1 Jel...

Page 27: ...harepoint For features that rely on Windows Sharepoint Services compatible client programs SRA 6 0 application offloading and HTTP S bookmarks do not support client integration capabilities on Internet Explorer Only forms based authentication and basic authentication schemes are supported Single Sign On is supported only for basic authentication Sharepoint 2010 is supported with application offloa...

Page 28: ...the bookmark which enables Cross Domain SSO for this bookmark Step 5 Specify a Host which is a portal with the same shared domain name Step 6 Save the bookmark and launch it The new portal is logged in automatically without any credential The shared domain names don t need to be identical a sub domain also works For example one portal is a regular portal whose virtual host domain name is www examp...

Page 29: ...D The ActiveSync label is not used in log entries for anonymous users who use ActiveSync Note A user s credential in the Exchange server must be the same as the one in the SRA Many authentication types are available for each domain in the SRA If using the Local User Database make sure the user name and password is the same as the one for the Exchange server Fortunately other authentication types l...

Page 30: ...ation Server Host to your Exchange server for example webmail example com Step 4 Set the virtual host name for example webmail example com The virtual host name should be resolved by the DNS server Otherwise modify the hosts file in the Android phone Step 5 Select the Enable ActiveSync Authentication check box Leave the default domain name blank or input webmail example com ...

Page 31: ...name to webmail Step 7 Turn on the Android phone open the Email application and type your email address and password Click Next Step 8 Choose Exchange Step 9 Input your Domain Username Password and Server No domain name is displayed so use the default domain name specified in the offloading portal s setting Select Accept all SSL certificates and click Next ...

Page 32: ... also check the SRA log to see if the user logged in successfully You may not encounter this problem if the AD authentication is fast Step 11 When the authentication finishes a security warning appears Click OK to continue modify your account settings and click Next Step 12 Try to send and receive emails and ensure that ActiveSync entries are included in the SRA log ...

Page 33: ...2007 Novell Groupwise Web Access 7 0 or Domino Web Access 8 0 1 8 5 1 and 8 5 2 with HTTP S reverse proxy support Reverse proxy bookmarks also support the HTTP 1 1 protocol and connection persistence HTTPS bookmarks on SRA 4600 4200 appliances support keys of up to 2048 bits HTTP S caching is supported on the SRA appliance for use when it is acting as a proxy Web server deployed between a remote u...

Page 34: ...d by the SRA appliance The remote user communicates with the SRA appliance by HTTPS and requests a URL that is retrieved over HTTP by the SRA appliance transformed as needed and returned encrypted to the remote user FTP supports 25 character sets including four Japanese sets two Chinese sets and two Korean sets The client browser and operating system must support the desired character set and lang...

Page 35: ...ature set plus four RDP 6 features The SRA appliance supports connections with RDP 6 1 clients RDC 6 1 is included with the following operating systems Windows 7 Windows Server 2008 Windows Vista Service Pack 1 SP1 Windows XP Service Pack 3 SP3 RDC 6 1 incorporates the following functionality in Windows Server 2008 Terminal Services RemoteApp Terminal Services EasyPrint driver Single Sign On For m...

Page 36: ...look interface and provides more features than basic OWA Microsoft OWA Premium includes features such as spell check creation and modification of server side rules Web beacon blocking support for tasks auto signature support and address book enhancements SRA HTTP S reverse proxy functionality supports Microsoft OWA Premium Microsoft OWA Premium includes the following features Access to email calen...

Page 37: ...o set common server side rules Outlook style Quick Flags Support for message signatures Search folders must be created in Outlook online mode Deferred search for new messages after delete Attachment blocking Web beacon blocking to make it more difficult for senders of spam to confirm email addresses Protection of private information when a user clicks a hyperlink in the body of an email message Se...

Page 38: ...SUN JRE 1 6 0_10 or higher The Citrix Receiver clients for ActiveX and Java are supported as well as the earlier XenApp and ICA clients In previous versions of Citrix the Citrix ICA Client was renamed as the Citrix XenApp plugin SRA appliances support client computers running the Citrix Receiver for Windows 3 0 ActiveX client the Citrix Receiver for Java 10 1 Java client Citrix XenApp plugin versi...

Page 39: ...nefits section on page 39 NetExtender Concepts section on page 40 For information on using NetExtender refer to the NetExtender Status section on page 192 or refer to the Dell SonicWALL SRA User s Guide What is NetExtender Dell SonicWALL NetExtender is a transparent software application for Windows Mac and Linux users that enables remote users to securely connect to the remote network With NetExte...

Page 40: ...plication that provides comprehensive remote access without requiring users to manually download and install the application The first time a user launches NetExtender the NetExtender stand alone client is automatically installed on the user s PC or Mac The installer creates a profile based on the user s login information The installer window then closes and automatically launches NetExtender If t...

Page 41: ...require it For networks that do not require segmentation client addresses and routes can be configured globally as in the SRA 1 0 version of NetExtender The following sections describe the new multiple range and route enhancements IP Address User Segmentation on page 41 Client Routes on page 42 IP Address User Segmentation Administrators can configure separate NetExtender IP address ranges for use...

Page 42: ...rnal network and to the internal network hosts communicating with remote NetExtender clients Because the PPP server IP address is independent from the NetExtender address pool all IP addresses in the global NetExtender address pool will be used for NetExtender clients Connection Scripts SRA appliances provide users with the ability to run batch file scripts when NetExtender connects and disconnect...

Page 43: ...xtender pop up window will prompt you to enter them when you first connect When NetExtender connects using proxy settings it establishes an HTTPS connection to the proxy server instead of connecting to the SRA server directly The proxy server then forwards traffic to the SRA server All traffic is encrypted by SSL with the certificate negotiated by NetExtender of which the proxy server has no knowl...

Page 44: ...porary token code every minute When the RSA or VASCO server authenticates the user it verifies that the token code timestamp is current If the PIN is correct and the token code is correct and current the user is authenticated Because user authentication requires these two factors the dual RADIUS servers solution the RSA SecureID solution and the VASCO DIGIPASS solution offers stronger security tha...

Page 45: ...ver in this example different RADIUS servers may have different reply message formats Some RADIUS servers may require the user to respond to several challenges to complete the authentication In this example the M ID server asks the user to supply two challenges The following passcode can be received through email or cellphone if SMS is configured When using two factor authentication with the NetEx...

Page 46: ...oviding additional security for Dell SonicWALL SRA users The SRA One Time Password feature requires users to first submit the correct SRA login credentials After following the standard login procedure the SRA generates a one time password which is sent to the user at a pre defined email address The user must login to that email account to retrieve the one time password and type it into the SRA log...

Page 47: ...Microsoft Exchange to support SRA One Time Password see the Dell SonicWALL SRA One Time Password Feature Module available online at http www sonicwall com us Support html For users enabled for the One Time Password feature either on a per user or per domain basis the login process begins with entering standard user name and password credentials in the SRA interface After login users receive a mess...

Page 48: ...bled to use the One time Password feature Is the email address correct If the email address for the user account has been entered incorrectly login to the management interface to correct the email address Is there no email with a one time password Wait a few minutes and refresh your email inbox Check your spam filter If there is no email after several minutes try to login again to generate a new o...

Page 49: ...orms Configuring End Point Control Perform the following tasks to configure EPC Step 1 Image the appliance with 6 0 firmware as explained in the Dell SonicWALL SRA Getting Started Guide Step 2 Configure Device Profiles that allow or deny user authentication based on various global group or user attributes See the End Point Control Device Profiles section on page 204 Step 3 Add and configure groups...

Page 50: ...ns 256 bit AES SSL encryption of the data by the SRA appliance provides a secure environment for the data and assists in the effort to be compliant with regulations like Sarbanes Oxley and HIPAA Greater flexibility for remote access Using the Secure Virtual Access functionality support staff can access their personal systems located outside the LAN of the SRA appliance How Does Secure Virtual Assi...

Page 51: ...cian has complete control of the customer computer s mouse and keyboard The customer sees all of the actions that the technician performs 9 If at anytime the customer wants to end the session they can take control and click on the End Virtual Assist button in the bottom right corner of the screen 10 When the session ends the customer resumes sole control of the computer Remote File Transfer Secure...

Page 52: ...hnicians Installing and using Secure Virtual Access requires administrative privileges Launching a Secure Virtual Assist Technician Session To launch a Secure Virtual Assist session as a technician perform the following steps Step 1 Log in to the SRA Virtual Office If you are already logged in to the SRA customer interface click on the Virtual Office button Step 2 Click on the Virtual Assist butto...

Page 53: ...nu Click No to launch Secure Virtual Assist without saving the application for future use Step 6 If you clicked Yes to save the application you will be prompted to select a location to save the file Select an appropriate location such as C Program Files SonicWALL Step 7 When Secure Virtual Assist launches for the first time you may see a security warning pop up window De select the Always ask befo...

Page 54: ...Once the technician has launched the Secure Virtual Assist application the technician can assist customers by performing the following tasks Inviting Customers by Email on page 54 Assisting Customers on page 55 Using the Secure Virtual Assist Taskbar on page 55 Controlling the Secure Virtual Assist Display on page 56 Request Full Control on page 57 Inviting Customers by Email To invite a customer ...

Page 55: ... name to begin assisting the customer Step 3 The customer s entire desktop is displayed in the bottom right window of the Secure Virtual Assist application The technician now has complete control of the customer s keyboard and mouse The customer can see all of the actions that the technician performs During a Secure Virtual Assist session the customer is not locked out of their computer Both the t...

Page 56: ...configured Controlling the Secure Virtual Assist Display Full Screen Hides all of the Secure Virtual Assist toolbars and displays the customer s desktop on the technician s entire screen with the Secure Virtual Assist taskbar in the top left corner If the Secure Virtual Assist taskbar doesn t display move your mouse to the top middle of the screen Right click on the taskbar and click Restore to ex...

Page 57: ...the technician s computer is shown on the left and the customer s computer on the right The File Transfer window functions in much the same manner as Windows Explorer or an FTP program Navigate the File Transfer window by double clicking on folders and selecting files The File Transfer window includes the following controls Desktop jumps to the desktop of the technician s or customer s computer Up...

Page 58: ...ctories To select multiple files hold down the Ctrl button while clicking on the files Enabling a System for Secure Virtual Access If Secure Virtual Access has been enabled on the Virtual Assist tab on the Portals Portals page of the management interface users should see a link on the portal to set up a system for Secure Virtual Access To enable Secure Virtual Access within the SRA management inte...

Page 59: ...e VASAC client should be left running in the desktop tray This system s identifier name should now appear in the technician s support queue displayed on the Secure Virtual Assist Status page within the management interface Upon double clicking the system listing the technician will be prompted to provide the password established during system set up to gain Secure Virtual Access to the system Endi...

Page 60: ...r encoding that content XSS allows attackers to execute scripts in the victim s browser which can hijack user sessions deface Web sites and possibly introduce worms A2 Injection Flaws Injection flaws particularly SQL injection are common in Web applications Injection occurs when user supplied data is sent to an interpreter as part of a command or query The attacker s hostile data tricks the interp...

Page 61: ...b application running on a server behind the SRA appliance The portal must be configured as a virtual host It is possible to disable authentication and access policy enforcement for such an offloaded host If authentication is enabled a suitable domain needs to be associated with this portal and all Dell SonicWALL advanced authentication features such as One Time Password Two factor Authentication ...

Page 62: ...r additional information Web Site Cloaking Web Site Cloaking prevents guessing the Web server implementation and exploiting its vulnerabilities See Configuring Web Site Cloaking section on page 248 for additional information PDF Reporting for WAF Monitoring and PCI DSS 6 5 and 6 6 Compliance Starting in SRA 5 5 PDF reporting is introduced for Web Application Firewall Monitoring and PCI DSS 6 5 and...

Page 63: ... Once custom configuration settings or exclusions are in place you can disable Web Application Firewall without losing the configuration allowing you to perform maintenance or testing and then easily re enable it How Does Web Application Firewall Work To use the Web Application Firewall feature the administrator must first license the software or start a free trial Web Application Firewall must th...

Page 64: ...ation Firewall inspects HTTP HTTPS request headers cookies POST data query strings response headers and content It compares the input to both a black list and a white list of signatures If pattern matching succeeds for any signature the event is logged and or the input is blocked if so configured If blocked an error page is returned to the client and access to the resource is prevented If blocked ...

Page 65: ...ite under attack the user may unwittingly load a malicious Web page from a different site within the same browser process context for instance by launching it in a new tab part of the same browser window If this malicious page makes a hidden request to the victim Web server the session cookies in the browser memory are made part of this request making this an authenticated request The Web server s...

Page 66: ...rmation disclosure are also used to prevent these types of attacks Beginning in SRA 5 5 Web Application Firewall protects against inadvertent disclosure of credit card and Social Security numbers SSN in HTML Web pages Note Only text or HTML pages and only the first 512K bytes are inspected for credit card or SSN disclosure Web Application Firewall can identify credit card and SSN numbers in variou...

Page 67: ...supports HTTPS with the backend Web server How is Access to Restricted URLs Prevented Dell SonicWALL SRA supports access policies based on host subnet protocol URL path and port to allow or deny access to Web sites These policies can be configured globally or for users and groups How are Slowloris Attacks Prevented Slowloris attacks can be prevented if there is an upstream device such as a Dell So...

Page 68: ...reen Partially Satisfied Orange Unsatisfied Red Unable to determine Black The third column provides comments and details explaining the status rating If the status is Satisfied no comments are provided How Does Cookie Tampering Protection Work SRA appliances protect important server side cookies from tampering There are two kinds of cookies Server Side Cookies These cookies are generated by backen...

Page 69: ...oss Site Scripting and session hijacking The attribute Secure ensures that the cookies are transported only in HTTPS connections Both together add a strong layer of security for the server side cookies Note By default the attribute Secure is always appended to an HTTP connection even if Cookie Tampering Protection is disabled This behavior is a configurable option and can be turned off Allow Clien...

Page 70: ... accessible URLs on the backend server You can click on the hyperlink to edit the learned values for that URL if the values are not accurate You can then generate rules to use the modified URL profile The SRA learns the following HTTP Parameters Response Status Code Post Data Length The Post Data Length is estimated by learning the value in the Content Length header The maximum size is set to the ...

Page 71: ...s an internal counter to track how many times the rule chain is matched The Max Allowed Hits field contains the number of matches that must occur before the rule chain action is triggered If the rule chain is not matched for the number of seconds configured in the Reset Hit Counter Period field then the counter is reset to zero Rate limiting can be enforced per remote IP address or per user sessio...

Page 72: ...o the Dell SonicWALL SRA Getting Started Guide for your model Note For configuring the SRA appliance using the Web based management interface a Web browser supporting Java and HTTP uploads such as Internet Explorer 8 or higher Firefox 16 0 or higher or Chrome 22 0 or higher is recommended Users will need to use IE 8 or higher supporting JavaScript Java cookies SSL and ActiveX in order to take adva...

Page 73: ...adings its submenu options are displayed below it Click on submenu links to view the corresponding management pages The Virtual Office option in the navigation menu opens a separate browser window that displays the login page for the user portal Virtual Office The Help button in the upper right corner of the management interface opens a separate browser window that displays SRA help The Logout but...

Page 74: ... on page 75 Accepting Changes section on page 75 Navigating Tables section on page 75 Restarting section on page 76 Common Icons in the Management Interface section on page 76 Tooltips in the Management Interface section on page 76 Getting Help section on page 77 Logging Out section on page 77 Navigation Bar Status Bar Location Main Window Field Name Check Box Section Title Button Text Box List Bo...

Page 75: ...window to save any configuration changes you made on the page If the settings are contained in a secondary window within the management interface the Accept button is still available at the top right corner of the window Navigating Tables Navigating tables with large number of entries is simplified by navigation buttons located above the table For example the Log View page contains an elaborate ba...

Page 76: ...n when the mouse cursor hovers over a check box text field or radio button Some fields have a Help icon that provides a tooltip stating related requirements Navigation Button Description Find Allows the administrator to search for a log entry containing the content specified in the Search field The search is applied to the element of the log entry specified by the selection in the drop down list T...

Page 77: ...bmenu of related management functions and the first submenu item page is automatically displayed For example when you click the System heading the System Status page is displayed The navigation menu headings are System Network Portals Services NetExtender End Point Control Secure Virtual Assist Secure Virtual Meeting Web Application Firewall High Availability SRA 4600 4200 only Users Log and Virtu...

Page 78: ...ies NetExtender Status View active NetExtender sessions Client Settings Create client addresses for use with the NetExtender application Client Routes Create client routes for use with the NetExtender application End Point Control Settings Enable or disable global EPC Device Profiles View and configure device profiles Log View client logins blocked by EPC Secure Virtual Assist Status View active S...

Page 79: ...ts that were detected or prevented over certain time periods View the top ten threats by signature severity or server View a graph of global WAF threats that were detected or prevented over certain time periods View a graph of the global top ten threats Log View log entries for detected or prevented attacks Click on a log instance to display additional information about the signature match signatu...

Page 80: ...iance Appliance Model Maximum Concurrent Tunnels Supported Recommended Number of Concurrent Tunnels SRA 1200 1600 50 20 SRA 4200 4600 500 50 SRA Virtual Appliance 500 50 Access Mechanism Access Types Standard Web browser Files and file systems including support for FTP and Windows Network File Sharing Web based applications Microsoft Outlook Web Access and other Web enabled applications HTTP and H...

Page 81: ... mode the primary interface X0 on the SRA appliance connects to an available segment on the gateway device The encrypted user session is passed through the gateway to the SRA appliance step 1 The SRA appliance decrypts the session and determines the requested resource The SRA session traffic then traverses the gateway appliance step 2 to reach the internal network resources While traversing the ga...

Page 82: ...y other machines connected to an internal interface of the SRA appliance in two armed mode would need to access the Internet or other network resources DNS NTP through a different gateway If you have an internal router as well as an Internet router you can use a two armed deployment to leverage your internal router to access your internal resources Sample Scenario Company A has resources and a num...

Page 83: ... 83 System Licenses section on page 88 System Time section on page 96 System Settings section on page 98 System Administration section on page 102 System Certificates section on page 106 System Monitoring section on page 110 System Diagnostics section on page 112 System Restart section on page 114 System Status This section provides an overview of the System Status page and a description of the co...

Page 84: ...ation section on page 85 Network Interfaces section on page 85 System Messages The System Messages section displays text about recent events and important system messages such as system setting changes For example if you do not set an outbound SMTP server you will see the message Log messages and one time passwords cannot be sent because you have not specified an outbound SMTP server address Syste...

Page 85: ...System Licenses page and allow the appliance to automatically synchronize registration and license status with the Dell SonicWALL server see the Registering the SRA Appliance from System Licenses section on page 90 Network Interfaces The Network Interfaces section provides the administrator with a list of SRA appliance interfaces by name For each interface the Network Interfaces tab provides the I...

Page 86: ...rd click the https www mysonicwall com link at the bottom of the page The MySonicWALL User Login page is displayed Do one of the following If you forgot your user name click the Forgot Username link If you forgot your password click the Forgot Password link If you do not have a MySonicWALL account click the Not a registered user link Step 3 Follow the instructions to activate your MySonicWALL acco...

Page 87: ...User Login page is displayed Step 5 Enter your MySonicWALL account user name and password Note If you are not a registered MySonicWALL user you must create an account before registering your SonicWALL product Click the Not a registered user link at the bottom of the page to create your free MySonicWALL account Step 6 Navigate to Products in the left hand navigation bar Step 7 Enter your Serial Num...

Page 88: ...es an overview of the System Licenses page and a description of the configuration tasks available on this page See the following sections System Licenses Overview section on page 88 Registering the SRA Appliance from System Licenses section on page 90 Activating or Upgrading Licenses section on page 92 System Licenses Overview Services upgrade licensing and related functionality is provided by the...

Page 89: ...service is activated Licensed available for activation Not Licensed or for Spike License Inactive or no longer active Expired ViewPoint Secure Virtual Assist Spike License and Web Application Firewall are licensed separately as upgrades The number of nodes users allowed by the license is displayed in the Count column A node is a computer or other device connected to your SRA appliance with an IP a...

Page 90: ...main Manage Security Services Online You can login to MySonicWALL directly from the System Licenses page by clicking the link Activate Upgrade or Renew services You can click this link to register your appliance to purchase additional licenses for upgrading or renewing services or to activate free trials Registering the SRA Appliance from System Licenses On a new SRA appliance or after upgrading t...

Page 91: ...en click Submit The display changes Step 3 Enter a descriptive name for your SRA appliance in the Friendly Name field Step 4 Under Product Survey fill in the requested information and then click Submit The display changes to inform you that your Dell SonicWALL SRA is registered Step 5 Click Continue ...

Page 92: ...icenses may not be valid Activating or Upgrading Licenses After your SRA appliance is registered you can activate licenses for Secure Virtual Assist includes Secure Virtual Meeting Analyzer ViewPoint End Point Control Spike License and Web Application Firewall on the System Licenses page Secure Virtual Assist Analyzer ViewPoint and Web Application Firewall also offer a free trial You can also upgr...

Page 93: ...k Activate Upgrade or Renew services The License Management page is displayed Step 2 Enter your MySonicWALL user name and password into the fields and then click Submit The display changes to show the status of your licenses The services can have a Try link an Activate link or an Upgrade link Step 3 To activate a free trial click Try next to the service that you want to try The page explains that ...

Page 94: ...u to temporarily increase the number of remote users your appliance or virtual appliance can support if there is a sudden spike in remote access needs such as during a period of severe weather or during a business event for remote participants Licensed separately this feature helps you accommodate spikes in remote access traffic during planned or unplanned events When you buy a Spike License it is...

Page 95: ...nce as described in Activating or Upgrading Licenses on page 92 After licensing the status is updated to Licensed and the total users supported and number of usage days remaining in the Spike License are shown on the System Licenses page Step 2 After reloading the page the Spike License is listed as Off on the System Licenses page Step 3 When you need to accommodate more users click Activate The s...

Page 96: ...ion on page 96 Setting the Time section on page 97 Enabling Network Time Protocol section on page 97 System Time Overview The System Time page provides the administrator with controls to set the SRA appliance system time date and time zone and to set the SRA appliance to synchronize with one or more NTP servers Figure 10 System Time Page System Time The System Time section allows the administrator...

Page 97: ...he current time in 24 hour time format will appear in the Time hh mm ss field and the current date will appear in the Date mm dd yyyy field Step 3 Alternately you can manually enter the current time in the Time hh mm ss field and the current date in the Date mm dd yyyy field Note If the check box next to Automatically synchronize with an NTP server is selected you will not be able to manually ente...

Page 98: ...he NTP Server Address 2 Optional and NTP Server Address 3 Optional fields Step 6 Click Accept to update the configuration System Settings This section provides an overview of the System Settings page and a description of the configuration tasks available on this page System Settings Overview section on page 98 Managing Configuration Files section on page 99 Managing Firmware section on page 101 Sy...

Page 99: ... for uploading new firmware creating a backup of current firmware downloading existing firmware to the management computer rebooting the appliance with current or recently uploaded firmware and rebooting the appliance with factory default settings There is also an option to be notified when new firmware becomes available Managing Configuration Files SRA appliances allow you to save and import file...

Page 100: ...cation pairs generated by Certificate Signing Requests CSRs from the System Certificates page if any uiaddon folder Contains a folder for each portal Each folder contains portal login messages portal home page messages and the default logo or the custom logo for that portal if one was uploaded VirtualOffice is the default portal firebase conf file Contains network DNS and log settings settings jso...

Page 101: ...manent Encrypting the Configuration File For security purposes you can encrypt the configuration files in the System Settings page However if the configuration files are encrypted they cannot be edited or reviewed for troubleshooting purposes To encrypt the configuration files select the Encrypt settings file check box in the System Settings page Managing Firmware The Firmware Management section o...

Page 102: ... Step 2 Download the latest SRA firmware version Step 3 In the SRA management interface navigate to the System Settings page Step 4 Click the Upload New Firmware button under the Firmware Management section Step 5 Click Browse Step 6 Select the downloaded SRA firmware It should have a sig file extension Step 7 Click Open Step 8 Click Accept Wait for the firmware to upload and be written to the dis...

Page 103: ...e System Administration page The System Administration page allows the administrator to configure login security Web management settings SNMP settings and GMS settings See the following sections Login Security section on page 104 Web Management Settings section on page 104 SNMP Settings section on page 104 GMS Settings section on page 104 Figure 14 System Administration Page ...

Page 104: ...us The minimum for the Streaming Update Interval field is 1 second the default is 10 seconds and the maximum is 99 999 SNMP Settings The SNMP Settings section allows the administrator to enable SNMP and specify SNMP settings for the appliance A list of downloaded MIBs is displayed to the right of the fields MIBs can be downloaded from MySonicWALL GMS Settings The GMS Settings section allows the ad...

Page 105: ...default is 10 the minimum is 1 and the maximum is 99 999 Step 3 Click the Accept button to save your changes Configuring SNMP Settings To configure the SNMP Settings fields Step 1 Navigate to System Administration Step 2 Select the Enable SNMP check box Step 3 Type the name FQDN of the system into the System Name field Step 4 Type the email address of the system contact into the System Contact fie...

Page 106: ... 24 hours Step 6 Click the Accept button to save your changes System Certificates This section provides an overview of the System Certificates page and a description of the configuration tasks available on this page System Certificates Overview section on page 106 Certificate Management section on page 107 Generating a Certificate Signing Request section on page 108 Viewing and Editing Certificate...

Page 107: ... The Additional CA Certificates section allows the administrator to import additional certificates from a Certificate Authority server either inside or outside of the local network The certificates are in PEM encoded format for use with chained certificates for example when the issuing CA uses an intermediate chained signing certificate The imported additional certificates only take effect after r...

Page 108: ...SR and Certificate Key The Generate Certificate Signing Request dialog box is displayed Step 3 Fill in the fields in the dialog box and click Accept Step 4 If all information is entered correctly a csr zip file will be created Save this zip file to disk You will need to provide the contents of the server csr file found within this zip file to the CA Viewing and Editing Certificate Information The ...

Page 109: ...d certificate or a zip file containing the PEM formatted private key file named server key and the PEM formatted certificate file named server crt The zip file must have a flat file structure no directories and contain only server key and server crt files To import a certificate perform the following steps Step 1 Navigate to the System Certificates page Step 2 Click Import Certificate The Import C...

Page 110: ...l be displayed in the Additional CA Certificates list in the System Certificates page Step 6 To add the new CA certificate to the Web server s active CA certificate list the Web server must be restarted Restart the SRA appliance to restart the Web server System Monitoring This section provides an overview of the System Monitoring page and a description of the configuration tasks available on this ...

Page 111: ...r days This fig ure is expressed as an integer for example 2 3 or 5 Bandwidth Usage Kbps Indicates the amount of data per second being transmitted and received by the appliance in Kbps measured over time by seconds minutes hours or days CPU Utilization The amount of capacity usage on the appliance processor being used measured over time by seconds minutes hours or days This figure is expressed as ...

Page 112: ... top right corner of the System Monitoring page System Diagnostics This section provides an overview of the System Diagnostics page and a description of the configuration tasks available on this page System Diagnostics Overview section on page 112 Downloading the Tech Support Report section on page 113 Performing Diagnostic Tests section on page 113 System Diagnostics Overview The System Diagnosti...

Page 113: ...ge 113 Downloading the Tech Support Report To download the tech support report click the Download Report button on the System Diagnostics page A Windows pop up will display confirming the download Click Save to save the report The tech support report is saved as a zip file containing graphs event logs and other technical information about your SRA appliance Performing Diagnostic Tests You can perf...

Page 114: ...ay at the bottom of the page System Restart This section provides an overview of the System Restart page and a description of the configuration tasks available on this page System Restart Overview section on page 114 Restarting the SRA Appliance section on page 114 System Restart Overview The System Restart page allows the administrator to restart the SRA appliance A warning is displayed that rest...

Page 115: ...olution This chapter contains the following sections Network Interfaces section on page 115 Network DNS section on page 118 Network Routes section on page 120 Network Host Resolution section on page 123 Network Network Objects section on page 124 Network Interfaces This section provides an overview of the Network Interfaces page and a description of the configuration tasks available on this page N...

Page 116: ...bnet mask speed and management settings of the X0 X1 X2 X3 and where available the X4 and X5 interfaces on the SRA appliance For a port on your SRA appliance to communicate with a firewall or target device on the same network you need to assign an IP address and a subnet mask to the interface Note If the management interface IP address changes the SRA services will be automatically restarted This ...

Page 117: ...er an IPv6 address for global scope If you leave this field empty IPv6 enabled devices can still automatically connect using a link local address The scope is indicated in a tooltip on the Network Interfaces page Step 5 In the Speed drop down list Auto Negotiate is selected by default to allow the SRA appliance to automatically negotiate the speed and duplex mode with the connected switch or other...

Page 118: ... and or Ping Step 7 Click Accept Network DNS This section provides an overview of the Network DNS page and a description of the configuration tasks available on this page Network DNS Overview section on page 118 Configuring Hostname Settings section on page 119 Configuring DNS Settings section on page 119 Configuring WINS Settings section on page 120 Network DNS Overview The Network DNS page allow...

Page 119: ...e following steps Step 1 Navigate to the Network DNS page Step 2 In the Hostname region type a hostname for the SRA appliance in the SRA Gateway Hostname field Step 3 Click Accept Configuring DNS Settings The Domain Name Server DNS is required to allow your SRA appliance to resolve host names and URL names with a corresponding IP address This enables your SRA appliance to connect to hosts or sites...

Page 120: ...ptional The SRA appliance can act as both a NetBIOS and WINS Windows Internet Naming Service client to learn local network host names and corresponding IP addresses To configure WINS settings perform the following tasks Step 1 Navigate to the Network DNS page Step 2 In the WINS Settings region type a primary WINS address in the Primary WINS Server optional field Step 3 In the WINS settings region ...

Page 121: ... and interface A default network route is required for Internet access Static Routes The static routes section allows the administrator to add and configure additional static routes by specifying a destination network subnet mask optional default gateway and interface Configuring a Default Route for the SRA Appliance You must configure a default gateway on your SRA appliance for it to be able to c...

Page 122: ...tic routes to certain subnets rather than attempting to reach them through the default gateway While the default route is the default gateway for the device static routes can be added as needed to make other networks reachable for the SRA appliance For more details on routing or static routes refer to a standard Linux reference guide To configure a static route to an explicit destination for the a...

Page 123: ...o add and configure a host name by specifying an IP address host name host or FQDN and an optional alias Configuring Host Resolution The Host Resolution page enables network administrators to configure or map host names or fully qualified domain names FQDNs to IP addresses Note A host resolution entry is automatically created for the SRA appliance itself Do not delete it The SRA appliance can act ...

Page 124: ...ion of the configuration tasks available on this page Network Network Objects Overview section on page 124 Adding Network Objects section on page 125 Editing Network Objects section on page 125 Network Network Objects Overview The Network Network Objects page allows the administrator to add and configure network resources called objects For convenience you can create an entity that contains both a...

Page 125: ... object you want to edit A new network object with the same name as an existing network object will not replace or modify an existing network object Step 4 Click on the Service list and select a service type Web HTTP Secure Web HTTPS NetExtender Terminal Services RDP Java Terminal Services RDP ActiveX Virtual Network Computing File Transfer Protocol Telnet Secure Shell version 1 SSHv1 Secure Shell...

Page 126: ...fining an Object Address on page 126 Step 4 When finished adding addresses click Done in the Edit Network Object screen Step 5 The Network Network Objects page is displayed with the new network object in the Network Objects list Step 6 If the object is not fully defined with at least one IP address or network range the status Incomplete will display Click the Incomplete link or the Configure icon ...

Page 127: ... in the desired network subnet and type a subnet mask in the Subnet Mask field In the Port Range Port Number field optionally enter a port range in the format 80 443 or enter a single port number For the IPV6 Address object type type an IP address in the IPv6 Address field For the IPV6 Network object type in the IPv6 Network Address field type an IPv6 address that resides in the desired network su...

Page 128: ...128 SRA 6 0 Administrator s Guide ...

Page 129: ... section on page 170 Portals Load Balancing section on page 171 Portals Portals This section provides an overview of the Portals Portals page and a description of the configuration tasks available on this page Portals Portals Overview section on page 130 Adding Portals section on page 131 Configuring General Portal Settings section on page 132 Enforcing Client Source Uniqueness section on page 134...

Page 130: ...se portals retain the classic interface from SonicOS SRA releases prior to 3 5 The administrator may choose to keep a legacy portal rather than upgrade it if the portal has been customized or for other reasons Additional Information About the Portal Home Page For most SRA administrators a plain text home page message and a list of links to network resources is sufficient For administrators who wan...

Page 131: ...r content do not include head or body tags in the file Adding Portals The administrator can customize a portal that appears as a customized landing page to users when they are redirected to the SRA appliance for authentication The network administrator may define individual layouts for the portal The layout configuration includes menu layout portal pages to display portal application icons to disp...

Page 132: ...cess this portal Portal Banner Title The welcome text that will appear on top of the portal screen Login Message Optional text that appears on the portal login page above the authenti cation area Virtual Host Domain Name Used in environments where multiple portals are offered allowing sim ple redirection to the portal URL using virtual hosts Portal URL The URL that is used to access this specific ...

Page 133: ...t complete general portal configuration then add a logo in the Adding a Custom Portal Logo section on page 141 Step 9 Select the Enable HTTP meta tags for cache control check box to apply HTTP meta tag cache control directives to the portal Cache control directives include meta http equiv pragma content no cache meta http equiv cache control content no cache meta http equiv cache control content m...

Page 134: ...the timeout value is reached The user reconnects and consumes a second license with the potential of consuming more licenses before the timeout disconnects them To enforce client source uniqueness perform the following steps Step 1 Navigate to Portals Portals Step 2 For an existing portal click the configure icon next to the portal you want to configure Or for a new portal click the Add Portal but...

Page 135: ...eck box options If not selected NetExtender and Mobile Connect will not be available on the portal Display NetExtender Displays the link to NetExtender allowing users to install and invoke the clientless NetExtender virtual adapter Launch NetExtender after Login Launches NetExtender automatically after a user successfully authenticates to the SRA appliance See Enabling NetExtender to Launch Automa...

Page 136: ...ficate links check box Step 5 Click Accept to update the home page content Use Applet for portal button Enables the Java File Shares Applet giving users a simple yet powerful file browsing interface with drag and drop multiple file selection and contextual click capabilities Display Bookmark Table If selected activates the following two check box options If not selected Bookmarks will not be avail...

Page 137: ...tExtender automatically when users login to the portal select the Launch NetExtender after login check box Step 6 Click Accept File Sharing Using Applet as Default The Java File Shares Applet option provides users with additional functionality not available in standard HTML based file sharing including Overwriting of existing files Uploading directories Drag and drop capability Multiple file selec...

Page 138: ...x If this box is not selected the Virtual Assist button will be hidden and technicians will be required to login directly through a downloaded client Step 6 Select the Display Request Help Button check box to allow users to request assistance through the portal Step 7 Select the Enable Virtual Access Mode check box to allow Secure Virtual Access connections to be made to this portal This must be e...

Page 139: ...efault URL For example sales members can access https sales company com instead of the default domain https vpn company com that you use for administration The Portal URL for example https vpn company com portal sales will still exist even if you define a virtual host name Virtual host names enable administrators to give separate and distinct login URLs to different groups of users To create a Vir...

Page 140: ...ist Unless you have a certificate for each virtual host domain name or if you have purchased a domain SSL certificate your users may see a Certificate host name mismatch warning when they log into the SRA appliance portal The certificate hostname mismatch affects the login page NetExtender and Secure Virtual Access Assist Meeting clients Other SRA client applications will not be affected by a host...

Page 141: ... the Upload Logo field The file browser window displays Step 4 Select a proper sized gif format logo in the file browser and click the Open button Note The custom logo must be in GIF format In a modern portal there is a hard size limit of 155x68 pixels Anything larger than this will be cropped to fit the designated logo space on the page In a legacy portal for the best aesthetic results import a l...

Page 142: ...can be applied on top of each other for the offloaded host The portal must be configured as a virtual host with a suitable SRA domain It is possible to disable authentication and access policy enforcement for such an offloaded host Web transactions can be centrally monitored by viewing the logs In addition Web Application Firewall can protect these hosts from any unexpected intrusion such as Cross...

Page 143: ...nvert an absolute URL reference to its relative form NTLM Microsoft NT Lan Manager authentication and digest authentication schemes are not supported for HTTP S bookmarks or Application Offloading Further information about configuring specific backend Web applications is available in the Dell SonicWALL SRA Application Offloading and HTTP S Bookmarks feature module available under Support on www so...

Page 144: ...eld is configured it redirects the user to the Web site s home page the first time the user accesses the portal This happens only when the user is accessing the site with no URL path that is when accessing the root folder for example https www google com This is not an alias for the root folder The user can edit the URL to go back to the root folder The key value pairs allow you to specify URL que...

Page 145: ...r Form Field to be the same as the name and id attribute of the HTML element representing User Name in the Login form for example input type text name userid Configure the Password Form Field to be the same as the name or id attribute of the HTML element representing Password in the Login form for example input type password name PASSWORD id PASSWORD maxlength 128 Step 15 On the Virtual Host tab s...

Page 146: ... for information about creating a domain Step 19 Update your DNS server for this virtual host domain name and alias if any Configuring Generic SSL Offloading SSL Offloading portals extends the Application Offloading feature to support protocol independent SSL requests and forward them to the backend server This feature is needed for customer client server applications that use SSL for security The...

Page 147: ... IP Address of the backend server where SSL offloaded requests are to be proxied Step 6 In the Application Server Port field enter the port of the backend server where SSL offloaded requests are to be proxied This is often set to 80 for internal HTTP communication Step 7 Select the Enable SSL for Backend Connections check box to enable SSL encapsulation of all traffic destined for the backend appl...

Page 148: ...rtals Domains page and a description of the configuration tasks available on this page Portals Domains Overview section on page 148 Viewing the Domains Table section on page 149 Removing a Domain section on page 149 Adding or Editing a Domain section on page 150 Adding or Editing a Domain with Local User Authentication section on page 151 Adding or Editing a Domain with Active Directory Authentica...

Page 149: ... created You can reverse the order by clicking the up down arrow next to the Domain Name column heading Removing a Domain To delete a domain perform the following steps Step 1 Navigate to Portals Domains Step 2 In the table click the delete icon in the same row as the domain that you wish to delete Step 3 Click OK in the confirmation dialog box Once the SRA appliance has been updated the deleted d...

Page 150: ...ting an existing domain Note After adding a new portal domain user group settings for that domain are configured on the Users Local Groups page Refer to the Users Local Groups section on page 314 for instructions on configuring groups In order to create access policies you must first create authentication domains By default the LocalDomain authentication domain is already defined The LocalDomain d...

Page 151: ...p 1 Navigate to the Portals Domains window and click the Add Domain button or the Configure icon for the domain to edit The Add Domain or Edit Domain window is displayed Step 2 If adding the domain select Local User Database from the Authentication Type drop down list Step 3 If adding the domain enter a descriptive name for the authentication domain in the Domain Name field This is the domain name...

Page 152: ... Password feature One Time Password emails for all users in the domain will be sent to username domain com Step 8 If you select using domain name an E mail domain field appears below the drop down list Type in the domain name where one time password emails will be sent for example abc com Step 9 Click Accept to update the configuration Once the domain has been added the domain will be added to the...

Page 153: ...s feature allows a user to change their password through the Virtual Office portal by selecting the Options button on the top of the portal page User must submit their old password along with a new password and a re verification of the newly selected password Step 8 Optionally select the Use SSL TLS check box This option allows for the needed SSL TLS encryption to be used for Active Directory pass...

Page 154: ...ibute select mail mobile or pager If your AD server is configured to store mobile or pager numbers using either of these attributes select mobile or pager respectively Raw numbers cannot be used however SMS addresses can userPrincipalName If your AD server is configured to store email addresses using the userPrincipalName attribute select userPrincipalName custom If your AD server is configured to...

Page 155: ... the Active Directory server and the SRA appliance must be synchronized Kerberos authentication used by Active Directory to authenticate clients permits a maximum 15 minute time difference between the Windows server and the client the SRA appliance The easiest way to solve this issue is to configure Network Time Protocol on the System Time page of the SRA Web based management interface and check t...

Page 156: ...me for the authentication domain in the Domain Name field This is the domain name users will select in order to log into the SRA appliance user portal It can be the same value as the Server Address field Step 4 Enter the IP address or domain name of the server in the Server Address field Step 5 Enter the search base for LDAP queries in the LDAP baseDN field An example of a search base string is CN...

Page 157: ...nt certificate Verify partial DN in subject Use the following variables to configure a partial DN that will match the client certificate User name USERNAME Domain name USERDOMAIN Active Directory user name ADUSERNAME Wildcard WILDCARD Step 11 Select the Auto assign groups at login check box to assign users to a group when they log in Users logging into LDAP domains are automatically assigned in re...

Page 158: ...where one time password emails will be sent for example abc com Step 13 Select the type of user from the User Type drop down list All users logging in through this domain will be treated as this user type The choices depend on user types defined already Some possible choices are External User Users logging into this domain are treated as normal users without administrative privileges External Admi...

Page 159: ...e NT Domain Name field This is the domain name configured on the Windows authentication server for network authentication Step 6 Enter the name of the layout in the Portal Name field Additional layouts may be defined in the Portals Portals page Step 7 Optionally select the Enable client certificate enforcement check box to require the use of client certificates for login By checking this box you r...

Page 160: ...Password feature Users who do not have a One Time Password email address configured will not be allowed to login using domain name Users in the domain will use the One Time Password feature One Time Password emails for all users in the domain will be sent to username domain com Step 11 If you select using domain name an E mail domain field appears below the drop down list Type in the domain name w...

Page 161: ...re the client to present a client certificate for strong mutual authentication Two additional fields will appear Verify user name matches Common Name CN of client certificate Select this check box to require that the user s account name match their client certificate Verify partial DN in subject Use the following variables to configure a partial DN that will match the client certificate User name ...

Page 162: ...accept RADIUS client connections from the SRA appliance Typically these connections will appear to come from the SRA appliance X0 interface IP address Refer to your RADIUS server documentation for configuration instructions Configuring Two Factor Authentication Two factor authentication is an authentication method that requires two independent pieces of information to establish identity and privil...

Page 163: ...5 Importing Tokens and Adding Users section on page 165 Note This configuration procedure is specific to RSA Authentication Manager version 6 1 If you are using a different version of RSA Authentication Manager the procedure will be slightly different If you will be using VASCO instead of RSA see Configuring the VASCO IdentiKey Solution on page 167 Adding an Agent Host Record for the SRA Appliance...

Page 164: ...ble Windows Password Integration options are enabled Dell SonicWALL recommends disabling all of these options except for Open to All Locally Known Users Step 7 Click OK Adding the SRA Appliance as a RADIUS Client After you have created the Agent Host record you must add the SRA appliance to the RSA Authentication Manager as a RADIUS client To do so perform the following steps Step 1 In RSA Authent...

Page 165: ...nager Setting the Time and Date Because two factor authentication depends on time synchronization it is important that the internal clocks for the RSA Authentication Manager and the SRA appliance are set correctly Importing Tokens and Adding Users After you have configured the RSA Authentication Manager to communicate with the SRA appliance you must import tokens and add users to the RSA Authentic...

Page 166: ...tokens imported to the RSA Authentication Manager Step 4 To create a user on the RSA Authentication Manager click on User Add user Step 5 Enter the user s First and Last Name Step 6 Enter the user s username in the Default Login field Step 7 Select either Allowed to Create a PIN or Required to Create a PIN Allowed to Create a PIN gives users the option of either creating their own PIN or having th...

Page 167: ... user is added to the RSA Authentication Manager Step 11 Give the user their RSA SecurID Authenticator and instructions on how to log in create a PIN and user the RSA SecurID Authenticator See the Dell SonicWALL SRA User Guide for more information Configuring the VASCO IdentiKey Solution The VASCO IdentiKey solution works with SRA 5 0 or higher The following sections describe how to configure two ...

Page 168: ...rk DNS and set the correct DNS settings and or WINS Settings Step 2 Navigate to Network Routes and set the correct Default Route for the SRA X0 interface Setting NetExtender Client Address Range and Route To configure the NetExtender client address range and route on the SRA appliance Step 1 Navigate to NetExtender Client Addresses to set the NetExtender Client Address Range Client Addresses will ...

Page 169: ...iously used in the SRA appliance Use the following settings for the policy Registering the SRA as a Client To register the SRA appliance as a VASCO client Step 1 In the Vasco Identikey Web Administration window click the Clients Tab and choose Register Step 2 Select RADIUS Client for Client Type Step 3 Enter the IP address of the SRA appliance Step 4 In the Policy ID field select your new policy S...

Page 170: ... users in the same domain will appear If no users appear make sure the domains of the DIGIPASS and the user match When a user is assigned to a DIGIPASS a confirmation message will pop up Verifying Two Factor Authentication To test the two factor authentication SRA connectivity with VASCO IdentiKey Step 1 Connect your PC on the WAN X1 interface of the Dell SonicWALL firewall by pointing your browse...

Page 171: ...re 25 Portals Load Balancing Page Configuration Scenarios Load Balancing for SRA SRA is a robust feature that has multiple uses including Balancing a Farm of Web Servers This is useful when the SRA appliance with a higher horse power is offering protection and balancing the load of a relatively low powered farm of Web servers In this case Web Application Firewall URL rewriting and other CPU intens...

Page 172: ...ction on page 172 Configuring a Load Balancing Group This section provides configuration details for creating a new load balancing group and consists of the following sections Adding a New Load Balancing Group on page 173 Configuring Probe Settings on page 174 Adding New Members to a Load Balancing Group on page 175 Option Description Enable Load Balancing Enables the load balancing feature across...

Page 173: ... distribution Weighted Traffic Keeps track of the number of bytes of inbound outbound data to decide which member should handle the next incoming request Least Requests Keeps track of the number of incoming requests excluding successfully completed requests that are currently being serviced to decide which Member should handle the next incoming request Step 4 Select Enable Load Balancing to enable...

Page 174: ...ically based on the configured Probe interval to see if the HTTP response status code is not greater than or equal to 500 to ensure there are no Web server errors This is the most reliable method to determine if a Web server is alive This method ignores SSL Certificate warnings while probing TCP Connect The Load Balancer completes a 3 way TCP handshake periodically to monitor the health of a backe...

Page 175: ...niquely identify this member within the Load Balancing Group Step 3 Enter a friendly name or description in the Comment field to identify this group by mousing over the group s page Step 4 Select a Scheme to determine HTTP or HTTPS access The default value is HTTPS Step 5 Enter the back end HTTP S server IP address in the IPv4 IPv6 Address field Step 6 Enter the Port for the back end server The de...

Page 176: ...176 SRA 6 0 Administrator s Guide ...

Page 177: ...rix RDP and VNC This chapter contains the following sections Services Settings section on page 177 Services Bookmarks section on page 180 Services Policies section on page 187 Services Settings This section provides an overview of the Services Settings page and a description of the configuration tasks available on this page HTTP HTTPS Service Settings section on page 178 Citrix Service Settings se...

Page 178: ... size in the valid range from two to 20 MB Select the Flush button to flush the content cache Step 2 Select the Enable Custom HTTP HTTPS Response Buffer Size check box if you wish to establish a response buffer Enabling this check box Set the desired buffer size using the Buffer size drop down menu This limit is enforced for HTTP and HTTPS responses from the backend Web server for plain text Flash...

Page 179: ...ng to the creation and communication of one time passwords One time passwords are dynamically generated strings of characters numbers or a combination of both For compatibility with mail services that allow a limited number of characters in the email subject such as SMS the administrator can customize the email subject to either include or exclude the one time password The email message body can a...

Page 180: ...n generating the one time password Step 4 Use the One Time Password Length fields to adjust the range of characters allowed for one time passwords Step 5 Click the Accept button in the upper right corner of the Services Settings page to save your changes For more information about the One Time Passwords feature refer to the One Time Password Overview section on page 46 Services Bookmarks The Servi...

Page 181: ...1 Use the Bookmark Owner drop down menu to select whether the bookmark is owned as a Global Bookmark a Local Domain group bookmark or a bookmark assigned to an individual User Step 2 Fill in the Bookmark Name field with a friendly name for the service bookmark Step 3 Fill in the Name or IP Address field with hostname IP address or IPv6 address for the desired bookmark IPv6 addresses should begin w...

Page 182: ...a bookmark to a Linux server see the Tip below this table FTP IP Address IPv6 Address IP Port non standard FQDN Host name 10 20 30 4 2008 1 2 3 4 10 20 30 4 6818 or 2008 1 2 3 4 6818 JBJONES PC sv us sonicwall com JBJONES PC Telnet IP Address IPv6 Address IP Port non standard FQDN Host name 10 20 30 4 2008 1 2 3 4 10 20 30 4 6818 or 2008 1 2 3 4 6818 JBJONES PC sv us sonicwall com JBJONES PC SSHv1...

Page 183: ... running a remote desktop session Additionally you may want to provide a path to where your application resides on your remote computer by typing the path in the Application Path field In the Colors drop down list select the default color depth for the terminal service screen when users execute this bookmark Optionally enter the local path for this application in the Application and Path field In ...

Page 184: ...bove with RDC installed expand Show advance Windows options and select the check boxes for any of the following redirect options Redirect Printers Redirect Drives Redirect Ports Redirect SmartCards Redirect clipboard or Redirect plug and play devices to redirect those devices or features on the local network for use in this bookmark session You can hover your mouse pointer over the Help icon next ...

Page 185: ...plorer to use Java to access the Citrix Portal when using Internet Explorer Without this setting a Citrix ActiveX client or plugin must be used with IE This setting lets users avoid installing a Citrix client or plugin specifically for IE browsers Java is used with Citrix by default on other browsers and also works with IE Enabling this check box leverages this portability Optionally select Always...

Page 186: ...VPN account credentials to forward credentials from the current SRA session for login to the FTP server Select Use custom credentials to enter a custom username password and domain for this bookmark For more information about custom credentials see Creating Bookmarks with Custom SSO Credentials section on page 310 Telnet No additional fields Secure Shell version 1 SSHv1 No additional fields Secure...

Page 187: ...n the Apply Policy To drop down menu select whether the policy will be applied to an individual host a range of addresses all addresses a network object a server path or a URL object You can also select an individual IPv6 host a range of IPv6 addresses or all IPv6 addresses The Add Policy dialog box changes depending on what type of object you select in the Apply Policy To drop down list Note Thes...

Page 188: ...st See Setting File Shares Access Policies section on page 299 URL Object If your policy applies to a predefined URL object type the URL into the URL field See Adding a Policy for a URL Object section on page 300 IPv6 Address If your policy applies to a specific host enter the IPv6 address of the local host machine in the IPv6 Address field Optionally enter a port range for example 4100 4200 or a ...

Page 189: ...ration Make all desired adjustments and select Accept The edited bookmark will still display in the Services Policies window Deleting a Policy To delete a configured policy navigate to the Services Policies screen Click on the X icon in the Configure column A dialog box will open and ask if you are sure you want to delete the specified policy Click OK to delete the policy The policy will no longer...

Page 190: ...190 SRA 6 0 Administrator s Guide ...

Page 191: ...nd with the icon on Android smartphones On Windows systems NetExtender supports establishing a VPN session before logging in to Windows The standalone NetExtender Mobile client is available for devices running Windows Mobile 5 PocketPC and Windows Mobile 6 Professional Classic The SRA appliance supports client certificates in both the standalone Windows NetExtender client and the NetExtender Mobil...

Page 192: ...ut control Table 16 NetExtender Status on page 192 provides a description of the status items Table 16 NetExtender Status Status Item Description Name The user name NetExtender Client IP Address The IP address assigned by NetExtender to the client machine User s Source IP Address The IP address of the workstation which the user is logged into Connection Start Time The time when the user first esta...

Page 193: ...nge The address range can be specified for both IPv4 and IPv6 An IPv6 address pool for NetExtender is optional while an IPv4 address pool is required The global NetExtender IP range defines the IP address pool from which addresses will be assigned to remote users during NetExtender sessions The range needs to be large enough to accommodate the maximum number of concurrent NetExtender users you wis...

Page 194: ...ngs to customize the behavior of NetExtender when users connect and disconnect To configure global NetExtender client settings perform the following steps Step 1 Navigate to the NetExtender Client Settings page Step 2 The following options can be enabled or disabled for all users Exit Client After Disconnect The NetExtender client exits when it becomes disconnected from the SRA server To reconnect...

Page 195: ... Group NetExtender Client Routes is enabled User level NX routes must always be pushed to the NX client and global routes must still depend on the Add Global NetExtender Client Routes option as they did before IPv4 and IPv6 routes both follow these rules Note With group access policies all traffic is allowed by default This is the opposite of the default behavior of Dell SonicWALL Unified Threat M...

Page 196: ...ype the subnet mask in the Subnet Mask Prefix field using decimal format 255 0 0 0 255 255 0 0 or 255 255 255 0 For an IPv6 destination network type the prefix such as 112 Step 6 Click Add Step 7 Repeat this procedure for all necessary routes NetExtender User and Group Settings Multiple range and route support for NetExtender enables network administrators to easily segment groups and users withou...

Page 197: ...ress Range End field Step 2 To give this user the same IP address every time the user connects enter the IP address in both fields Step 3 To configure an IPv6 address range for this user enter the beginning of the range in the Client IPv6 Address Range Begin field and the end of the range in the Client IPv6 Address Range End field IPv6 configuration is optional To give this user the same IPv6 addr...

Page 198: ... terminates or when the user selects Exit as opposed to simply disconnecting To reconnect users will have to return to the SRA portal and click NetExtender This option only applies to Windows clients It does not apply to Windows Mobile Android Mac or Linux clients Create Client Connection Profile The NetExtender client will create a connection profile recording the SRA Server name the Domain name ...

Page 199: ...traffic for this user including traffic destined to the remote users local network over the SRA NetExtender tunnel Step 8 To also add the global NetExtender client routes which are configured on NetExtender Client Routes page to the user select the Add Global NetExtender Client Routes check box Step 9 To also add the group NetExtender client routes for the group the user belongs to select the Add ...

Page 200: ...p 1 Navigate to the Users Local Groups page Step 2 Click on the configure icon for the group you want to edit The Edit Group Settings window is launched Step 3 Click on the Nx Settings tab Configuring Group Client IP Address Range To configure group level NetExtender address ranges Step 1 To configure an IPv4 address range for this group enter the beginning of the range in the Client Address Range...

Page 201: ...t automatically uninstalls when it terminates or when the user selects Exit as opposed to simply disconnecting To reconnect users in the group will have to return to the SRA portal and click NetExtender This option only applies to Windows clients It does not apply to Windows Mobile Android Mac or Linux clients Create Client Connection Profile The NetExtender client will create a connection profile...

Page 202: ...ccess with NetExtender in the Destination Network field Step 4 For an IPv4 route type the subnet mask in the Subnet Mask Prefix field For an IPv6 route type the prefix in the Subnet Mask Prefix field Step 5 Click Add Repeat this procedure for all necessary routes Step 6 Select Enabled from the Tunnel All Mode drop down list to force all traffic for this user including traffic destined to the remot...

Page 203: ...re that the client system is in compliance with your organization s security policy Dell SonicWALL end point security controls are tightly integrated with access control to analyze the Windows client system and apply access controls based on the results Currently EPC only supports the Windows NetExtender client EPC enhancements are supported on the Dell SonicWALL SRA 4600 4200 1600 1200 and Virtua...

Page 204: ...nd Deny profiles identify attributes of the network that cannot be present If multiple profiles are defined for a group or user connection to the SRA appliance is granted only when a client s environment fulfills all Allow profiles for the group or user and does not fulfill any Deny profiles Use the End Point Control Device Profiles page to manage device profiles Figure 29 End Point Control Device...

Page 205: ...right of the page Users Local Groups Edit EPC Settings After creating device profiles assign them to the local groups that will use them to authenticate users Device profiles can be Allow profiles and Deny profiles Allow profiles identify attributes of the client s network that must be present before a user is authenticated and Deny profiles identify attributes of the network that cannot be presen...

Page 206: ...ux clients In the Enable Mac Linux Client Login field set the default action to Enabled to allow or Disabled to block logins from these clients when EPC is enabled Step 5 EPC is not currently supported for mobile clients such as iOS Android and WinMobile In the Enable Mobile Client Login field set the default action to Enabled to allow or Disabled to block logins from these clients when EPC is ena...

Page 207: ...ton b In the Edit EPC page select the profiles from the All Profiles list that you want to add to the group and click the Add selected profiles button Selected profiles are then moved to the In Use Profiles list on the page which lists all device profiles that will be used for the group c To disable a profile without deleting it clear the Enabled check box next to the profile O enable a profile se...

Page 208: ...is not supported on Mac platforms Linux platforms or mobile devices To configure device profiles to be used when authenticating a local user Step 1 Navigate to the Users Local Users page and click the Edit button for the user to be configured for EPC Step 2 When the Edit Local User page appears click the EPC tab Use the EPC tab to enable or disable EPC for the user select how to handle authenticat...

Page 209: ...very x minutes thereafter while the user is logged in select Check endpoint at login and every x minutes thereafter and type the number of minutes to wait between EPC checks OR To configure EPC for a local user select Use global setting or Custom Setting from the Recurring EPC drop down list If you select Use global setting the local user inherits the EPC settings from the Global group If you sele...

Page 210: ...r Local User End Point Control Settings EPC is globally enabled or disabled on the End Point Control Settings page When EPC is disabled it is disabled at the global group and user level The Settings page also is used to customize the message displayed when a NetExtender client login fails EPC security checking Figure 35 End Point Control Settings ...

Page 211: ...he e mail address configured on the Log Settings page Use the Search options to filter log messages Note that the search is case sensitive In the drop down menu select the field you want to search in Click Search to only display messages that match the search string Click Exclude to hide messages that match the search string Click Reset to display all messages Change the value in the Items per pag...

Page 212: ...212 SRA 6 0 Administrator s Guide ...

Page 213: ...itionally a costly and time consuming aspect of business Virtual Assist creates a simple to deploy easy to use remote support solution For more information on Secure Virtual Assist concepts see the Secure Virtual Assist Overview section on page 49 This chapter contains the following sections Secure Virtual Assist Status section on page 213 Secure Virtual Assist Settings section on page 214 Secure ...

Page 214: ...tively Click the Logout button to remove a customer from the queue If the customer is currently in a session both the customer and technician are disconnected For information about using Virtual Assist as a technician see the following sections Launching a Secure Virtual Assist Technician Session section on page 52 Performing Secure Virtual Assist Technician Tasks section on page 54 Secure Virtual...

Page 215: ...formation enter the text in the Disclaimer field HTML code is allowed in this field Customers will be presented with the disclaimer and required to click Accept before beginning a Virtual Assist session Step 6 Optional To change the URL that customers use to access Virtual Assist enter it in the Customer Access Link field This may be necessary if your SRA appliance requires a different access URL ...

Page 216: ...in the Virtual Assist queue enter a value in the Maximum Request field Step 4 Optionally you can customize the message that is displayed to customers when the queue is full in the Limit Message field The message is limited to 256 characters Step 5 Entering a value in the Maximum requests From One IP field can be useful if individual customers are repeatedly requesting help However this may cause p...

Page 217: ...ation Text that introduces the link to the URL for accessing Virtual Assist Invitation Message The body of the invitation email message Default Email Address for Invitation The default source email These three fields support the following variables to customize and personalize the invitation EXPERTNAME The name of the technician sending the invitation email CUSTOMERMSG The disclaimer configured on...

Page 218: ...tomer Portal Settings To customize the appearance of the Virtual Assist customer portal perform the following tasks Step 1 On the Secure Virtual Assist Settings page click the Customer Portal Settings tab at the bottom of the page Step 2 Configure the following options to customize the appearance of the customer portal Show Company Logo Displays the company logo that is configured on the Logo tab ...

Page 219: ...st restriction settings perform the following tasks Step 1 On the Secure Virtual Assist Settings page click the Restriction Settings tab at the bottom of the page Step 2 To deny Virtual Assist requests from specific IP addresses or networks select Deny from the Request From Defined Addresses drop down menu Step 3 To allow Virtual Assist requests only from specific IP addresses or networks select A...

Page 220: ...mation about previous Virtual Assist sessions The Log page displays a summary of recent sessions The Technician s activities while servicing the customer are now fully logged including the Technician ID the time of service information about the customer s and Technician s computers the chat dialog the customer request login if the customer exit prior to servicing and Technician input after the end...

Page 221: ...page and a description of the configuration tasks available on this page Secure Virtual Assist Licensing Overview section on page 221 Enabling Secure Virtual Assist section on page 221 Secure Virtual Assist Licensing Overview Secure Virtual Assist is a licensed service Enabling Secure Virtual Assist By default Virtual Assist is enabled on portals that are created after Virtual Assist is licensed V...

Page 222: ...y Technician Button check box to hide the technician button on the Virtual Office window and require technicians to login directly through the client Step 6 Select the Display Request Help Button check box to display the help button on the Virtual Office for users to launch Virtual Assist Step 7 Select the Enable Virtual Access Mode check box to allow Secure Virtual Access connections to be made t...

Page 223: ...re Virtual Meeting Log section on page 226 Secure Virtual Meeting Licensing section on page 227 For information about using Virtual Meeting see the Dell SonicWALL SRA 6 0 User Guide Secure Virtual Meeting Status The Secure Virtual Meeting Status page displays a summary of current active meetings and attendees in addition to upcoming meetings On the right side of the screen Streaming Updates indica...

Page 224: ...thout clicking the link in the e mail invitation Participants run the Virtual Meeting client and join the meeting directly with a meeting code set by the Coordinator Step 3 Select the Allow starting meeting without meeting creator check box to allow a meeting to start without the Coordinator present If enabled and a scheduled meeting has no Coordinator in the meeting room at the scheduled start ti...

Page 225: ...ng attendees Step 7 In the Max Concurrent Meeting Rooms field select the maximum number of meetings that can take place simultaneously on the appliance For example your company has 5 Secure Virtual Assist technician licenses and 2 of them are being used for Virtual Assist technicians Any number of Virtual Meetings can occur concurrently but the number of concurrent users in the lobby is limited to...

Page 226: ...port Log to create a zip file containing the full text of all logged meetings The zip file contains a summary log file and a detail log file for each meeting which can be viewed in Microsoft Word Click Clear Log to erase all log messages Click Email Log to send the log to the e mail address configured on the Log Settings page The Search options allow you to filter the log messages Note that the se...

Page 227: ...concurrently but the number of concurrent users in the lobby is limited to 9 5 2 3 licenses available 3x3 9 licenses for meeting users available Licenses are assigned on a first come first served basis Secure Virtual Meeting licenses are considered in use when an attendee is in the lobby Secure Virtual Assist Access licenses are considered in use when the connection is active and screen sharing is...

Page 228: ...228 SRA 6 0 Administrator s Guide ...

Page 229: ... High Availability requires one SRA appliance configured as the primary device and an identical SRA configured as the backup device During normal operation the primary device is in an active state and services all connections The backup device is in an idle state When the primary device loses connectivity the backup transitions to the active state and begins to service outside connections The nece...

Page 230: ...ve state The High Availability Settings page provides the settings for configuring High Availability See the following sections for configuration information Physical Connectivity section on page 231 Preparing for High Availability section on page 231 Configuring High Availability Settings section on page 231 Enabling Interface Monitoring section on page 232 Configuring Network Monitoring Addresse...

Page 231: ...he primary unit and navigate to the Network Interfaces page Confirm that the X3 port is active by checking the Status which should show 1000 Mbps Full Duplex Configuring High Availability Settings To enable High Availability and configure the options in the High Availability Settings section perform the following steps Step 1 In a browser log in to the primary unit and navigate to the High Availab...

Page 232: ...f the working interfaces to which VPN users connect The monitored interfaces available for selection are X0 X1 and X2 When Interface Monitoring is enabled and configured if any of the monitored interfaces loses connectivity on the active unit and is still reachable on the idle unit failover occurs To enable interface monitoring Step 1 On the High Availability Settings page under Interface Monitori...

Page 233: ...es not synchronize firmware but synchronizes settings from the active to the idle unit Technical FAQ 1 Once HA is enabled can the idle device be used separately No Once HA is configured only one device can be in use at any one time During failover the Idle device will become Active Two devices in HA mode cannot be used as separate SRA appliances 2 What will happen if we remove the X3 interface cab...

Page 234: ... Are firmware and settings synchronized to the Idle unit Yes both firmware and settings are synchronized between Active and Idle nodes The Synchronize Firmware button allows you to synchronize firmware from the Active to the Idle unit When settings are changed clicking the Accept button synchronizes settings 8 Does the HA configuration for SRA 4200 or 4600 devices differ from the HA configuration ...

Page 235: ...nformation on Web Application Firewall concepts see the Web Application Firewall Overview section on page 60 This chapter contains the following sections Licensing Web Application Firewall section on page 235 Configuring Web Application Firewall section on page 239 Verifying and Troubleshooting Web Application Firewall section on page 284 Licensing Web Application Firewall Dell SonicWALL SRA Web A...

Page 236: ...ep 1 Log in to your Dell SonicWALL SRA appliance and navigate to Web Application Firewall Licensing Step 2 If Web Application Firewall is not licensed click the System Licenses link The System Licenses page is displayed Step 3 Under Manage Security Services Online click the Activate Upgrade or Renew services link The MySonicWALL Login page is displayed ...

Page 237: ...ll Configuration 237 Step 4 Type your MySonicWALL credentials into the fields and then click Submit The Product Survey page is displayed Step 5 Fill out the survey and then click Submit The System Licenses page is displayed ...

Page 238: ...r The screen below is displayed after selecting the free trial Step 7 Click Synchronize to view the license on the System Licenses page Web Application Firewall is now licensed on your SRA appliance Navigate to Web Application Firewall Settings to enable it and then restart your appliance to completely activate Web Application Firewall ...

Page 239: ...he Host Entry for Exclusions on page 254 Configuring Custom Rules and Application Profiling on page 256 Using Web Application Firewall Monitoring on page 274 Using Web Application Firewall Logs on page 282 Viewing and Updating Web Application Firewall Status The Web Application Firewall Status page provides status information about the Web Application Firewall service and signature database and di...

Page 240: ...ble updates to the signature database Expiration date of the Web Application Firewall subscription service Status of the Web Application Firewall license Step 2 If updates are available for the signature database the Apply button is displayed Click Apply to download the updates You can select an option to update and apply new signatures automatically on the Web Application Firewall Settings page I...

Page 241: ...6 6 compliance report perform the following steps Step 1 Navigate to Web Application Firewall Status Step 2 Click the Download button Step 3 In the File Download dialog box click Open to create the PCI report as a temporary file and view it with Adobe Acrobat or click Save to save the report as a PDF file ...

Page 242: ...2 Configuring Global Exclusions on page 243 Configuring Intrusion Prevention Error Page Settings on page 245 Configuring Cross Site Request Forgery Protection Settings on page 245 Configuring Cookie Tampering Protection Settings on page 247 Configuring Web Site Cloaking on page 248 Configuring Information Disclosure Protection on page 248 Configuring Session Management Settings on page 250 Enablin...

Page 243: ...are or to manually continue the configuration Step 4 Select the Apply Signature Updates Automatically check box to enable new signatures to be automatically downloaded and applied when available You do not have to click the Apply button on the Web Application Firewall Status page to apply the new signatures Step 5 Select the desired level of protection for High Priority Attacks in the Signature Gr...

Page 244: ...raffic but takes no action Step 4 In the Host field type in the host entry as it appears in the bookmark or offloaded application This can be a host name or an IP address Up to 32 characters are allowed To determine the correct host entry for this exclusion see Determining the Host Entry for Exclusions on page 254 You can configure a path to a particular folder or file along with the host The prot...

Page 245: ...nt customized error page to the default error page click the Default Blocked Page button and then click OK in the confirmation dialog box Step 6 If you do not want to use a customized error page select one of the following for the error page HTTP Error Code 400 Bad Request HTTP Error Code 403 Forbidden HTTP Error Code 404 Not Found HTTP Error Code 500 Internal Server Error Step 7 When finished cli...

Page 246: ...select the Application Offloading portal to which these CSRF protection settings will apply To make these CSRF settings the default for all portals select Global Step 3 For Protection Mode select the desired level of protection against CSRF attacks You can select Detect Only to log these attacks or Prevent to log and block them Select Disabled to disable CSRF protection on the portal Step 4 When f...

Page 247: ... cookie names or values unreadable Only server side cookies are encrypted by these options Step 5 For Cookie Attributes select the HttpOnly check box to append the HttpOnly attribute to server side cookies and or select the Secure check box to append the Secure attribute to server side cookies The attribute HttpOnly prevents the client side scripts from accessing the cookies which is important in ...

Page 248: ...nto the second field then click Add For example if you set the host name to webmail xyz com and the header name to X OWA version headers with the name X OWA version from host webmail xyz com will be blocked In general listed headers will not be sent to the client if an HTTP HTTPS bookmark or offloaded application is used to access a listed Web server To block a certain header from all hosts set th...

Page 249: ... when masking the SSN or credit card number Step 4 In the table select the level of protection desired for each representation of a SSN or credit card number You can select one of the following in each row Disabled Do not match numbers in this format No logging or masking is performed Detect Detect numbers in this format and create a log entry when detected Mask Partially Substitute the masking ch...

Page 250: ...sers in this section To configure session management settings Step 1 Expand the Session Management section Step 2 Select the Launch Logout Dialog Window after Login check box to display the session logout popup dialog box when the user portal is launched or when a user logs into an application offloaded portal Step 3 In the Global Inactivity Timeout field type the number of inactive minutes allowe...

Page 251: ...tect All for the Signature Group to which the specific signature belongs If neither is set that Signature Group is globally disabled and cannot be modified on a per signature basis See Enabling Web Application Firewall and Configuring General Settings on page 242 See the following sections Enabling Performance Optimization on page 252 Configuring Signature Based Custom Handling and Exclusions on p...

Page 252: ...ng and Exclusions You can disable inspection for a signature in traffic to an individual host or for all hosts You can also change the handling of detected threats for an individual host or for all hosts If the signature group to which the signature belongs is set globally to Detect All you can raise the level of protection to Prevent for the configured hosts If no hosts are configured the action ...

Page 253: ...lication into the Host field This can be a host name or an IP address To determine the correct host entry for this exclusion see Determining the Host Entry for Exclusions on page 254 You can configure a path to a particular folder or file along with the host The protocol port and the request parameters are simply ignored in the URL If a path is configured then the exclusion is recursively applied ...

Page 254: ...ions and requests The existing HTTP connections and requests will continue to use the old settings until they are terminated Removing a Host from a Per Signature Exclusion To remove a host from a configured exclusion for a signature perform the following steps Step 1 On the Web Application Firewall Signatures page click the Configure button for the signature that you wish to change Step 2 Select t...

Page 255: ...he Virtual Office page and click Show Edit Controls above the list of bookmarks Step 2 Click the Edit button for the bookmark Step 3 In the Edit Bookmark screen view the host entry in the Name or IP Address field Step 4 Click Cancel Viewing the Host Entry in an Offloaded Application You can determine exactly what host name to enter in your exclusion by viewing the configuration details of the offl...

Page 256: ... and application profiling Application profiling allows you to generate custom rules in an automated manner based on a trusted set of inputs used to develop a profile of what inputs are acceptable by an application Other inputs are denied providing positive security enforcement When you place the SRA appliance in learning mode in a staging environment it learns valid inputs for each URL accessed b...

Page 257: ... 257 Custom rules created on this page have all the same properties as the signatures that Dell SonicWALL pushes out to Web Application Firewall enabled appliances Figure 39 shows the Rules page Figure 39 Web Application Firewall Rules Page ...

Page 258: ... and rule chains can be used to distinguish between legitimate and illegitimate traffic as defined by a Web application that is using a certain URI or running on a certain portal One rule in the chain is configured to match the URI or portal host name while another rule is created that matches an undesirable value for another element of the HTTP S traffic When the rule chain both rules matches som...

Page 259: ...e traffic and log the match or to simply log it You can also set the action to Disabled to remove the rule chain from active status and stop comparing traffic against those rules The Custom Rules feature can be enabled or disabled using the Enable Custom Rules global setting Note Rule chains are enforced in the order that the rule chains were added This order can be changed by deleting and re crea...

Page 260: ...h as images HTML and CSS HTML XML Selected by default this is the most important from a security standpoint because it typically covers the more sensitive Web transactions Javascript Appropriate for an application written in Javascript CSS Select CSS to profile the cascading style sheet content used to control the formatting of Web pages written in HTML XHTML or XML variants Step 4 Click Begin Pro...

Page 261: ...ct one of the following actions from the Default Action for generated Rule Chains drop down list Disabled The generated rules will be disabled rather than active Detect Only Content triggering the generated rule will be detected and logged Prevent Content triggering the generated rule will be blocked and logged Step 10 Select the Overwrite existing Rule Chains for URL Profiles check box to overwri...

Page 262: ...e Adding or Editing a Rule Chain To add or edit a rule chain perform the following steps Step 1 On the Web Application Firewall Rules page click the Add Rule Chain button to add a new rule chain To edit an existing rule chain click its Edit Rule Chain icon under Configure The New Rule Chain screen or the screen for the existing rule chain displays Both screens have the same configurable fields in ...

Page 263: ...e same IP address Tracking per remote address uses the remote address as seen by the SRA appliance This covers the case where different clients sit behind a firewall with NAT enabled causing them to effectively send packets with the same source IP Step 11 Select the Track Per Session check box to enable rate limiting based on an attacker s browser session This method sets a cookie for each browser...

Page 264: ...he or she forgot to add another rule to narrow the criteria for the match to requests for that portal host or URL If the first rule was too broad then this will mean a denial of service for the appliance Specifically the administrator creates a rule chain to deny using the GET HTTP method for a specific URL which expects a POST request For this the administrator needs to create two rules 1 The fir...

Page 265: ...s as required to match the specified value If multiple variables are configured then the rule is matched if any one of the configured variables matches the target value See the About Variables section on page 266 for more information about variables Operators These are arithmetic and string operators The Not check box is an inversion operator used to match any value except the configured condition...

Page 266: ...r delete them from the list of selected variables You can combine multiple variables as required to match the specified value If multiple variables are configured then the rule is matched if any one of the configured variables matches the target value A variable can represent a single value or a collection If a variable represents a collection such as Parameter Values then a specific variable with...

Page 267: ... the parameter name in the selection field to the right of the colon Remote Address No Refers to the client s IP address This variable allows you to allow or block access from certain IP addresses Request Header Values Yes Refers to the collection of all HTTP S request header values for the current request To match against some aspect of the entire list of request header val ues leave the selectio...

Page 268: ...reate a rule chain that applies to a particular virtual host one rule would match the host and another would specify other criteria for the match Portal Address No Refers to the IP address or virtual IP address of the SRA portal which accepts the request from the client Variable Name Collection Description Operator Type Description Contains String One or more of the scanned variables contains the ...

Page 269: ...case Use the Convert to Lowercase operation when you want to make case insensitive comparisons by converting the input to all lowercase before the comparison When you use this operation make sure that strings entered in the Value field are all in lowercase This is an anti evasive operation to prevent hackers from changing case to bypass the rule Normalise URI Path Use the Normalise URI Path operat...

Page 270: ... than and set Value to 8 Select String Length in the Advanced Operations list to compute the length of the password form parameter URL Decode URL Decode Unicode Use the URL Decode operation to decode URL encoded strings in the input Use the URL Decode Unicode operation to handle uXXXX encoding URL encoding is used to safely transmit data over the Internet when URLs contain characters outside the A...

Page 271: ...rm has a request parameter other than formId or if the value of formId contains more than 4 digits To accomplish this you would need two rule chains 1 The first rule chain contains two rules The first rule identifies the URL where the form is submitted The second rule checks if Parameter Names does not match the name of the valid parameter formId It uses the Equals String operator with the Not inv...

Page 272: ...figured value s to check for a match Specifically if a request is made to the URI http www host com foo 20bar and the URL Decode operation is selected the scanned URI becomes http www host com foo bar after decoding which can now be safely matched To thwart a hacker who sends a non encoded request in addition to the encoded one the administrator can select the None and the URL Decode options in th...

Page 273: ... opens Step 2 Click the Clone icon under Configure for the rule you want to clone Step 3 Click OK in the confirmation dialog box You can now edit the rule to customize it See Adding or Editing a Rule on page 273 Adding or Editing a Rule To add or edit a rule in a rule chain perform the following steps Step 1 Click the Edit Rule Chain icon under Configure for the rule chain on which you want to add...

Page 274: ...hreats The Local tab also displays Web server status statistics and graphs of the number of requests and the amount of traffic during the selected monitoring period The monitoring functions of each tab are explained in the following sections Monitoring on the Local Tab on page 274 Monitoring on the Global Tab on page 280 Monitoring on the Local Tab The Local tab displays statistics and graphs for ...

Page 275: ...e report Step 6 If prompted to install Adobe Flash Player click Get Flash and then after the installation click Try Again to generate the PDF report from Internet Explorer Monitoring Web Server Status On the Local tab below the control buttons this page displays graphs for Web server status One graph shows the number of Web requests detected over time and another graph shows the amount of traffic ...

Page 276: ...Web Application Firewall Monitoring page displays graphs indicating the number of detected and prevented threats Two graphs are presented one showing the number of threats over time and the other showing the top ten threats that were detected and prevented during that time frame You can change the time frame displayed in both graphs or change the view to display all threats in list format by selec...

Page 277: ...e pointer over the signature ID causes a tooltip to appear with details about the threat Figure 48 Threat Details Tooltip Viewing Threats in List Format To see the threats in list format rather than as a graph select All in Lists from the Monitoring Period drop down list Figure 49 shows the list format The Severity column of the threat list is color coded for quick reference as follows High severi...

Page 278: ...49 Threats in List Format To view and hide threat details perform the following steps Step 1 On the Web Application Firewall Monitoring page select All in Lists from the Monitoring Period drop down list The list of detected or prevented threats is displayed in the WAF Threats Detected Prevented table Step 2 To display details about a threat click on the threat The details include the following URL...

Page 279: ...an select the following display options from the Perspective drop down list Signature The name of each threat shown is listed at the left side of the graph Severity High medium and low severity threats are displayed using color coding Server The server names are listed at the left side of the graph ...

Page 280: ...name is displayed in red or pink while the inactive tab name is blue The control buttons act on the page that is currently displayed Step 2 To turn streaming on or off click the ON or OFF indicator next to Streaming Updates Step 3 To refresh the display click the Refresh button Step 4 To generate a PDF report containing Web Application Firewall statistics click the Download Report button Note Inte...

Page 281: ...ltip to appear with details about the threat Figure 51 Threat Details Tooltip The local signature database on the appliance is accessed to get detailed threat information but if the database is not up to date some detailed information for the Top 10 Threats might not be available In this case the threat color in the graph is light grey and the severity is displayed as unknown in the tooltip for th...

Page 282: ...ing the Log You can search for a value contained in a certain column of the log table and can also search for log entries that do not contain the specified value To view and search Web Application Firewall log files perform the following steps Step 1 On the Web Application Firewall Log page type the value to search for into the Search field Step 2 Select the column in which to search from the drop...

Page 283: ...g with the command for detected threats Information about the agent that caused the event is also displayed For an explanation of the rather cryptic Agent string the following Wikipedia page provides a description and links to external sites that can analyze any user agent string http en wikipedia org wiki User_agent To view more details about an individual log entry perform the following steps St...

Page 284: ...he Web Application Firewall Log page The entries on the page are removed and any attempt to export or email the log file while it is still empty will cause a confirmation dialog box to display To clear the Web Application Firewall log perform the following Step 1 On the top right corner of the Web Application Firewall Log page click Clear Step 2 Click OK in the confirmation dialog box Verifying an...

Page 285: ...age WAF signature database update failed No signatures were found in the update The download for the database update completed but no suitable signatures were found in the database WAF signature database update failed Old signature timestamp found in the update The timestamp found in the database update from the License Manager is older than what was originally advertised before the download for t...

Page 286: ...tton on the Web Application Firewall Status page WAF engine is being started with the factory default signature database The Web Application Firewall engine will be using the factory default signature database for traffic inspection This may imply that no new signatures were found since the firmware update If an attempt to download is revealed in the logs earlier then this message could also imply...

Page 287: ... users and administrators who are currently logged into the SRA appliance This section provides general information about how the SRA appliance manages users through a set of hierarchical policies This section contains the following sub sections Access Policies Concepts section on page 288 Access Policy Hierarchy section on page 288 Figure 52 Users Status Page When Streaming Updates is set to ON t...

Page 288: ...ence For example a policy configured for a single IP address takes precedence over a policy configured for a range of addresses A policy that applies to a range of IP addresses takes precedence over a policy applied to all IP addresses If two or more IP address ranges are configured then the smallest address range takes precedence Host names are treated the same as individual IP addresses Network ...

Page 289: ...y Policy 3 A single host name is more specific than the IP address range configured in Policy 2 Note In this example the user would not be able to access ftp company com using its IP address 10 0 1 3 The SRA policy engine does not perform reverse DNS lookups Tip When using Citrix bookmarks in order to restrict proxy access to a host a Deny rule must be configured for both Citrix and HTTP services ...

Page 290: ...ve Directory the administrator will need to create the user manually in the Local User database Removing a User To remove a user navigate to Users Local Users and click the delete icon next to the name of the user that you wish to remove Once deleted the user will be removed from the Local Users window Adding a Local User To create a new local user perform the following steps Step 1 Navigate to th...

Page 291: ...mation as bookmarks Rather than requiring administrators to manually create local users for external domain users wishing to use personal bookmarks the SRA appliance will automatically create a corresponding local user entity when an external domain user creates a personal bookmark so that it may store the bookmark information Editing User Settings To edit a user s attributes navigate to the Users...

Page 292: ...6 Adding or Editing User Bookmarks section on page 302 Configuring Login Policies section on page 312 Modifying General User Settings The General tab provides configuration options for a user s password inactivity timeout value and bookmark single sign on SSO control The following table provides detailed information about application specific support of SSO global group user policies and bookmark ...

Page 293: ... be set at the user group and global level If one or more timeouts are configured for an individual user the user timeout setting will take precedence over the group timeout and the group timeout will take precedence over the global timeout Setting the global settings timeout to 0 disables the inactivity timeout for users that do not have a group or user timeout configured Step 5 To allow users to...

Page 294: ...P attributes or RADIUS filter IDs Note If a user s external group membership has changed their SRA group membership automatically changes to match the external group membership To configure settings on the Groups tab Step 1 To set a group as the primary group click the Set Primary Group star corresponding to the group you wish to set as the primary Step 2 To add a group of which users will be a me...

Page 295: ...owing steps Step 1 Navigate to Users Local Users Step 2 Click the configure icon next to the user you want to configure Step 3 In the Edit Local User page select the NxSettings tab Step 4 Enter a beginning IPv4 address in the Client Address Range Begin field Step 5 Enter an ending IPv4 address in the Client Address Range End field Step 6 Enter a beginning IPv6 address in the Client IPv6 Address Ra...

Page 296: ... global setting Step 14 In the User Name Password Caching drop down list select one of the following Use group setting Take the action specified by the group setting See Editing Group Settings section on page 316 Allow saving of user name only Allow caching of the user name The user will only need to enter a password when starting NetExtender Overrides the group setting Allow saving of user name p...

Page 297: ... or a single port number into the Port Range Port Number field See Adding a Policy for an IP Address section on page 298 IP Address Range If your policy applies to a range of addresses enter the beginning IP address in the IP Network Address field and the subnet mask that defines the IP address range in the Subnet Mask field Optionally enter a port range for example 4100 4200 or a single port numb...

Page 298: ...in the network object Step 4 Select Allow or Deny from the Status drop down list to either permit or deny SRA connections for the specified service and host machine Tip When using Citrix bookmarks in order to restrict proxy access to a host a Deny rule must be configured for both Citrix and HTTP services Step 5 Click Accept to update the configuration Once the configuration has been updated the ne...

Page 299: ...ll Addresses Step 1 In the Apply Policy to field select the All Addresses option Step 2 Define a name for the policy in the Policy Name field Step 3 The IP Address Range field is read only specifying All IP Addresses Step 4 In the Service drop down list click on a service option Step 5 In the Status drop down list click on an access action either Allow or Deny Step 6 Click Accept Setting File Shar...

Page 300: ... Step 5 Select Server Path from the Apply Policy To drop down list Step 6 Type a name for the policy in the Policy Name field Step 7 In the Server Path field enter the server path in the format servername share path or servername share path The prefixes and are acceptable Note Share and path provide more granular control over a policy Both are optional Step 8 Select Allow or Deny from the Status d...

Page 301: ... for an IPv6 Address To add a policy for an IPv6 address perform the following steps Element Usage Host Can be a hostname that should be resolved or an IP address Host information has to be present Port If port is not mentioned then all ports for that host are matched Specify a specific port or port range using digits 0 9 and or wildcard elements Zero 0 must not be used as the first digit in this ...

Page 302: ...ess in the IPv6 Network Address field Step 4 Type a prefix value in the IPv6 Prefix field such as 64 or 112 Step 5 In the Port Range Port Number field optionally enter a port range or an individual port Step 6 In the Service drop down list click on a service option Step 7 In the Status drop down list click on an access action either Allow or Deny Step 8 Click Accept Adding a Policy for All IPv6 Ad...

Page 303: ...iptive name for the bookmark in the Bookmark Name field Step 2 Enter the fully qualified domain name FQDN or the IPv4 or IPv6 address of a host machine on the LAN in the Name or IP Address field In some environments you can enter the host name only such as when creating a VNC bookmark in a Windows local network If a Port number is included with an IPv6 address in the Name or IP Address field the I...

Page 304: ... not use 10 20 30 4 1 Tip For a bookmark to a Linux server see the Tip below this table FTP IP Address IPv6 Address IP Port non standard FQDN Host name 10 20 30 4 2008 1 2 3 4 10 20 30 4 6818 or 2008 1 2 3 4 6818 JBJONES PC sv us sonicwall com JBJONES PC Telnet IP Address IPv6 Address IP Port non standard FQDN Host name 10 20 30 4 2008 1 2 3 4 10 20 30 4 6818 or 2008 1 2 3 4 6818 JBJONES PC sv us ...

Page 305: ...icy setting Step 5 Select one of the service types from the Service drop down list File Shares Host Folder Host File FQDN Folder FQDN File IP Folder IP File server 3 sharedfolder server 3 inventory xls server 3 company net sharedfolder server 3company net inventory xls 10 20 30 4 sharedfolder 10 20 30 4 status doc Note Use backslashes even on Linux or Mac com puters these use the Windows API for f...

Page 306: ...console in RDC 6 1 and newer Select the Enable wake on LAN check box to enable waking up a computer over the network connection Selecting this check box causes the following new fields to be displayed MAC Ethernet Address Enter one or more MAC addresses separated by spaces of target hosts to wake Wait time for boot up seconds Enter the number of seconds to wait for the target host to fully boot up...

Page 307: ...ding drop down list select one of Raw Pixel data is sent in left to right scanline order and only rectangles with changes are sent after the original full screen has been transmitted RRE Rise and Run length Encoding uses a sequence of identical pixels that are compressed to a single value and repeat count This is an efficient encoding for large blocks of constant color CoRRE A variation of RRE usi...

Page 308: ...dentials from the current SRA session for login to the Web server Select Use custom credentials to enter a custom username password and domain for this bookmark For more information about custom credentials see Creating Bookmarks with Custom SSO Credentials section on page 310 Select the Forms based Authentication check box to configure Single Sign On for forms based authentication Configure the U...

Page 309: ...s computers in the domain doing so will disable access to the DFS file shares from other domains The SRA appliance is not a domain member and will not be able to connect to the DFS shares DFS file shares on a stand alone root are not affected by this Microsoft restriction File Transfer Protocol FTP Expand Show advanced server configuration to select an alternate value in the Character Encoding dro...

Page 310: ...Select the box next to HTTPS Mode to enable HTTPS mode Step 8 Optionally select the Always use Java in Internet Explorer check box to use Java to access the Citrix Portal when using Internet Explorer Without this setting a Citrix ICA client or XenApp plugin an ActiveX client must be used with IE This setting lets users avoid installing a Citrix ICA client or XenApp plugin specifically for IE brows...

Page 311: ...e passed or leave the field blank to pass the current user s password to the bookmark Step 5 Select the Forms based Authentication check box to configure Single Sign On for Forms based authentication User Form Field This should be the same as the name and ID attribute of the HTML element representing the User Name in the login form for example input type text name userid Password Form Field This s...

Page 312: ...ed Step 4 To block the specified user or users from logging into the appliance select the Disable login check box Step 5 Optionally select the Enable client certificate enforcement check box to require the use of client certificates for login By checking this box you require the client to present a client certificate for strong mutual authentication Two additional fields will appear Verify user na...

Page 313: ...d appear in the Define Address window Step 10 Provide appropriate IP address es for the source address type you selected IP Address Type a single IP address in the IP Address field IP Network Type an IP address in the Network Address field and then supply a subnet mask value that specifies a range of addresses in the Subnet Mask field IPv6 Address Type an IPv6 address such as 2007 1 2 3 4 IPv6 Net...

Page 314: ...314 Deleting a Group section on page 315 Adding a New Group section on page 315 Editing Group Settings section on page 316 Group Configuration for LDAP Authentication Domains section on page 329 Group Configuration for Active Directory NT and RADIUS Domains section on page 333 Creating a Citrix Bookmark for a Local Group on page 336 For a description of global settings for local groups see the Glo...

Page 315: ...up for an authentication domain first delete all users in the group Then you will be able to delete the group on the Edit Group Settings page Adding a New Group Note that a group is automatically created when you create a domain You can create domains in the Portals Domains page You can also create a group directly from the Users Local Groups page The Users Local Groups window contains two default...

Page 316: ...d single sign on settings To modify the general user settings perform the following steps Step 1 In the left hand column navigate to the Users Local Groups Step 2 Click the configure icon next to the group you want to configure The General tab of the Edit Group Settings window displays The General tab displays the following non configurable fields Group Name and Domain Name Step 3 To set the inact...

Page 317: ...ion to disable single sign on for bookmarks Step 5 Click Accept to save the configuration changes Modifying Group Portal Settings The Portal tab provides configuration options for portal settings for this group To configure portal settings for this group perform the following steps Step 1 In the left hand column navigate to the Users Local Groups Step 2 Click the configure icon next to the group y...

Page 318: ...ned bookmarks select Allow from the Allow user to edit delete bookmarks drop down menu To prevent users from editing or deleting user owned bookmarks select Deny To use the setting defined globally select Use global setting Note The Allow User to Edit Delete Bookmarks setting applies to user owned bookmarks only Users cannot edit or delete group and global bookmarks Step 7 Click Accept Enabling Gr...

Page 319: ...isconnect drop down list Use global setting Take the action specified by the global setting See Edit Global Settings section on page 337 Enabled Enable this action for all members of the group Overrides the global setting Disabled Disable this action for all members of the group Overrides the global setting Step 12 In the Uninstall Client After Exit drop down list select one of the following Use g...

Page 320: ...tion on page 337 Enabled Force all traffic for this user including traffic destined to the remote users local network over the SRA NetExtender tunnel Affects all members of the group Overrides the global setting Disabled Disable this action for all members of the group Overrides the global setting Step 5 To add globally defined NetExtender client routes for members of this group select the Add Glo...

Page 321: ...ally tunnel all SRA client traffic through the NetExtender connection by entering 0 0 0 0 for the Destination Network and Subnet Mask Prefix in the Add Client Routes window Adding Group Policies With group access policies all traffic is allowed by default Additional allow and deny policies may be created by destination address or address range and by service type The most specific policy will take...

Page 322: ...ge For more information refer to Configuring Login Policies section on page 312 IP Address If your policy applies to a specific host enter the IP address of the local host machine in the IP Address field Optionally enter a port range 80 443 or a single port number into the Port Range Port Number field IP Address Range If your policy applies to a range of addresses enter the beginning IP address in...

Page 323: ...Status drop down list to either permit or deny SRA connections for the specified service and host machine Step 9 Click Accept to update the configuration Once the configuration has been updated the new group policy will be displayed in the Edit Local Group window The group policies are displayed in the Group Policies list in the order of priority from the highest priority policy to the lowest prio...

Page 324: ...fy group bookmarks Step 4 Enter a string that will be the name of the bookmark in the Bookmark Name field Step 5 Enter the fully qualified domain name FQDN or the IPv4 or IPv6 address of a host machine on the LAN in the Name or IP Address field In some environments you can enter the host name only such as when creating a VNC bookmark in a Windows local network Note If a Port number is included wit...

Page 325: ...s separated by spaces of target hosts to wake Wait time for boot up seconds Enter the number of seconds to wait for the target host to fully boot up before cancelling the WoL operation Send WOL packet to host name or IP address To send the WoL packet to the hostname or IP of this bookmark select the Send WOL packet to host name or IP address check box which can be applied in tandem with a MAC addr...

Page 326: ...n efficient encoding for large blocks of constant color CoRRE A variation of RRE using a maximum of 255x255 pixel rectangles allowing for single byte values to be used More efficient than RRE except where very large regions are the same color Hextile Rectangles are split up in to 16x16 tiles of raw or RRE data and sent in a predetermined order Best used in high speed network environments such as w...

Page 327: ...ser Name in the Login form for example input type text name userid Configure the Password Form Field to be the same as the name or id attribute of the HTML element representing Password in the Login form for example input type password name PASSWORD id PASSWORD maxlength 128 Secure Web HTTPS Optionally select Automatically log in and select Use SSL VPN account credentials to forward credentials fr...

Page 328: ...t Use SSL VPN account credentials to forward credentials from the current SRA session for login to the FTP server Select Use custom credentials to enter a custom username password and domain for this bookmark For more information about custom credentials see Creating Bookmarks with Custom SSO Credentials section on page 310 Telnet No additional fields Secure Shell version 1 SSHv1 No additional fie...

Page 329: ...query this information and provide specific group policies or bookmarks based on LDAP attributes By configuring LDAP attributes the SRA appliance administrator can leverage the groups that have already been configured in an LDAP or Active Directory database rather than needing to manually recreate the same groups in the SRA appliance Once an LDAP authentication domain is created a default LDAP gro...

Page 330: ...r portal It can be the same value as the Server address field Step 4 Enter the IP address or domain name of the server in the Server address field Step 5 Enter the search base for LDAP queries in the LDAP baseDN field An example of a search base string is CN Users DC yourdomain DC com Tip It is possible for multiple OUs to be configured for a single domain by entering each OU on a separate line in...

Page 331: ...eature required for all users All users must use the One Time Password feature Users who do not have a One Time Password email address configured will not be allowed to login using domain name Users in the domain will use the One Time Password feature One Time Password emails for all users in the domain will be sent to username domain com Step 11 If you select One time passwords an LDAP e mail att...

Page 332: ...tion may be helpful If multiple attributes are defined for a group all attributes must be met by LDAP users LDAP authentication binds to the LDAP tree using the same credentials as are supplied for authentication When used against Active Directory this requires that the login credentials provided match the CN common name attribute of the user rather than samAccountName login name For example if yo...

Page 333: ...d out the LDAP attributes of your users there are several different methods From a machine with ldap search tools for example a Linux machine with OpenLDAP installed run the following command ldapsearch h 10 0 0 5 x D cn demo cn users dc sonicwall dc net w demo123 b dc sonicwall dc net tmp file Where 10 0 0 5 is the IP address of the LDAP or Active Directory server cn demo cn users dc sonicwall dc...

Page 334: ...les it is necessary for group and user bookmarks to be correlated to defined group and user entities When working with local LocalDomain groups and users this is automated since the administrator must manually define the groups and users on the appliance Similarly when working with external non LocalDomain for example RADIUS NT LDAP groups the correlation is automated since creating an external do...

Page 335: ...xisting AD group memberships By adding one or more AD groups to an SRA group only users associated with specified AD group s are allowed to login Note Before configuring and Active Directory group ensure that you have already created an Active Directory domain This option is configured in the Portals Domains page To add an AD group perform the following steps Step 1 In the Users Local Groups page ...

Page 336: ...t Explorer to use Java to access the Citrix Portal when using Internet Explorer Without this setting an ActiveX Citrix client or plugin must be used with IE Step 10 Optionally select Always use specified Citrix ICA Server and specify the IP address in the ICA Server Address field that appears This setting allows you to specify the Citrix ICA Server address for the Citrix ICA session By default the...

Page 337: ... To prevent users from adding new bookmarks select Deny Step 5 To allow users to edit or delete user owned bookmarks select Allow from the Allow User to Edit Delete Bookmarks drop down menu To prevent users from editing or deleting user owned bookmarks select Deny Note Users cannot edit or delete group and global bookmarks Step 6 In the Automatically log into bookmarks drop down list select one of...

Page 338: ...e enter the IPv4 network address 10 202 0 0 For IPv6 enter the IPv6 network address in the form 2007 1 2 3 0 Step 19 For an IPv4 destination network type the subnet mask in the Subnet Mask Prefix field using decimal format 255 0 0 0 255 255 0 0 or 255 255 255 0 For an IPv6 destination network type the prefix such as 112 Step 20 Click Add Step 21 Click Accept to save the configuration changes Step ...

Page 339: ...he Users Local Users or Users Local Groups window Step 2 Click the configure icon next to Global Policies The Edit Global Settings window is displayed Step 3 On the Policies tab click Add Policy The Add Policy window is displayed Note User and group access policies will take precedence over global policies Step 4 In the Apply Policy To drop down list select one of the following IP Address IP Addre...

Page 340: ...tus drop down list to either permit or deny SRA connections for the specified service and host machine Step 9 Click Accept to update the configuration Once the configuration has been updated the new policy will be displayed in the Edit Global Settings window The global policies will be displayed in the policy list in the Edit Global Settings window in the order of priority from the highest priorit...

Page 341: ... Note Depending on the service you select from the Service drop down list additional fields may appear Fill in the information based on the service you select For example if you select RDP ActiveX or RDP Java a Screen Size drop down list and other additional fields are displayed Step 7 Click Accept to update the configuration Once the configuration has been updated the new global bookmark will be ...

Page 342: ...342 SRA 6 0 Administrator s Guide ...

Page 343: ...Log ViewPoint section on page 350 Log Analyzer section on page 351 Log View The SRA appliance supports Web based logging syslog logging and email alert messages In addition The SRA appliance may be configured to email the event log file to the SRA administrator before the log file is cleared This section provides an overview of the Log View page and a description of the configuration tasks availab...

Page 344: ...olumn Views Each log entry displays the following information Table 23 Log View Columns Column Description Time The time stamp displays the date and time of log events in the format YY MM DD HH MM SS Year Month Day Hour Minute Second Hours are displayed in 24 hour clock format The date and time are based on the local time of the SRA gateway which is configured in the System Time page Priority The ...

Page 345: ...ntranet Web site through the SRA portal the corresponding log entry would display the IP address or Fully Qualified Domain Name FQDN of the Web site accessed User The name of the user who was logged into the appliance when the message was generated Message The text of the log message Column Description Navigation Button Description Find Enables you to search for a log containing a specified settin...

Page 346: ...istrator email and mail server information has been specified in the Email Logging and Alerts section of the Log Settings page For instructions on configuring the administrator email refer to Configuring Log Settings on page 348 Column Description Time Displays the date and time of log events in the format YY MM DD HH MM SS Year Month Day Hour Minute Second Hours are displayed in 24 hour clock for...

Page 347: ...l that records system and networking activity The syslog messages are sent in WELF WebTrends Enhanced Log Format so most standard firewalls and networking reporting products can accept and interpret the log files The syslog service transmits syslog messages to external syslog server s listening on UDP port 514 Figure 56 Log Settings Page Log Alert Levels The Log Alert Levels section allows the adm...

Page 348: ...en Full is selected the event log will be emailed and then cleared from when the log file is full If Daily is selected select the hour at which to email the event log If Weekly is selected select the day of the week and the hour If Daily or Weekly are chosen the log file will still be sent if the log file is full before the end of the period In the Log View page you can click the Clear Log button ...

Page 349: ...il address where you want logs sent to in the Email Events Logs to field Step 4 Type the email address where you want alerts sent to in the Email Alerts to field Step 5 Type the IP address for the mail server you will be using in the Mail Server field Step 6 Type the email address for outgoing mail from your SRA appliance in the Mail From Address field Step 7 Click Accept in the upper right hand c...

Page 350: ...have Dell SonicWALL ViewPoint available or are managed by the Dell SonicWALL Global Management System GMS appliance management software This feature requires a ViewPoint license key ViewPoint is an integrated appliance management solution that Creates dynamic web based reports of SRA appliance and remote access activity Generates both real time and historical reports to provide a complete view of ...

Page 351: ...lyzer Overview The Log Analyzer page allows the administrator to add the SRA appliance to an Analyzer server for installations that have Dell SonicWALL Analyzer available or are managed by the Dell SonicWALL Global Management System GMS version 7 0 or higher appliance management software This feature requires an Analyzer license key Dell SonicWALL Analyzer is a software application that creates dy...

Page 352: ... if you do not have a valid license the page provides a link to the System Licenses page to activate your license Step 2 In the Analyzer Settings section click the Add button The Add Analyzer Server screen displays Step 3 In the Add Analyzer Server screen enter the Hostname or IP Address of your Analyzer server Step 4 Enter the Port which your Analyzer server communicates with managed devices The ...

Page 353: ...ALL SRA Web based management interface Virtual Office This section provides an overview of the Virtual Office page and a description of the configuration tasks available on this page Virtual Office Overview section on page 353 Using the Virtual Office section on page 354 Virtual Office Overview The Virtual Office option is located in the navigation bar of the SRA management interface ...

Page 354: ... the SRA Web based management interface click Virtual Office in the navigation bar Step 2 A new browser window opens to the Virtual Office home page Note When you launch the Virtual Office from the Web based management interface you will be automatically logged in with your administrator credentials The Logout button will not appear in the Virtual Office when you are logged on as an administrator ...

Page 355: ...Secure Virtual Access mode if allowed by administrator Configure passwords Configure single sign on options Note For detailed configuration information about the Virtual Office user portal and these tasks refer to the Dell SonicWALL SRA User s Guide available on the Secure Remote Access pages of the Dell SonicWALL support Web site at http www sonicwall com us Support html ...

Page 356: ...356 SRA 6 0 Administrator s Guide ...

Page 357: ...ne help document Using Context Sensitive Help Context sensitive help is available on most pages of the SRA Web based management interface Click the context sensitive help button in the top right corner of the page to get help that corresponds to the SRA management page you are using Clicking the context sensitive help button launches a separate browser window to the corresponding documentation The...

Page 358: ...358 SRA 6 0 Administrator s Guide ...

Page 359: ...bal and enable level passwords in order to access the device and issue changes to the configuration If you do not have these contact your network administrator before continuing Dell SonicWALL recommends updating the PIX s OS to the most recent version if your PIX can support it This document was validated on a Cisco PIX 515e running PIX OS 6 3 5 and is the recommended version for interoperation w...

Page 360: ...not to conflict with these addresses For example enter 192 168 100 201 in the field next to Client Address Range Begin and enter 192 168 100 249 in the field next to Client Address Range End When done click on the Accept button in the upper right hand corner to save and activate the change Step 5 Navigate to the NetExtender Client Routes page Add a client route for 192 168 100 0 If there is an ent...

Page 361: ...ol h323 h225 1720 fixup protocol h323 ras 1718 1719 fixup protocol http 80 fixup protocol rsh 514 fixup protocol rtsp 554 fixup protocol sip 5060 fixup protocol sip udp 5060 fixup protocol skinny 2000 fixup protocol smtp 25 fixup protocol sqlnet 1521 fixup protocol tftp 69 names access list sslvpn permit tcp any host 64 41 140 167 eq www access list sslvpn permit tcp any host 64 41 140 167 eq http...

Page 362: ...g the default numbering scheme of the SRA appliance Step 1 From a management system log into the SRA appliance s management interface By default the management interface is X0 and the default IP address is 192 168 200 1 Step 2 Navigate to the Network Routes page and make sure the Default Gateway is set to 192 168 200 2 When done click on the Accept button in the upper right hand corner to save and...

Page 363: ... Step 19 Issue the command static dmz outside tcp x x x x https 192 168 200 1 https netmask 255 255 255 255 0 0 replace x x x x with the WAN IP address of your PIX Step 20 Issue the command static inside dmz 192 168 100 0 192 168 100 0 netmask 255 255 255 0 0 0 Step 21 Issue the command access group sslvpn in interface outside Step 22 Issue the command access group dmz to inside in interface dmz S...

Page 364: ...255 255 0 0 static inside dmz 192 168 100 0 192 168 100 0 netmask 255 255 255 0 0 0 access group sslvpn in interface outside access group dmz to inside in interface dmz route outside 0 0 0 0 0 0 0 0 64 41 140 166 1 timeout xlate 3 00 00 timeout conn 1 00 00 half closed 0 10 00 udp 0 02 00 rpc 0 10 00 h225 1 00 00 timeout h323 0 05 00 mgcp 0 05 00 sip 0 30 00 sip_media 0 02 00 timeout sip disconnec...

Page 365: ...ng information Step 3 With the configuration complete click the Save Settings button on the bottom of the page The Linksys is now ready for operations with the SRA appliance WatchGuard Firebox X Edge This guide assumes that your WatchGuard Firebox X Gateway is configured with an IP of 192 168 100 1 and your SRA appliance is configured with an IP of 192 168 100 2 Note The steps below are similar fo...

Page 366: ...o the System Status page below Step 2 If the WatchGuard s management interface is already configured to accept HTTPS on port 443 you will need to change the port in order to be able to manage both the Dell SonicWALL SRA and WatchGuard appliances Step 3 Navigate to Administration System Security Figure 1 WatchGuard Administration System Security Dialog Box Step 4 Clear the Use non secure HTTP inste...

Page 367: ...of 192 168 100 1 and your SRA appliance is configured with an IP of 192 168 100 2 Step 1 Click Remote Management from the left hand index of your Netgear management interface In order for the SRA appliance to function with your Netgear gateway device you must verify that the NetGear s management port will not conflict with the management port used by the SRA appliance Step 2 Clear the Allow Remote...

Page 368: ...tep 9 Select HTTPS from the Service Name drop down list Step 10 Select ALLOW always in the Action drop down list Step 11 Enter the WAN IP address of the SRA appliance ex 192 168 100 2 in the Local Server Address field Step 12 Click Accept to save changes Your Netgear gateway device is now ready for operations with the SRA appliance Name HTTPS Type TCP UDP Start Port 443 Finish Port 443 ...

Page 369: ... Management in the left hand index of your Netgear management interface Step 2 Click the Add Custom Service button in the middle of the page Step 3 Enter a service name in the Service Name field ex SRA Step 4 Enter 443 in the Starting Port field Step 5 Enter 443 in the Ending Port field Step 6 Enter the WAN IP address of the SRA appliance ex 192 168 100 2 in the Local Server Address field Step 7 C...

Page 370: ...ne under the file menu Manage and Network Objects Figure 57 Check Point Host Node Object Dialog Box Note The object is defined as existing on the internal network Should you decide to locate the SRA appliance on a secure segment sometimes known as a demilitarized zone then subsequent firewall rules will have to pass the necessary traffic from the secure segment to the internal network ...

Page 371: ...e Most installations of Check Point AIR55 require a static route This route will send all traffic from the public IP address for the SRA appliance to the internal IP address route add 64 41 140 167 netmask 255 255 255 255 192 168 100 2 ARP Check Point AIR55 contains a feature called auto ARP creation This feature will automatically add an ARP entry for a secondary external IP address the public IP...

Page 372: ... to flow from the Internet to the SRA appliance Figure 60 Check Point Policy Rule Window Again should the SRA appliance be located on a secure segment of the Check Point firewall a second rule allowing the relevant traffic to flow from the SRA appliance to the internal network will be necessary ...

Page 373: ... certificate See the following sections Importing a goDaddy Certificate on Windows on page 373 Importing a Server Certificate on Windows on page 376 Importing a goDaddy Certificate on Windows In this use case we format a goDaddy Root CA Certificate on a Windows system and then import it to our SRA appliance Step 1 Double click on the goDaddy p7b file to open the Certificates window and navigate to...

Page 374: ...t the Details tab Step 3 Click Copy to File The Certificate Export Wizard launches Step 4 In the Certificate Export Wizard click Next Step 5 Select Base 64 encoded X 509 CER and then click Next Step 6 In the File to Export screen type the file name in as goDaddy cer and then click Next ...

Page 375: ...zard screen verify the path and format and then click Finish Step 8 Click OK in the confirmation dialog box The certificate is exported in base 64 encoded format You can view it in a text editor Step 9 In the SRA management interface navigate to System Certificates ...

Page 376: ...A server certificate to a Windows system In this case the purpose is to use an SSL certificate for application offloading to a mail server The server certificate is mail chaoslabs nl This certificate needs to be exported in base 64 format as the server crt file that is put in a zip file and uploaded as a Server Certificate The private key is not included in the p7b file The private key needs to be...

Page 377: ...ser from AD the user will be placed into the local SRA group with which they have the most AD groups in common For example Bob belongs to the Users Administrators and Engineering AD groups If one SRA group is associated with Users and another is associated with both Administrators and Engineering Bob will be assigned to the SRA group with both Administrators and Engineering because it matches more...

Page 378: ... domain of the OWA server Step 1 Log in to the SRA management interface and navigate to the Portals Domains page Step 2 Click Add Domain The Add Domain window appears Step 3 In the Authentication type drop down list select Active Directory Step 4 In the Domain name field type SNWL_AD Step 5 In the Active Directory domain field type the AD domain name in loraxmfg com Step 6 In the Server address fi...

Page 379: ... Edit Global Policies window appears Step 3 In the Edit Global Policies window click the Policies tab Step 4 Click Add Policy The Add Policy window appears Step 5 Select IP Address Range from the Apply Policy To drop down list Step 6 In the Policy Name field type the descriptive name Deny All Step 7 In the IP Network Address field type the network address 10 200 1 0 Step 8 In the Subnet Mask field...

Page 380: ...roup into the Group Name field Step 3 Select SNWL_AD from the Domain drop down list Step 4 Click Add Step 5 On the Users Local Groups page click Add Group to add the second local group Step 6 In the Add Local Group window type Mega_Group into the Group Name field Step 7 Select SNWL_AD from the Domain drop down list Step 8 Click Add Step 9 On the Users Local Groups page click Add Group to add the s...

Page 381: ...b click the Add Group button Step 4 In the Edit Active Directory Group window select Acme Group from the Active Directory Group drop down list Step 5 Click Edit Acme Group is listed in the Active Directory Groups table on the AD Groups tab Step 6 In the Edit Group Settings window click OK Step 7 On the Users Local Groups page click the Configure button in the Mega_Group row The Edit Group Settings...

Page 382: ...ding the SSHv2 PERMIT Policy In this section we will add the SSHv2 PERMIT policy for both Acme_Group and IT_Group to access the 10 200 1 102 server using SSH This procedure creates a policy for the SRA Local Group Acme_Group and results in SSH access for members of the Active Directory group Acme Group Repeat this procedure for IT_Group to provide SSH access to the server for members of the Active...

Page 383: ...enied access to the https owa server public folder because these groups have access only to the exchange and exchweb subfolders The OWA policies are applied to Exchange server URL Objects rather than server IP addresses since OWA is a Web service Step 1 In the Users Local Groups page click the Configure button in the Mega_Group row We will create two PERMIT policies for Mega_Group to allow access ...

Page 384: ...Step 14 In the Edit Group Settings window click OK We are finished with the policies for Mega_Group Repeat this procedure for IT_Group to provide OWA access for members of the Active Directory group IT Group Verifying the Access Policy Configuration At this point Acme_Group users are allowed to access SSH to 10 200 1 102 Mega_Group users are allowed to access OWA at 10 200 1 10 IT_Groups users are...

Page 385: ...se Cases 385 Test Result Try Acmeuser Access Acmeuser logs into the SNWL_AD domain The Users Status page shows that acmeuser is a member of the local group Acme_Group Acmeuser can access SSH as expected ...

Page 386: ...user tries to access to other resources like OWA 10 200 1 10 but is denied as expected Test Result Try Megauser Access Megauser logs into the SNWL_AD domain The Users Status page shows that megauser is a member of the local group Mega_Group ...

Page 387: ...cess OWA resources as expected Megauser tries to access SSH but is denied as expected Test Result Try Ituser Access Ituser logs into the SNWL_AD domain The Users Status page shows that ituser is a member of the local group IT_Group ...

Page 388: ...388 SRA 6 0 Administrator s Guide Ituser can access SSH to 10 200 1 102 as expected Ituser can access OWA resources as expected ...

Page 389: ... required along with Sun Java 1 6 0_10 2 Check that the user has administrator privilege NetExtender can only install work under the user account with administrator privileges 3 Check if ActiveX has been blocked by Internet Explorer or third party blockers 4 If the problem still exists obtain the following information and send to support The version of Dell SonicWALL SRA NetExtender Adapter from D...

Page 390: ...and Remote Access Connection Manager to see if those two services have been started If not set them to automatic start reboot the machine and install NetExtender again 3 Check if there is another dial up connection in use If so disconnect the connection reboot the machine and install NetExtender again 4 If problem still exists obtain the following information and send them to support The version o...

Page 391: ...xtender dbg The event logs in Control Panel Administrator Tools Event Viewer Select Applications and System events and use the Action Save Log File as menu to save the events in a log file Problem Solution NetExtender BSOD after connected 1 Uninstall NetExtender reboot machine reinstall the latest version NetExtender 2 Obtain the following information and send them to support The version of Dell S...

Page 392: ...392 SRA 6 0 Administrator s Guide ...

Page 393: ...5 what do I do When I launch any of the Java components it gives me an error what should I do Do I have to purchase a SSL certificate What format is used for the digital certificates Are wild card certificates supported What CA s certificates can I use with the SRA appliance Does the SRA appliance support chained certificates Any other tips when I purchase the certificate for the SRA appliance Can...

Page 394: ...tExtender instead of a Proxy Application Does performance change when using NetExtender instead of proxy The SRA appliance is application dependent how can I address non standard applications What applications are supported using Application Offloading Speaking of SSH is SSHv2 supported Why is it required that an ActiveX component be installed Does NetExtender support desktop security enforcement ...

Page 395: ... support multicast Are SNMP and Syslog supported Does the SRA appliance have a Command Line Interface CLI Can I Telnet or SSH into the SRA appliance When controlling user access can I apply permissions on both a domain as well as a Forest basis What does the Web cache cleaner do Why didn t the Web cache cleaner work when I exited the Web browser What does the encrypt settings file check box do Wha...

Page 396: ...get web server is using an unsupported HTTP S authentication scheme through the SRA which currently supports only basic and digest authentication schemes Please contact the administrator for further assistance why Why do Java Services such as Telnet or SSH not work through a proxy server Why won t the SSH client connect to my SSH server How are the F1 F12 keys handled in the Java based SSHv1 and T...

Page 397: ... SRA 1600 4600 FCC Class A ICES Class A CE C Tick VCCI Class A KCC ANATEL BSMI NOM UL cUL TUV GS CB Environment Temperature SRA 1600 4600 32 105ª F 0 40ª C Relative Humidity SRA 1600 4600 5 95 RH non condensing MTBF SRA 1600 18 3 years SRA 4600 17 8 years 2 What are the hardware specs for the SRA 1200 and SRA 4200 Answer Interfaces SRA 1200 2 10 100 1000 Ethernet 1 RJ 45 Serial port 115200 Baud SR...

Page 398: ...NOM UL cUL TUV GS CB WEEE RoHS Europe RoHS China FIPS Mechanically Designed for FIPS 140 2 Level 2 Environment Temperature SRA 1200 4200 32 105ª F 0 40ª C Relative Humidity SRA 1200 4200 5 95 non condensing MTBF SRA 1200 13 years SRA 4200 8 3 years 3 What are the SRA virtual appliance virtualized environment requirements Hypervisor VMWare ESXi and ESX version 4 0 and newer Appliance size on disk 2...

Page 399: ...ired The site requested by the client Web browser does not match the site name embedded in the certificate Type Max Supported on 1200 1600 Max Supported on 4200 4600 Max Supported on Virtual Appliance Portal entries 32 32 32 Domain entries 32 32 32 Group entries 64 64 64 User entries 1 000 2 000 2 000 NetExtender global client routes 100 100 100 NetExtender group client routes 100 100 100 NetExten...

Page 400: ...d to purchase and install a trusted SSL certificate onto the SRA appliance 2 I get this message below when I log into my SRA appliance what do I do Answer It s the same problem as noted in the previous topic but this is the new improved security warning screen in Microsoft Internet Explorer 8 0 Whereas before IE5 x and IE6 x presented a pop up that listed the reasons why the certificate is not tru...

Page 401: ...ove Internet Explorer errors To get past this screen click the Or you can add an exception link at the bottom then click the Add Exception button that appears In the Add Security Exception window that opens click the Get Certificate button ensure that Permanently store this exception is checked and finally click the Confirm Security Exception button See below To avoid this inconvenience it is stro...

Page 402: ... Answer This is the Firefox 3 5 warning message when any certificate problem is detected The conditions for this error are the same as for the above Internet Explorer errors To get past this screen click the arrow next to I Understand the Risks to expand the section then click the Add Exception button that appears ...

Page 403: ...by the SRA appliance during the SSL handshake process This error can be safely ignored 6 Do I have to purchase a SSL certificate Answer No you can simply ignore the security warnings which are a message to users that the certificate is not trusted or contains mismatched information Accepting a non trusted certificate does not have anything to do with the level of encryption negotiated during the S...

Page 404: ...the appliance 13 Why can t I import my new certificate and private key Answer Be sure that you upload a zip file containing the PEM formatted private key file named server key and the PEM formatted certificate file named server crt The zip file must have a flat file structure no directories and contain only server key and server crt files The key and the certificate must also match otherwise the i...

Page 405: ...ollowing variables are supported User name USERNAME Domain name USERDOMAIN Active Directory user name ADUSERNAME Wildcard WILDCARD Note Firmware prior to 3 5 required the client certificate CN field to be the username CN username entered to login to the appliance Support for Microsoft CA Subject Names where CN Full user name e g CN John Doe Client certificate authentication attempts for users in A...

Page 406: ...nvironments where the OS is locked down to prevent this sort of behavior If your SRA appliance is running firmware 1 5 firmware or newer a user can run NetExtender provided that a user with administrative rights previously installed NetExtender onto the system 4 Can I block communication between NetExtender clients Answer Yes this can be achieved with the User Group Global Policies by adding a den...

Page 407: ...e NetExtender is it uninstalled when I leave my session Answer By default when NetExtender is installed for the first time it stays resident on the system although this can be controlled by selecting the Uninstall On Browser Exit Yes option from the NetExtender icon in the taskbar while it is running If this option is checked NetExtender will remove itself when it is closed It can also be uninstal...

Page 408: ...er to provide access for any application that cannot be accessed using internal proxy mechanisms HTTP HTTPS FTP RDP4 firmware 1 0 only ActiveX based RDP Java based RDP firmware 1 5 and newer Telnet and SSHv1 With 3 5 firmware and later Application Offloading can be used for web applications In this way the SRA appliance functions similar to an SSL offloader and will proxy web applications pages wi...

Page 409: ...in 3 5 and up the Windows NetExtender client supports client certificate authentication from the stand alone client Users can also authenticate to the SRA portal and then launch NetExtender 26 My firewall is dropping NetExtender connections from my SonicWALL SRA as being spoofs Why Answer If the NetExtender addresses are on a different subnet than the X0 interface a rule needs to be created for th...

Page 410: ...o Windows computers in the domain doing so will disable access to the DFS file shares from other domains The SRA appliance is not a domain member and will not be able to connect to the DFS shares DFS file shares on a stand alone root are not affected by this Microsoft restriction 7 Does the SRA appliance have a SPI firewall Answer No It must be combined with a Dell SonicWALL security appliance or ...

Page 411: ...or NSA series security appliance 15 Can the Dell SonicWALL Global VPN Client or any other third party VPN client connect to the SRA appliance Answer No only NetExtender and proxy sessions are supported 16 Can I connect to the SRA appliance over a modem connection Answer Yes although performance will be slow even over a 56K connection it is usable 17 What SSL ciphers are supported by the SRA applia...

Page 412: ...crypt settings file check box do Answer This setting will encrypt the settings file so that if it is exported it cannot be read by unauthorized sources Although it is encrypted it can be loaded back onto the SRA appliance or a replacement appliance and decrypted If this box is not selected the exported settings file is clear text and can be read by anyone 31 What does the store settings button do ...

Page 413: ...ocks synchronized 38 My Windows XPSP2 system cannot use the RDP based connectors Why Answer You will need to download and install a patch from Microsoft for this to work correctly The patch can be found at the following site http www microsoft com downloads details aspx FamilyID 17d997d2 5034 4bbb b74dad8430a1f7c8 DisplayLang en You will need to reboot your system after installing the patch 39 I c...

Page 414: ...n it is stated to allow such access If possible try disabling such software on either side and then test again 50 What port is the SRA appliance using for the Radius traffic Answer It uses port 1812 51 Do the SRA appliances support the ability for the same user account to login simultaneously Answer Yes this is supported on 1 5 and newer firmware releases On the portal layout you can enable or dis...

Page 415: ...rt other types such as SCO ANSI yet This may be supported in a future firmware release 57 There is no port option for the service bookmarks what if these are on a different port than the default Answer You can specify in the IP address box an IPaddress portid pair for HTTP HTTPS Telnet Java and VNC 58 What if I want a bookmark to point to a directory on a Web server Answer Add the path in the IP a...

Page 416: ...416 SRA 6 0 Administrator s Guide ...

Page 417: ...figuration of the network settings when deploying the SRA Virtual Appliance Note The Dell SonicWALL SRA 6 0 CLI allows configuration of only the X0 interface on the SRA 4600 4200 1600 1200 or SRA Virtual Appliance For the SRA physical appliances console access is achieved by connecting a computer to the serial port Use the following settings Baud 115200 Data Bits 8 Parity None Stop Bits 1 For the ...

Page 418: ... VPN Services 4 Logout Press Ctrl c at any time to cancel changes and logout Select a number 1 4 You can press Ctrl C at any time to log out and exit the CLI returning to the login prompt The main menu has four selections 1 Setup Wizard This option launches a simple wizard to change the basic network settings starting with the X0 IP Address X0 subnet mask default gateway primary and secondary DNS ...

Page 419: ... 51 X0 IP Address 192 168 200 201 X0 Subnet mask 255 255 0 0 Default Gateway 192 168 200 1 Primary DNS 10 50 128 52 Secondary DNS 4 2 2 2 Hostname SRA4200 Main Menu 1 Setup Wizard 2 Reboot 3 Restart SSL VPN Services 4 Logout Press Ctrl c at any time to cancel changes and logout Select a number 1 4 If no changes are saved the following message is displayed and pressing Enter returns to the initial ...

Page 420: ... FTP Session OK Stopping HTTPD OK Cleaning Apache State OK Stopping Graphd OK Cleaning Temporary files Starting SMM OK Starting firebase OK Starting httpd OK Starting ftpsession OK Starting graphd OK Restart completed returning to main menu 4 Logout The logout option ends the CLI session and returns to the login prompt ...

Page 421: ...85551212 alltelmessage com Arch Wireless 4085551212 archwireless net BeeLine GSM 4085551212 sms beemail ru BeeLine Moscow 4085551212 sms gate ru Bell Canada 4085551212 txt bellmobility ca Bell Canada 4085551212 bellmobility ca Bell Atlantic 4085551212 message bam com Bell South 4085551212 sms bellsouth com Bell South 4085551212 wireless bellsouth com Bell South 4085551212 blsdcs net Bite GSM Lithu...

Page 422: ...Q GSM 4085551212 qgsm ee Estonia Mobil Telephone 4085551212 sms emt ee Fido 4085551212 fido ca Georgea geocell 4085551212 sms ge Goa BPLMobil 4085551212 bplmobile com Golden Telecom 4085551212 sms goldentele com Golden Telecom Kiev Ukraine only 4085551212 sms gt kiev ua GTE 4085551212 messagealert com GTE 4085551212 airmessage net Gujarat Idea 4085551212 ideacellular net Gujarat Airtel 4085551212 ...

Page 423: ...bplmobile com Manitoba Telecom Systems 4085551212 text mtsmobility Mumbai Orange 4085551212 orangemail co in MTS Russia 4085551212 sms mts ru MTC 4085551212 sms mts ru Mumbai BPL Mobile 4085551212 bplmobile com MTN South Africa only 4085551212 sms co za MiWorld Singapore 4085551212 m1 com sg NBTel 4085551212 wirefree informe ca Netcom GSM Norway 4085551212 sms netcom no Nextel 4085551212 messaging...

Page 424: ...im it Telenor Mobil Norway 4085551212 mobilpost com Telecel Portugal 4085551212 sms telecel pt Tele2 4085551212 sms tele2 lv Tele Danmark Mobil 4085551212 sms tdk dk Telus 4085551212 msg telus com Telenor 4085551212 mobilpost no Telia Denmark 4085551212 gsm1800 telia dk TIM 4085551212 timnet com TMN Portugal 4085551212 mail tmn pt T Mobile Austria 4085551212 sms t mobile at T Mobile Germany 408555...

Page 425: ...dafone Japan 4085551212 h vodafone ne jp Vodafone Japan 4085551212 t vodafone ne jp Vodafone Spain 4085551212 vodafone es Vodafone UK 4085551212 vodafone net West Central Wireless 4085551212 sms wcc net Western Wireless 4085551212 cellularonewest com Carrier SMS Format ...

Page 426: ...426 SRA 6 0 Administrator s Guide ...

Page 427: ...ALL Page http www sonicwall com us company 286 html GNU General Public License GPL Source Code Dell SonicWALL will provide a machine readable copy of the GPL open source on a CD To obtain a complete machine readable copy send your written request along with a certified check or money order in the amount of US 25 00 payable to Dell SonicWALL Inc to General Public License Source Code Request Dell So...

Page 428: ...Y LASTS THE ABOVE LIMITATION MAY NOT APPLY TO YOU THIS WARRANTY GIVES YOU SPECIFIC LEGAL RIGHTS AND YOU MAY ALSO HAVE OTHER RIGHTS WHICH VARY FROM JURISDICTION TO JURISDICTION This disclaimer and exclusion shall apply even if the express warranty set forth above fails of its essential purpose DISCLAIMER OF LIABILITY DELL SONICWALL S SOLE LIABILITY IS THE SHIPMENT OF A REPLACEMENT PRODUCT AS DESCRI...

Page 429: ...ITY Dell SonicWALL S SOLE LIABILITY IS THE SHIPMENT OF A REPLACEMENT PRODUCT AS DESCRIBED IN THE ABOVE LIMITED WARRANTY IN NO EVENT SHALL Dell SonicWALL OR ITS SUPPLIERS BE LIABLE FOR ANY DAMAGES WHATSOEVER INCLUDING WITHOUT LIMITATION DAMAGES FOR LOSS OF PROFITS BUSINESS INTERRUPTION LOSS OF INFORMATION OR OTHER PECUNIARY LOSS ARISING OUT OF THE USE OR INABILITY TO USE THE PRODUCT OR FOR SPECIAL ...

Page 430: ...e includes the right to install use and execute up to the number of copies of Software Licenses purchased In addition the License includes the right to x make a reasonable number of additional copies of the Software to be used solely for non productive archival purposes and y make and use copies of the end user documentation for Hardware and or Software provided with the Products Documentation as ...

Page 431: ...d from nor used on a separate or standalone basis from the Product Each permitted copy of the Software and Documentation made by Customer hereunder must contain all titles trademarks copyrights and restricted rights notices as in the original Customer understands and agrees that the Products may work in conjunction with third party products and Customer agrees to be responsible for ensuring that i...

Page 432: ...WALL s date of issuance 2 OWNERSHIP SonicWALL and its licensors are the sole and exclusive owners of the Software and all underlying intellectual property rights in the Hardware All rights not expressly granted to Customer are reserved by SonicWALL and its licensors 3 TERMINATION OF LICENSE S All licenses to the Software hereunder shall terminate if Customer fails to comply with any of the provisi...

Page 433: ...S DISTRIBUTORS AND RESELLERS ALL WARRANTIES EXPRESS STATUTORY AND IMPLIED APPLICABLE TO THE PRODUCTS SERVICES AND OR THE SUBJECT MATTER OF THIS AGREEMENT INCLUDING BUT NOT LIMITED TO ANY WARRANTY OF MERCHANTABILITY NON INFRINGEMENT OR FITNESS FOR A PARTICULAR PURPOSE 6 LIMITATION OF LIABILITY The Products are not designed manufactured authorized or warranted to be suitable for use in any system wh...

Page 434: ... Section 227 7202 The rights to use the Products and the underlying commercial technical date and computer software is limited to those rights customarily provided to the public purchasers as set forth in this Agreement The Software and accompanying Documentation are deemed to be commercial computer software and commercial computer software documentation respectively pursuant to DFAR Section 227 7...

Page 435: ...munications g Waiver Performance of any obligation required by a party hereunder may be waived only by a written waiver signed by an authorized representative of the other party which waiver shall be effective only with respect to the specific obligation described therein Any waiver or failure to enforce any provision of this Agreement on one occasion will not be deemed a waiver of any other provi...

Page 436: ...436 SRA 6 0 Administrator s Guide ...

Page 437: ...SRA appliance This uses the Web browser to browse shared files on the network Lightweight Directory Access Protocol LDAP An Internet protocol that email and other programs use to retrieve data from a server One time Password A randomly generated single use password One time Password may be used to refer to a particular instance of a password or to the feature as a whole Simple Mail Transfer Protoc...

Page 438: ...438 SRA 6 0 Administrator s Guide ...

Page 439: ... 439 ...

Page 440: ......

Reviews: