and lift it up off the bracket hooks and away from the chassis.
Removing the Hard Drive Bracket From the Chassis
If a drive is already installed in the bracket, disconnect the DC power cable and interface cable from the back of the drive before removing the bracket
from the chassis. To remove the old drive from the bracket, remove the four screws that secure the drive in the bracket (see "
Installing a Hard Drive in
the Bracket
").
5.
Unpack the drive and prepare it for installation.
See the documentation that accompanied the drive to verify that the drive is configured for your computer. Change any settings necessary for your
configuration.
6.
Slide the drive into one of the bracket bays, oriented so the connectors on the back of the drive will face the interior of the chassis when the bracket is
reinstalled (see "
Installing a Hard Drive in the Bracket
").
7.
Align the screw holes of the drive and bracket, and secure the drive in the bracket using the screws that came with the upgrade kit (see the following
figure).
Installing a Hard Drive in the Bracket
8.
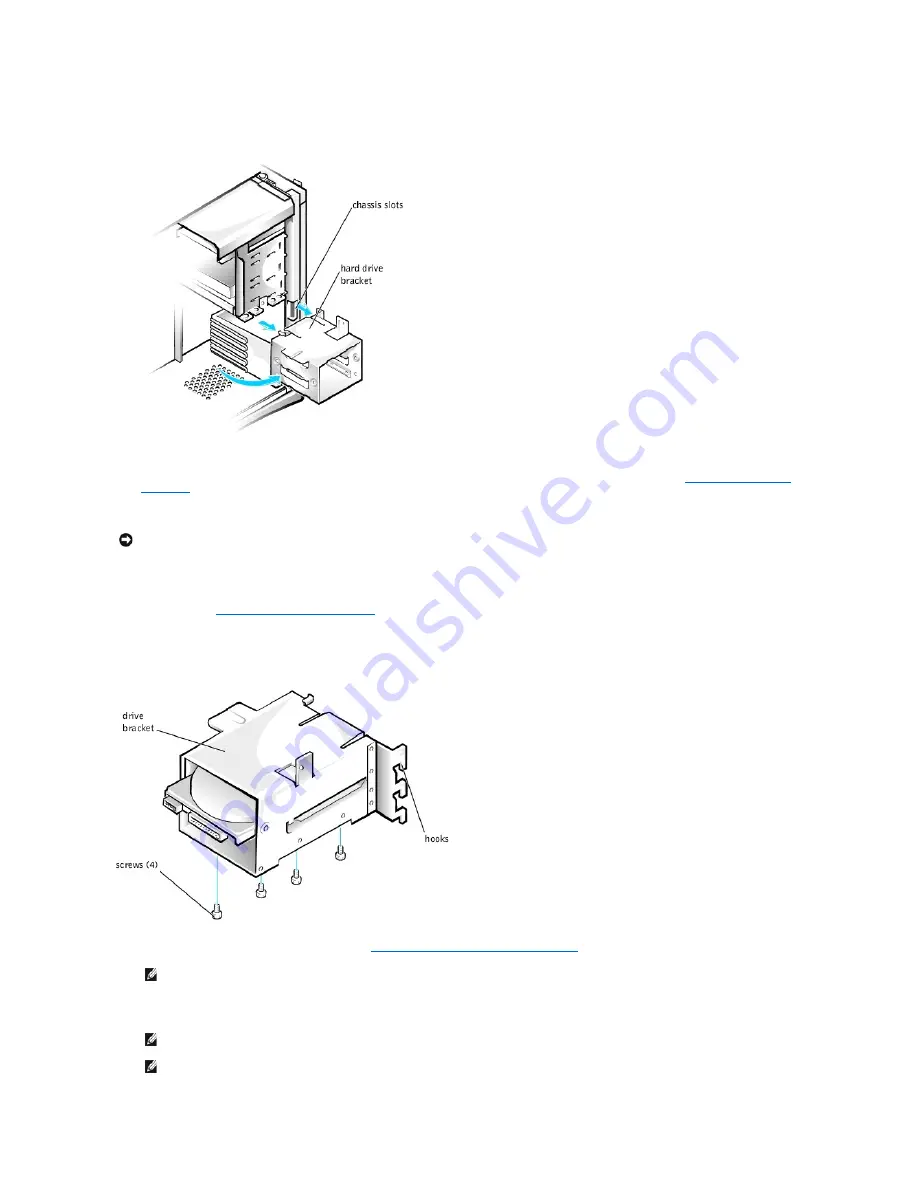
Reinstall the hard drive bracket in the chassis (see "
Installing the Hard- Drive Bracket in the Chassis
").
Insert the drive bracket into the chassis, sliding it in until the tabs snap into place. Rotate the drive door upward to the chassis until it snaps securely
into place.
NOTICE:
Ground yourself by touching an unpainted metal surface on the back of the computer.
NOTE:
Orient the drive in the bracket so that its bottom will face the left side of the chassis when the bracket is installed in the chassis.
NOTE:
When you rotate the drive door back into place, ensure that the tabs on the drive door are inserted between the drive bracket and the
drive cage.
NOTE:
Be sure to fold down the drive door handle so that the front panel can be replaced on the chassis.


