NOTICE: When you unpack the drive, do not set it on a hard surface, which may damage the drive. Instead, set the drive on a
surface, such as a foam pad, that will sufficiently cushion it.
1. If necessary, attach the bracket rails to the new hard drive by aligning the four screw holes of the drive and bracket and then inserting and
tightening the screws that came with your upgrade kit.
2. Reinstall the hard-drive bracket in the chassis by gently sliding the bracket into place until you hear it securely click.
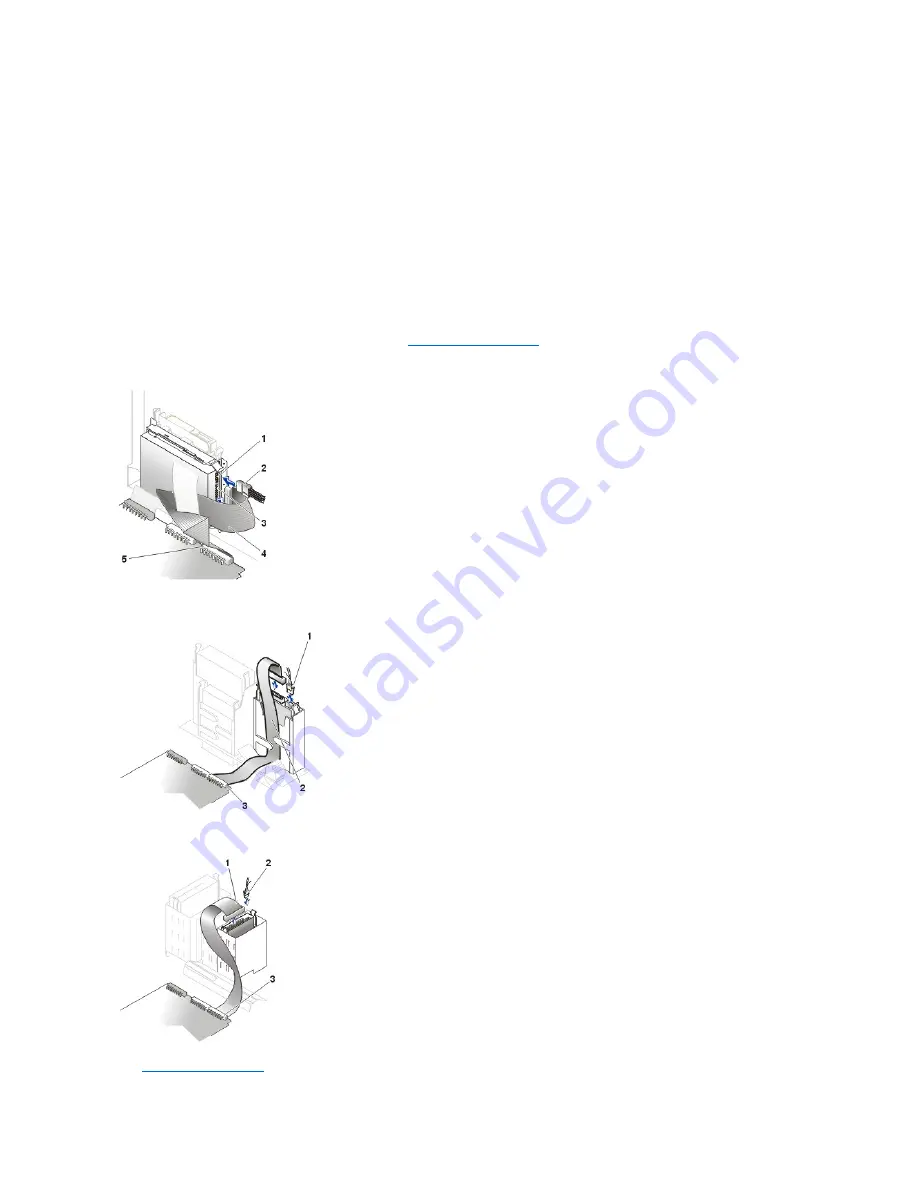
3. Connect a power cable to the power input connector on the back of the drive, and connect one of the device connectors on the EIDE cable to
the 40-pin interface connector on the back of the hard drive.
4. Check all connectors to be certain that they are properly cabled and firmly seated.
5. On the small desktop system, replace the hard-drive shroud.
NOTICE: To avoid possible damage to the system, you must match the colored stripe on the EIDE interface cable with pin 1 on the
drive's interface connector and with the EIDE interface connector (labeled IDE1) on the system board.
To locate EIDE connector 1 (IDE1) on the system board, see "
System Board Components
."
Attaching Hard-Drive Cables
—
Small Form-Factor Desktop System
Attaching Hard-Drive Cables
—
Small Desktop System
Attaching Hard-Drive Cables
—
Small Mini-Tower System
6.
Close the computer cover
.
1
Drive power connector
2
Hard-drive power cable
3
Drive IDE1 connector
4
Hard-drive data cable
5
System board IDE1 connector
1
Hard-drive power cable
2
Hard-drive data cable
3
IDE1 connector
1
Hard-drive data cable
2
Hard-drive power cable
3
IDE1 connector
Summary of Contents for OptiPlex GX150
Page 2: ...February 2002 08WUP A06 ...
Page 97: ...Back to Contents Page ...


