background image

Troubleshooting Tools

73

10

Troubleshooting Tools

Diagnostic Lights


CAUTION: 

Before you begin any of the procedures in this section, follow the 

safety instructions in the 

Product Information Guide

.

Your computer has three keyboard status lights located above the keyboard 

(see "Front View" on page 19). During normal operation, the keyboard status 

lights display the current status (

on

 or 

off

) of the Num Lock, Caps Lock, and 

Scroll Lock features. If the computer starts without error, the lights flash, and 

then turn off. If the computer malfunctions, however, you can use the status 

of the lights to help identify the problem.


NOTE: 

After the computer completes POST, the Num Lock light may remain on, 

depending on your BIOS settings (see "Commonly Used Options" on page 102).

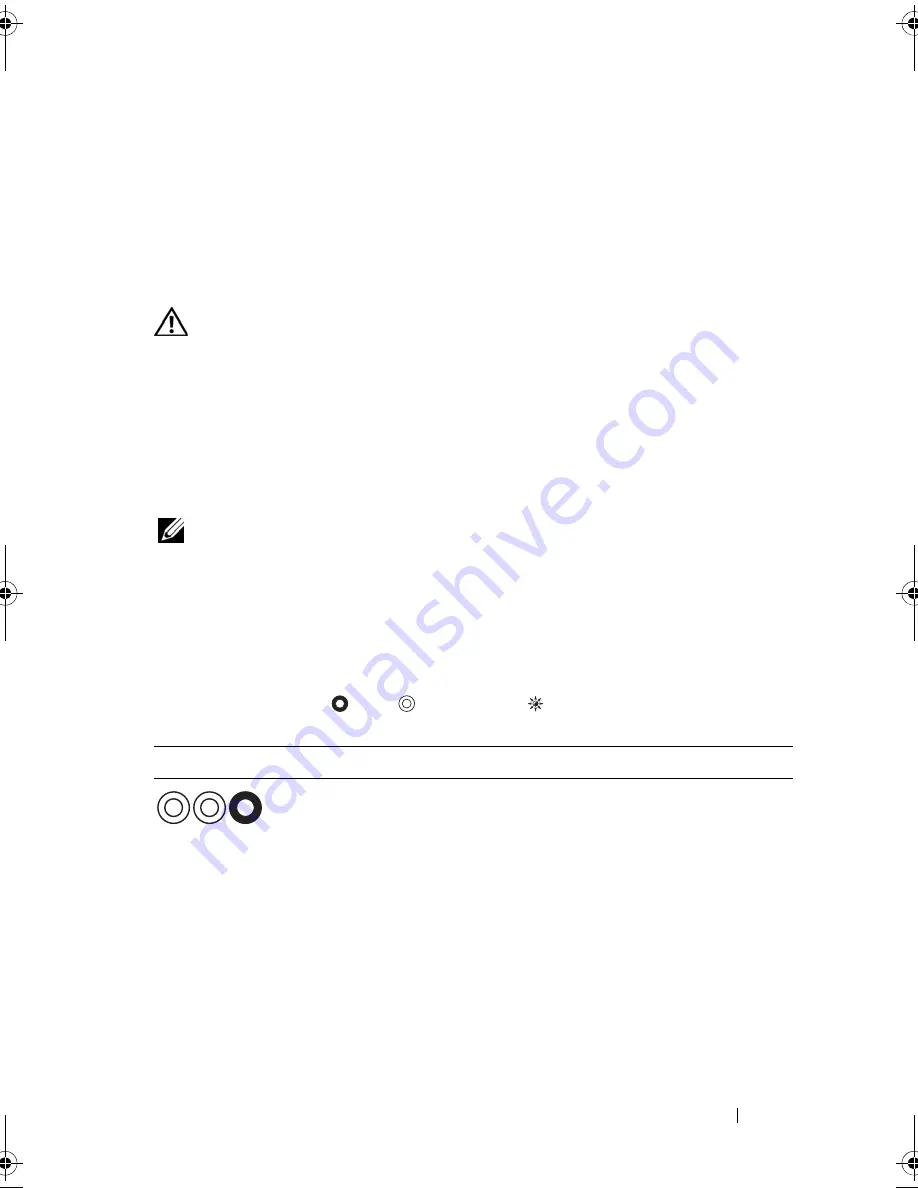
Diagnostic Light Codes During POST

To troubleshoot a problem with your computer, read the sequence of the 

keyboard status lights in order from left to right (Num Lock, Caps Lock, and 

then Scroll Lock). If the computer malfunctions the individual lights display 

a status of either 

On

 , 

Off

 , 

or 

Flashing

  .

Light Pattern

Problem Description

Suggested Resolution

The microcontroller is 

handing control of 

the system to the 

Pentium controller. If 

no processor is 

installed, or there is 

no FWH/ROM, this 

code persists.

• Reseat the processor (see your 

Service 

Manual

).

• If the problem persists, contact Dell 

(see "Contacting Dell" on page 129).

book.book  Page 73  Wednesday, December 12, 2007  10:32 AM

Summary of Contents for Inspiron 1200

Page 1: ...w w w d e l l c o m s u p p o r t d e l l c o m Dell Vostro 1200 Owner s Manual Model PP16S ...

Page 2: ...c is strictly forbidden Trademarks used in this text Dell the DELL logo Vostro and TravelLite are trademarks of Dell Inc Intel and Celeron are registered trademarks of Intel Corporation Microsoft Windows and Windows Vista are either trademarks or registered trademarks of Microsoft Corporation in the United States and or other countries Bluetooth is a trademark of Bluetooth SIG Inc Blu ray Disc is ...

Page 3: ...iew 25 Bottom View 28 3 Using a Battery 31 Battery Performance 31 Checking the Battery Charge 32 Microsoft Windows Power Meter 32 Low Battery Warning 32 Conserving Battery Power 33 Power Management Modes 33 Standby and Sleep Mode 33 Hibernate Mode 34 Configuring Power Management Settings 35 Accessing Power Options Properties 35 ...

Page 4: ...soft Windows Logo Key Functions 40 Touch Pad 41 Customizing the Touch Pad 42 5 Using the Display 43 Adjusting Brightness 43 Using a Projector 43 Making Images and Text Look Bigger or Sharper 44 Microsoft Windows XP 44 Windows Vista 44 Using Both a Monitor and Your Computer Display 45 Microsoft Windows XP 45 Windows Vista 46 Using a Monitor as Your Primary Display 46 Microsoft Windows XP 47 Windows...

Page 5: ...dband Modem Cable 55 Setting Up a Network in the Microsoft Windows XP Operating System 56 Setting Up a Network in the Microsoft Windows Vista Operating System 56 Wireless Local Area Network WLAN 57 What You Need to Establish a WLAN Connection 57 Checking Your Wireless Network Card 57 Setting Up a New WLAN Using a Wireless Router and a Broadband Modem 58 Connecting to a WLAN 59 Microsoft Windows Fi...

Page 6: ...uter Tracking Software 70 Fingerprint Reader Optional 70 If Your Computer Is Lost or Stolen 70 10 Troubleshooting Tools 73 Diagnostic Lights 73 Diagnostic Light Codes During POST 73 System Messages 74 Hardware Troubleshooter 78 Dell Diagnostics 79 When to Use the Dell Diagnostics 79 Starting the Dell Diagnostics From Your Hard Drive 79 Starting the Dell Diagnostics From the Drivers and Utilities M...

Page 7: ...ker Problems 94 Touch Pad or Mouse Problems 95 Video and Monitor Problems 96 Power Lights 97 Dell Technical Update Service 98 Dell Support Utility 98 Accessing the Dell Support Utility 99 Clicking the Dell Support Icon 99 Double Clicking the Dell Support Icon 99 12 System Setup Program 101 Overview 101 Viewing the System Setup Screens 102 System Setup Screens 102 Commonly Used Options 102 Changing...

Page 8: ...estore 111 Using Dell PC Restore and Dell Factory Image Restore 113 Using the Operating System Media 116 14 Traveling With Your Computer 119 Identifying Your Computer 119 Packing the Computer 119 Travel Tips 120 Traveling by Air 120 15 Getting Help 123 Obtaining Assistance 123 Technical Support and Customer Service 124 DellConnect 124 Online Services 124 AutoTech Service 125 Automated Order Status...

Page 9: ...r or Credit 126 Before You Call 127 Contacting Dell 129 16 Specifications 131 17 Appendix 137 FCC Notice U S Only 137 FCC Class B 137 Cleaning Your Computer 138 Computer Keyboard and Display 138 Mouse Non Optical 139 Touch Pad 139 CDs and DVDs 139 Glossary 141 Index 159 ...

Page 10: ...10 Contents ...

Page 11: ...computer Drivers for my computer Notebook System Software NSS Drivers and Utilities Media Documentation and drivers are already installed on your computer You can use the media to reinstall drivers see Reinstalling Drivers and Utilities on page 106 Readme files may be included on your media to provide last minute updates about technical changes to your computer or advanced technical reference mate...

Page 12: ...y information Ergonomics information End User License Agreement Dell Product Information Guide How to set up my computer Setup Diagram NOTE See the setup diagram that came with your computer NOTE The appearance of your setup diagram may vary How to set up my computer What Are You Looking For Find It Here ...

Page 13: ...umber and an Express Service Code Use the Service Tag to identify your computer when you use support dell com or contact support Enter the Express Service Code to direct your call when contacting support Use the product key on the License Label if you need to reinstall your operating system NOTE As an increased security measure the newly designed Microsoft Windows license label incorporates a miss...

Page 14: ... updates Dell Support Website support dell com NOTE Select your region or business segment to view the appropriate support site Notebook System Software NSS If you reinstall the operating system for your computer you should also reinstall the NSS utility NSS provides critical updates for your operating system and support for processors optical drives USB devices and so on NSS is necessary for corr...

Page 15: ...the taskbar For more information see Dell Support Utility on page 98 How to find information about my computer and its components How to connect to the Internet How to add user accounts for different people How to transfer files and settings from another computer Windows Welcome Center The Windows Welcome Center automatically appears when you use the computer for the first time You can choose to h...

Page 16: ...problem 3 Follow the instructions on the screen Microsoft Windows Vista 1 Click the Windows Vista Start button and then click Help and Support 2 In Search Help type a word or phrase that describes your problem and then press Enter or click the magnifying glass 3 Click the topic that describes your problem 4 Follow the instructions on the screen How to reinstall my operating system Operating System...

Page 17: ...Drivers and Utilities media to reinstall drivers for the devices that came with your computer Your operating system product key label is located on your computer NOTE The color of your CD varies based on the operating system you ordered What Are You Looking For Find It Here ...

Page 18: ...18 Finding Information ...

Page 19: ...About Your Computer 19 2 About Your Computer Front View 1 left array microphone optional with camera 2 camera optional 4 5 1 2 9 13 12 10 3 7 6 8 11 ...

Page 20: ...the Display on page 43 MEDIA CONTROL BUTTONS Press these buttons to adjust the volume Press Fn and the right arrow key to toggle on and off these lights for illumination of the keyboard in low light environments KEYBOARD STATUS LIGHTS 3 right array microphone optional with camera 4 display 5 media control buttons 6 keyboard status lights 7 keyboard 8 fingerprint reader 9 touch pad 10 touch pad but...

Page 21: ...more information on the fingerprint reader see Fingerprint Reader Optional on page 70 TOUCH PAD Provides the functionality of a mouse see Touch Pad on page 41 TOUCH PAD BUTTONS Use these buttons much like the buttons on a mouse when using the touch pad to move the cursor on the display see Touch Pad on page 41 SPEAKER To adjust the volume of the integrated speaker press the volume control buttons ...

Page 22: ...t mode see Power Management Modes on page 33 Turns on when you turn on the computer and blinks when the computer is in a power management mode Turns on steadily or blinks to indicate battery charge status Turns on when the computer reads or writes data NOTICE To avoid loss of data never turn off the computer while the light is flashing Turns on when Bluetooth wireless technology is enabled NOTE Bl...

Page 23: ... OPTICAL DRIVE Supports a floppy or an optical drive second battery second hard drive or a Dell TravelLite module see Using Multimedia on page 49 EJECT BUTTON Ejects media in the optical drive EXPRESSCARD SLOT Supports one ExpressCard with a PCMIA adapter The computer ships with a blank installed in the slot to prevent foreign matter from entering the computer interior when a card is not installed...

Page 24: ...r and add on devices such as audio players joysticks keyboards telephones scanners and printers AUDIO CONNECTORS 1 USB connector 2 audio connectors 3 air vent 4 video connector VGA 5 security cable slot Attach headphones to the connector Attach a microphone to the connector 1 4 5 3 2 ...

Page 25: ...se Restricting the airflow can damage the computer or cause a fire The computer turns on the fan when the computer gets hot Fan noise is normal and does not indicate a problem with the fan or the computer VIDEO CONNECTOR SECURITY CABLE SLOT Lets you attach a commercially available antitheft device to the computer see Security Cable Lock on page 67 Back View AC ADAPTER CONNECTOR Connects video devi...

Page 26: ...e or improperly connecting the cable to the power strip or electrical outlet may cause fire or equipment damage NOTICE When you disconnect the AC adapter cable from the computer grasp the connector not the cable itself and pull firmly but gently to avoid damaging the cable When you wrap the AC adapter cable ensure that you follow the angle of the connector on the AC adapter to avoid damaging the c...

Page 27: ...r To avoid damaging the computer do not plug a telephone line into the network connector Connects the computer to a network The two lights next to the connector indicate status and activity for wired network connections For information on using the network adapter see the device user s guide supplied with your computer ...

Page 28: ... that came with your card To quickly enable or disable all wireless devices press Fn F2 AIR VENTS The computer uses an internal fan to create airflow through the fan air vents preventing the computer from overheating 1 air vents 2 cover for optional internal card with Bluetooth wireless technology 3 battery 4 battery bay latch release 2 1 2 4 3 ...

Page 29: ...environment such as a closed briefcase while it is running Restricting the airflow can damage the computer or cause a fire BATTERY When a battery is installed you can use the computer without connecting the computer to an electrical outlet see Using a Battery on page 31 BATTERY BAY LATCH RELEASES Release the battery see Removing the Battery on page 36 ...

Page 30: ...30 About Your Computer ...

Page 31: ...To view battery charge status check the Power Meter in Power Options see Accessing Power Options Properties on page 35 Battery operating time varies depending on operating conditions NOTE Battery operating time the time the battery can hold a charge decreases over time Depending on how often the battery is used and the conditions under which it is used you may need to purchase a new battery during...

Page 32: ...ithium ion battery See Battery Disposal in the Product Information Guide CAUTION Misuse of the battery may increase the risk of fire or chemical burn Do not puncture incinerate disassemble or expose the battery to temperatures above 65 C 149 F Keep the battery away from children Handle damaged or leaking batteries with extreme care Damaged batteries may leak and cause personal injury or equipment ...

Page 33: ... times the battery is used and recharged Place the computer in standby mode or hibernate mode when leaving the computer unattended for long periods of time see Power Management Modes on page 33 Use the Power Options Properties window to select options to optimize your computer s power usage These options can also be set to change when you press the power button close the display or press Fn Esc NO...

Page 34: ...ing system data to a reserved area on the hard drive and then completely turning off the computer When the computer exits hibernate mode it returns to the same operating state it was in before entering hibernate mode NOTICE You cannot remove devices or undock your computer while your computer is in hibernate mode Your computer enters hibernate mode if the battery charge level becomes critically lo...

Page 35: ...stem and Maintenance and then click Power Options Charging the Battery When you connect the computer to an electrical outlet or install a battery while the computer is connected to an electrical outlet the computer checks the battery charge and temperature If necessary the AC adapter then charges the battery and maintains the battery charge NOTE If the battery is hot from being used in your comput...

Page 36: ...utlet and the computer disconnect the modem from the wall connector and computer and remove any other external cables from the computer NOTICE You must remove all external cables from the computer to avoid possible connector damage To remove the battery 1 If the computer is connected to a docking device docked undock it See the documentation that came with your docking device for instructions 2 En...

Page 37: ...ure in reverse order Storing a Battery Remove the battery when you store your computer for an extended period of time A battery discharges during prolonged storage After a long storage period recharge the battery fully see Charging the Battery on page 35 before using it ...

Page 38: ...38 Using a Battery ...

Page 39: ...rd Each key on the keypad has multiple functions The keypad numbers and symbols are marked in blue on the right of the keypad keys To type a number or symbol hold down Fn and press the desired key To enable the keypad press Num Lk The light indicates that the keypad is active To disable the keypad press Num Lk again numeric keypad 9 ...

Page 40: ...ons Properties on page 35 Fn Page Up Increases the volume of the integrated speakers and external speakers if attached Fn Page Dn Decreases the volume of the integrated speakers and external speakers if attached Fn End Enables and disables the integrated speakers and external speakers if attached Windows logo key and m Minimizes all open windows Windows logo key and Shift m Restores all minimized ...

Page 41: ...n the display Use the touch pad and touch pad buttons as you would use a mouse To move the cursor lightly slide your finger over the touch pad To select an object lightly tap once on the surface of the touch pad or use your thumb to press the left touch pad button Windows logo key and r Opens the Run dialog box Windows logo key and f Opens the Search Results dialog box Windows logo key and Ctrl f ...

Page 42: ...ss the left touch pad button twice Customizing the Touch Pad You can use the Mouse Properties window to disable the touch pad and adjust settings 1 Open the Control Panel and then click Mouse For information about the Control Panel see the Windows Help and Support Center To access the Help and Support Center click Start Help and Support 2 In the Mouse Properties window Click the Device Select tab ...

Page 43: ...he Brightness Meter may appear but the brightness level on the external device does not change You can press the following keys to adjust display brightness Press Fn and the up arrow key to increase brightness on the integrated display only not on an external monitor Press Fn and the down arrow key to decrease brightness on the integrated display only not on an external monitor Using a Projector W...

Page 44: ...rivers must be installed NOTE Use only the Dell installed video drivers which are designed to offer the best performance with your Dell installed operating system If you choose a resolution or color palette that is higher than the display supports the settings adjust automatically to the closest supported values To set the display resolution and refresh rate for your display perform the steps in t...

Page 45: ...nitor or projector to your computer and use it as an extension of your display known as dual independent display or extended desktop mode This mode allows you to use both screens independently and drag objects from one screen to the other effectively doubling the amount of viewable work space To use extended desktop mode perform the steps in the following section that corresponds to the operating ...

Page 46: ...computer display Windows Vista 1 Click the Windows Vista Start button and click Control Panel 2 Under Appearance and Personalization click Adjust screen resolution 3 In the Display Settings window click the monitor 2 icon click the Extend the desktop onto this monitor check box and then click Apply 4 Click OK to close the Display Settings window To disable extended desktop mode 1 In the Display Se...

Page 47: ...ay 4 Click the Settings tab Advanced Displays tab See the documentation that came with your video card for additional information Windows Vista 1 Click the Windows Vista Start button and click Control Panel 2 Under Appearance and Personalization click Adjust screen resolution 3 In the Display Settings window click the monitor 2 icon click the This is my main monitor check box and then click Apply ...

Page 48: ...48 Using the Display ...

Page 49: ...y when you open or close it Keep the tray closed when you are not using the drive NOTICE Do not move the computer while playing CDs or DVDs 1 Press the eject button on the front of the drive 2 Pull out the tray 3 Place the disc label side up in the center of the tray and snap the disc onto the spindle ...

Page 50: ...ta to create music CDs or to copy CDs see the CD software that came with your computer NOTE Ensure that you follow all copyright laws when you create CDs A CD player includes the following basic buttons A DVD player includes the following basic buttons Play Move backward within the current track Pause Move forward within the current track Stop Go to the previous track Eject Go to the next track St...

Page 51: ...s stored on your computer or backing up important data For help open Roxio Creator Plus and then click the question mark icon in the upper right corner of the window How to Copy a CD or DVD NOTE CD RW DVD combo drives cannot write to DVD media If you have a CD RW DVD combo drive and you experience recording problems check for available software patches on the Sonic support website at sonic com The...

Page 52: ... CD RW drives can write to CD recording media only including high speed CD RW media while DVD writable drives can write to both CD and DVD recording media Use blank CD Rs to record music or permanently store data files After the maximum storage capacity of a CD R is reached you cannot write to that CD R again see the Sonic documentation for more information Use blank CD RWs if you plan to erase re...

Page 53: ...ayer see the documentation provided with your DVD player or contact the manufacturer Do not burn a blank CD R or CD RW to its maximum capacity for example do not copy a 650 MB file to a blank 650 MB CD The CD RW drive needs 1 2 MB of blank space to finalize the recording Use a blank CD RW to practice CD recording until you are familiar with CD recording techniques If you make a mistake you can era...

Page 54: ...nting DVD playback adjust the display properties Microsoft Windows XP 1 Click Start Control Panel Appearance and Themes 2 Under Pick a task click Change the screen resolution 3 Under Screen resolution click and drag the bar to reduce the resolution setting 4 In the drop down menu under Color quality click Medium 16 bit and click OK Microsoft Windows Vista Operating System 1 Click the Windows Vista...

Page 55: ...ide wizards to help guide you through the process of networking computers For more information about Networking see the Windows Help and Support Center see Windows Help and Support on page 16 Connecting a Network or Broadband Modem Cable Before you connect your computer to a network the computer must have a network adapter installed and a network cable connected to it 1 Connect the network cable t...

Page 56: ...ng the connection method labeled This computer connects directly to the Internet enables the integrated firewall provided with Windows XP Service Pack 2 SP2 2 Complete the checklist 3 Return to the Network Setup Wizard and follow the instructions in the wizard Setting Up a Network in the Microsoft Windows Vista Operating System 1 Click the Windows Vista Start button and then click Connect To Set u...

Page 57: ...Before you can set up a WLAN you need High speed broadband Internet access such as cable or DSL A broadband modem that is connected and working A wireless router or access point A wireless network card for each computer that you want to connect to your WLAN A network cable with a network RJ 45 connector Checking Your Wireless Network Card Depending on what you selected when you purchased your comp...

Page 58: ...re and software that shipped with your computer Setting Up a New WLAN Using a Wireless Router and a Broadband Modem 1 Contact your Internet service provider ISP to obtain specific information about the connection requirements for your broadband modem 2 Ensure that you have wired Internet access through your broadband modem before you attempt to set up a wireless Internet connection see Connecting ...

Page 59: ... at least 2 minutes for the broadband modem to stabilize After 2 minutes proceed to step 12 12 Turn on your wireless router and wait for at least 2 minutes for the wireless router to stabilize After 2 minutes proceed to the step 13 13 Start your computer and wait until the boot process completes 14 See the documentation that came with your wireless router to do the following in order to set up the...

Page 60: ...etwork Card on page 57 Determining the Wireless Network Device Manager Depending on the software installed on your computer different wireless configuration utilities may manage your network devices Your wireless network card s client utility The Windows XP or Windows Vista operating system To determine which wireless configuration utility is managing your wireless network card in Windows XP 1 Cli...

Page 61: ... on to your computer within the range of the wireless network that you selected the same pop up notifies you of the wireless network connection NOTE If you select a secure network you must enter a WEP or WPA key when prompted Network security settings are unique to your network Dell cannot provide this information NOTE Your computer can take up to 1 minute to connect to the network Microsoft Windo...

Page 62: ...62 Setting Up and Using Networks ...

Page 63: ...ultimedia and security features ExpressCards support two form factors ExpressCard 54 54 mm wide in an L shape with a 34 mm connector The 54 mm card only fits into a 54 mm card slot See Specifications on page 131 for information on supported ExpressCards NOTE An ExpressCard is not a bootable device 1 ExpressCard 54 1 ...

Page 64: ...e computer automatically detects the card ExpressCards are generally marked with a symbol such as a triangle or an arrow or a label to indicate which end to insert into the slot The cards are keyed to prevent incorrect insertion If card orientation is not clear see the documentation that came with the card CAUTION Before you begin any of the procedures in this section follow the safety instruction...

Page 65: ...rd or Blank CAUTION Before you begin any of the procedures in this section follow the safety instructions in the Product Information Guide Press the release latch and remove the card or blank For some release latches you must press the latch twice once to pop the latch out and then a second time to pop the card out Save a blank to use when no ExpressCard is installed in a slot Blanks protect unuse...

Page 66: ...66 Using Cards 1 slot 2 ExpressCard 1 2 ...

Page 67: ...ly available antitheft device To use the lock attach it to the security cable slot on your Dell computer For more information see the instructions included with the device NOTICE Before you buy an antitheft device ensure that it will work with the security cable slot on your computer Passwords About Passwords NOTE Passwords are disabled when you receive your computer ...

Page 68: ...write down passwords If you do write it down however ensure that the password is stored in a secure place Do not share passwords with other people Ensure that people are not watching you when you type your password s If you forget any of your passwords contact Dell see Contacting Dell on page 129 For your protection Dell technical support staff will ask you for proof of your identity to ensure tha...

Page 69: ...t or change administrator passwords access User Accounts from the Control Panel When you set an administrator password the Configure Setup option becomes available in system setup The Configure Setup option allows you to restrict access to system setup in the same way that a primary password restricts access to the computer The administrator password can be used instead of the primary password Whe...

Page 70: ... security in the following ways Associate digitized images of your fingerprints with your user name password and generated security keys in your own secure passport Use the fingerprint reader to manage OS level authentication Register applications and web pages in a password bank so that you can use the fingerprint reader to enter your password Launch a favorite application by swiping your finger ...

Page 71: ...ng computer If possible give the name of the investigating officer The Dell customer service representative will log your report under the computer Service Tag and record the computer as missing or stolen If someone calls Dell for technical assistance and gives your Service Tag the computer is identified automatically as missing or stolen The representative will attempt to get the phone number and...

Page 72: ...72 Securing Your Computer ...

Page 73: ...to help identify the problem NOTE After the computer completes POST the Num Lock light may remain on depending on your BIOS settings see Commonly Used Options on page 102 Diagnostic Light Codes During POST To troubleshoot a problem with your computer read the sequence of the keyboard status lights in order from left to right Num Lock Caps Lock and then Scroll Lock If the computer malfunctions the ...

Page 74: ... Software Problems on page 88 Memory subsystem configuration activity is in progress or a memory failure was detected If available install working memory of the same type into your computer see your Service Manual If the problem persists contact Dell see Contacting Dell on page 129 The system is in flash recovery mode Contact Dell see Contacting Dell on page 129 No LCD panel detected or LCD self t...

Page 75: ...nd Software Problems on page 88 NO BOOT DEVICE AVAILABLE STRIKE F1 TO RETRY BOOT F2 FOR SETUP UTILITY PRESS F5 TO RUN ONBOARD DIAGNOSTICS The system cannot detect a bootable device or partition If the floppy drive is your boot device ensure that the drive is installed properly and that a bootable floppy disk is in the drive If the hard drive is your boot device ensure that the drive is installed p...

Page 76: ... ATTACH THE POWER ADAPTER OR PLUG IN THE POWER CORD STRIKE THE F1 KEY TO SHUTDOWN THE AMOUNT OF SYSTEM MEMORY HAS CHANGED IF YOU DID NOT CHANGE YOUR MEMORY TO RESOLVE THIS ISSUE TRY TO RESEAT THE MEMORY STRIKE THE F1 KEY TO CONTINUE F2 TO RUN THE SETUP UTILITY PRESS F5 TO RUN ONBOARD DIAGNOSTICS Reseat the memory see Memory in your Service Manual If memory was not removed or installed memory modul...

Page 77: ...nstalled incorrectly or the battery or system board may be defective WARNING THE BATTERY ATTACHED CANNOT POWER THE SYSTEM THE SYSTEM WILL NOT BOOT WITH THIS BATTERY PLUGGED IN PRESS F1 TO SHUTDOWN THE SYSTEM WARNING BATTERY IS CRITICALLY LOW HIT F1 TO CONTINUE WARNING MESSAGES HAVE BEEN DISABLED RUN THE SETUP UTILITY TO ENABLE THESE MESSAGES See System Setup Program on page 101 WARNING DELL S DISK...

Page 78: ...OR IN THE SYSTEM IS NOT SUPPORTED Ensure that the processor you are using is supported by your computer see Specifications on page 131 Hardware Troubleshooter If a device is either not detected during the operating system setup or is detected but incorrectly configured you can use the Hardware Troubleshooter to resolve the incompatibility Windows XP 1 Click Start Help and Support 2 Type hardware t...

Page 79: ...s enter System Setup see Viewing the System Setup Screens on page 102 to review your computer s configuration information and ensure that the device you want to test is displayed in System Setup and is active The Dell Diagnostics is located on a separate diagnostic utility partition on your hard drive NOTE If the computer is connected to a docking device docked undock it See the documentation that...

Page 80: ... Dell Diagnostics from the diagnostics utility partition on your hard drive 4 Press Tab to select Test System and then press Enter NOTE It is recommended that you select Test System to run a complete test on your computer Selecting Test Memory initiates the extended memory test which can take up to thirty minutes or more to complete When the test completes record the test results and then press an...

Page 81: ...en the boot device list appears use the up or down arrow keys to highlight CD DVD CD RW Drive then press Enter NOTE Using the one time boot menu changes the boot sequence for the current boot only Upon restart the computer boots according to the boot sequence specified in System Setup 5 Press any key to confirm that you want to start from the CD DVD If you wait too long and the operating system lo...

Page 82: ...the following menu appears Press Tab to select the test you want to run and then press Enter NOTE It is recommended that you select Test System to run a complete test on your computer Selecting Test Memory initiates the extended memory test which can take up to thirty minutes or more to complete When the test completes record the test results and then press any key to return to this menu After Tes...

Page 83: ...een The following tabs provide additional information for tests run from the Custom Test or Symptom Tree option Extended Test Performs a thorough check of devices in the system This typically can take an hour or more NOTE The Extended Test periodically requires your input to answer specific questions Custom Test Use to test a specific device or customize the tests to be run Symptom Tree This optio...

Page 84: ...ces from System Setup memory and various internal tests and displays the information in the device list in the left pane of the screen NOTE The device list may not display the names of all components installed on your computer or all devices attached to your computer Parameters Allows you to customize the test if applicable by changing the test settings Tab Function ...

Page 85: ...you set your Dell computer to the Windows Classic view Battery Problems CAUTION There is a danger of a new battery exploding if it is incorrectly installed Replace the battery only with the same or equivalent type recommended by the manufacturer Discard used batteries according to the manufacturer s instructions CAUTION Before you begin any of the procedures in this section follow the safety instr...

Page 86: ...then listen for a dial tone If you have other telephone devices sharing the line such as an answering machine fax machine surge protector or line splitter bypass them and use the telephone to connect the modem directly to the telephone wall jack If you are using a line that is 3 meters 10 feet or more in length try a shorter one RUN THE MODEM DIAGNOSTIC TOOL Windows XP 1 Click Start All Programs M...

Page 87: ...ne has a checkmark next to it click the checkmark to remove it and connect to the Internet For help contact your Internet service provider Error Messages CAUTION Before you begin any of the procedures in this section follow the safety instructions in the Product Information Guide If the error message is not listed see the documentation for the operating system or the program that was running when ...

Page 88: ...es you may have to restart your computer to restore computer resources If so run the program that you want to use first OPERATING SYSTEM NOT FOUND Contact Dell see Contacting Dell on page 129 Lockups and Software Problems CAUTION Before you begin any of the procedures in this section follow the safety instructions in the Product Information Guide The computer stops responding NOTICE You may lose d...

Page 89: ...XP operating system environments 1 Click Start All Programs Accessories Program Compatibility Wizard Next 2 Follow the instructions on the screen Windows Vista The Program Compatibility Wizard configures a program so that it runs in an environment similar to non Windows Vista operating system environments 1 Click Start Control Panel Programs Use an older program with this version of Windows 2 In t...

Page 90: ...AND CLOSE ANY OPEN FILES OR PROGRAMS AND SHUT DOWN YOUR COMPUTER THROUGH THE START MENU Memory Problems CAUTION Before you begin any of the procedures in this section follow the safety instructions in the Product Information Guide IF YOU RECEIVE AN INSUFFICIENT MEMORY MESSAGE Save and close any open files and exit any open programs you are not using to see if that resolves the problem See the soft...

Page 91: ...rk communication is occurring Replace the network cable RESTART THE COMPUTER AND LOG ON TO THE NETWORK AGAIN CHECK YOUR NETWORK SETTINGS Contact your network administrator or the person who set up your network to verify that your network settings are correct and that the network is functioning RUN THE HARDWARE TROUBLESHOOTER See Hardware and Software Problems on page 110 Power Problems CAUTION Bef...

Page 92: ...e your Service Manual Remove and then reinstall any expansion cards see Removing an ExpressCard or Blank on page 65 ELIMINATE INTERFERENCE Some possible causes of interference are Power keyboard and mouse extension cables Too many devices connected to the same power strip Multiple power strips connected to the same electrical outlet Printer Problems CAUTION Before you begin any of the procedures i...

Page 93: ...ck the printer icon 3 Click Properties and click Ports 4 Adjust the settings as needed REINSTALL THE PRINTER DRIVER SEE THE PRINTER DOCUMENTATION FOR INFORMATION ON REINSTALLING THE PRINTER DRIVER Scanner Problems CAUTION Before you begin any of the procedures in this section follow the safety instructions in the Product Information Guide NOTE If you need technical assistance for your scanner cont...

Page 94: ... on the media player s has not been turned down or off CHECK THE SPEAKER CABLE CONNECTIONS Ensure that the speakers are connected as shown on the setup diagram supplied with the speakers If you purchased a sound card ensure that the speakers are connected to the card ENSURE THAT THE SUBWOOFER AND THE SPEAKERS ARE TURNED ON See the setup diagram supplied with the speakers If your speakers have volu...

Page 95: ...t corner of your screen Ensure that the volume is turned up and that the sound is not muted Touch Pad or Mouse Problems CHECK THE TOUCH PAD SETTINGS 1 Click Start Control Panel Printers and Other Hardware Mouse 2 Try adjusting the settings CHECK THE MOUSE CABLE Shut down the computer Disconnect the mouse cable check it for damage and firmly reconnect the cable If you are using a mouse extension ca...

Page 96: ...fety instructions in the Product Information Guide NOTICE If your computer came with a PCI graphics card installed removal of the card is not necessary when installing additional graphics cards however the card is required for troubleshooting purposes If you remove the card store it in a safe and secure location For information about your graphics card go to support dell com The screen is blank NO...

Page 97: ...y or video controller may be defective Contact Dell see Contacting Dell on page 129 Power Lights CAUTION Before you begin any of the procedures in this section follow the safety instructions in the Product Information Guide The power button light located on the front of the computer illuminates and blinks or remains solid to indicate different states If the power light is green and the computer is...

Page 98: ... or incorrectly installed Remove and then reinstall any cards see Using Cards on page 63 Eliminate interference Some possible causes of interference are Too many devices on a power strip Multiple power strips connected to the same electrical outlet Dell Technical Update Service The Dell Technical Update service provides proactive e mail notification of software and hardware updates for your comput...

Page 99: ...ar functions differently when you click double click or right click the icon Clicking the Dell Support Icon Click or right click the icon to perform the following tasks Check your computing environment View the Dell Support Utility settings Access the help file for the Dell Support Utility View frequently asked questions Learn more about the Dell Support Utility Turn the Dell Support Utility off D...

Page 100: ...100 Troubleshooting ...

Page 101: ...Windows Vista Start button Help and Support You can use the system setup program as follows To set or change user selectable features for example your computer password To verify information about the computer s current configuration such as the amount of system memory After you set up the computer run the system setup program to familiarize yourself with your system configuration information and ...

Page 102: ...option is the setting or value for that option You can change settings that appear as white type on the screen Options or values that you cannot change because they are determined by the computer appear less bright The upper right corner of the screen displays help information for the currently highlighted option the lower right corner displays information about the computer System setup key funct...

Page 103: ... items appear blue or dimmed without a triangle To reorder a device in the list highlight the device and then press or not case sensitive to move the highlighted device up or down Boot sequence changes take effect as soon as you save the changes and exit the system setup program Performing a One Time Boot You can set a one time only boot sequence without entering the system setup program You can a...

Page 104: ... serial connector 2 Press the down arrow key to select the Infrared Data Port setting and press the right arrow key to change the setting to a COM port 3 Press Esc and then click Yes to save the changes and exit the system setup program If you are prompted to restart your computer click Yes 4 Follow the instructions on the screen 5 After the infrared sensor has been enabled click Yes to restart th...

Page 105: ...dy installed no further installation or configuration is needed NOTICE The Drivers and Utilities media may contain drivers for operating systems that are not on your computer Ensure that you are installing software appropriate for your operating system Many drivers such as the keyboard driver come with your Microsoft Windows operating system You may need to install drivers if you Upgrade your oper...

Page 106: ... an exclamation point is next to the device name you may need to reinstall the driver or install a new driver see Reinstalling Drivers and Utilities on page 106 Reinstalling Drivers and Utilities NOTICE The Dell Support website at support dell com and your Drivers and Utilities media provide approved drivers for Dell computers If you install drivers obtained from other sources your computer might ...

Page 107: ...tilities media go to step 2 If not go to step 5 2 When the Drivers and Utilities media installation program starts follow the prompts on the screen 3 When the InstallShield Wizard Complete window appears remove the Resource media and click Finish to restart the computer 4 When you see the Windows desktop reinsert the Resource media 5 At the Welcome Dell System Owner screen click Next NOTE The Driv...

Page 108: ...low the instructions on the screen to continue 3 From the Language drop down menu in the toolbar select your preferred language for the driver or utility if available 4 At the welcome screen click Next and wait for the CD DVD to complete the hardware scan 5 To detect other drivers and utilities under Search Criteria select the appropriate categories from the System Model Operating System and Topic...

Page 109: ...on Advanced Next 6 Click Browse and browse to the location to which you previously copied the driver files 7 When the name of the appropriate driver appears click Next 8 Click Finish and restart your computer Windows Vista 1 Click the Windows Vista start button and right click Computer 2 Click Properties Device Manager NOTE The User Account Control window may appear If you are an administrator on ...

Page 110: ...ooter list select the option that best describes the problem and click Next to follow the remaining troubleshooting steps Windows Vista 1 Click the Windows Vista start button and click Help and Support 2 Type hardware troubleshooter in the search field and press Enter to start the search 3 In the search results select the option that best describes the problem and follow the remaining troubleshoot...

Page 111: ...es if changes to the hardware software or other system settings have left the computer in an undesirable operating state Any changes that System Restore makes to your computer are completely reversible NOTICE Make regular backups of your data files System Restore does not monitor your data files or recover them NOTE The procedures in this document were written for the Windows default view so they ...

Page 112: ...n or delete any files or programs until the system restoration is complete Windows XP 1 Click Start All Programs Accessories System Tools System Restore 2 Click Undo my last restoration and click Next Windows Vista 1 Click Start 2 In the Start Search box type System Restore and press Enter 3 Click Undo my last restoration and click Next Enabling System Restore NOTE Windows Vista does not disable S...

Page 113: ...s in when you purchased the computer Any programs or files added since you received your computer including data files are permanently deleted from the hard drive Data files include documents spreadsheets e mail messages digital photos music files and so on If possible back up all data before using PC Restore or Factory Image Restore Windows XP Dell PC Restore Using PC Restore 1 Turn on the comput...

Page 114: ...PC Restore from your computer even to gain additional hard drive space If you remove PC Restore from the hard drive you cannot ever recall it and you will never be able to use PC Restore to return your computer operating system to its original state 1 Log on to the computer as a local administrator 2 In Microsoft Windows Explorer go to c dell utilities DSR 3 Double click the filename DSRIRRemv2 ex...

Page 115: ...r To access the command prompt type administrator in the User name field then click OK 5 Click Dell Factory Image Restore NOTE Depending upon your configuration you may need to select Dell Factory Tools then Dell Factory Image Restore The Dell Factory Image Restore welcome screen appears 6 Click Next The Confirm Data Deletion screen appears NOTICE If you do not want to proceed with Factory Image R...

Page 116: ...es media contains drivers that were installed during the assembly of the computer Use the Dell Drivers and Utilities media to load any required drivers Depending on the region from which you ordered your computer or whether you requested the media the Dell Drivers and Utilities media and Operating System media may not ship with your computer Reinstalling Windows XP or Windows Vista The reinstallat...

Page 117: ...omputer and try again NOTE The next steps change the boot sequence for one time only On the next start up the computer boots according to the devices specified in the system setup program 5 When the boot device list appears highlight CD DVD CD RW Drive and press Enter 6 Press any key to Boot from CD ROM 7 Follow the instructions on the screen to complete the installation ...

Page 118: ...118 Reinstalling Software ...

Page 119: ... if it offers coded identification tags Packing the Computer Remove any external devices attached to the computer and store them in a safe place To make the computer as light as possible replace any devices installed in the module bay with the Dell TravelLite module Fully charge the main battery and any spare batteries that you plan to carry with you Shut down the computer Disconnect the AC adapte...

Page 120: ...ctivity press Fn F2 Consider changing your power management options to maximize battery operating time see Power Management Modes on page 33 If you are traveling internationally carry proof of ownership or of your right to use the computer if it is company owned to speed your passage through customs Investigate the customs regulations of the countries you plan to visit and consider acquiring an in...

Page 121: ...puter 121 Prior to entering the airplane verify that using a computer is permitted Some airlines forbid the use of electronic devices during flight All airlines forbid the use of electronic devices during takeoff and landing ...

Page 122: ...122 Traveling With Your Computer ...

Page 123: ...e 5 If the preceding steps have not resolved the problem see Contacting Dell on page 129 NOTE Call Dell Support from a telephone near or at the computer so that the support staff can assist you with any necessary procedures NOTE Dell s Express Service Code system may not be available in all countries When prompted by Dell s automated telephone system enter your Express Service Code to route the ca...

Page 124: ...ugh a broadband connection diagnose your problem and repair it all under your supervision For more information go to support dell com and click DellConnect Online Services You can learn about Dell products and services on the following websites www dell com www dell com ap Asian Pacific countries only www dell com jp Japan only www euro dell com Europe only www dell com la Latin American and Carib...

Page 125: ... touch tone telephone to select the subjects that correspond to your questions For the telephone number to call for your region see Contacting Dell on page 129 Automated Order Status Service To check on the status of any Dell products that you have ordered you can go to support dell com or you can call the automated order status service A recording prompts you for the information needed to locate ...

Page 126: ...f the invoice and a letter describing the reason for the return 3 Include a copy of the Diagnostics Checklist see Diagnostics Checklist on page 128 indicating the tests that you have run and any error messages reported by the Dell Diagnostics see Dell Diagnostics on page 79 4 Include any accessories that belong with the item s being returned power cables software floppy disks guides and so on if t...

Page 127: ...ics Checklist see Diagnostics Checklist on page 128 If possible turn on your computer before you call Dell for assistance and call from a telephone at or near the computer You may be asked to type some commands at the keyboard relay detailed information during operations or try other troubleshooting steps possible only at the computer itself Ensure that the computer documentation is available CAUT...

Page 128: ...ion Devices Expansion cards Are you connected to a network Yes No Network version and network adapter Programs and versions See your operating system documentation to determine the contents of the system s start up files If the computer is connected to a printer print each file Otherwise record the contents of each file before calling Dell Error message beep code or diagnostic code Description of ...

Page 129: ...support and service options Availability varies by country and product and some services may not be available in your area To contact Dell for sales technical support or customer service issues 1 Visit support dell com 2 Verify your country or region in the Choose A Country Region drop down menu at the bottom of the page 3 Click Contact Us on the left side of the page 4 Select the appropriate serv...

Page 130: ...130 Getting Help ...

Page 131: ...ype Intel Core 2 Duo and Solo Celeron L2 cache up to 4 MB External bus frequency 533 667 and 800 MHz System Information System chipset Intel GM965 Memory Memory module capacities Supports two SODIMM with 512 MB 1 GB or 2 GB modules Memory type SODIMM Minimum memory 512 MB Maximum memory 4 GB Ports and Connectors Audio microphone connector stereo headphone speakers connector Modem RJ 11 port Networ...

Page 132: ...s internal Bluetooth V 2 0 with USB 2 0 interface for wireless support Video Video type Intel integrated UMA graphics Data bus PCI Express Video controller Intel GM965 Video memory 256 MB shared with system memory LCD interface LVDS Audio Audio type Audio controller RealtekALC268 Stereo conversion 18 bit analog to digital and digital to analog Interfaces Internal PCI bus AC 97 External microphone ...

Page 133: ...lion colors Response time typical 20 ms rise maximum 30 ms fall maximum Refresh rate 60 Hz Operating angle 0 closed to 180 Viewing angles Horizontal 40 XGA and SXGA 50 60 UXGA 65 WXGA WSXGA and WUXGA Vertical 50 50 WXGA supports 12 1 inch 307 34 mm 1280 x 800 CCFL or 12 1 inch 307 34 mm 1280 x 800 LED B L Controls brightness can be controlled through keyboard shortcuts Keyboard Number of keys 87 U...

Page 134: ...c Charge time approximate Computer off 2 5 hours Operating time Battery operating time varies depending on operating conditions and can be significantly reduced under certain power intensive conditions See Battery Performance on page 31 for more information on battery life Life span approximate 300 discharge charge cycles Temperature range Operating 0 to 35 C 32 to 95 F Storage 40 to 65 C 40 to 14...

Page 135: ... ROM Type DVD Super Multi Hard Disk Drive Height 9 5 mm 2 5 inch SATA Capacity 80 120 160 GB 5400 RPM Physical Height 28 3 mm 1 11 inches front side 36 3 mm 1 43 inches rear side Width 300 mm 11 81 inches Depth 222 mm 8 74 inches Weight With 4 cell battery and 12 1 WXGA screen 1 8 kg 4 0 lb Environmental Temperature range Operating 0 to 40 C 32 to 104 F Storage 40 to 65 C 40 to 149 F AC Adapter co...

Page 136: ...lates user environment Operating 0 9 GRMS Storage 1 3 GRMS Maximum shock measured with hard drive in head parked position and a 2 ms half sine pulse Operating 122 G Storage 163 G Altitude maximum Operating 15 2 to 3048 m 50 to 10 000 ft Storage 15 2 to 10 668 m 50 to 35 000 ft Airborne contaminant level G2 or lower as defined by ISA S71 04 1985 Environmental continued ...

Page 137: ...hanges or modifications not expressly approved by Dell Inc could void your authority to operate this equipment These limits are designed to provide reasonable protection against harmful interference in a residential installation However there is no guarantee that interference will not occur in a particular installation If this equipment does cause harmful interference with radio or television rece...

Page 138: ... from the electrical outlet and remove any installed batteries Clean your computer with a soft cloth dampened with water Do not use liquid or aerosol cleaners which may contain flammable substances Use a can of compressed air to remove dust from between the keys on the keyboard NOTICE To avoid damaging the computer or display do not spray cleaning solution directly onto the display Only use produc...

Page 139: ...nnect any attached devices from the computer and from their electrical outlets 3 Remove any installed batteries see Removing the Battery on page 36 4 Moisten a soft lint free cloth with water and wipe it gently across the surface of the touch pad Do not allow water from the cloth to seep between the touch pad and the surrounding palm rest CDs and DVDs NOTICE Always use compressed air to clean the ...

Page 140: ...t line from the center to the outer edge of the disc For stubborn dirt try using water or a diluted solution of water and mild soap You can also purchase commercial products that clean discs and provide some protection from dust fingerprints and scratches Cleaning products for CDs are also safe to use on DVDs ...

Page 141: ...Advanced Host Controller Interface An interface for a SATA hard drive Host Controller which allows the storage driver to enable technologies such as Native Command Queuing NCQ and hot plug antivirus software A program designed to identify quarantine and or delete viruses from your computer ASF alert standards format A standard to define a mechanism for reporting hardware and software alerts to a m...

Page 142: ...way between the components in your computer bus speed The speed given in MHz that indicates how fast a bus can transfer information byte The basic data unit used by your computer A byte is usually equal to 8 bits C C Celsius A temperature measurement scale where 0 is the freezing point and 100 is the boiling point of water cache A special high speed storage mechanism which can be either a reserved...

Page 143: ...y the Dell Travel Remote in some systems In other systems this port allows you to transfer data between the computer and infrared compatible devices without using a cable connection Control Panel A Windows utility that allows you to modify operating system and hardware settings such as display settings controller A chip that controls the transfer of data between the processor and memory or between...

Page 144: ...devices on a network that are administered as a unit with common rules and procedures for use by a specific group of users A user logs on to the domain to gain access to the resources DRAM dynamic random access memory Memory that stores information in integrated circuits containing capacitors driver Software that allows the operating system to control a device such as a printer Many devices do not...

Page 145: ...t provides bidirectional data transmission ESD electrostatic discharge A rapid discharge of static electricity ESD can damage integrated circuits found in computer and communications equipment expansion card A circuit board that installs in an expansion slot on the system board in some computers expanding the capabilities of the computer Examples include video modem and sound cards expansion slot ...

Page 146: ...or disk for file storage When a drive or disk is formatted the existing information on it is lost FSB front side bus The data path and physical interface between the processor and RAM FTP file transfer protocol A standard Internet protocol used to exchange files between computers connected to the Internet G G gravity A measurement of weight and force GB gigabyte A measurement of data storage that ...

Page 147: ...gahertz MHz gigahertz GHz or terahertz THz I iAMT Intel Active Management Technology Delivers more secure systems management capabilities regardless of whether the computer is turned on or off or the operating system is not responding IC integrated circuit A semiconductor wafer or chip on which thousands or millions of tiny electronic components are fabricated for use in computer audio and video e...

Page 148: ...ame and access phone numbers for a fee K Kb kilobit A unit of data that equals 1024 bits A measurement of the capacity of memory integrated circuits KB kilobyte A unit of data that equals 1024 bytes but is often referred to as 1000 bytes key combination A command requiring you to press multiple keys at the same time kHz kilohertz A measurement of frequency that equals 1000 Hz L LAN local area netw...

Page 149: ... for RAM memory address A specific location where data is temporarily stored in RAM memory mapping The process by which the computer assigns memory addresses to physical locations at start up Devices and software can then identify information that the processor can access memory module A small circuit board containing memory chips which connects to the system board MHz megahertz A measure of frequ...

Page 150: ...technology to read or write data from CDs DVDs or DVD RWs Example of optical drives include CD drives DVD drives CD RW drives and CD RW DVD combo drives P parallel connector An I O port often used to connect a parallel printer to your computer Also referred to as an LPT port partition A physical storage area on a hard drive that is assigned to one or more logical storage areas known as logical dri...

Page 151: ... hard drives and video If no problems are detected during POST the computer continues the start up processor A computer chip that interprets and executes program instructions Sometimes the processor is referred to as the CPU central processing unit PS 2 personal system 2 A type of connector for attaching a PS 2 compatible keyboard mouse or keypad PXE pre boot execution environment A WfM Wired for ...

Page 152: ...d programs that cannot be deleted or written to by the computer ROM unlike RAM retains its contents after you shut down your computer Some programs essential to the operation of your computer reside in ROM RPM revolutions per minute The number of rotations that occur per minute Hard drive speed is often measured in rpm RTC real time clock Battery powered clock on the system board that keeps the da...

Page 153: ...smissions SIM cards can be used in phones or portable computers smart card A card that is embedded with a processor and a memory chip Smart cards can be used to authenticate a user on computers equipped for smart cards S PDIF Sony Philips Digital Interface An audio transfer file format that allows the transfer of audio from one file to another without converting it to and from an analog format whi...

Page 154: ... settings have on the computer do not change the settings for this program T TAPI telephony application programming interface Enables Windows programs to operate with a wide variety of telephony devices including voice data fax and video text editor A program used to create and edit files that contain only text for example Windows Notepad uses a text editor Text editors do not usually provide word...

Page 155: ...on the system board in computers with an integrated video controller that provides the video capabilities in combination with the monitor for your computer video memory Memory that consists of memory chips dedicated to video functions Video memory is usually faster than system memory The amount of video memory installed primarily influences the number of colors that a program can display video mod...

Page 156: ... picture and make it wallpaper WLAN wireless local area network A series of interconnected computers that communicate with each other over the air waves using access points or wireless routers to provide Internet access write protected Files or media that cannot be changed Use write protection when you want to protect data from being changed or destroyed To write protect a 3 5 inch floppy disk sli...

Page 157: ...ial kind of zipped file is a self extracting file which has a filename extension of exe You can unzip a self extracting file by double clicking it Zip drive A high capacity floppy drive developed by Iomega Corporation that uses 3 5 inch removable disks called Zip disks Zip disks are slightly larger than regular floppy disks about twice as thick and hold up to 100 MB of data ...

Page 158: ...158 Glossary ...

Page 159: ...ing system 16 playing 49 cleaning touch pad 139 computer crashes 88 89 restore to previous state 110 specifications 131 stops responding 88 conflicts software and hardware incompatibilities 78 110 connecting Mobile Broadband network 61 contacting Dell 129 copying CDs general information 51 helpful tips 53 how to 51 copying DVDs general information 51 helpful tips 53 how to 51 D Dell contacting 129...

Page 160: ...12 regulatory 12 safety 12 warranty 12 drivers 105 about 105 identifying 105 reinstalling 106 Drivers and Utilities CD 108 DVDs 51 playing 49 E e mail problems 85 End User License Agreement 12 ergonomics information 12 error messages diagnostic lights 73 problems 87 ExpressCards blanks 64 65 extended 63 installing 64 removing 65 slots 63 types 63 F Factory Image Restore 113 115 firewall Windows 20...

Page 161: ...computer 73 diagnostic 73 lost computer 70 M memory problems 90 messages error 87 Mobile Broadband network connections 61 See also wireless switch modem problems 85 monitor blank 96 hard to read 96 switching the video image 43 N network firewall 61 problems 91 O operating system media 116 reinstalling 16 Operating System CD 16 P passwords about 67 administrator 68 69 forgetting 68 primary 68 secur...

Page 162: ... 88 Internet 85 memory 90 modem 85 monitor hard to read 96 monitor is blank 96 network 91 power 91 power light conditions 91 printer 92 program crashes 89 program stops responding 88 restore to previous state 110 111 scanner 93 screen hard to read 96 screen is blank 96 software 88 90 volume adjusting 94 Product Information Guide 12 R regulatory information 12 S safety instructions 12 scanner probl...

Page 163: ...uter by air 120 identification tag 119 packing 119 tips 120 troubleshooting conflicts 78 110 diagnostic lights 73 Hardware Troubleshooter 78 110 restore to previous state 110 111 V volume adjusting 94 W warranty information 12 Windows 2000 hibernate mode 34 Internet Connection Firewall 61 standby mode 33 Windows Vista Factory Image Restore 113 System Restore 111 Windows XP Device Driver Rollback 1...

Page 164: ...164 Index ...

Reviews: