


CL5499
Figure 47. Installing the chassis bracket
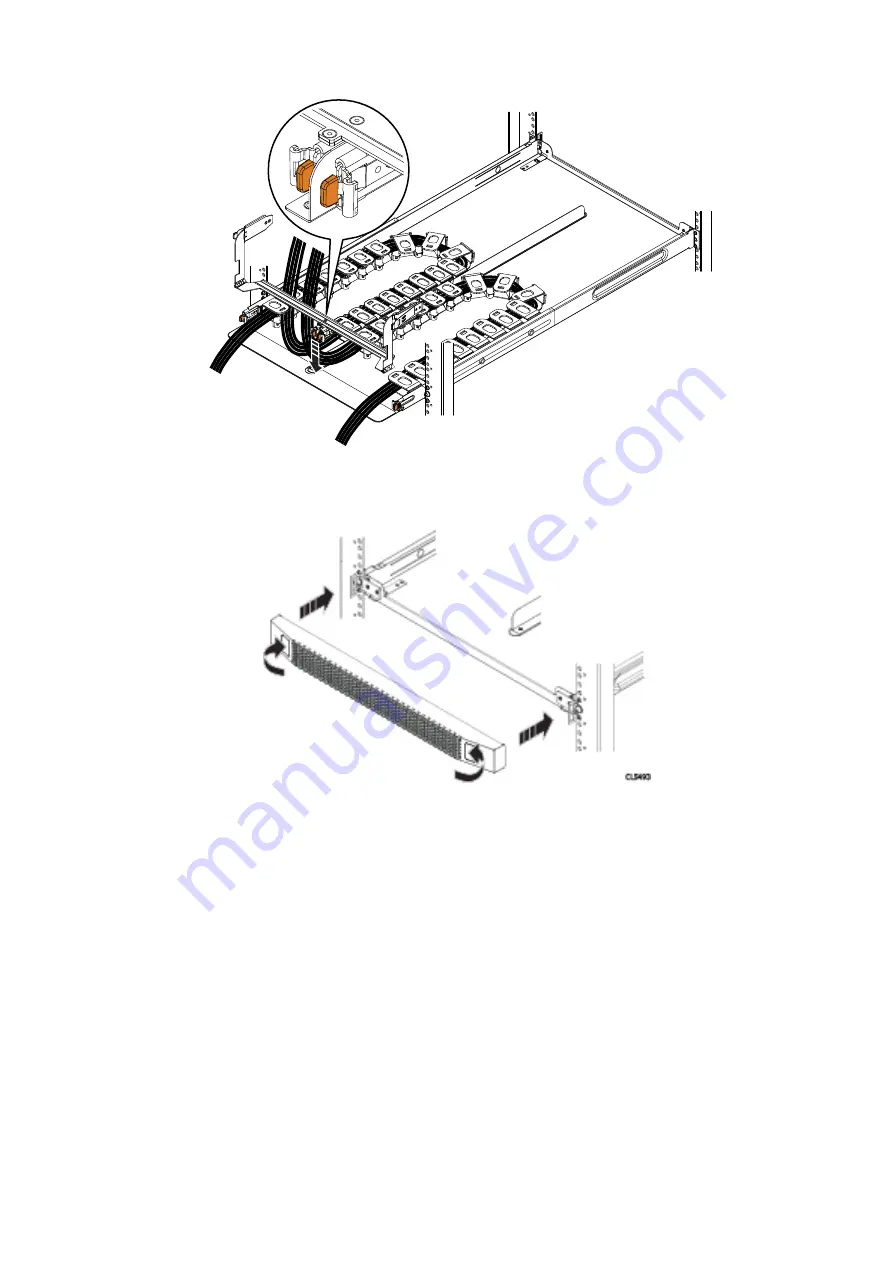
9. Place the chassis bracket over the center rail of the cable tray. Clip the free end of the cable chains to the center flange on
the chassis bracket.
Figure 48. Installing the bezel
10. Place the bezel over the front of the tray by pressing the release buttons on the bezel and placing it over the retaining slots
on the tray. Release the buttons and the tabs will mate with the slots.
11. Refer to the application guide and connect the cables as required. Dress the cable runs with proper cable strain reliefs when
routing to the rack.
Disconnecting cables for a shelf installed with the 1U cable management
tray
When servicing a shelf installed with the 1U cable management tray, cables might need to be disconnected to perform servicing
procedures.
Steps
1. Unplug/disconnect all cables from the rear of the shelf to be serviced.
2. Disconnect the cable guide clips from the chassis.
3. Disconnect the cable guide clips from the 1U cable management tray.
4. Move the cables out of the way to provide access for servicing the shelf.
42
Install the Disk Shelves in the Rack
Summary of Contents for PowerProtect DD9400
Page 1: ...Dell EMC PowerProtect DD9400 System Installation Guide September 2020 Rev 03...
Page 57: ...Figure 65 Single node DD9400 with DS60 shelves Connect Cables and Power On 57...
Page 58: ...Figure 66 HA DD9400 with DS60 shelves 58 Connect Cables and Power On...
Page 63: ...Figure 72 Routing cables through the CMA brackets Connect Cables and Power On 63...


