


Steps
1. Locate the 4U high cabinet space designated for the shelf.
2. Adjust rail length if required.
3. The rails are shipped with M5 adapters, which fit into the Dell EMC NEMA channels. For Dell EMC racks, proceed to step 4.
For third-party racks, proceed as follows:
a. Using a flat-tipped screwdriver, remove the two M5 adapters from the adapter mounting block on the rails.
b. Select the required adapters from the hardware kit and install the adapters into the adapter mounting block. The
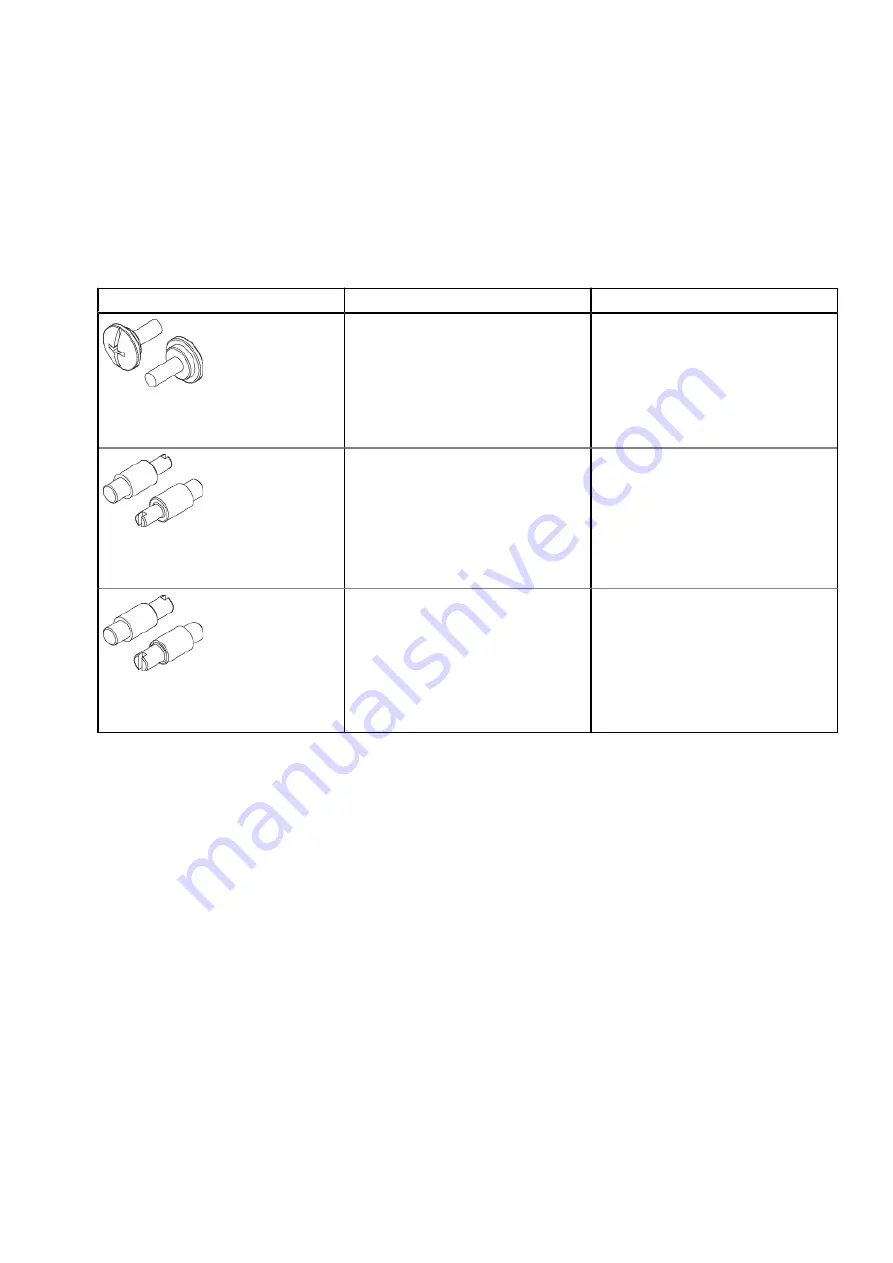
following table shows the pins for third-party racks.
Table 4. Pins for third-party racks
Rail Pins from kit
Part Number and Description
Suggested Use
036-028-018
Custom screw, M4 x 10MM
(Quantity: 4 per kit)
Used for any third-party rack. Can be
used in racks with threaded holes.
036-028-016
3.8MM Alignment Pin
(Quantity: 8 per kit)
Used in racks that have M5, #10, or
#12 threaded holes.
036-028-017
4.8MM Alignment Pin
(Quantity: 8 per kit)
Used in racks that have M6 threaded
holes.
4. Install the right rail to the rack rear channel. You can adjust the rails later, if necessary. The following figure shows the
installation details.
Refer to
Installing the right rail to the front channel
on page 31 while performing the tasks in this step.
Install the Disk Shelves in the Rack
29
Summary of Contents for PowerProtect DD9400
Page 1: ...Dell EMC PowerProtect DD9400 System Installation Guide September 2020 Rev 03...
Page 57: ...Figure 65 Single node DD9400 with DS60 shelves Connect Cables and Power On 57...
Page 58: ...Figure 66 HA DD9400 with DS60 shelves 58 Connect Cables and Power On...
Page 63: ...Figure 72 Routing cables through the CMA brackets Connect Cables and Power On 63...


