A-Class
27
3.4 Quick Calibration
Perform Quick Calibration during initial printer set-up or after changing the media, but not if using
continuous media.
Media with long gaps between labels may require a PAPER OUT DISTANCE change;
see Section 4.2.1. Also, if UNCALIBRATED is displayed, see Section 5.2.1.
•
With media loaded and the Media Sensor adjusted, press and hold the FEED Key until at least
two complete labels advance before releasing the key.
Upon successful completion, CALIBRATION COMPLETED will appear then the printer will feed to
the next TOF and READY will be displayed. (A ‘Warning Low Backing’ message may appear if
using notched media or media on a transparent liner; however, the calibration was successful).
Calibration Hints
With some media, the sensor may have trouble differentiating between the label and liner. If
CANNOT CALIBRATE is displayed, try calibrating over a longer distance:
•
Press and hold the FEED Key until the printer has output three (or more) labels.
If this method also fails (that is, if UNCALIBRATED is displayed), perform the Standard
Calibration; see Section 5.2.1.
3.5 Print Quality Controls
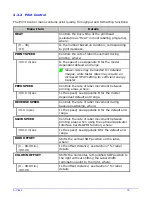
Flexible printing controls are provided. Of these, the amount of heat applied and the rate of media
movement will have the most effect. Four settings are available via PRINT CONTROL; see Section
4.2.2:
•
HEAT – adjust this setting to lighten or darken the print contrast;
•
PRINT SPEED – adjust this setting to regulate throughput, where slow speeds allow more time
for energy transfer and fast speeds may require more HEAT to achieve the desired contrast;
•
CONTRAST – adjust this setting to fine-tune the gray (shaded) areas of the image; and,
•
DARKNESS – adjust this setting to fine-tune the solid areas of the image.
Heat and Speed commands from the host software may override the printer’s menu
setting; see HOST SETTINGS, Section 4.2.5.
Summary of Contents for A-Class Mark II
Page 1: ...Operator s Manual ...
Page 2: ......
Page 5: ......
Page 20: ...10 A Class Peel Point Dimension See Appendix C for the PE Series printer s dimension Peel Bar ...
Page 80: ...70 A Class ...
Page 113: ...A Class 103 ...
Page 115: ...A Class 105 ...
Page 126: ...116 A Class ...
Page 134: ...124 A Class ...
Page 138: ...128 A Class ...
Page 142: ...132 A Class ...
Page 156: ...146 A Class ...
Page 158: ...148 A Class ...
Page 164: ...154 A Class ...

