background image

APPENDIX A 

 73 


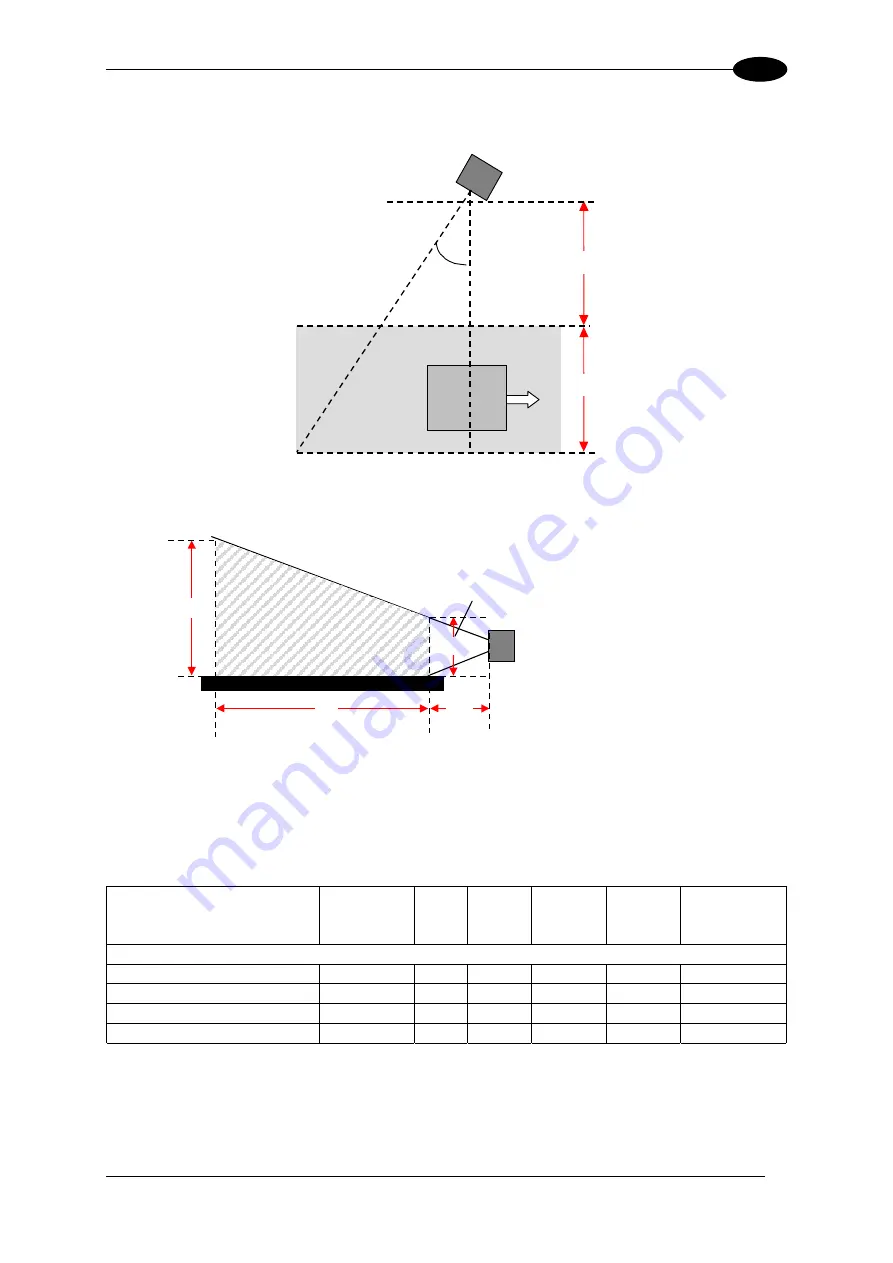
Side Reading Installation 


Top View


DV9500 


α


= 45° 

Reading line 

CL 

V


Maximum 
Field Width


Minimum 
Field Width


Conveyor Width


Clearance


Front View 

DV9500


CL 


Figure 55 – Side Reading station - Measurement Reference Diagram 


Some examples of applications: 


Model type 

Barcode 

dimension 

(mm) 

(mm) 

(mm) 

CL 

(mm) 

Maximum 
Conveyor 
Speed (m/s) 


DV9500-1400 50 mm - AF 

0.38 

524 

876 

600 

450 

2.5 

DV9500-1300 85 mm - AF 

0.38 

676 

952 

800 

977 

2.5 

DV9500-1200 105 mm - AF 

0.38 

669 

949 

1000 

1196 

2.5 

DV9500-1200 105 mm - AF 

0.30 

610 

790 

650 

1099 

2.1 


Summary of Contents for DV9500 Series

Page 1: ...DV9500 Installation Manual ...

Page 2: ......

Page 3: ...DV9500 Series Installation Manual ...

Page 4: ... improvements without prior notification Datalogic shall not be liable for technical or editorial errors or omissions contained herein nor for incidental or consequential damages resulting from the use of this material Product names mentioned herein are for identification purposes only and may be trademarks and or registered trademarks of their respective companies Datalogic S p A 2004 02 11 04 ...

Page 5: ...d PS Photocell 21 2 6 Electrical Connections 22 2 6 1 Main Connector Power Supply and Sensors 22 2 6 2 Camera COM1 Decoder Communication and Configuration 25 2 6 3 Camera COM2 Lighting System Control and Master Slave Configuration 26 2 6 4 Camera Link Connector VIDEO1 VIDEO2 27 2 6 5 LVDS Connectors VIDEO1 VIDEO2 28 3 CAMERA SETUP 29 3 1 Setup Procedure Overview 29 3 2 Camera Parameters Setup 30 3...

Page 6: ...y Section 60 5 1 4 DLOscilloscope Status Bar 61 5 2 The Test Tool 61 5 2 1 System Information Page 61 5 2 2 Sensors Page 62 5 2 3 Laser Pointers Page 62 5 2 4 I O Page 63 5 2 5 Communication Page 63 5 2 6 Illuminators 64 5 2 7 PS HS Distance Check Page 64 5 2 8 Logging Page 65 5 3 The Autofocus Wizard 66 5 4 The Parallelism Check Wizard 66 5 5 The Light Profile Equalization Wizard 66 5 6 The Chann...

Page 7: ...eral services as well as technical support through its website Log on to www datalogic com services and click on the links indicated for further information including Datalogic Services Warranty Extensions and Maintenance Agreements Downloads Software Downloads Manuals and Catalogues Contact Us Listing of Datalogic Subsidiaries and Quality Partners Authorised Repair Centres ...

Page 8: ...vi GENERAL VIEW DV9500 Figure A DV9500 General View 192 mm model Figure B DV9500 General View other models ...

Page 9: ...Camera Link Figure D DV9500 Back Panel with LVDS COM1 connector 9 pin D sub Female connector Main connector 25 pin D sub Male connector 1 2 COM2 connector 9 pin D sub Female connector Camera Link connectors 3 4 LVDS connectors 5 1 2 3 4 5 ...

Page 10: ...he power on of the camera OFF LINE Yellow This LED indicates camera inactivity ENCODER Yellow Encoder input signal This LED goes on when an optical encoder connected to the DV9500 is pulsing PRESENCE SENSOR Yellow Presence sensor signal This LED goes on when presence sensor signal is active USER DEF Yellow User defined Programmable LED In the standard application signals that COM1 has been redirec...

Page 11: ...on MAIN Green This LED indicates activity on Main port COM1 Green This LED signal serial line activity for COM1 port COM2 Green This LED signal serial line activity for COM2 port FRAME VALID Green This LED goes on when camera sends out video lines ...

Page 12: ...cording to the specific system design documentation and to the procedures described in paragraph 2 3 3 Mount the system sensors according to the specific system design documentation and to the procedures described in paragraphs 2 4 and 2 5 4 Provide system cabling according to the specific system design documentation and to the procedures described in paragraph 2 6 5 Perform all the setup procedur...

Page 13: ...encoder presence sensor distance sensor etc One DD9500 decoder for each camera DC9500 controller External Mirrors EMK 400 o EMK 800 Presence sensor Speed sensor Distance Sensors Decoder Decoder Ethernet hub switch Modem Dedicated Phone Line System Remote Control Ethernet Host Connection System Remote Control Host connection Serial 232 Serial 422 485 Digital I O Ethernet Profibus Device Net Etherne...

Page 14: ... conveyor belt Figure 2 Reading station example The camera manages three kinds of external sensors Speed Sensor at all times the camera needs to know the speed of the objects to be acquired The speed sensor is usually an OEK 1 optical encoder connected to the belt that generates a square wave with a frequency proportional to the speed Height Side Position Sensor the camera intrinsic depth of field...

Page 15: ...es of the parcel α 45 When the acquisition starts the camera starts adapting acquisition parameters to the current conditions Acquisition period the camera acquires one line at a time If the image quality specifications ask for square pixels to obtain unstretched images the acquisition speed must be set based on the package speed and on its height near images have a higher resolution in the scan d...

Page 16: ...m top from side Description Top 0 Used to read top side of the packages No package justification is required Top Front 45 Top Back 45 Used to read top front or top rear sides of the packages A precise package justification is required for front and rear side reading Left 0 Right 0 Used to read Left Right side of the packages Package justification is usually required ...

Page 17: ...eft Front Left Rear Right Front or Right Rear sides of the packages Package justification is required to guarantee reading of both sides Four cameras at 45 guarantee reading of unjustified packages Each camera knows its position by the Optical setup Camera position parameter and its reading angle by the Optical setup View angle parameter ...

Page 18: ...Cable 24 VDC Power Cable Presence sensor Console DV9500 Figure 3 Typical single camera station A typical single camera station includes One DV9500 camera selected according to the reading specifications One or two LS 701 LS 504 LS 660 or LS 690 illuminator One OEK 1 optical encoder One LCC 9010 or LCC 9006 height sensor or one side position sensor DK 500 One DD9500 decoder One C BOX 100 junction b...

Page 19: ... Serial 232 Serial 422 485 Ethernet Digital I 0 25 pin cable Serial Digital I O 24 VDC LS 504 LS 701 LS 660 690 Height sensor C BOX 100 PWR 120 or PWR 240 DD9500 SlaveDecoder Serial Control Cable 24 VDC Power Cable Presence sensor Console DD9500 Master Decoder Camera Link or LVDS RS232 Video Cable DV9500 C BOX 100 Distance sensors DV9500 Master Slave Serial Control Cable Ethernet hub switch Figure...

Page 20: ...ders communicate using TCP IP on an Ethernet connection All the decoders run decoding software one of them runs the DlMaster application DlMaster collects data from all the decoders and communicates with the host DlMaster can be executed also on an additional PC connected to the LAN Any addition digital I O required by the application is managed from the decoders 1 3 3 Multiple Cameras with DC9500...

Page 21: ...he sensor information is processed and transmitted to the cameras The DC9500 controller provides the 24 Vdc power supply to all the cameras the sensors and up to two illuminators The DC9500 provides also 4 general purpose optoisolated inputs and outputs As in previous configurations each camera is connected to its decoder using a single camera link cable or an LVDS cable plus an RS232 serial cable...

Page 22: ...e parts supplied with their respective equipment are present and intact when opening the packaging The list of parts includes DV9500 Camera 2 fast brackets 1 serial null modem adapter 1 ferrite 4 hammerhead screws and nuts CD containing Software and Manuals Figure 6 DV9500 Package Contents ...

Page 23: ...INSTALLATION 11 2 2 2 OVERALL DIMENSIONS Figure 7 Overall dimensions of DV9500 192 mm model Figure 8 Overall dimensions of DV9500 ...

Page 24: ...e conveyor This frame is usually built with aluminum profiles as shown in the following figure Figure 9 Example Reading Station Frame The frame should minimize camera vibrations In order to minimize these vibrations the frame should never be fixed to the conveyor The actual frame dimensions may vary due to the camera model the conveyor type the accessories to be used encoder photocell barrier or l...

Page 25: ...osch supports using 4 M8 x 25 T head bolt with flange nut Figure 10 Mounting the fast brackets on the Bosch supports 2 Affix the camera to the structure using the 3 screws Tighten the middle screws and rotate the camera as shown in Figure 11 during calibration to obtain correct positioning In the case of mounting for top reading position the camera horizontally A position fine tuning procedure wil...

Page 26: ...lling the camera from the structure CAUTION Before powering on the camera make sure the autofocus lock is in the unlock position Before shipping the camera make sure the autofocus lock is in the lock position The Autofocus Lock is located on the top side of the camera It protects the autofocus mechanism whenever the camera is being moved for example during shipping and mounting procedures Figure 1...

Page 27: ...the unlock position as indicated on the label 2 3 3 External Mirror Mounting Affix the EMK 400 or EMK 800 external mirror to the structure using two M8 x 25 inserts T head bolt with flange nut Rotate the mirror angle to either 15 or 45 according to the mounting specifications A position fine tuning procedure will be described in paragraph 3 4 Figure 15 Mounting The Emk 400 800 External Mirror on t...

Page 28: ...ounting LS 701 with Brackets 2 4 MOUNTING THE PHOTOCELL BARRIERS OR DISTANCE SENSOR 2 4 1 Photocell Barriers Light Curtains The barriers position depends on the application In general The distance between the barriers and the nearest camera scan line should be at least 150 mm Side View DV9500 α 0 Conveyor Belt Light curtains 150 mm Side View DV9500 α 0 Conveyor Belt Light curtains 150 mm DOF ...

Page 29: ...aximum reading distance is 4900 mm 2 Verify the bar alignment and check that they are at the same distance from the belt surface 3 Open the control unit WARNING When you open the control unit to prevent electrical shock the power cable must be disconnected from the mains 4 Mount one of the two compression connectors contained in the kit in front of the power connector bottom left corner near the t...

Page 30: ... port to the internal serial debug connector by means of the included connection cable only this COM port must be connected therefore disconnect the RS485 serial port 7 Start HyperTerminal and open the option Properties inside the File menu Then proceed with the following setting Inside Phone Number page select Configure and set 19200 8 N 1 Flow Control none Inside the Setting page select ASCII Se...

Page 31: ...MSK ORL ORL Do not change it SETMSK 12 couple of 00 24 couple of 00 This parameter will automatically change when MODE parameter is set to DOUBLE SCAN SCREEN 0 0 Do not change it QMIN 1 1 Do not change it REPORT ASCII RAW BINARY TOPBEAM Type just the Setting BINARY TOPBEAM without the parameter name REPORT NBEAM 96 192 This parameter will be automatically updated when MODE parameter is set to DOUB...

Page 32: ...nected to the DC9500 Controller unit or to a C BOX 100 passive junction box see the DC9500 Controller manual for electrical connection In general the measured object should be between 300 and 2200 mm from the sensor the sensor should be mounted perpendicular to the conveyor In the case of side cameras at 45º with no DC9500 preprocessing the sensor should be mounted at 45º parallel to the reading p...

Page 33: ...s If the Optical Encoder OE is used it has to be connected to the conveyor Unfortunately due to various different conveyor types there is no standard way to do this and so the best solution is applied on site during installation A presence sensor photocell can be used as a trigger source The actual photocell used and its position depends on the application If the photocell is used as a presence se...

Page 34: ...llows connection to power supply connection to presence sensor connection to height sensor or distance sensor COM3 RS422 interface connection to optical encoder driving of an external digital output sensing of an external digital signal With appropriate factory setting the connector allows also connection to the decoder PC for runtime communication or for configuration using Genius COM1 RS232 inte...

Page 35: ... connected optionally factory configured as COM2 TX 21 N C Not connected optionally factory configured as COM2 RX 22 0 Vdc 24 Vdc reference ground 23 N C Not connected optionally factory configured as COM2 GND 24 AUX OUT Auxiliary digital output negative pin 25 0 Vdc 24 Vdc reference ground Normally the DC9500 Controller supplies correct power to the camera through the CAB X05 5 mt or CAB X10 10 m...

Page 36: ... NPN source PS PS 10 6 PRESENCE SENSOR DV9500 Vext Signal V Figure 20 Presence Sensor PNP Input Command PS PS 10 6 PRESENCE SENSOR DV9500 Vext V Signal Ground Figure 21 Presence Sensor NPN Input Command AUX OUT is an optoisolated output with Maximum output voltage 30 V Maximum output current 100 mA If not present a ferrite type Stewart 28A2029 0A0 must be applied on the camera side of the Main cab...

Page 37: ...amera link output with the standard application software the USER DEF LED is switched on To connect the COM1 camera port to the DC9500 Controller use serial cable CAB 9205 5 mt or CAB 9208 8 mt or CAB 9210 10mt Alternatively it is possible to use a shielded 9 pin male to female pin to pin serial cable 5 1 9 6 Figure 22 COM1 9 pin Female Connector Pin Name Function 1 N C Not connected 2 TXD Transmi...

Page 38: ...CAB 9205 5 mt or CAB 9208 8 mt or CAB 9210 10mt Alternatively it is possible to use a shielded 9 pin male to female pin to pin serial cable 5 1 9 6 Figure 23 COM2 9 pin Female Connector Pin Name Function 1 N C Not connected 2 TXD Transmit data 3 RXD Receive data 4 N C Not connected 5 GND Signal ground 6 N C Not connected 7 N C Not connected 8 N C Not connected 9 N C Not connected If not present a ...

Page 39: ...utput is also shared while the input is connected only to VIDEO1 26 13 14 1 Figure 24 CAMERA LINK 26 pin Connector Pin Channel Link Signal 1 Inner shield 14 Inner shield 2 X0 15 X0 3 X1 16 X1 4 X2 17 X2 5 Xclk 18 Xclk 6 X3 19 X3 7 SerTC only VIDEO1 20 SerTC only VIDEO1 8 SerTFG 21 SerTFG 9 CC1 22 CC1 10 CC2 23 CC2 11 CC3 24 CC3 12 CC4 25 CC4 13 Inner shield 26 Inner shield To connect the CAMERA LI...

Page 40: ...In the 32 bit output VIDEO1 transmits the lower 16 bits while VIDEO2 transmits the upper ones In BCR applications a 16 bit output is selected by default and Datalogic provides a cable to connect VIDEO1 2 to the frame grabber inside the PC Decoder To connect the LVDS signals to the DD9500 Decoder use LVDS cable CAB 9005 5 mt or CAB 9008 8 mt Alternatively it is possible to use a double shielded Sta...

Page 41: ...tup should be repeated for each camera of the reading station 3 1 SETUP PROCEDURE OVERVIEW The setup procedure described in this chapter can be summarized in the following diagram Mechanical mounting and cabling done Speed position and trigger sensor test Fine camera mirror and illuminator positioning More than 15 min passed from camera switching on No Yes Parallelism check Camera ready for the fi...

Page 42: ...hysical OE LED on the camera back panel Whichever speed sensor is used you can read the current speed on the Sensors Speed sensor page of the test tool Please notice that the Digital I O page shows the status of the physical input while the Sensors Speed sensor page shows the status of the logical sensor In case of activity on the physical input and bad speed measurement check the speed sensor par...

Page 43: ...see the laser pointer spots on the conveyor If the application uses the EMK 400 o EMK 800 external mirrors move the camera so that the spots hit the mirror as close as possible to the horizontal center line see Figure 26 Figure 26 Camera View Line The laser pointers show the camera view line reflected onto the conveyor or the conveyor side by the external mirror In this way it is possible to posit...

Page 44: ...r 93ACC1370 at the maximum distance in front of the camera that will use the illuminator 2 connect Genius and run the Oscilloscope tool see par 4 3 1 3 switch the illuminator on and switch all the other illuminators off 4 loosen the illuminator adjusting screws 5 position the illuminators until the maximum white level is obtained along the view line as indicated in the oscilloscope window see Figu...

Page 45: ...f this height CAUTION Be sure that the focusing target is perfectly horizontal vertical Click the Next button to continue At this point the Oscilloscope window appears Make sure you see the target in the oscilloscope window If the target does not cover the complete view line select the target area using the two cursors Click the Exit icon in the upper right of the oscilloscope window and wait for ...

Page 46: ...adjustment In case of failure of the parallelism check 1 using laser pointers check the vertical and horizontal position of the view line on the mirror and or on the conveyor 2 if used also verify that the external mirror is perfectly orthogonal to the camera and parallel to the conveyor 3 sometimes the precision of positioning with laser pointers may be insufficient rotate the camera with small m...

Page 47: ...the target along the view line at the indicated height until you see that the target in the oscilloscope window is like Figure 29 Figure 29 Light Profile Equalization The image must be as uniform as possible and clean Check that the target is perfectly clean and covers the entire View Line If it is not possible to cover the entire view line with the target for side cameras this is a standard situa...

Page 48: ...ocus setup for a Top Reading camera station For side reading cameras it is the same considering height the distance from the conveyor border opposite to the camera The autofocus setup procedure checks the focus value and the sensitivity to be set at different reference heights An easy way to do this is to place the target on a platform that can be moved up and down with the required step Datalogic...

Page 49: ...ut modifying the autofocus settings uncheck the Set Autofocus table checkbox If you choose to build only the sensitivity table you can use both the autofocus target 93ACC1360 or the white reference chart 93ACC1370 2 Click the Next button to continue At this point the Oscilloscope window appears Position the target along the View Line at the indicated height until you see that the target in the osc...

Page 50: ...anual CAUTION The precision of this procedure increases as the conveyor speed decreases If the conveyor speed can t be reduced run many packages and get an average of each measurement 1 If the Optics Camera position includes FRONT or BACK change this parameter to the nearest position between LEFT RIGHT TOP or BOTTOM without front back 2 Set Acquisition Start margin and Acquisition Stop margin to 0...

Page 51: ...igger source Distance and Sensors Position sensor Distance by the same quantity Repeat this step until the package and the two lines are perfectly aligned 8 Acquire one or more packages at the minimum distance height almost equal to DOF or justified on the camera conveyor side Look at the red and white lines showing the start and stop of the acquisition as detected by the camera trigger If the two...

Page 52: ...ned in the CD For further information check the README TXT file in the root directory of the CD 4 1 2 Genius Startup In order to setup the camera you should connect either the camera COM1 or COM2 serial port to a PC or laptop computer NOTE COM1 serial port can be redirected by software on the CameraLink interface In this case COM1 connector is isolated Use COM2 when you are not sure of the camera ...

Page 53: ...h the camera on after a few seconds the camera should start the bootstrap procedure and the Not Ready LED on the camera should switch off 5 Click on the Get icon or select the Get command from the Device menu to connect to the camera Figure 35 Genius Get Configuration ...

Page 54: ...yed on the terminal or an error pop up appears check the cables and the Not Ready LED After connection the System Information window is closed and the Parameters Explorer window appears Figure 37 Genius Parameters Explorer This window allows the editing of all the device configuration parameters MIB described in the following paragraphs ...

Page 55: ...s an icon to run Genius in USER mode For more details about Genius refer to the Genius Help on line 4 1 3 How to Save the Modified Parameters To save the modified parameters choose one of the following options Click on the icon Send Configuration on the Genius Tool Bar or select Send from the Device Menu The following window will open Figure 38 Send Options window If you select Send permanently th...

Page 56: ...lows defining the operating mode of the camera The operating mode of the camera must be selected according to the application type or the position of the camera You can select one of the following operating modes D Power You can select this operating mode when the camera is connected with a DC9500 This is the normal operating mode of a camera in a multisided reading system The DC9500 directly cont...

Page 57: ... operating in a Master Slave mode receives speed and trigger information through a serial connection from a Master camera 4 2 2 Optical Setup This folder groups the configuration parameters used to define the optical characteristics of the camera Figure 40 Parameters Explorer Optical Setup Pixel Type This parameter defines the form of the pixels in the video image supplied by the camera by definin...

Page 58: ...Appendix A for further details View Angle deg This parameter allows defining the reading angle of the camera For Top Reading this angle is set to 15 degrees while for Side Reading it can be either 15 45 degrees depending on the type of installation Refer to Appendix A for further details Camera Position This parameter allows defining the installation position of the camera in multisided tunnel ins...

Page 59: ...rrect decoding Digital Gain 1 acts on Look up table 0 LUT0 while Digital Gain 2 acts on Look up table 1 LUT1 Digital Offset 1 Digital Offset 2 These values are added to the gray level of each acquired pixel The possible values are from 100 to 100 The default value is 0 but it can be increased to reduce the image contrast or decreased to increase the image contrast Digital Offset 1 acts on LUT0 whi...

Page 60: ...p procedure Profile 0 usually this parameter is set to DOF 4 For more details refer to the Equalization Tools Light Profile setup procedure in par 4 2 3 Look Up Table 1 Setup Height mm This parameter indicates the test height used to build LUT1 During the Light Profile setup procedure Profile 1 this parameter is usually set to DOF 4 For more details refer to the Equalization Tools Light Profile se...

Page 61: ...t 45 this parameter is not available since follow mode is always selected Default Position When the autofocus mode Don t use is selected the autofocus engine is set at the value indicated by this parameter The autofocus will remain fix in this position even if the package values indicated by the barriers are different Focus Correction Depth mm This parameter has been studied to reluctantly set the...

Page 62: ...e focus zero point Focus correction Depth mm parameter is set as the quote returned by the Height sensor when the tray is in front of them Height sensor offset is always set as positive Percentage of TrayDepth to set Af parameter is set as 50 Third case Height sensor zero reference lower than the focus zero point Focus correction Depth mm parameter is set as the quote returned by the Height sensor...

Page 63: ... Decoder and the end of the package The default value is 0 which means that the acquisition stops when the package ends If the value is positive the acquisition end is delayed See also Image Marker in this paragraph Image Marker By enabling this parameter the margins of start and stop of the acquisition will be marked in the image The images coming from cameras reading only one side of the package...

Page 64: ...the settings relative to the position sensor are stored Visible only in D Power Pass Through Single Camera Master Camera Slave Camera operating modes Position Sensor Input This parameter allows selecting the position sensor input If the position sensor is directly connected to the camera through the serial cable select Camera If the information from the position sensor to the camera comes through ...

Page 65: ...er allows selecting the trigger source If the trigger is directly connected to the camera through the serial cable select Camera If the information from the trigger sensor to the camera comes through the PC Decoder select Decoder see Master Slave configuration par 2 6 3 Type This parameter allows selecting the trigger sensor type Height Sensor Distance sensor or Presence Sensor SPEED SENSOR In thi...

Page 66: ...on parameters regarding the illuminators To control the illuminators it is necessary to provide a serial daisy chain connection between the camera and the illuminators Figure 45 Parameters Explorer Illumination Illuminator Chain Length This parameter indicates how many illuminators are connected together in the serial daisy chain configuration CAUTION The illuminator LS 701 is considered as two il...

Page 67: ...ly Illuminator 1 2 6 These sections contain parameters relative to each specific illuminator Power This parameter indicates the illuminating power It is possible to regulate the power between 50 and 100 Description This string appears as a description of the specific illuminator in all setup and supervision tools It usually describes the position of the illuminator on the multi sided reading stati...

Page 68: ...ormation about Hw Sw features of the system They are visible in the main toolbar View SystemInfo Figure 46 SystemInfo window Parameter Description Add OnPrograms Genius Add On programs used for DV9500 Device Information Name and serial number of the device Device Components Reading station controller program Device Package Device package name Hardware List List of the optional boards used Ethernet...

Page 69: ...oscope icon the following window will be opened Figure 47 Oscilloscope Window 5 1 1 DLOscilloscope Tool Bar ICON MEANING Start Acquisition Zoom In allows zooming the window to visualize a part of the view line Zoom Out allows extending the window to visualize all the view line ...

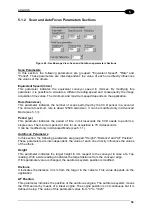
Page 70: ...ble to modify all the visible values Exit allows exiting from the Oscilloscope Tool At the center of the window what is currently acquired by the camera CCD sensor will be visualized The example shows the target reproducing the barcode for the autofocus system setup procedure The image is made up of the 6144 pixels from the CCD sensor horizontally and by the light level for each pixel a value betw...

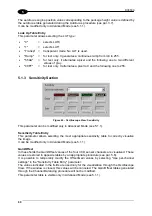
Page 71: ...indicates the period of time in microseconds the CCD needs to perform a single scan The minimum period of time for an acquisition is 79 microseconds It can be modified only in Advanced Mode see 5 1 1 Autofocus Parameters In this section the following parameters are grouped Height Distance and AF Position These parameters are inter dependent the value of each one directly influences the values of t...

Page 72: ... parameter can be modified only in Advanced Mode see 5 1 1 Sensitivity Table Entry This parameter allows selecting the most appropriate sensitivity table to correctly visualize the image It can be modified only in Advanced Mode see 5 1 1 Gain Offset In these fields the Gain Offset values of the four CCD sensor channels are visualized These values are stored in apposite tables by an appropriate pro...

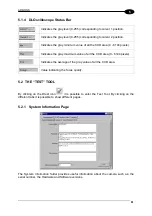
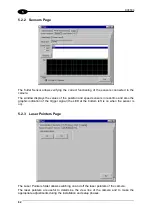
Page 73: ...aximum value of all the CCD area 0 6144 pixels Indicates the average of the gray value of all the CCD area Value indicating the focus quality 5 2 THE TEST TOOL By clicking on the Dtest icon it is possible to enter the Test Tool By clicking on the different tabs it is possible to show different pages 5 2 1 System Information Page The System Information folder provides useful information about the c...

Page 74: ...sors in real time and also the graphic indication of the trigger signal the LED at the bottom left is on when the sensor is on 5 2 3 Laser Pointers Page The Laser Pointers folder allows switching on and off the laser pointers of the camera The laser pointers are useful to determine the view line of the camera and to make the appropriate adjustments during the installation and setup phases ...

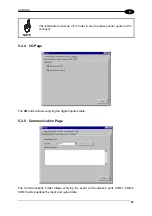
Page 75: ...he laser pointer spots on the conveyor 5 2 4 I O Page The I O folder allows verifying the digital inputs status 5 2 5 Communication Page The Communication Folder allows verifying the serial communication ports COM1 COM2 COM3 and visualizes the input and output data ...

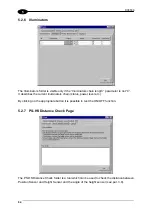
Page 76: ...the current illuminators chain status power level etc By clicking on the appropriate button it is possible to test the ON OFF function 5 2 7 PS HS Distance Check Page The PS HS Distance Check folder is a tool which can be used to check the distance between Position Sensor and Height Sensor and the angle of the height sensor see par 3 8 ...

Page 77: ...ADD ONS 65 5 5 2 8 Logging Page The Logging Folder provides a chronological report of the latest most significant system events reset malfunctioning etc ...

Page 78: ...camera to verify the parallelism between the camera and the conveyor In case an external mirror is used this procedure also verifies the mirror alignment To perform the parallelism check procedure click on the Parallelism Check icon from the Genius toolbar and follow the steps given For a complete description of this procedure see par 3 5 5 5 THE LIGHT PROFILE EQUALIZATION WIZARD The camera has tw...

Page 79: ...llow the camera to warm up for at least 15 minutes before performing this procedure If the storage temperature of the camera is different from the working one this time has to be increased Place the Channel Balancing Chart 93ACC1380 in front of the camera at the distance with the lowest illumination usually maximum distance Click the Next button to continue At this point the Oscilloscope window ap...

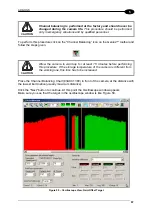
Page 80: ...nment lights in particular neon lights can disturb the measurement increasing computing time and decreasing the precision Artificial environment lightning should be minimized during this procedure 5 7 THE INTERPIXEL EQUALIZATION WIZARD CAUTION Interpixel equalization is performed at the factory and should never be changed during the camera life This procedure should be performed only in emergency ...

Page 81: ...lean the target with a soft cloth and alcohol or substitute it High resolution cameras are the most sensitive While for low resolution cameras any uniform white paper plastic stripe can be used as a target for these kind of cameras the standard reference target is recommended Click the Next button to continue The Oscilloscope window reappears Verify that the image is as uniform as possible As prom...

Page 82: ...p and offset These values will then be sent to the device and saved for the correct functioning of the system The first window of the calibration procedure allows selecting the sensor to be calibrated The automatic calibration can be performed only on the laser sensors Figure 52 DSSetup Opening Window The following figure shows the last window of the calibration procedure with the computed step an...

Page 83: ... Kbit s opto isolated RS485 full duplex opto isolated Digital Inputs NPN or PNP Presence sensor open collector opto isolated input NPN or PNP Optical encoder opto isolated input Video Output Camera Link standard or LVDS 16 32 bit INDICATORS GENERAL COMMUNICATION POWER MAIN POWER FAIL COM1 NOT READY COM2 OFF LINE FRAME VALID ENCODER PRESENCE SENSOR LEDs USER DEF ENVIRONMENTAL FEATURES Operating tem...

Page 84: ...ement Reference Diagram Some examples of applications Model type Barcode dimension A mm B mm C DOF mm H mm Maximum Conveyor Speed m s DV9500 1400 50 mm AF 0 38 726 1373 750 1590 2 8 DV9500 1300 85 mm AF 0 38 916 1373 900 2700 2 8 DV9500 1300 85 mm AF 0 30 706 1084 750 2150 2 3 DV9500 1200 105 mm AF 0 38 962 1373 1000 3340 2 8 DV9500 1200 105 mm AF 0 30 758 1084 800 2650 2 3 DV9500 1000 192 mm AF 0...

Page 85: ... B W CL A Figure 55 Side Reading station Measurement Reference Diagram Some examples of applications Model type Barcode dimension A mm B mm W mm CL mm Maximum Conveyor Speed m s DV9500 1400 50 mm AF 0 38 524 876 600 450 2 5 DV9500 1300 85 mm AF 0 38 676 952 800 977 2 5 DV9500 1200 105 mm AF 0 38 669 949 1000 1196 2 5 DV9500 1200 105 mm AF 0 30 610 790 650 1099 2 1 ...

Page 86: ... VDC 93A401005 LS 701 LED LIGHTING SYS DOF 1 24 VDC Accessories Order number Description 93A051269 CAB 9305 VIDEO CAB CLINK 5 m 93A051270 CAB 9310 VIDEO CAB CLINK 10 m 93A051271 CAB 6010 CABLE NEW 6000 TO C BOX100 10M 93A051272 CAB X05 25P CONN 5 m EXT 93A051273 CAB X10 25P CONN 10 m EXT 93A201104 EMK 400 EXT MIRROR 400 mm 93A201105 EMK 800 EXT MIRROR 800 mm 93ACC1740 CRD 01 MOUNTING CRADLE LS 701...

Page 87: ...CH 3 CHANNEL BAL CHART 800 MM 10 PCS 93ACC1733 DK 500 DISTANCE KIT RS485 CABLE 5 M 93ACC1580 LCC 9006 LIGHT CURTAIN 640 MM CABLE 10 M 93ACC1590 LCC 9010 LIGHT CURTAIN 1000 MM CAB 10 M 93ACC1727 MEP 542 PHOTOCELL KIT PNP 93ACC1728 MEP 543 PHOTOCELL KIT NPN 93ACC1600 OEK 1 OPTICAL ENCODER KIT CABLE 10M 93ACC1530 PWR 120 JBOX POWER UNIT 110 230VAC 24V 93ACC1070 PWR 240 JBOX P0WER UNIT 110 230VAC 24V ...

Page 88: ...DSSetup 70 Dynamic Gain Equalization 47 Dynamic Offset Equalization 47 E Electrical Connections 22 Enable 53 Equalization 47 Equivalent Speed 59 External Mirror Mounting 15 F Focus Correction Depth 49 Focus position 3 G Gain Offset 60 General View vi Genius Configuration Program 40 Genius Startup 40 Guide to Installation x H Height 59 Height Barrier Configuration 18 Height Side Position Sensor 2 I...

Page 89: ...sition Parameters Fine Tuning 38 Position Sensor Angle 53 Position Sensor Input 52 Position Sensor Threshold 52 Power 55 Protocol 55 PS HS Distance Check Page 64 R Rate 59 Reference Documentation v S Scan and AutoFocus Parameters Sections 59 Scan Parameters 59 Sensitivity Section 60 Sensitivity Table 48 Sensitivity Table Entry 60 Sensors 52 Sensors Check 30 Sensors Page 62 Setup Black 48 Setup Tem...

Page 90: ...ic compatibility and product safety Basée sur la législation des Etats membres relative à la compatibilité électromagnétique et à la sécurité des produits Über die Annäherung der Gesetze der Mitgliedsstaaten in bezug auf elektromagnetische Verträglichkeit und Produktsicherheit entsprechen Basado en la aproximación de las leyes de los Países Miembros respecto a la compatibilidad electromagnética y ...

Reviews: