DV9500
68
5
The target must be centered in the view line.
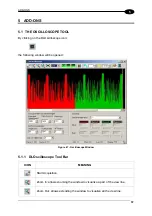
A simple way to see the center of the line is to enable the “Colored view” by clicking the
button on the oscilloscope tool bar.
To obtain a good balancing it is important to have a flat illumination on the central white
band. If this is not possible at the selected target distance, change it.
Position the cursors at the center of the black bands as shown in figure 39.
Click the "Exit" icon in the upper right of the oscilloscope window and wait for the procedure
to automatically determine the Gain/Offset values.
During the measurement period be careful not to move the camera or change the
illumination.
In some cases low frequency environment lights (in particular neon lights) can disturb the
measurement increasing computing time and decreasing the precision.
Artificial environment lightning should be minimized during this procedure.
5.7 THE “INTERPIXEL EQUALIZATION” WIZARD
CAUTION
Interpixel equalization is performed at the factory and should never
be changed during the camera life.
This procedure should be
performed only in emergency situations and by qualified personnel.
Pixel-by-pixel equalization should be made only after performing Channel Balancing (see
par. 5.6) and the Autofocus Procedure (see par. 3.7).
To perform this procedure click on the “Interpixel Equalization” icon on the Genius™ toolbar
and follow the steps given.
Completely cover the camera reading window by positioning an opaque object (like a piece
of cardboard) in front of the lens in order to simulate a perfectly black target.
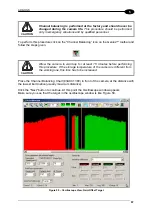
The image appears as in Figure 51:
Summary of Contents for DV9500 Series
Page 1: ...DV9500 Installation Manual ...
Page 2: ......

