DATA DISPLAY GROUP
Manual
4
System Requirements
To use ArtistaMEDIA you need the following equipment:
Standard PC with Windows XP, Vista or Windows 7 and with USB and Ethernet interface for
configuration of the ArtistaMEDIA board and content updates
Web browser (e.g. Internet Explorer) for configuration of the ArtistaMEDIA board
ArtistaControlCenter (ACC) software installed on the Windows PC for playlist creation and
content updates via USB flash drive or over network
Optional: FTP server for automatic content updates over network
5
Getting Started
5.1
Network Configuration of ArtistaMEDIA via Web Frontend
To change the configuration of the ArtistaMEDIA board, perform firmware updates or get some
system information, a Web Frontend is available. To get access to it with a standard Web Browser
within your local area network (LAN) installation, you have to setup the network configuration of
ArtistaMEDIA properly. The network interface of ArtistaMEDIA can be configured dynamically by
using a DHCP server or statically by the system administrator. Every single ArtistaMEDIA board
must be configured before it can be installed into your LAN infrastructure.
To configure the network settings of ArtistaMEDIA the first time, you have to execute the following
steps:
Ask your network administrator if ArtistaMEDIA should be configured to DHCP or to a static
IP address
If static configuration should be used, ask for the IP address which can be assigned to the
ArtistaMEDIA board for use within your LAN
Connect ArtistaMEDIA directly to your PC using a cross-link Ethernet cable or an Ethernet
Switch and two Patch Cables
Power up ArtistaMEDIA
Configure your PC to a static IP address within the subnet 192.168.0 (e.g. 192.168.0.100)
Start the Web Browser and enter the address
http://192.168.0.1
A logon dialog will appear. Enter “
Artista
” for both, user name and password
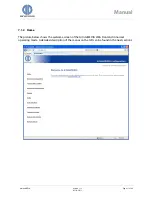
The main menu of the ArtistaMEDIA Web Frontend will appear
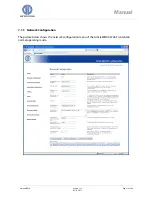
Select the entry “
Network Configuration
”
For dynamic network configuration enable the check-box “
Use DHCP
”. For static network
configuration, enter the new IP address into the field “
ArtistaMEDIA IP Address
”
Also adjust the other entries according to your requirements, press the button “
Submit
Configuration
” and wait until ArtistaMEDIA saved all settings
Disconnect ArtistaMEDIA from power supply, connect it to your LAN and power up the
board again
Now you can access the Web Frontend of ArtistaMEDIA for further configuration from any
PC within the same subnet with a standard Web Browser (for different subnets a Gateway is
required in the network)
ArtistaMEDIA
Version 1.12
05.10.2011
Page 5 of 49

