DSL-6740U
VDSL/Ethernet Router with Wi-Fi
and Built-in Switch
User Manual
Configuring via Web-based Interface
Additional Settings
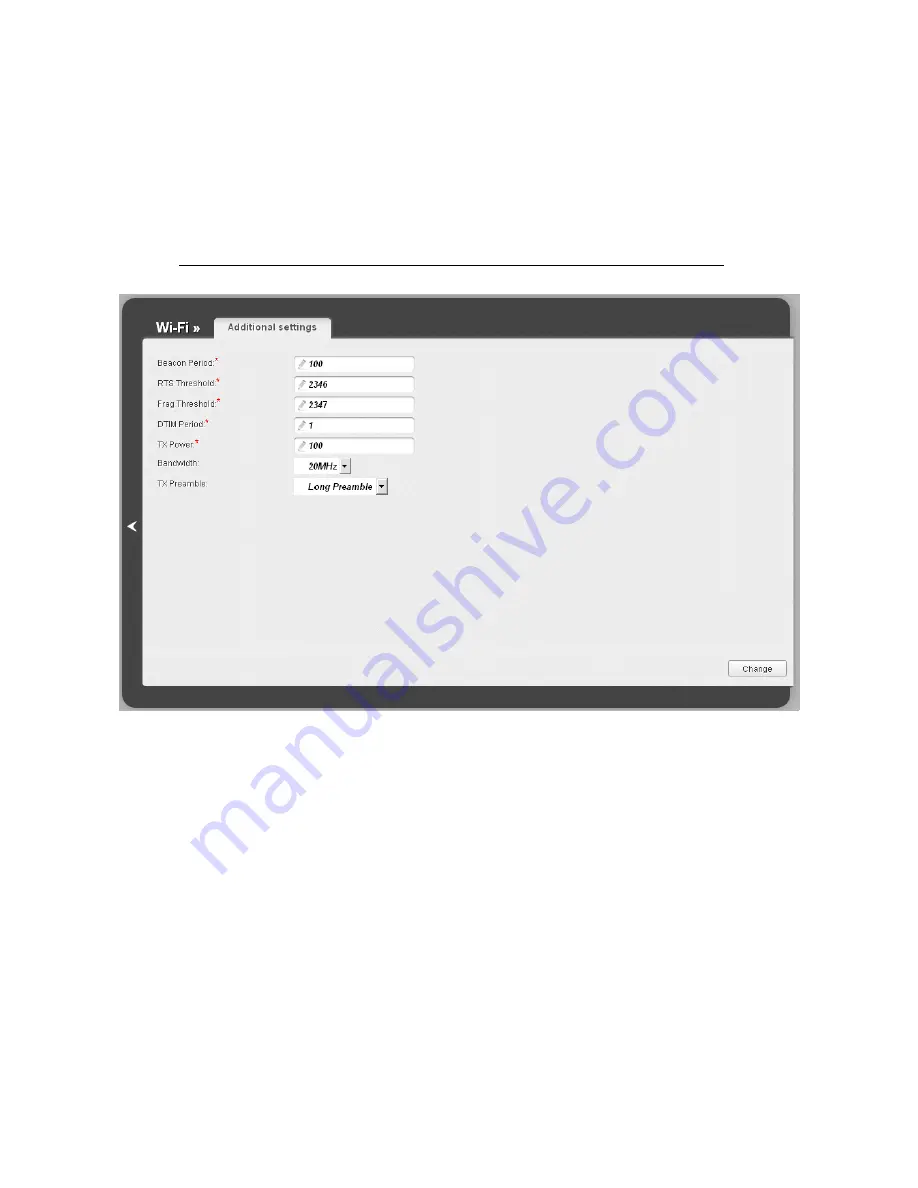
On the
Wi-Fi / Additional settings
page, you can define additional parameters for the router's
WLAN.
!
Changing parameters presented on this page may negatively affect your WLAN!
Figure 82. Additional settings of the WLAN.
Page
109
of 158