background image


192 

Server Address: 

Enter the specific IP address of the File Server. 


User Name: 

Enter the specific username to access the File Server. 


Password: 

Enter the specific password to access the File Server. 

 
File Location: 

Enter the specific path and filename within the File Server. 

 
Click 

OK

  to  start  the  download  process  and  receive  files  from  the  server.  A  transmitting 

progress  will  be  displayed  during  file  transfer.  Once  completed,  a  process-completed 
message will pop up to remind the user. 
 
Click 

Put

 to start the upload process and transmit files to the server. A transmitting progress 

will  be  displayed  during  file  transfer.  Once  completed,  a  process-completed  message  will 
pop up to remind users. 
 
Click 

Stop

 to abort the current operation. 

 
Select 

Update

  then  press 

Enter

  to  instruct  the  Managed  Switch  to  update  existing 

firmware/configuration  to  the  latest  firmware/configuration  received.  After  a  successful 
update,  a  message  will  pop  up.  The  Managed  Switch  will  need  a  reset  to  make  changes 
effective.  


4.6.3 Load Factory Settings 

Load  Factory  Setting 

will  set  all  the  configurations  of  the  Managed  Switch  back  to  the 

factory  default  settings,  including  the  IP  and  Gateway  address. 

Load  Factory  Setting 

is 

useful when network administrators would like to re-configure the system. A system reset is 
required to make all changes effective after Load Factory Setting.  
 
Select 

Load  Factory  Setting 

from the 

System  Utility 

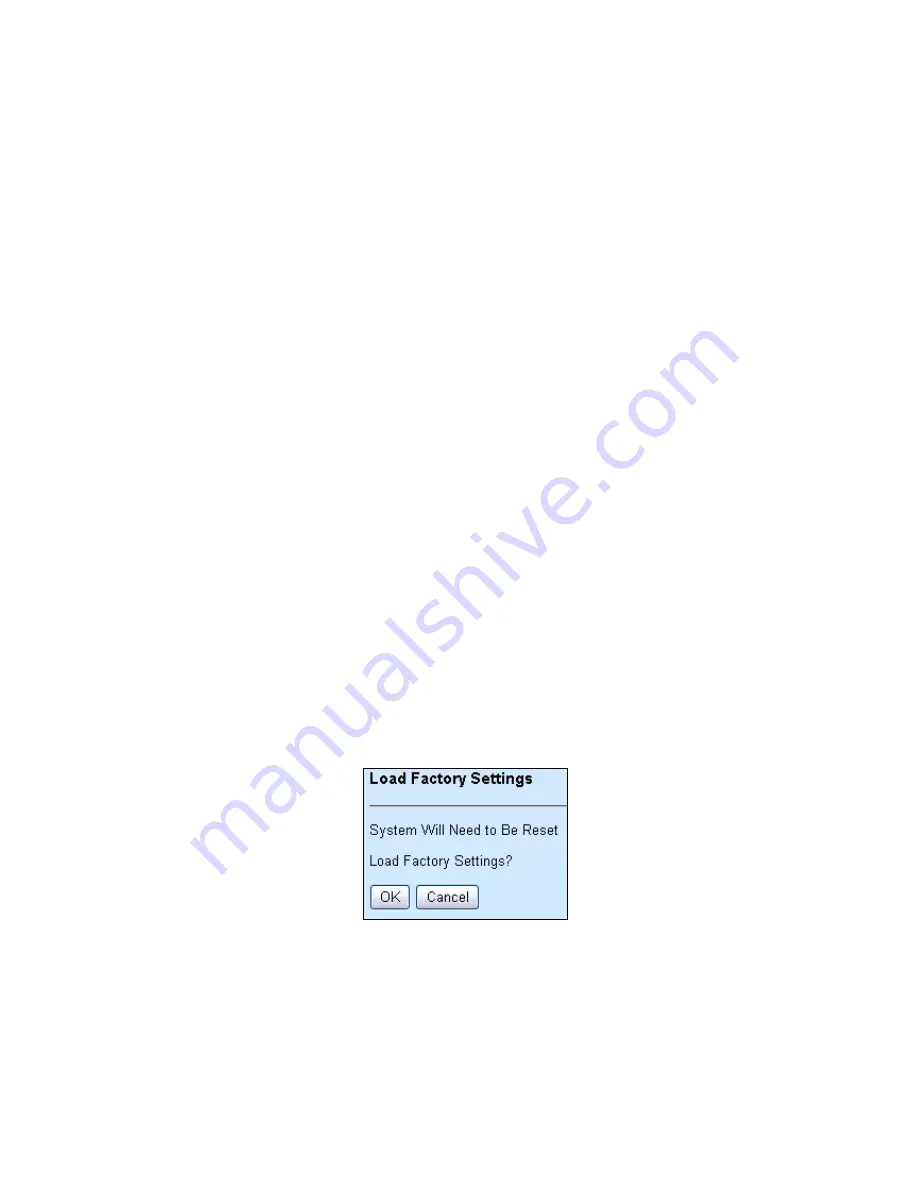
menu and then the following screen 

page appears. 


Click 

OK

 to start loading factory settings. 


Summary of Contents for FOS-3124 SERIES

Page 1: ...1 FOS 3124 SERIES 20 PORTS 100 1000BASE X SFP WITH 4 COMBO PORTS 10 100 1000BASE T 100 1000BASE X SFP UPLINK MANAGED SWITCH Network Management User s Manual Version 1 0 ...

Page 2: ...es cause harmful interference to radio or television reception which can be determined by turning the equipment off and on the user is encouraged to try to correct the interference by one or more of the following measures Reorient or relocate the receiving antenna Increase the separation between the equipment and receiver Connect the equipment into an outlet on a circuit different from that to whi...

Page 3: ...nd Format 17 2 3 4 Login Username Password 18 2 4 User Mode 19 2 4 1 Ping Command 19 2 5 Privileged Mode 20 2 5 1 Copy cfg Command 20 2 5 2 Firmware Command 21 2 5 3 Ping Command 22 2 5 4 Reload Command 22 2 5 5 Write Command 22 2 5 6 Configure Command 22 2 6 Configuration Mode 23 2 6 1 Entering Interface Numbers 23 2 6 2 No Command 24 2 6 3 Show Command 24 2 6 4 Interface Command 26 2 6 5 ACL Com...

Page 4: ...6 2 6 26 Show interface statistics Command 88 2 6 27 Show sfp Command 89 2 6 28 Show default setting running config and start up config Command 89 3 SNMP NETWORK MANAGEMENT 90 4 WEB MANAGEMENT 91 4 1 System Information 93 4 2 User Authentication 94 4 2 1 RADIUS Configuration 96 4 3 Network Management 97 4 3 1 Network Configuration 98 4 3 2 System Service Configuration 99 4 3 3 RS232 Telnet Console...

Page 5: ...4 5 3 Configure Port Reauthenticate 120 4 4 6 MAC Address Management 121 4 4 6 1 MAC Table Learning 121 4 4 6 2 Static MAC Table Configuration 122 4 4 7 VLAN Configuration 123 4 4 7 1 Port Based VLAN 123 4 4 7 2 802 1Q VLAN Concept 124 4 4 7 3 Introduction to Q in Q 126 4 4 7 4 802 1Q VLAN 128 4 4 7 4 1 Configure VLAN 128 4 4 7 4 2 VLAN Interface 129 4 4 7 4 3 Management VLAN 130 4 4 8 QoS Configu...

Page 6: ...ol 157 4 4 14 7 Anti Broadcast Configuration 158 4 4 15 Access Control List Management ACLM 159 4 4 16 LLDP Configuration 169 4 4 17 Loop Detection Configuration 170 4 5 Switch Monitor 171 4 5 1 Switch Port State 172 4 5 2 Port Traffic Statistics 173 4 5 3 Port Packet Error 174 4 5 4 Port Packet Analysis Statistics 175 4 5 5 LACP Monitor 176 4 5 5 1 LACP Port Status 176 4 5 5 2 LACP Statistics 177...

Page 7: ...5 12 LLDP Status 188 4 5 13 Loop Detection Status 189 4 6 System Utility 190 4 6 1 Event Log 191 4 6 2 Upgrade 191 4 6 3 Load Factory Settings 192 4 6 4 Load Factory Settings Except Network Configuration 193 4 6 5 Backup Configuration 193 4 7 Save Configuration 194 4 8 Reset System 194 APPENDIX A Free RADIUS readme 195 APPENDIX B Set Up DHCP Auto Provisioning 196 APPENDIX C VLAN Application Note 2...

Page 8: ...ent 1 1 Interface There are 5 models in this series Descriptions and interface figures are provided below Model 1 20 Ports 100 1000BASE X SFP With 4 Combo Ports 10 100 1000BASE T 100 1000BASE X SFP Uplink Management Switch Fixed 1 AC Model 2 20 Ports 100 1000BASE X SFP With 4 Combo Ports 10 100 1000BASE T 100 1000BASE X SFP Uplink Management Switch Fixed 2 Reduandant AC Model 3 20 Ports 100 1000BA...

Page 9: ...nsole Management is done through the RS 232 DB 9 Console port located on the rear panel of the Managed Switch Direct RS 232 cable connection between the PC and the Managed switch is required for this type of management Telnet Management Telnet runs over TCP IP and allows you to establish a management session through the network Once the Managed switch is on the network with proper IP configuration...

Page 10: ...e of the Managed Switch to set up the needed IP can be done through one of the 10 100Base TX 8 pin RJ 45 ports located at the front panel of the Managed Switch Direct RJ 45 LAN cable connection between a PC and the Managed Switch is required for Web Management 1 3 Management Software Following is a list of management software options provided by this Managed Switch Managed Switch CLI interface SNM...

Page 11: ...ment system 1 4 Management Preparations After you have decided how to manage your Managed Switch you are required to connect cables properly determine the Managed switch IP address and in some cases install MIB shipped with your Managed Switch Connecting the Managed switch It is very important that the proper cables with the correct pin arrangement are used when connecting the Managed switch to ot...

Page 12: ...ed for local out of band management This DB 9 port is DTE therefore a null modem is required to connect the Managed Switch and the PC With a connection through RJ 45 DB 9 port users can configure and check the Managed Switch even when the network is down IP Addresses IP addresses have the format n n n n The default factory setting is 192 168 0 1 IP addresses are made up of two parts The first part...

Page 13: ...ed MIB for Network Management Systems Private MIB Management Information Bases is provided for managing the Managed Switch through the SNMP based network management system You must install the private MIB into your SNMP based network management system first The MIB file is shipped together with the Managed Switch The file name extension is mib that allows SNMP based compiler can read and compile ...

Page 14: ...network is down and the switch cannot be reached by any other means You also need the Local Console Management to setup the Switch network configuration for the first time You can setup the IP address and change the default configuration to the desired settings to enable Telnet or SNMP services Follow these steps to begin a management session using Local Console Management Step 1 Attach the serial...

Page 15: ...uthorized username and password and then you will be directed to User mode In CLI management the User mode only provides users with basic functions to operate the Managed Switch If you would like to configure advanced features of the Managed Switch such as VLAN QoS Rate limit control you must enter the Configuration Mode The following table provides an overview of modes available in this Managed S...

Page 16: ... perform several functions The following table summarizes the most frequently used quick keys in CLI Keys Purpose tab Enter an unfinished command and press Tab key to complete the command Press key in each mode to get available commands Unfinished command followed by Enter an unfinished command or keyword and press key to complete the command and get command syntax help Example List all available ...

Page 17: ...eged Mode config Currently the device is in Global Configuration Mode Syntax Brief Description Brackets represent that this is a required field s size r repeat t timeout These three parameters are used in ping command and are optional which means that you can ignore these three parameters if they are unnecessary when executing ping command A B C D Brackets represent that this is a required field E...

Page 18: ...tion For first time users enter the default login username admin and press Enter key in password field no password is required for default setting When system prompt shows Switch it means that the user has successfully entered the User Mode For security reasons it is strongly recommended that you add a new login username and password using User command in Configuration Mode When you create your ow...

Page 19: ...mpt display Switch Command Description exit Quit the User Mode or close the terminal connection help Display a list of available commands in User Mode history Display the command history logout Logout from the Managed Switch ping Test whether a specified network device or host is reachable or not enable Enter the Privileged Mode 2 4 1 Ping Command Ping is used to test the connectivity of end devic...

Page 20: ... current setting of each listed command 2 5 1 Copy cfg Command Use copy cfg command to backup a configuration file via FTP or TFTP server and restore the Managed Switch back to the defaults or to the defaults but keep IP configurations 1 Restore a configuration file via FTP or TFTP server Command Parameter Description Switch copy cfg from ftp A B C D file name user_name password A B C D Enter the ...

Page 21: ... but keep IP configurations Command Example Switch copy cfg from default keep ip 2 5 2 Firmware Command To upgrade Firmware via TFTP or FTP server Command Parameter Description Switch firmware upgrade ftp A B C D file_name user_name password A B C D Enter the IP address of your FTP server file name Enter the firmware file name that you want to upgrade user_name Enter the username for FTP server lo...

Page 22: ...128 r 5 t 10 2 5 4 Reload Command To restart the Managed Switch enter the reload command Command Example Switch reload 2 5 5 Write Command To save running configurations to startup configurations enter the write command All unsaved configurations will be lost when you restart the Managed Switch Command Example Switch write 2 5 6 Configure Command The only place where you can enter Global Configura...

Page 23: ...p required configurations for Network Time Protocol qos Set up the priority of packets within the Managed Switch security Configure broadcast multicast unknown unicast storm control settings snmp server Create a new SNMP community and trap destination and specify the trap types spanning tree Set up RSTP status of each port and aggregated ports switch Set up acceptable frame size and address learni...

Page 24: ...n be negated using no command followed by the original or similar command The purpose of no command is to disable a function remove a command or set the setting back to the default value In each sub section below the use of no command to fulfill different purposes will be introduced 2 6 3 Show Command The show command is very important for network administrators to get information about the device...

Page 25: ...ain board version Serial Number Display the serial number of this Managed Switch Date Code Display the Managed Switch Firmware date code Up Time Display how long the device has booted up Local Time Display the local time of the location where the device is CPU Temperature Display CPU s current temperature PHY1 2 3 Temperature Display the current temperature of each PHY Case Fan1 2 Display the stat...

Page 26: ...trol Enable the selected interfaces flow control function Switch config if PORT PORT description description description Specify a descriptive name for the selected interfaces Switch config if PORT PORT media type sfp sfp Set the selected interfaces type to fiber Switch config if PORT PORT shutdown Administratively disable the selected ports status No command Switch config interface port_list port...

Page 27: ...if 1 3 duplex full Set the selected interfaces to full duplex mode Switch config if 1 3 flowcontrol Enable the selected interfaces flow control function Switch config if 1 3 speed 1000 Set the selected ports speed to 1000Mbps Switch config if 1 3 media type sfp Set the selected ports media type to fiber Switch config if 1 3 shutdown Administratively disable the selected ports status 2 6 5 ACL Comm...

Page 28: ...heck ip Ethernet source_mac Define source MAC address any Specify any to apply ACL rule to any source MAC addresses xx xx xx xx xx xx Specify the specific source MAC address mac_mask Specify MAC mask any Specify any mean any MAC mask ff ff ff 00 00 00 Specify a specific MAC mask dest_mac Define the destination MAC filtering type any Specify any to filter any kind of traffic uc Specify uc to filter...

Page 29: ...o mean any IP mask 255 255 0 0 Specify a specific IP mask dest_ip This is destination IP filtering function any Specify any to filter frames to any destination IP addresses x x x x Specify either a host IP address or a network address ip_mask Define destination IP mask any Specify any to mean any IP mask 255 255 0 0 Specify a specific IP mask arp_smac_match This is to configure whether ARP source ...

Page 30: ...1 Specify 1 to indicate that HLN Hardware Address Length field in the ARP RARP frame is equal to Ethernet 0x6 and the Protocol Address Length field is equal to IPv4 0x4 ip any Specify any to indicate a match and not a match 0 Specify 0 to indicate that Protocol Address Space field in ARP RARP frame is not equal to IP 0x800 1 Specify 1 to indicate that Protocol Address Space is equal to IP 0x800 Et...

Page 31: ... dest_mac Define destination MAC address type or a specific MAC address any Specify any to apply ACL rule to any destination MAC addresses uc Specify uc to apply ACL rule to unicast traffic mc Specify mc to apply ACL rule to multicast traffic bc Specify bc to apply ACL rule to broadcast traffic xx xx xx xx xx xx Enter the specific destination MAC address mac_mask Specify MAC mask any Specify any m...

Page 32: ...to filter any types 0 255 Specify 0 255 to filter different defined types icmp_code This parameter is to show and filter the ICMP code defined in the code field of the ICMP header any Specify any to filter any codes 0 255 Specify 0 255 to filter different defined codes source_ip This is sender IP filtering function Specify any to filter frames from any sender IP addresses Or specify either a host ...

Page 33: ... IPv4 header is 0 1 If the value in TTL field is not 0 use 1 to indicate that ip_option Specify IP option bit any Specify any to denote the value which is either 0 or not 0 0 Specify 0 to indicate that the IPv4 is 5 bytes 1 Specify 1 to indicate that the IPv4 header is bigger than 5 bytes Switch config acl RULE frame type ipv4 dest_mac protocol_id source_ip ip_mask dest_ip ip_mask ip_ttl ip_fragme...

Page 34: ...This is destiantion IP filtering function any Specify any to filter frames to any target IP addresses x x x x Specify a host IP ip_mask Define destination IP mask any Specify any to mean any IP mask 255 255 0 0 Specify a specific IP mask ip_ttl Specify IP TTL bit any Specify any to denote the value which is either zero or not zero 0 Specify 0 to indicate that the TTL filed in IPv4 header is 0 1 If...

Page 35: ...mc to apply ACL rule to multicast traffic bc Specify bc to apply ACL rule to broadcast traffic source_port any Specify any to filter frames from any source ports 0 65535 Specify a source port between 0 and 65535 0 65535 0 65535 Specify a range of source ports For example 1000 2000 means that port numbers from 1000 to 200 are specified The starting source port number is100 whereas the ending source...

Page 36: ...ither a host IP address ip_mask Define destination IP mask any Specify any to mean any IP mask 255 255 0 0 Specify a specific IP mask ip_ttl Specify IP TTL bit any Specify any to denote the value which is either zero or not zero 0 Specify 0 to indicate that the TTL filed in IPv4 header is 0 1 If the value in TTL field is not 0 use 1 to indicate that ip_fragment Specify IP fragment bit any Specify ...

Page 37: ...e that the value either 1 or 0 tcp_rst Specify 0 to indicate that the RST value in TCP header is zero 1 to indicate the RST value in TCP header is one Specify any to indicate that the value is either 1 or 0 tcp_psh Specify 0 to indicate that the PSH value in TCP header is zero 1 to indicate the PSH value in TCP header is one Specify any to indicate that the value is either 1 or 0 tcp_ack Specify 0...

Page 38: ... 65535 0 65535 0 65535 Specify a range of source ports For example 1000 2000 means that port numbers from 1000 to 200 are specified The starting source port number is100 whereas the ending source port number is 2000 dest_port any Specify any to filter frames from any destination ports 0 65535 Specify a destination port between 0 and 65535 0 65535 0 65535 Specify a range of destination ports For ex...

Page 39: ...any to mean any IP mask 255 255 0 0 Specify a specific IP mask ip_ttl Specify IP TTL bit any Specify any to denote the value which is either zero or not zero 0 Specify 0 to indicate that the TTL filed in IPv4 header is 0 1 If the value in TTL field is not 0 use 1 to indicate that ip_fragment Specify IP fragment bit any Specify any to denote the value which is either 0 or not 0 0 Specify 0 to indic...

Page 40: ...umber 1 24 as an ingress port Switch config acl RULE tag priority 0 7 0 7 Configure the tag priority for this ACL rule The allowable tag priority value is between 0 and 7 Switch config acl RULE vid any 1 4094 any 1 4094 Configure the VLAN ID filter function any Specify any to mean any VLAN ID 1 4094 Specify an existing VLAN ID Switch config acl rate limiter 1 14 rate_pps 1 14 Specify the rate limi...

Page 41: ...fig acl RULE no vid Reset VID filter setting back to the factory default Switch config no acl 1 110 1 110 Delete the specified ACL rule Switch config no acl rate limiter 1 14 1 14 Delete the specified Rate limiter rule Show command Switch show acl Switch config show acl Show ACL information Switch show acl 1 110 Switch config show acl 1 110 1 110 Show ACL information for the specified rule Switch ...

Page 42: ...specified interfaces to the assigned policy No command Switch config if PORT PORT no acl action Permit the action on the specified interfaces Switch config if PORT PORT no acl action port copy Disable the Managed Switch to send a copy of traffic from the specified interfaces to the defined port Switch config if PORT PORT no acl action rate limiter id Remove rate limiter rule from the specified int...

Page 43: ...ich a copy of configuration will be saved Switch config archive auto backup time 0 23 0 23 Specify the time that you would like the server to backup a configuration file automatically No command Switch config no archive auto backup Disable auto backup function Switch config no archive auto backup path Reset the backup protocol back to the default setting Switch config no archive auto backup time R...

Page 44: ...n group Switch config interface port_list Switch config if PORT PORT no channel group trunking port_list Remove the selected ports from a link aggregation group Switch config no channel group type destination mac Disable load balancing based on destination MAC address Switch config no channel group type source mac Disable load balancing based on destination MAC address Show command Switch config s...

Page 45: ...and Switch config show channel group lacp Show or verify each interface s LACP settings including current mode key value and LACP type Switch config show channel group lacp port_list port_list Show or verify the selected interfaces LACP settings Switch config show channel group lacp status Show or verify each interface s current LACP status Switch config show channel group lacp status port_list po...

Page 46: ...tion settings Switch config show loop detection status port_list port_list Show Loop Detection status of the ports Loop Detection command example Switch config loop detection interval 60 Set the Loop Detection time interval to 60 seconds Switch config loop detection unlock interval 120 Set the Loop Detection unlock time interval to 120 minutes Switch config loop detection vlan id 100 Set the Loop ...

Page 47: ...the identification word or number assigned to each RADIUS authentication server with which the client shares a secret Switch config dot1x server A B C D A B C D Specify the RADIUS Authentication server IP address Switch config dot1x timeout 1 255 1 255 Specify the time value in seconds The Managed Switch will wait for a period of time for the response from the authentication server to an authentic...

Page 48: ...0 Set the reauthentication period to 3600 seconds Switch config dot1x reauthentication Enable re authentication function Switch config dot1x secret agagabcxyz Set the shared secret to agagabcxyz Switch config dot1x server 192 168 1 10 Set the 802 1x server IP address to 192 168 1 10 Switch config dot1x timeout 120 Set the timeout value to 120 seconds Use Interface command to configure a group of p...

Page 49: ...ce s 802 1x settings including port status and authentication status Switch config show dot1x interface port_list port_list Show or verify the selected interfaces 802 1x settings including port status and authentication status Switch config show dot1x statistics Show or verify 802 1x statistics Switch config show dot1x statistics port_list port_list Show or verify the selected interfaces statistic...

Page 50: ...ult gateway to 192 168 1 254 Switch config ip address dhcp Get an IP address automatically 2 Enable DHCP server function IP DHCP Snooping Command Parameter Description Switch config ip dhcp snooping Enable DHCP snooping function Switch config ip dhcp snooping dhcp server port_list port_list Configure DHCP server trust ports Switch config ip dhcp snooping initiated 0 9999 1 9999 Specify the time va...

Page 51: ...elay Agent 3 Use Interface command to configure a group of ports DHCP Snooping settings DHCP Interface Command Parameter Description Switch config interface port_list port_list Enter several discontinuous port numbers separated by commas or a range of ports with a hyphen For example 1 3 or 2 4 Switch config if PORT PORT ip dhcp snooping option Enable the selected interfaces DHCP Option 82 Relay Ag...

Page 52: ...s all the IGMP packets between hosts connected to the switch and multicast routers in the network When a switch hears an IGMP report from a host for a given multicast group the switch adds the host s port number to the multicast list for that group And when the switch hears an IGMP Leave it removes the host s port from the table entry IGMP snooping can very effectively reduce multicast traffic fro...

Page 53: ...igmp snooping flooding Disable flooding function Traffic will be forwarded to router ports only when disabled Switch config no ip igmp snooping immediate leave Disable IGMP immediate leave function Switch config no ip igmp snooping max response time Reset maximum response time back to the factory default Switch config no ip igmp snooping mcast router port_list port_list Remove the selected ports f...

Page 54: ...er Show IGMP Filtering setting Switch config show ip igmp filter interface port_list port_list Show the specified ports IGMP Filtering status Switch config show ip igmp profile Show IP multicast profile information Switch config show ip igmp profile profile_name profile_name Show the specified profile s setting Switch config show ip igmp segment Show IP multicast segment information Switch config ...

Page 55: ...a VLAN ID Switch config if PORT PORT ip sourceguard dhcp fixed ip dhcp fixed ip Specify authorized access information for the selected ports dhcp DHCP server assigns IP address fixed IP Only Static IP Create Static IP table first unlimited Non Limited Allows both static IP and DHCP assigned IP This is the default setting Switch config if PORT PORT ip sourceguard static ip A B C D mask 255 X X X vl...

Page 56: ...file information Switch config show ip igmp profile profile_name profile_name Show the specified profile s setting Switch config show ip igmp segment Show IP multicast segment information Switch config show ip igmp segment 1 400 1 400 Show the specified segment s setting Switch config show ip igmp static multicast ip Show static multicast IP table Switch config segment ID show Show the selected se...

Page 57: ...is between 1 and 3600 seconds Switch config lldp initiated delay 0 300 0 300 Specify a period of time the Managed Switch will wait before the initial LLDP packet is sent The allowable initiated delay value is between 0 and 300 seconds Switch config lldp interval 1 180 1 180 Specify the time interval for updated LLDP packets to be sent The allowable interval value is between 1 and 180 seconds Switc...

Page 58: ...d time value to 60 seconds Switch config lldp initiated delay 60 Set the initiated delay value to 60 seconds Switch config lldp interval 10 Set the updated LLDP packets to be sent in very 10 seconds Switch config lldp packets 2 Set the number of packets to be sent in each discovery to 2 Switch config lldp tlv select capability Enable Capability attribute to be sent Switch config lldp tlv select ma...

Page 59: ..._list port_list Show MAC addresses learned by the specified interfaces Switch config show mac address table mac mac_addr mac_addr Show the specific MAC address information Switch config show mac learning Show MAC learning setting of each interface Switch config show mac static mac Show static MAC address table Switch config show mac aging time Show current MAC address table aging time or verify cu...

Page 60: ...itch config show mac address table mac mac addr Show the specific MAC address information Switch config show mac learning Show MAC learning setting of each interface Switch config show mac static mac Show static MAC address table Switch config show mac aging time Show current MAC address table aging time or verify currently configured aging time 2 6 13 Management Command Command Parameter Descript...

Page 61: ...ve for 600 seconds Switch config management telnet Enable Telnet management Switch config management telnet port 23 Set Telnet port to port 23 Switch config management web Enable SSH management Switch config management web Enable Web management 2 6 14 Mirror Command Command Parameter Description Switch config mirror destination port port Specify the preferred destination port 1 24 for mirroring Sw...

Page 62: ...onfig show mvr group Show or verify MVR group settings MVR command example Switch config mvr Enable MVR function Switch config mvr vlan 50 Create a MVR VLAN 50 Switch config mvr group 50 224 10 0 10 238 10 0 10 Add a multicasting IP group to the registered MVR VLAN Use Interface command to configure a group of ports MVR settings MVR Interface command Parameter Description Switch config interface p...

Page 63: ...onfig no ntp Disable the Managed Switch to synchronize the clock with a time server Switch config no ntp daylight saving Disable the daylight saving function Switch config no ntp offset Set the offset value back to the default setting Switch config no ntp server1 Delete the primary time server IP address Switch config no ntp server2 Delete the primary time server IP address Switch config no ntp sy...

Page 64: ...port number or several TCP UDP port numbers between 0 and 65535 low normal medium high Specify one priority level to classify data packets Switch config qcl LIST tos 0 7 tos_list low normal medium high 0 7 tos_list Specify a TOS priority value from 0 7 low normal medium high Specify one priority level to classify data packets Switch config qcl LIST vlan id 1 4094 low normal medium high vlan id 1 4...

Page 65: ...ority to the ether type 0x9100 Switch config qcl 1 tcpudp port 1 100 high Specify high priority to TCP UDP port from 1 to 100 Switch config qcl 1 tos 1 3 5 medium Map type of service values 1 3 5 to medium priority value Switch config qcl 1 vlan id 55 high Specify high priority to VLAN 55 Switch config qcl 1 802 1p 1 2 low Map 802 1p bit values 1 2 to low priority 2 Set up DSCP and 802 1p remarkin...

Page 66: ...queues are serviced Switch config if PORT PORT qos qcl 1 24 1 24 Apply the selected ports to the specified QCL rule Switch config if PORT PORT qos rate limit ingress 0 500 1000000 kbps 0 500 1000000 kbps Specify ingress rate limit value Switch config if PORT PORT qos rate limit egress 0 500 1000000 kbps 0 500 1000000 kbps Specify egress rate limit value Switch config if PORT PORT qos remarking dsc...

Page 67: ...ast traffic on a per switch basis so as to protect network from broadcast multicast unknown unicast storms Any broadcast multicast unknown unicast packets exceeding the specified value will then be dropped 1 Configure anti broadcast IPv6 filter UPnP filter and port isolation settings Security command Parameter Description Switch config security anti broadcast polling interval 3 300 3 300 Specify a...

Page 68: ... function Switch config security isolation Enable port isolation function If port isolation is set to enable the customer ports port 1 24 can t communicate with each other Switch config security upnp filter Enable UPnP filter function 2 Enable or disable broadcast multicast unknown unicast storm control Security command Parameter Description Switch config security storm protection broadcast 1 1024...

Page 69: ...e dropped The packet rates that can be specified are listed below 1 2 4 8 16 32 64 128 256 512 1k 2k 4k 8k 16k 32k 64k 128k 256k 512k 1024k NOTE To view a list of allowable values that can be specified you can press spacebar and then followed by For example Switch config security storm protection unicast No command Switch config no security storm protection broadcast Disable broadcast storm contro...

Page 70: ...d by commas or a range of ports with a hyphen For example 1 3 or 2 4 Switch config if PORT PORT security anti broadcast Enable anti broadcast function on the selected interfaces Switch config if PORT PORT security anti broadcast threshold 20 1488000 20 1488000 Specify anti broadcast threshold value for the selected interfaces No command Switch config if PORT PORT no security anti broadcast Disable...

Page 71: ...change an evolution of the Spanning Tree Protocol Rapid Spanning Tree Protocol RSTP introduced by IEEE with document 802 1w RSTP is a refinement of STP therefore it shares most of its basic operation characteristics This essentially creates a cascading effect away from the root bridge where each designated bridge proposes to its neighbors to determine if it can make a rapid transition This is one ...

Page 72: ...normal Set up RSTP version compatible means that the Managed Switch is compatible with STP normal means that the Managed Switch uses RSTP No command Switch config no spanning tree aggregated port Disable STP on aggregated ports Switch config no spanning tree aggregated port cost Reset aggregated ports cost to the factory default Switch config no spanning tree aggregated port priority Reset aggrega...

Page 73: ...kets received RSTP packets transmitted STP packets received STP packets transmitted TCN Topology Change Notification packets received TCN packets transmited illegal packets received and unknown packets received Switch config show spanning tree status Show current RSTP port status Switch config show spanning tree status port_list llag port_list llag Show the selected interfaces or link aggregation ...

Page 74: ...selected interfaces to edge ports Switch config if PORT PORT spanning tree p2p forced_fasle auto forced_fasle auto Set the aggregated ports to non point to point ports forced_false or allow the Managed Switch to detect point to point status automatically auto By default aggregated ports are set to point to point ports forced_true No command Switch config if PORT PORT no spanning tree Disable spann...

Page 75: ...uding the total RSTP packets received RSTP packets transmitted STP packets received STP packets transmitted TCN Topology Change Notification packets received TCN packets transmited illegal packets received and unknown packets received Switch config show spanning tree status Show current RSTP port status Switch config show spanning tree status port_list llag port_list llag Show the selected interfa...

Page 76: ...witch bpdu 00 0F permit permit Permit packets from the address ranging from 0180C2000000 to 0180C200000F Switch config switch bpdu 20 2F permit permit Permit packets from the address ranging from 0180C2000020 to 0180C200002F Switch config switch bpdu 10 permit permit Permit packets from the address 0180C2000010 Switch config switch mtu 1518 9600 1518 9600 bytes Specify the maximum transmission uni...

Page 77: ... 2F permit Permit packets from the address ranging from 0180C2000020 to 0180C200002F Switch config switch bpdu 10 permit Permit packets from the address 0180C2000010 Switch config switch mtu 9600 Set the maximum transmission unit to 9600 bytes 2 6 21 SNMP Server Command 1 Create a SNMP community and set up detailed configurations for this community Snmp server command Parameter Description Switch ...

Page 78: ...ity NAME no level Remove the configured access privilege This will set this community s level to access denied Show command Switch config show snmp server Show or verify whether SNMP is enabled or disabled Switch config show snmp server community Show or verify each SNMP server account s information Switch config show snmp server community community Show the specified SNMP server account s setting...

Page 79: ...onfig trap ACCOUNT no description Delete the configured trap destination description Show command Switch config show snmp server trap destination Show SNMP trap destination account information Switch config show snmp server trap destination 1 10 1 10 Show the specified SNMP trap destination account information Switch config trap ACCOUNT show Show and verify the selected trap destination account s ...

Page 80: ...er is down anti bcast A trap will be sent when broadcast packets exceed the specified threshold value auth fail A trap will be sent when any unauthorized user attempts to login case fan A trap will be sent when the fan is not working or fails cold start A trap will be sent when the device boots up port link A trap will be sent when the link is up or down power down A trap will be sent when the dev...

Page 81: ...ding company name hostname system name etc Switch info Command Parameter Description Switch config switch info company name company_name company_name Enter a company name up to 55 alphanumeric characters for this Managed Switch Switch config switch info system contact sys_contact sys_contact Enter contact information up to 55 alphanumeric characters for this Managed switch Switch config switch inf...

Page 82: ...Switch config show switch info Show or verify switch information including company name system contact system location system name model name firmware version and fiber type Switch info example Switch config switch info company name telecomxyz Set the company name to telecomxyz Switch config switch info system contact info company com Set the system contact field to info compnay com Switch config ...

Page 83: ...em information and load factory settings ro read only Read Only access privilege No command Switch config no user name username username Delete the specified account Switch config user NAME no active Deactivate the selected user account Switch config user NAME no description Remove the configured description Switch config user NAME no password Remove the configured password value Switch config use...

Page 84: ...o validate communications between RADIUS servers Switch config user radius server1 A B C D A B C D Specify the primary RADIUS server IP address Switch config user radius server2 A B C D A B C D Specify the secondary RADIUS server IP address No command Switch config no user radius Disable RADIUS authentication Switch config no user radius radius port Set the radius port setting back to the factory ...

Page 85: ... function Switch config no syslog server1 Delete the primary system log server IP address Switch config no syslog server2 Delete the secondary system log server IP address Switch config no syslog server3 Delete the third system log server IP address Show command Switch config show syslog Show current system log settings Switch config show log Show event logs currently stored in the Managed Switch ...

Page 86: ...ame Specify a name for this port based VLAN No command Switch config no vlan dot1q vlan 1 4094 1 4094 Delete the specified VLAN Switch config vlan VID no name Remove the descriptive name for the specified VLAN Switch config no vlan port based name name Delete the specified port based VLAN Show command Switch config show vlan Display global VLAN information including 802 1q VLAN Enable Disable stat...

Page 87: ...ode trunk native Enable native VLAN for untagged traffic Switch config if PORT PORT vlan dot1q vlan trunk vlan 1 4094 1 4094 Specify a VID to trunk VLAN Switch config if PORT PORT vlan port based name name Set the selected ports to a specified port based VLAN No command Switch config if PORT PORT no vlan dot1q vlan access vlan Set the selected ports PVID to the default setting Switch config if POR...

Page 88: ...ch config show interface statistics analysis rate port_list port_list Display packets analysis rates for the selected ports Switch config show interface statistics error Display error packets statistics events for each port Switch config show interface statistics error port_list port_list Display error packets statistics events for the selected ports Switch config show interface statistics error r...

Page 89: ...ture safety Bias power TX power RX power and voltage 2 6 28 Show default setting running config and start up config Command Command Description Switch config show default setting Show the original configurations assigned to the Manged Switch by the factory Switch config show running config Show configurations currently used in the Manged Switch Please note that you must save running configurations...

Page 90: ...mory resources required for the complete network management SNMP Manager is often composed by desktop computer work station and software program such like HP OpenView Totally 4 types of operations are used between SNMP Agent Manager to change the MIB information These 4 operations all use the UDP IP protocol to exchange packets GET This command is used by an SNMP Manager to monitor managed devices...

Page 91: ...se the RS 232 DB 9 console port or one of the 10 100 1000Base TX RJ 45 ports as the temporary RJ 45 Management console port to set up the assigned IP parameters of the Managed Switch including IP address Subnet Mask and Default Gateway of the Managed Switch if required Run a Web browser and specify the Managed Switch s IP address to reach it The Managed Switch s default IP can be reached at http 1...

Page 92: ... view the IP address and related information of the Managed Switch required for network management applications 4 Switch Management Set up switch port configuration VLAN configuration and other functions 5 Switch Monitor View the operation status and traffic statistics of the ports 6 System Utility Ping Firmware Upgrade Load Factory Settings etc 7 Save Configuration Save all changes to the system ...

Page 93: ...ique name up to 55 alphanumeric characters for this Managed Switch Use a descriptive name to identify the Managed Switch in relation to your network for example Backbone 1 This name is mainly used for reference only System Location Enter a brief description up to 55 alphanumeric characters of the Managed Switch location Like the name the location is for reference only for example 13th Floor Model ...

Page 94: ...le is installed on the device Type View only field that shows the type of the power module State View only field that shows the current status of the power module 4 2 User Authentication To prevent any unauthorized operations only registered users are allowed to operate the Managed Switch Users who want to operate the Managed Switch need to register into the user list first To view or change curre...

Page 95: ...ng Description Enter a unique description up to 35 alphanumeric characters for the user This is mainly for reference only IP Security Enable or disable the IP security function If enabled the user can access the Managed Switch only through the management station which has exact IP address specified in IP address field below If disabled the user can access the Managed Switch through any station IP ...

Page 96: ... and then the following screen page appears When RADIUS Authentication is enabled User login will be according to those settings on the RADIUS server s NOTE For advanced RADIUS Server setup please refer to APPENDIX A or the free RADIUS readme txt file on the disc provided with this product Secret Key The word to encrypt data of being sent to RADIUS server RADIUS Port The RADIUS service port on RAD...

Page 97: ...Telnet Console Configuration View the RS 232 serial port setting specific Telnet and Console services 4 Time Server Configuration Set up the time server s configuration 5 Device Community View the registered SNMP community name list Add a new community name or remove an existing community name 6 Trap Destination View the registered SNMP trap destination list Add a new trap destination or remove an...

Page 98: ...out how to set up a DHCP server please refer to APPENDIX B IP Address Enter the unique IP address of this Managed Switch You can use the default IP address or specify a new one when the situation of address duplication occurs or the address does not match up with your network The default factory setting is 192 168 0 1 Subnet Mask Specify the subnet mask The default subnet mask values for the three...

Page 99: ...e SSH Management service To enable SSH Service Telnet Service must be disabled SNMP Service To enable or disable the SNMP Management service Web Service To enable or disable the Web Management service 4 3 3 RS232 Telnet Console Configuration Click the option RS232 Telnet Console Configuration from the Network Management menu and then the following screen page appears Baud Rate 9600 bps RS 232 sett...

Page 100: ...guration Click the option Time Server Configuration from the Network Management menu and then the following screen page appears Time Synchronization To enable or disable time synchronization Time Server Address NTP time server address 2nd Time Server Address When the default time server is down the Managed Switch will automatically connect to the 2nd time server Synchronization Interval The time i...

Page 101: ...ck New to add a new community and then the following screen page appears Click Edit to view the current community settings Click Delete to remove a registered community Current Total Max Agents View only field Current This shows the number of currently registered communities NOTE SNTP is used to get the time from those NTP servers It is recommended that the time server is in the same LAN with the ...

Page 102: ...ed Community may access the Managed Switch only through the management station which has the exact IP address specified in IP address field below If disabled Community can access the Managed Switch through any management stations IP Address Specify the IP address used for IP Security function SNMP Level Click the pull down menu to select the desired privilege for the SNMP operation NOTE When the c...

Page 103: ... Start Trap Enable or disable the Managed Switch to send a trap when the Managed Switch restarts Authentication Failure Trap Enable or disable the Managed Switch to send authentication failure trap after any unauthorized users attempt to login Port Link Up Down Trap Enable or disable the Managed Switch to send port link up link down trap Broadcast Storm Trap Enable or disable broadcast storm trap ...

Page 104: ...s When DHCP Snooping filters unauthorized DHCP packets on the network the Mal attempt log will allow the Managed Switch to send event notification messages to Log server Log Server Enable or disable Mal attempt log function SNTP Status View only field that shows the SNTP server status Log Server IP 1 Specify the default Log server IP address Log Server IP 2 Specify the second Log server IP address...

Page 105: ...ttings aggregated port settings physical port settings etc 5 802 1X Configuration Set up the 802 1X system port Admin state port reauthenticate 6 MAC Address Management Set up MAC address enable or disable MAC security etc 7 VLAN Configuration Set up VLAN mode and VLAN configuration 8 QoS Configuration Set up the priority queuing rate limit and storm control 9 DSCP Remark Set up DSCP Remarking 802...

Page 106: ...tion configuration 4 4 1 Switch Configuration Click the option Switch Configuration from the Switch Management menu and then the following screen page appears Maximum Frame Size Specify the maximum frame size between 1518 and 9600 bytes The default maximum frame size is 9600bytes MAC Address Aging Time Specify MAC Address aging time between 0 and 4080 seconds 0 means that MAC addresses will never ...

Page 107: ...ning tree as a leaf 0180C2000001 802 3 Clause 31 use i e Full Duplex PAUSE operation 0180C2000002 802 3 Clause 43 Link Aggregation and Clause 57 OAM use aka Slow Protocols Multicast address 0180C2000003 802 1X Port Authenticator Entity PAE address 0180C2000004 5 Reserved for future media access specific method standardization 0180C2000006 7 Reserved for future standardization 0180C2000008 All Prov...

Page 108: ... operation Duplex mode full or half duplex of the port s Flow Control Enable or disable the Flow Control function 4 4 3 Link Aggregation Link aggregation is an inexpensive way to set up a high speed backbone network that transfers much more data than any one single port or device can deliver without replacing everything and buying new hardware For most backbone installations it is common to instal...

Page 109: ...n this folder will be displayed 1 Trunk Mode Configuration Enable or disable Source and Destination MAC address 2 Port Trunking Create edit or delete port trunking group s 3 LACP Port Configuration Set up the configuration of LACP on all or some ports 4 4 3 1 Trunk Mode Configuration Click the option Trunk Mode Configuration from the Link Aggregation menu the following screen page appears There ar...

Page 110: ...characters Port Members Select ports that belong to the specified trunking group Please keep the rules below in mind when assign ports to a trunking group Must have 2 to 16 ports in each trunking group Each port can only be grouped in one group If the port is already set On in LACP Port Configuration it can t be grouped anymore Click OK and return back to Link Aggregation menu NOTE All trunking po...

Page 111: ...already configured as part of a static trunk If ports on other devices are also configured as LACP the Managed Switch and the other devices will negotiate a trunk link between them If an LACP trunk consists of more than four ports all other ports will be placed in a standby mode Should one link in the trunk fail one of the standby ports will automatically be activated to replace it Configure Port ...

Page 112: ...port Key must be set to the same value The range of key value is between 0 and 255 When key value is set to 0 the port Key is automatically set by the Managed Switch Configure Port Role Select Role from the pull down menu of Select Setting Active Port Role Active LACP ports are capable of processing and sending LACP control frames This allows LACP compliant devices to negotiate the aggregated link...

Page 113: ...and hence the same network hosts are seen on multiple ports Second a broadcast storm occurs This is caused by broadcast packets being forwarded in an endless loop between switches A broadcast storm can consume all available CPU resources and bandwidth Spanning tree allows a network design to include spare redundant links to provide automatic backup paths if an active link fails without the danger ...

Page 114: ...t the priority to achieve optimized performance The Managed Switch with the lowest priority will be selected as the root bridge The root bridge is the central bridge in the spanning tree Hello Time Periodically a hello packet is sent out by the Root Bridge and the Designated Bridges that are used to communicate information about the topology throughout the entire Bridged Local Area Network Max Age...

Page 115: ...ted to an end device that doesn t support RSTP then set it as an edge port to ensure maximum performance This will tell the switch to immediately start forwarding traffic on the port and not bother trying to establish a RSTP connection Otherwise turn it off Point to Point Forced True parameter indicates a point to point P2P shared link P2P ports are similar to edge ports however they are restricte...

Page 116: ...n the following screen page appears Configure Port State Select State from the pull down menu of Select Setting This allows ports to be enabled or disabled When it is On RSTP is enabled Configure Port Path Cost Select Path Cost from the pull down menu of Select Setting This sets up each port s path cost The default value is 0 ...

Page 117: ... pull down menu of Select Setting You can choose Port Priority value between 0 and 240 The default value is 0 Configure Port Edge Select Edge from the pull down menu of Select Setting Set the port to enabled or disabled When it is On Port Edge is enabled ...

Page 118: ...s connecting to a VLAN clients that are 802 1X complaint should successfully authenticate with the authentication server Initially ports are in the authorized state which means that ingress and egress traffic are not allowed to pass through except 802 1X protocol traffic When the authentication is successful with the authentication server traffic from clients can flow normally through a port If au...

Page 119: ...d the authentication server In other words the Managed Switch requests identifying information from the client verifies that information with the authentication server and relays the response to the client RADIUS IP Specify RADIUS Authentication server address RADIUS Secret The identification number assigned to each RADIUS authentication server with which the client shares a secret Reauthenticatio...

Page 120: ...ed This forces the Managed Switch to deny access to all clients either 802 1X aware or 802 1X unaware Auto This requires 802 1X aware clients to be authorized by the authentication server Accesses from clients that are not dot1x aware will be denied 4 4 5 3 Configure Port Reauthenticate Click the option Configure Port Reauthenticate from the 802 1X Configuration menu and then the following screen ...

Page 121: ...Learning To enable or disable learning MAC address function 2 Static MAC Table Configuration To create edit or delete Static MAC Table setting 4 4 6 1 MAC Table Learning Click the option MAC Table Learning from the MAC Address Table menu and then the following screen page appears Auto Enable port MAC address learning Disabled Disable port MAC address learning ...

Page 122: ...s entity and then the following screen page appears Click Edit to view and edit the selected MAC address entity Click Delete to remove a MAC address entity Current Total Max The number of current total and maximum MAC address entry or entries MAC Address Specify a destination MAC address in the packet with the 00 00 00 00 00 00 format VID Specify the VLAN where the packets with the Destination MAC...

Page 123: ... same VLAN no matter where they are physically located on the network Another benefit of VLAN is that you can change the network topology without physically moving stations or changing cable connections Stations can be moved to another VLAN and thus communicate with its members and share its resources simply by changing the port VLAN settings from one VLAN to another This allows VLAN to accommodat...

Page 124: ...bers If you select V from the pull down menu it denotes that the port selected belongs to the specified VLAN 4 4 7 2 802 1Q VLAN Concept Port Based VLAN is simple to implement and use but it cannot be deployed cross switches VLAN The 802 1Q protocol was developed in order to provide the solution to this problem By tagging VLAN membership information to Ethernet frames the IEEE 802 1Q can help netw...

Page 125: ...that will assign the VID to untagged traffic from that port The VLAN ID VID specifies the set of VLAN that a given port is allowed to receive and send labeled packets Both variables can be assigned to a switch port but there are significant differences between them An administrator can only assign one PVID to each switch port since the 802 1Q protocol assigns any single packet to just one VLAN The...

Page 126: ... been tagged previously the port will not alter the packet and keep the VLAN information intact The VLAN information in the tag can then be used by other 802 1Q compliant devices on the network to make packet forwarding decisions Un tagging Ports without a tagging will strip the 802 1Q tag from all packets that flow into and out of those ports If the packet does not have an 802 1Q VLAN tag the por...

Page 127: ...anch 1 that is 1000 miles away One common thing about these two locations is that they have the same VLAN ID of 20 called C VLAN Customer VLAN Since customer traffic will be routed to service provider s backbone there is a possibility that traffic might be forwarded insecurely for example due to the same VLAN ID used Therefore in order to get the information from Headquarter to Branch 1 the easies...

Page 128: ...ace To set up VLAN mode on the selected port 3 Management VLAN To set up management VLAN and management ports 4 4 7 4 1 Configure VLAN The following screen page appears if you choose Configure VLAN Click New to add a new VLAN entity an then the following screen page appears Click Edit to view and edit current IEEE 802 1Q Tag VLAN setting Click Delete to remove a VLAN entity ...

Page 129: ...LANs that are available for registration VLAN Name Use the default name or specify a VLAN name VLAN ID Specify a VLAN ID between 1 and 4094 VLAN Members If you select V from the pull down menu it denotes that the ports selected belong to the specified VLAN 4 4 7 4 2 VLAN Interface The following screen page appears if you choose VLAN Interface Mode Select the appropriate mode for each port ...

Page 130: ... that you would like them to become Management ports 4 4 8 QoS Configuration Network traffic is always unpredictable and the only basic assurance that can be offered is the best effort traffic delivery To overcome this challenge Quality of Service QoS is applied throughout the network This ensures that network traffic is prioritized according to specified criteria and receives preferential treatme...

Page 131: ...tings 3 QoS Rate Limiters To configure each port s Policer and Shaper Rate 4 4 8 1 QoS Port Configuration Select the option QoS Port configuration from the QoS Configuration menu and then the following screen page appears Configure Default Class Click the pull down menu to choose the class level Low Normal Medium or High The default class level of each port is Low ...

Page 132: ...r Priority There are eight priority levels that you can choose to classify data packets Choose one of the listed options from the pull down menu for CoS Class of Service priority tag values The default value is 0 The default 802 1p settings are shown in the following table Priority Level normal low low normal medium Medium High high 802 1p Value 0 1 2 3 4 5 6 7 ...

Page 133: ...l order and all traffic with higher priority queues is transmitted first before lower priority queues are serviced Weight Weighted Round Robin shares bandwidth at the egress ports by using scheduling weights 1 2 4 8 for queues 1 through 4 respectively Configure Queuing Weighted Click the pull down menu to select values of Queue weighted for each port ...

Page 134: ...only filed that shows QCL s current QCE type Type Value View only field that shows QCL s current type value Traffic Class View only field that shows QCL s Traffic Class Click New to add a new QCL setting and then the following screen page appears Click Edit to view and edit registered QCL settings Click Delete to remove a current QCL setting Current Total Max List View only field ...

Page 135: ...pe you can further specify TCP UDP Port by selecting Specific or Range from the pull down menu Specific allows you to assign TCP UDP Port No On the other hand Range allows you to assign TCP UDP port range in TCP UDP Port Range field DSCP When you choose DSCP as your preferred QCE Type you can further specify DSCP value Traffic Class When you choose Ethernet Type VLAN ID UDP TCP Port or DSCP as you...

Page 136: ...able this function Configure Shaper Rate This allows users to specify each port s outbound bandwidth The excess traffic will be dropped Specifying 0 is to disable this function 4 4 9 DSCP Remark To set up DSCP Remark select the option DSCP Remark from the Switch Management menu and then the following screen page appears ...

Page 137: ... remarking for each port The default setting is disabled Configure 802 1p Remark Select 802 1p Remark from the pull down menu of Select Setting This allows you to enable or disable 802 1p remarking for each port The default setting is disabled Configure Queue Mapping Select Queue Mapping from the pull down menu of Select Setting ...

Page 138: ...n Port Mirroring from the Switch Management menu and then the following screen page appears Source Port Choose Y enable or N disable from the pull down menu to enable or disable Target Port s mirroring on the TX and RX of Source port Target Port Select the preferred target port for mirroring or select Disable to turn off port mirroring function When enabled the traffic flowing from the selected so...

Page 139: ...ven multicast group from a host the switch adds the host s port number to the multicast list for that group When the switch hears an IGMP Leave it removes the host s port from the table entry IGMP snooping can reduce multicast traffic from streaming and make other bandwidth intensive IP applications run more effectively A switch using IGMP snooping will only forward multicast traffic to the hosts ...

Page 140: ...e traffic will flood when enabled However the traffic will be forwarded to router ports only when disabled Query Interval The Query Interval is used to set the time between transmitting IGMP queries entries between 1 6000 seconds are allowed Default value 125 One Unit 1 second Query Response Interval This determines the maximum amount of time allowed before sending an IGMP response report Default ...

Page 141: ... enabled the port in VLAN will monitor network traffic and determine which hosts to receive the multicast traffic Querying When enabled the port in VLAN can serve as the Querier which is responsible for asking hosts whether they want to receive multicast traffic 4 4 11 3 IPMC Segment Select the option IPMC Segment from the IGMP Snooping menu and then the following screen page with the ability info...

Page 142: ...nt registration Current Total Max VLANs View only field Current This shows the number of current registered IPMC Segment Total This shows the total number of registered IPMC Segment Max This shows the maximum number available for IPMC Segment The maximum number is 400 Segment ID Specify a number from 1 400 for a new ID Segment Name Enter an identification name This field is limited to 20 character...

Page 143: ...le and then the following screen page appears Click Edit to edit the IPMC Profile settings Click Delete to remove a current IPMC Profile registration Current Total Max VLANs View only field Current This shows the number of current registered IPMC Profile Total This shows the number of total IPMC Profiles that are registered Max This shows the maximum number available for IPMC Profile The maximum n...

Page 144: ... IGMP Filter This option may enable or disable the IGMP filter The default setting is Disabled Channel Limit View only field that shows the maximum limit of each port s multicast streams Enable View only field that shows each port s IGMP filter is turned on or off IPMC Profile View only field that shows the specified IPMC Profile s ...

Page 145: ...Profile fields to pass through The field for IPMC Profile name is from the entry registered in IPMC Profile option 4 4 12 Static Multicast Configuration Select the option Static Multicast Configuration from the Switch Management menu and then the following screen page appears IP Address View only field that shows the current source IP address of multicast stream VLAN View only field that shows the...

Page 146: ... ID for multicast stream Forwarding port Select a port number for multicast stream forwarding 4 4 13 MVR MVR stands for Multicast VLAN Registration that enables a media server to transmit multicast stream in a single multicast VLAN when clients receiving multicast VLAN stream can reside in different VLANs Clients in different VLANs intend to join or leave the multicast group simply by sending the ...

Page 147: ...uld not belong to the multicast VLAN Do not configure MVR on private VLAN ports MVR can coexist with IGMP snooping on a switch MVR data received on an MVR receiver port is not forwarded to MVR source ports MVR does not support IGMPv3 messages MVR on IPv6 multicast groups is not supported Click the folder MVR Configuration from the Switch Management menu and then the following screen page appears 1...

Page 148: ... and then the following screen page appears Click Edit to edit MVR settings Use Delete to remove a current MVR VLAN ID Current Total Max VLAN View only field Current This shows the number of current registered MVR VLAN configuration Total This shows the total number of registered MVR VLAN configuration Max This shows the maximum number available for MVR VLAN configuration VLAN Specify a VLAN ID fo...

Page 149: ...owing screen page appears Click Edit to edit and view the MVR Group settings Click Delete to remove a current MVR Group Current Total Max VLAN View only field Current This shows the number of current registered MVR Group Total This shows the total number of registered MVR Groups Max This shows the maximum number available for registered MVR Group VLAN ID Specify a VLAN ID number that is registered...

Page 150: ...y mechanisms to protect your network from unauthorized access to a network or redirect traffic for malicious purposes such as Source IP Spoofing and ARP Spoofing Select the folder Security Configuration from the Switch Management menu and then the following screen page appears 1 DHCP Option 82 Settings To enable or disable DHCP Option 82 relay agent global setting and show each port s configuratio...

Page 151: ...from the Security Configuration menu and then the following screen page appears DHCP Opt82 Relay Agent To enable or disable DHCP Option 82 Relay Agent Global setting When enabled Relay Agent Information option is inserted by the DHCP relay agent when forwarding client originated DHCP packets to a DHCP server Servers recognizing the Relay Agent Information option may use the Information to implemen...

Page 152: ...discard DHCP messages For example A DHCP request is from Port 1 that is marked as both Opt82 port and trust port A If a DHCP request is with Opt82 Agent information and then the Managed Switch will forward it B If a DHCP request is without Opt82 Agent information and then the Managed Switch will add Opt82 Agent information and forward it ...

Page 153: ...Agent information and then forward it 4 4 14 2 DHCP Port Settings Select the option DHCP Port Settings from the Security Configuration menu and then the following screen page appears Source Guard To specify authorized access information for each port There are three options available Unlimited Non Limited Static IP or DHCP assigned IP DHCP DHCP assigned IP address only Fixed IP Only Static IP You ...

Page 154: ...cify the time value 0 9999 Seconds that packets might be received Default DHCP Leased Time Specify packets expired time 180 259200 Seconds Port Isolation Enable or disable port isolation function If port isolation is set to enable the customer port port 1 24 can t communicate to each other IPv6 auto discovery DHCPv6 Enable or disable IPv6 filter When enabled IPv6 packets will be dropped UPnP Enabl...

Page 155: ...ent Mask address VLAN ID View only field that shows the VLAN ID Port View only field that shows the connection port number Click New to register a new Static IP address and then the following screen page appears Click Edit to edit and view Static IP Table settings Use Delete to remove a current Static IP address Current Total Max View only field Current This shows the number of current registered ...

Page 156: ...n you want to use DHCP Snooping function follow the steps described below to enable a client to receive an IP from DHCP server Step 1 Select each port s IP type Select Unlimited or DHCP Step 2 Enable DHCP Snooping Step 3 Connect your clients to the Managed Switch After you complete Step 1 2 connect your clients to the Managed Switch Your clients will send a DHCP Request out to DHCP Server soon aft...

Page 157: ...programs are not well designed or properly configured broadcast storms may occur which eventually degrades network performance and even worse cause a complete halt The network can be protected from broadcast storms by setting a threshold for broadcast traffic for each port Any broadcast packet exceeding the specified threshold will then be dropped see Anti broadcast Configuration Three options of ...

Page 158: ...each port Port Threshold pps Enter the threshold value for each port When the port exceeds the threshold value in the time specified the port will be temporarily blocked until the value is refreshed in the next polling interval For example if you enable port 1 s anti broadcast function and set polling interval to 9 seconds and port threshold to 14880 then the total packets within 9 seconds can not...

Page 159: ...stablish rules applied to port numbers to permit or deny actions Select the folder Access Control List Management from the Switch Management menu and then the following screen page appears ACL Ports Configuration When information does not conform to ACL entries configured in ACL Configuration actions set in ACL Ports Configuration will be taken Port number Select a port number that you would like ...

Page 160: ...ort Shutdown If enabled the Managed Switch will shutdown the interface Counter View only filed that shows the amount of packets that conform to the configured rules OK Click OK to save the port configurations Reflash Click Reflash to show the number of packets that conform to the default ACL rule Clear Click Clear to delete the number in the Counter field ACL Rate Limiter Configuration When Rate L...

Page 161: ...lick Delete to remove an existing ACL configuration Click Edit to view and edit an existing ACL configuration Current Max ACL View only field Current This shows the number of the current ACL rule Max ACL This shows the maximum number available for registering ACL rule The maximum default number is 110 ...

Page 162: ...f packets to the selected port Shutdown If enabled the Managed Switch will shutdown the interface Hit Counter View only filed that shows the amount of packets that conform to the configured rules Any Frame Type MAC Parameters DMAC Filter Select an option from the pull down menu for destination MAC filtering Select Any to filter any kind of traffic Select UC to filter unicast traffic Select MC to f...

Page 163: ... traffic Select UC to filter unicast traffic Select MC to filter multicast traffic Select BC to filter broadcast traffic DMAC Value Specify a destination MAC address VLAN Parameters VLAN ID Filter Select Any or Specific for VLAN ID Filter If Specific is selected you need to further specify a VLAN ID VLAN ID Specify a VLAN ID Tag Priority Select a tag priority from the pull down menu Ethernet Type ...

Page 164: ...lect Any UC MC or BC for destination MAC filtering Select Any to filter any kind of traffic Select UC to filter unicast traffic Select MC to filter multicast traffic Select BC to filter broadcast traffic VLAN Parameters VLAN ID Filter Select Any or Specific for VLAN ID Filter If Specific is selected you need to further specify a VLAN ID VLAN ID Specify a VLAN ID Tag Priority Select a tag priority ...

Page 165: ...icate a match and not a match RARP DMAC Match Select 0 to indicate that the THA Target Hardware Address field in the ARP RARP frame is not equal to source MAC address Select 1 to indicate that THA field in the ARP RARP frame is equal to source MAC address Select Any to indicate a match and not a match IP Ethernet Length Select 0 to indicate that HLN Hardware Address Length field in the ARP RARP fr...

Page 166: ...cify a VLAN ID Tag Priority Select a tag priority from the pull down menu IP Parameters IP Protocol Filter Select Any ICMP UDP TCP or Other protocol from the pull down menu for IP Protocol filtering IP TTL Select 0 to indicate that the TTL filed in IPv4 header is 0 If the value in TTL field is not 0 use 1 to indicate that You can also select any to denote the value which is either 0 or not 0 IP Fr...

Page 167: ...ld of the ICMP header Select any to filter any type If Specific is selected you need to further specify an ICMP type value ICMP Type Value Specify an ICMP type value ICMP Code Filter This field is used to filter the ICMP code defined in the code field of the ICMP header Select any to filter any code If Specific is selected you need to further specify an ICMP code value ICMP Code Value Specify an I...

Page 168: ...ination port range The source port number is from 0 to 65535 TCP FIN Select 0 to indicate that the FIN value in TCP header is zero 1 to indicate the FIN value in TCP header is one Select any to indicate either 1 or 0 TCP SYN Select 0 to indicate that the SYN value in TCP header is zero 1 to indicate the SYN value in TCP header is one Select any to indicate either 1 or 0 TCP RST Select 0 to indicat...

Page 169: ...ration from the Switch Management menu and then the following screen page appears Port Tick the checkbox to enable LLDP Receiver Hold Time TTL Enter the amount of time for receiver hold time in seconds The Managed Switch will keep the information sent by the remote device for a period of time you specify here before discarding it Sending LLDP Packet Interval Enter the time interval for updated LLD...

Page 170: ...ble or disable Loop Detection function Detection Interval Specify the time interval of performing Loop Detection The maximum time interval is 180 seconds Looped port unlock interval Specify the time interval of unlocking looped ports The maximum time interval is 1440 minutes VLAN ID Specify the VLANs where Loop Detection will be performed Port 1 24 Enable or disabled Loop Detection function on the...

Page 171: ...t s frames and bytes received or sent utilization etc 3 Port Packet Error Statistics View each port s traffic condition of error packets e g CRC fragment Jabber etc 4 Port Packet Analysis Statistics View each port s traffic condition of error packets e g RX TX frames of Multicast and Broadcast etc 5 LACP Monitor View the LACP port status and statistics 6 RSTP Monitor View RSTP VLAN Bridge Port Sta...

Page 172: ...e port Media Type The media type of the port either TX or Fiber Port State This shows each port s state which can be D Disabled B L Blocking Listening L Learning or F Forwarding Disabled A port in this state does not participate in frame relay or the operation of the Spanning Tree Algorithm and Protocol if any Blocking A Port in this state does not participate in frame relay thus it prevents frame...

Page 173: ...plex mode of the port either Full or Half Flow Control The current state of Flow Control either on or off 4 5 2 Port Traffic Statistics In order to view the real time port traffic statistics of the Managed Switch select Port Traffic Statistics from the Switch Monitor menu and then the following screen page appears Select Choose the Traffic Statistics from the pull down menu Bytes Received Total by...

Page 174: ...mode counter is calculated since the last time that counter was reset or cleared Select Port Packet Error Statistics from the Switch Monitor menu and then the following screen page appears Select Choose the Packet Error Statistics from the pull down menu RX CRC Align Error CRC Align Error frames received RX Undersize Frames Undersize frames received RX Fragments Frames Fragments frames received RX...

Page 175: ...ames 64 Bytes 64 bytes frames received Frames 65 127 Bytes 65 127 bytes frames received Frames 128 255 Bytes 128 255 bytes frames received Frames 256 511 Bytes 256 511 bytes frames received Frames 512 1023 Bytes 512 1023 bytes frames received Frames 1024 1518 Bytes 1024 1518 bytes frames received Frames 1519 MAX Bytes Over 1519 bytes frames received Multicast Frames RX Good multicast frames receiv...

Page 176: ...us from the LACP monitor menu and then the following screen page appears In this page you can find the following information about LACP port status Port Number The number of the port Partner ID The current operational key for the LACP group In LACP mode link aggregation control protocol data unit LACPDU is used for exchanging information among LACP enabled devices After LACP is enabled on a port t...

Page 177: ...ggregation group all ports share the same operational key in a manual or static LACP aggregation the selected ports share the same operational key Partner Port The corresponding port numbers that connect to the partner switch in LACP mode 4 5 5 2 LACP Statistics In order to view the real time LACP statistics status of the Managed Switch select LACP Statistics from the LACP Monitor menu and then th...

Page 178: ...ollowing screen page appears In this page you can find the following information about RSTP VLAN bridge Update Update the current status VLAN ID VID of the specific VLAN Bridge ID RSTP Bridge ID of the Managed Switch in a specific VLAN Max Age Max Age setting of the Managed Switch in a specific VLAN Hello Time Hello Time setting of the Managed Switch in a specific VLAN Forward Delay The Managed Sw...

Page 179: ...tion about RSTP status Port Number The number of the port Path Cost The Path Cost of the port Edge Port Yes is displayed if the port is the Edge port connecting to an end station and does not receive BPDU P2p Port Yes is displayed if the port link is connected to another STP device Protocol Display RSTP or STP Role Display the Role of the port non STP forwarding or blocked Port State Display the s...

Page 180: ...ted The total transmitted STP packets from current port TCN Transmitted The total transmitted TCN Topology Change Notification packets from current port RSTP Received The total received RSTP packets from current port STP Received The total received STP packets from current port TCN Received The total received TCN packets from current port Illegal Received The total received illegal packets from cu...

Page 181: ...802 1X Port Status 802 1X Port Status allows users to view a list of all 802 1x ports information Select 802 1X port status from the 802 1x Monitor menu and then the following screen page appears In this page you can find the following information about 802 1X ports Port The number of the port ...

Page 182: ... Source Last ID Display the number of the port s Last ID 4 5 7 2 802 1X Statistics In order to view the real time 802 1X port statistics status of the Managed Switch select 802 1x Statistics from the 802 1x Monitor menu and then the following screen page shows up Select the port number from the pull down menu to view statistics ...

Page 183: ...Click Update to update the table VLAN ID VID of the specific VLAN The IGMP querier periodically sends IGMP general queries to all hosts and routers 224 0 0 1 on the local subnet to find out whether active multicast group members exist on the subnet Upon receiving an IGMP general query the Managed Switch forwards it through all ports in the VLAN except the receiving port Querier The state of IGMP q...

Page 184: ...s of the Managed Switch select IGMP Group Table from the IGMP monitor menu and then the following screen page appears Update Click Update to update the table VLAN ID VID of the specific VLAN Group The multicast IP address of IGMP querier Port The port s grouped in the specific multicast group 4 5 9 MAC Address Table MAC Address Table displays MAC addresses learned when System Reset and MAC Address...

Page 185: ...ormation folder and then the following screen page appears 4 5 10 1 SFP Port Info SFP Port Info displays each port s slide in SFP Transceiver information e g Speed Length Vendor Name Vendor PN Vendor SN and detection Temperature Voltage TX Bias etc Select SFP Port Info from the SFP Information menu and then the following screen page appears Port The number of the port Speed Data rate of the slide ...

Page 186: ... State Select SFP Port Status from the SFP Information menu and then the following screen page appears Port Number The number of the SFP module slide in port Temperature C The Slide in SFP module operation temperature Voltage V The Slide in SFP module operation voltage TX Bias mA The Slide in SFP module operation current TX Power dbm The Slide in SFP module optical Transmission power RX Power dbm ...

Page 187: ...Cli Port View only field that shows where the DHCP client binding port is SrvPort View only field that shows where the DHCP server binding port is VID View only field that shows the VLAN ID of the client port CliIP Addr View only field that shows client IP address Cli MAC Addr View only field that shows client MAC address Srv Addr View only field that shows server MAC address TimeLeft View only fi...

Page 188: ...f the LLDP frames received the MAC address of the neighboring device Remote Port View only field that shows the port number of the neighboring device System Name View only field that shows the system name advertised by the neighboring device Port Description View only field that shows the port description of the remote port System Capabilities View only field that shows the capability of the neigh...

Page 189: ... the Switch Monitor menu and then the following screen page appears 1 Status View only filed that shows the loop status of each port 2 Lock Cause View only filed that shows the cause why the port is locked Click Update to refresh the Loop Detection status of each port ...

Page 190: ... lose when the system is shut down or rebooted 2 Upgrade This allows users to upgrade the latest firmware save current configuration or restore previous configuration to the Managed Switch 3 Load Factory Setting Load Factory Setting will set the configuration of the Managed Switch back to the factory default settings The IP and Gateway addresses will be set to the factory default as well 4 Load Fa...

Page 191: ...o clear all Event log records 4 6 2 Upgrade The Managed Switch has both built in TFTP and FTP clients Users may save or restore their configuration and update their Firmware on line Select Update from the System Utility menu and then the following screen page appears Protocol Select the preferred protocol either FTP or TFTP File Type Select the file to process either Firmware or Configuration ...

Page 192: ...eted message will pop up to remind users Click Stop to abort the current operation Select Update then press Enter to instruct the Managed Switch to update existing firmware configuration to the latest firmware configuration received After a successful update a message will pop up The Managed Switch will need a reset to make changes effective 4 6 3 Load Factory Settings Load Factory Setting will se...

Page 193: ...m REMOTELY because conventional Factory Reset will bring network settings back to default and lose all network connections Select Load Factory Setting Except Network Configuration from the System Utility menu the following screen page shows up Click OK to start loading factory settings except network configuration 4 6 5 Backup Configuration Select Backup Configuration from the System Utility menu ...

Page 194: ...ame of backup files which will be saved by date Transmitting Progress View only field that shows the file transmitting progress Backup State View only field that shows the backup status 4 7 Save Configuration In order to save configuration setting permanently users need to save configuration first before resetting the Managed Switch Select Save Configuration from the Console main menu and then the...

Page 195: ...the directory raddb and modify these three files users clients conf and dictionary which are on the disc shipped with this product Please use any text editing software e g Notepad to carry out the following file editing works In the file users Set up user name password and other attributes In the file clients conf Set the valid range of RADIUS client IP address In the file dictionary Add this foll...

Page 196: ...visioning process are described below for your reference A Setup Procedures Follow the steps below to set up Auto Provisioning server modify dhcpd conf file and generate a copy of configuration file Step 1 Set Up Environment DHCP Auto provisioning enabled products that you purchased support the DHCP option 60 to work as a DHCP client To make auto provisioning function work properly you need to pre...

Page 197: ...on Server Update DHCP Client Linux Fedora 12 supports yum function by default First of all update DHCP client function by issuing yum install dhclient command Install DHCP Server Issue yum install dhcp command to install DHCP server ...

Page 198: ...lease note that each vendor has its own way to define auto provisioning Make sure to use the file provided by the vendor Enable and run DHCP service 1 Choose dhcpd 2 Enable DHCP service 3 Start running DHCP service NOTE DHCP service can also be enabled using CLI Issue dhcpd command to enable DHCP service 1 2 3 ...

Page 199: ...199 Step 3 Modify dhcpd conf File Open dhcpd conf file in etc dhcp directory Double click dhcpd conf placed in etc dhcp directory to open it ...

Page 200: ...does not request a specific IP lease time the server will assign a default lease time value Maximum lease time This is the maximum length of time that the server will lease for 2 Define subnet subnet mask IP range broadcast address router address and DNS server address 3 Map a host s MAC address to a fixed IP address 4 Map a host s MAC address to a fixed IP address Use the same format to create mu...

Page 201: ...e MD5 for firmware image 13 Specify the configuration filename 14 Specify the MD5 for configuration file NOTE 1 The text beginning with a pound sign will be ignored by the DHCP server For example in the figure shown above firmware file name HS 0600 provision_2 bin and firmware md5 line 5 6 from the bottom will be ignored If you want DHCP server to process these two lines remove pound signs in the ...

Page 202: ...202 Restart DHCP service ...

Page 203: ... to DHCP when provisioning and it results in MD5 never matching and causes the device to reboot endlessly In order to have your Managed Switch retrieve the correct configuration image in TFTP FTP Server please make sure the filename of your configuration file is defined exactly the same as the one specified in in dhcpd conf For example if the configuration image s filename specified in dhcpd conf ...

Page 204: ...or configuration 2 The device will compare the firmware and configuration MD5 code form of DHCP option whenever it communicates with DHCP server 3 If MD5 code is different and the device will then upgrade the firmware or configuration However it will not be activated immediately 4 If the Urgency Bit is set the device will be reset to activate the new firmware or configuration immediately 5 The dev...

Page 205: ...ty The Managed Switch supports Port based VLAN implementation and IEEE 802 1Q standard tagging mechanism that enables the switch to differentiate frames based on a 12 bit VLAN ID VID field Besides the Managed Switch also provides double tagging function The IEEE 802 1Q double tagging VLAN is also referred to Q in Q or VLAN stacking IEEE 802 1ad Its purpose is to expand the 802 1Q VLAN space by tag...

Page 206: ...t PCs or other workstations Switch 1 also connects to Port 1 in Managed Switch Client PCs in the Marketing Department can access the Server 1 and Public Server Switch 2 is used in the RD Department to provide network connectivity to Client PCs or other workstations Switch 2 also connects to Port 2 in Managed Switch Client PCs in the RD Department can access the Server 2 and Public Server Client PC...

Page 207: ...rts to the port based VLAN RD SWH config if 2 21 22 24 vlan port based RD OK 7 Return to Global Configuration mode and show currently configured port based VLAN membership SWH config if 2 21 22 24 exit SWH config show vlan port based Port Based VLAN Index VLAN Name 1 8 9 16 17 24 1 Default_VLAN VVVVVVVV VVVVVVVV VVVVVVVV 2 Marketing V V V V 3 RD V VV V Note By default all ports are member ports of...

Page 208: ...d name it to Marketing Switch Management VLAN Configuration Port Based VLAN Configure VLAN Click OK to apply the settings 4 Click New to add a new Port Based VLAN Switch Management VLAN Configuration Port Based VLAN Configure VLAN 5 Add Port 2 21 22 and 24 in a group and name it to RD Switch Management VLAN Configuration Port Based VLAN Configure VLAN ...

Page 209: ...h will be forwarded out untagged Therefore in this example the Managed Switch will look at the Port Based forwarding table for Port 1 and forward untagged packets to member port 20 22 and 24 2 An untagged packet arrives at Port 2 Untagged packets received on the Managed Switch will be forwarded out untagged Therefore in this example the Managed Switch will look at the Port Based forwarding table f...

Page 210: ...based traffic management traffic and data traffic In practice it is common to separate voice and management traffic from data traffic such as files emails Data traffic only carries user generated traffic which is sometimes referred to a user VLAN and usually untagged when received on the Managed Switch In the network diagram provided it depicts a data VLAN network where PC1 wants to ping PC2 in a ...

Page 211: ...ember ports of the Default_VLAN Before removing the Default_VLAN from the VLAN table make sure you have correct management VLAN and PVID configurations otherwise incorrect configurations may disconnect your management PC to the Managed Switch immediately when you enter the command 6 Set Port 24 to trunk mode SWH config interface 24 SWH config if 24 vlan dot1q vlan mode trunk OK SWH config if 24 ex...

Page 212: ... VLAN option in IEEE 802 1Q Tag VLAN menu Switch Management VLAN Configuration IEEE 802 1q Tag VLAN Configure VLAN 2 Create a new Data VLAN 11 that includes Port 1 and Port 24 as members Switch Management VLAN Configuration IEEE 802 1q Tag VLAN Configure VLAN Click New to create a new VLAN Data VLAN 11 that includes Port 1 and Port 24 as member ports Click OK button to return to IEEE 802 1q Tag VL...

Page 213: ...e VLAN table make sure you have correct management VLAN and PVID configurations otherwise incorrect configurations may disconnect your management PC to the Managed Switch immediately when you enter the command 4 Change Port 1 s PVID to 11 and set Port 24 to trunk mode Switch Management VLAN Configuration IEEE 802 1q Tag VLAN VLAN Interface Click OK to apply the settings Select TRUNK Change Port 1 ...

Page 214: ...ceived possibly sent by malicious attackers they will be dropped III Management VLAN For security and performance reasons it is best to separate user traffic and management traffic When Management VLAN is set up only a host or hosts that is are in this Management VLAN can manage the device thus broadcasts that the device receives or traffic e g multicast directed to the management port will be min...

Page 215: ...ot1q settings and check CPU has been a member port in Management VLAN 10 SWH config show vlan dot1q vlan IEEE 802 1q Tag VLAN CPU VLAN ID 10 VLAN Name VLAN 1 8 9 16 17 24 CPU Default_VLAN 1 VVVVVVVV VVVVVVVV VVVVVVVV Management 10 V V NOTE By default all ports are member ports of the Default_VLAN Before removing the Default_VLAN from the VLAN table make sure you have correct management VLAN and PV...

Page 216: ...VLAN Configure VLAN NOTE By default all ports are member ports of the Default_VLAN Before removing the Deafult_VLAN from the VLAN table make sure you have correct management VLAN and PVID configurations otherwise incorrect configurations may disconnect your management PC to the Managed Switch immediately when you enter the command Management VLAN 10 that includes Port 24 as a member port Click OK ...

Page 217: ...onfigure VLAN Now Port 24 and CPU are member ports in Management VLAN 10 Treatments of Packets 1 A tagged packet arrives at Port 24 In this example port 24 is assigned as a management port Therefore the client can manage the Managed Switch remotely When management traffic with tag 10 arrives at port 24 the tag will be removed Then untagged traffic is sent to CPU When sending out management traffic...

Page 218: ...hen tagged packets are received on the Managed Switch they should be tagged with an outer Service Provider tag 15 To set up the network as provided you can follow the steps described below Q in Q VLAN Network Diagram CLI Configuration Steps Commands 1 Enter Global Configuration mode SWH enable Password SWH config SWH config 2 Create a VLAN 15 SWH config vlan dot1q vlan 15 OK 3 Name VLAN 15 to S VL...

Page 219: ...ode SWH config interface 1 SWH config if 1 vlan dot1q vlan mode dot1q tunnel OK 7 Change Port 1 s PVID to 15 SWH config if 1 vlan dot1q vlan access vlan 15 OK SWH config if 1 exit 8 Set Port 24 to trunk mode SWH config interface 24 SWH config if 24 vlan dot1q vlan mode trunk OK 9 Show currently configured VLAN tag settings SWH config show vlan interface IEEE 802 1q Tag VLAN Interface Port Mode PVI...

Page 220: ...802 1q Tag VLAN Configure VLAN 2 Create a new Service VLAN 15 that includes Port 1 and Port 24 as member ports Switch Management VLAN Configuration IEEE 802 1q Tag VLAN Configure VLAN Click New to create a new VLAN Create S VLAN 15 that includes Port 1 and Port 24 as member ports Click OK button to return to IEEE 802 1q Tag VLAN table ...

Page 221: ...ake sure you have correct management VLAN and PVID configurations otherwise incorrect configurations may disconnect your management PC to the Managed Switch immediately when you enter the command 4 Change Port 1 s PVID to 15 and set Port 1 to DOT1Q TUNNEL mode and Port 24 to TRUNK mode Switch Management VLAN Configuration IEEE 802 1q Tag VLAN VLAN Interface Set Port 1 to DOT1Q TUNNEL mode and chan...

Page 222: ... outer tag 15 by Port 1 which is set as a tunnel port When this packet is forwarded to Port 24 two tags will be forwarded out because Port 24 is set as a trunk port 2 An untagged packet arrives at Port 1 If an untagged packet is received it will also be added a tag 15 However Q in Q function will not work Click OK to apply the settings Set Port 24 to TRUNK mode ...

Page 223: ... 93 Add SSH and Loop Detection commands Renew figures 0 99 C0 2012 02 0 92 Add VLAN Application Note Revise VLAN introduction section Change RSTP Path Cost figure 0 99 7C 2011 12 0 91 Change figures 26 ports 24 ports The initial version 0 99 2011 07 NOTE This User s Manual is written or revised according to the officially released Firmware version The content of this Manual is subject to change wi...

Reviews: