Backup Parameters
95
3.
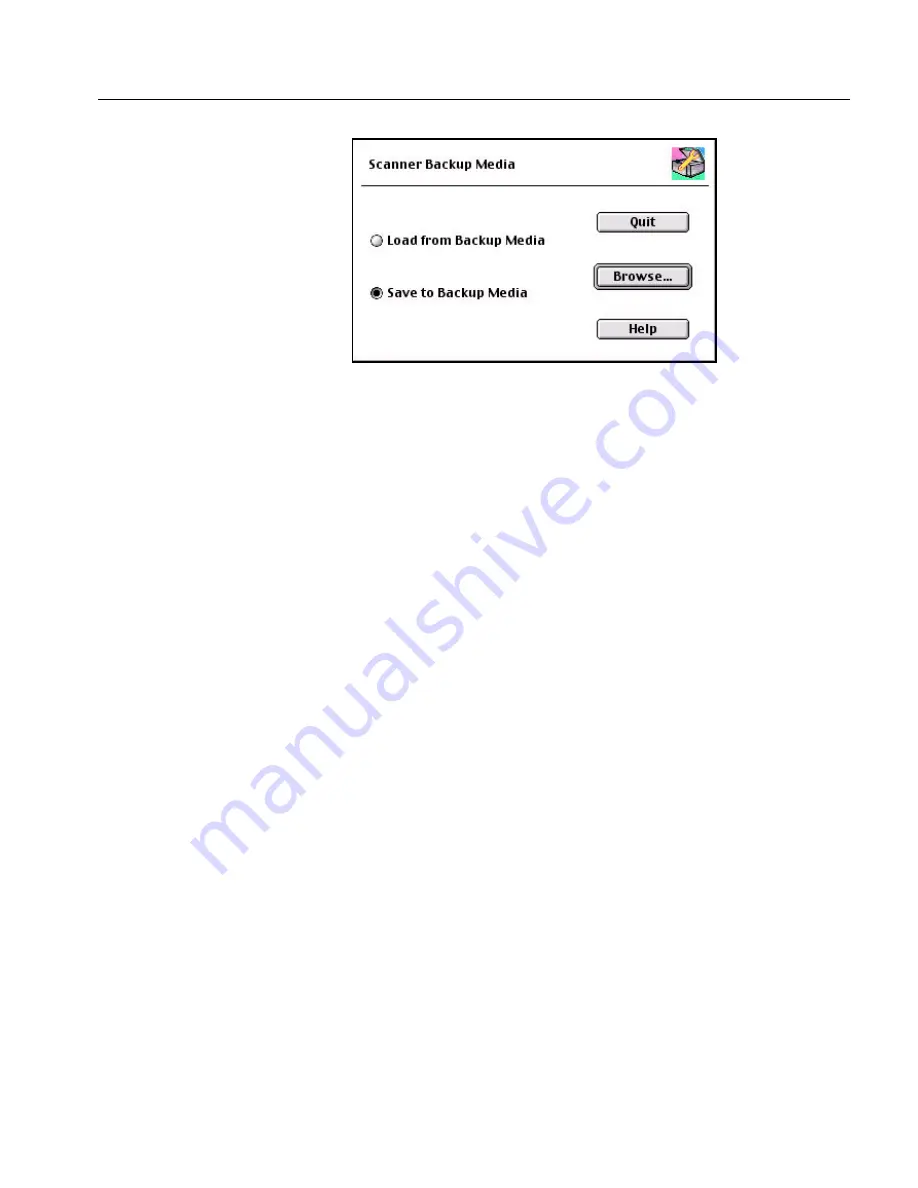
Select one of the following options:
•
Load from Backup Media
to overwrite the parameters on the
computer. This option enables faster installation (when
previous parameters are to be used).
•
Save to Backup Media
to save the parameters on the computer
to a backup media or to another location.
4.
Select
Browse
to set media or required destination, and follow the
instructions that appear on the screen.
At the end of the process, a completion message window is
displayed on the screen.
Results File
Upon completion of the backup procedure, the results are written to the
file Install&UtilResultFile.txt file.
See
Section 7.9 on page 73
for details.
For an explanation of this file, see
Section 8.6 CreoScan_Log Folder on
page 96
.
Summary of Contents for iqsmar series
Page 2: ......
Page 3: ...iQsmart Scanners Installation and Maintenance Guide Mac and PC Platforms...
Page 4: ......
Page 10: ......
Page 15: ...1 Environment Management System EMS...
Page 18: ......
Page 19: ...5 Chapter 1 Site Preparation General Requirements 6 Safety Instructions 10...
Page 25: ...11 Chapter 2 Unpacking Unpacking the Scanner 12 Unlocking Screws and Removing Packing 18...
Page 28: ...14 Chapter 2 Unpacking 4 Remove the top foam corners...
Page 34: ......
Page 35: ...21 P C Chapter 3 FireWire Installation for PC Platform FireWire Adaptor Installation 23...
Page 44: ......
Page 49: ...Powering on the Scanner 35 5 Power the scanner ON The scanner enters Standby mode...
Page 52: ......
Page 79: ...Stage 3 Enter the Serial Number 65 Scanner serial number...
Page 118: ...104 Chapter 9 Maintenance 6 Release the lock screw on the side of the transparency lamp unit...
Page 123: ...Lamp Unit Replacement 109 6 Lift the two handles of the base glass 7 Pull out the base glass...
Page 124: ...110 Chapter 9 Maintenance 8 Place the base glass on a soft surface...
Page 127: ...Lamp Unit Replacement 113 11 Slide the lamp unit out...
Page 134: ...120 Chapter 9 Maintenance 3 Lift the two handles of the base glass 4 Pull out the base glass...
Page 135: ...Cleaning the Glass 121 5 Turn the base glass upside down and place it on a soft surface...
Page 138: ......
Page 155: ...141 Appendix A Packing the Scanner Locking the Scanner 142 Packing the Scanner 143...
Page 160: ...146 Appendix A Packing the Scanner 6 Use straps to attach the wooden palette to the carton...
Page 161: ...147 Appendix B Technical Specifications...
Page 164: ......
Page 170: ......
Page 174: ......
Page 191: ...177 Appendix F Language Support...
Page 193: ...179 Appendix G Part Numbers...
Page 196: ......


