- 20 -
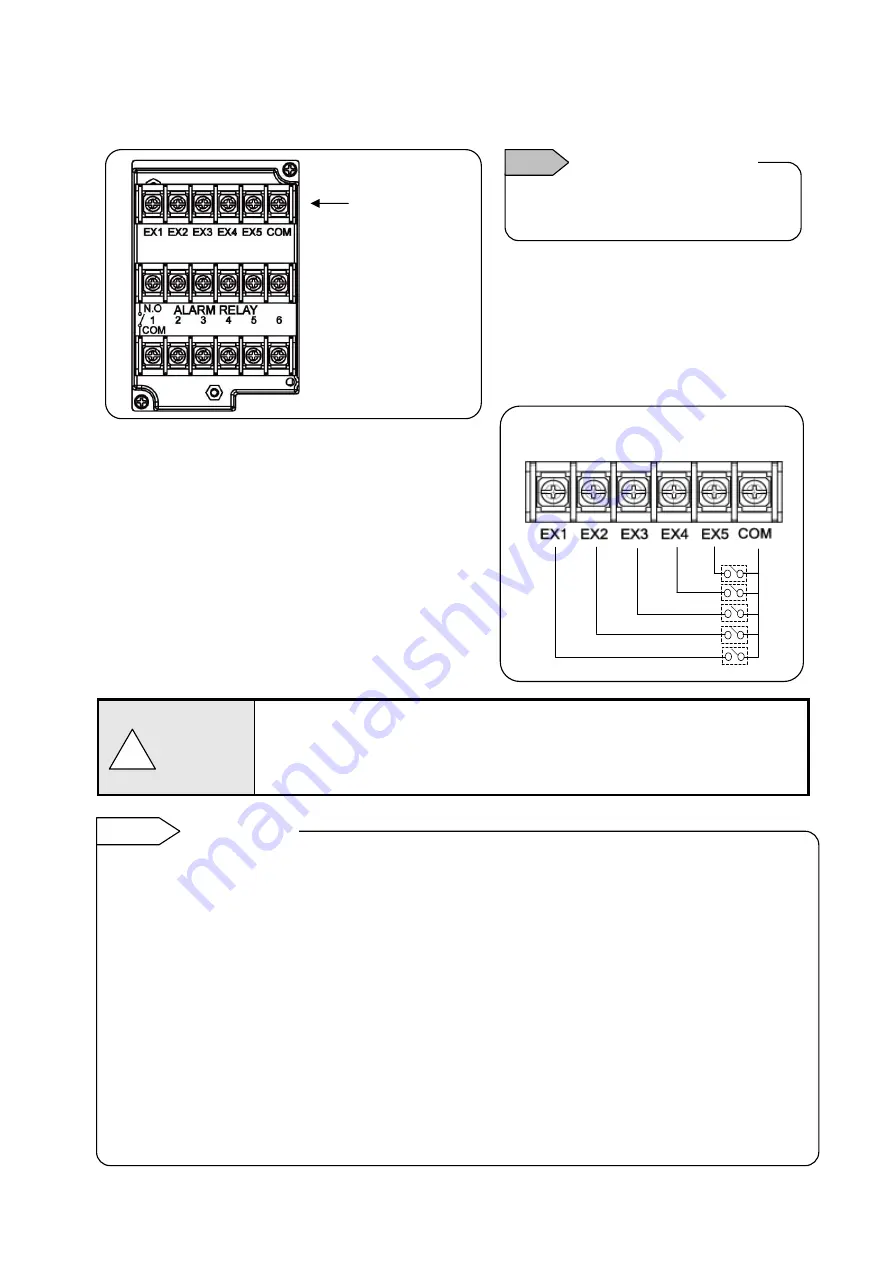
6. Remote contacts terminals wiring and operation selection (option)
Only with remote contacts terminals (option).
1) Remote contacts terminals
2) Wiring
Turn OFF the feed power source before wiring to
prevent an electric shock.
(1) Use no voltage contact signals to be given to the
remote contacts terminals.
(2) Install crimping terminals with insulation sleeves
to remote contacts terminals for wiring.
No voltage contact
For contacts connected to the remote contacts terminals, be able to connect only the
circuit of secondary side which is reinforced from primary side or treated double
insulation. Use switches or relays driven with voltage level 30VAC or 60VDC or less or
manual contacts which support light load.
■
Wiring example
Voltage on contact open: About 5V
Current on contact short: About10mA
Note
Characteristics of contact
input terminals
!
Warning
Upper row
Remote contacts
terminals
Remote contact enabled operation name
(1) Recording ON/OFF and three chart speed selection (two terminals of EX1 and EX2 are used)
(2) Messages (No. 01 and 02) selection and printing execution (two terminals of EX1 and EX2 are
used)
(3) Messages (No. 01 to 05) selection and execution (four terminals of EX1 to EX4 are used)
(4) Digital data printing (arbitrary one terminal)
(5) List printing (No. 1 to 3) (arbitrary one terminal for each)
(6) Integration reset (arbitrary one terminal)
(7) Messages No. 01 to 20 printing execution (each arbitrary one terminal)
(8) Time correction execution (arbitrary one terminal)
Each function requires short-circuit for one second or more between COM terminal and each terminal.
Operation allocation
Setting of allocation of operations to each terminal (EX1 to EX10) is required.
Name of operations which require setting
(1) Recording ON/OFF and three chart speed selection (See 8-7. Chart Speed Setting.)
(2) Message selection and printing execution (See 8-13. Message Printing 1 Settings.)
Remote contact
Reference


