51
Section 3 - Maintenance
NOTE: If there is a leak in the system or if the
outdoor furnace loses water from boiling
frequently, the problem should be identified and
repaired immediately. Under normal operation,
little or no water needs to be added. Adding
water to the furnace may cause corrosion if not
immediately treated with Corrosion Inhibitor
Plus™ to the proper pH and nitrite levels. In
addition, the amount of dissolved solids in the
system (due to adding additional water) can
cause problems.
After the initial three months of operation and every
six months thereafter, the pH and nitrite levels of the
system water should be tested. These levels should be
maintained as previously stated.
POST HEATING SEASON MAINTENANCE
The water should be left in the outdoor furnace if the
outdoor furnace is not being used for an extended
period of time. Check pH and nitrite levels as described
in the Water Quality and Maintenance section.
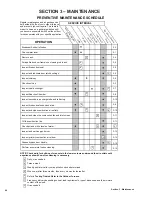
1. Refer to the Preventive Maintenance Schedule for a
list of operations to perform.
2. Shut off the power supply to the outdoor furnace.
3. Place a cover over the chimney to keep rain from
entering the outdoor furnace. Clean and oil the
chimney flue to the firebox.
4. To prevent condensation in the firebox, one option
is to keep a 60W light bulb on in the firebox during
the non-heating season.
If water is drained from the furnace, remove the plug
from the unused supply port to prevent damage from
water freezing in the supply port pipe.
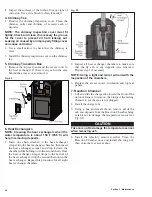
Fig. 64
Flushing the System
If the system water is brown or orange, it is an indication
the Corrosion Inhibitor Plus level has not been
maintained and corrosion is present in the water jacket.
The water jacket should be thoroughly flushed and the
system refilled with the proper amount of Corrosion
Inhibitor Plus added. Be sure to test the system water to
verify the proper amount of Corrosion Inhibitor Plus.
1. De-energize the pumps and close the supply and
return valves on the outdoor furnace. Remove the
inspection panel and insulation covering the drain
to gain access to the drain valve. Remove the cap
and connect a hose to the drain.
NOTE: Refer to General Installation Information
for information on draining treated system water.
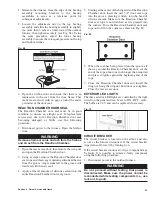
2. Open the drain valve to drain the outdoor furnace;
then flush the top of the firebox and bottom of the
water jacket beneath the firebox using a wand placed
in the vent (Fig. 65). Rotate the wand in a circle to
flush thoroughly.
CAUTION
Completely clean out the firebox before draining
water from the outdoor furnace.
Fig. 65
3. Close the drain valve securely and replace the cap
on drain after flushing the outdoor furnace.
4. Add Corrosion Inhibitor Plus™.
5. Fill the outdoor furnace following the procedure
in Water Quality and Maintenance making sure to
operate the pump(s) to thoroughly mix the Corrosion
Inhibitor Plus.
6. Replace insulation around drain valve.
7. Replace the inspection panel.
Summary of Contents for e-Classic 1450 IR
Page 17: ...15 Section 1 Outdoor Furnace Installation...
Page 29: ...27 Section 1 Outdoor Furnace Installation Fig 30 Fig 31...
Page 30: ...28 Section 1 Outdoor Furnace Installation Fig 32 Fig 33...
Page 66: ...64 E CLASSIC 1450 WIRING DIAGRAM Section 6 General Information...
Page 67: ...65 Section 6 General Information E CLASSIC 1450 WIRING DIAGRAM OPTIONAL POWER IGNITION...
Page 69: ...67 NOTES...
Page 70: ...68 NOTES...
Page 71: ...69 NOTES...


