44
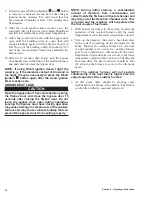
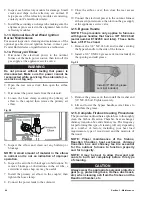
6. Close the Reaction Chamber door; then close the
rear access door.
7. Replace the access covers, insulation and top rear
panels.
8. Press the Power button on the FireStar controller
to turn it on.
3-8. Reaction Chamber
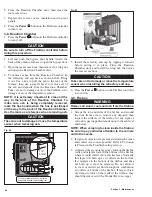
1. Press the Power button on the FireStar controller
to turn it off.
CAUTION
Be sure to turn off the FireStar controller before
doing this procedure.
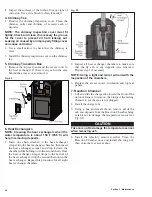
2. Lift and push the bypass door handle toward the
back of the outdoor furnace to open the bypass door.
3. Open the rear access door; then remove the wing nut
and open the Reaction Chamber door.
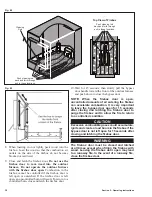
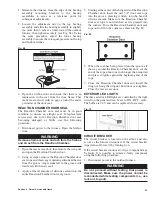
4. To remove ashes from the Reaction Chamber, tip
the refractory end cap back as shown before lifting
it out. Use a hoe to pull the ash to the rear of the
furnace; then use a small shovel to remove all of
the ash and deposits from the Reaction Chamber.
Take care not to damage or move the firebrick, or to
damage or move the temperature sensor.
NOTE: It is extremely important to clean all the
way to the back of the Reaction Chamber. To
make sure ash is being completely removed,
mark the hoe handle when the hoe is positioned
all the way to the back of the Reaction Chamber.
Use the mark as a reference when removing ash.
CAUTION
Take care not to damage or move the temperature
sensor when removing ash.
Fig. 52
1/2"
(13 mm)
To remove refractory end cap, it must be
tipped back as shown before lifting it out.
Thermocouple
Fig. 53
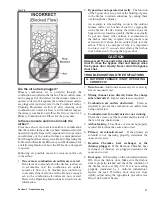
5. Install the refactory end cap by tipping it forward
before setting it in place. Close the Reaction
Chamber door and install the wing nut; then close
the rear access door.
CAUTION
Take care not to damage or move the temperature
sensor when installing the refractory end cap.
6. Press the Power button on the FireStar controller
to turn it on.
3-9. Firebox
WARNING
Remove all wood, coals and ash from the firebox.
1. Scrape the top and sides of the firebox and around
the door frame area to remove any deposits; then
inspect the surfaces of the firebox for any signs of
corrosion, paying particular attention to the ash level
and below.
NOTE: When scraping to clean inside the firebox,
be sure to pay particular attention to the corners
and to the seams.
2. If signs of corrosion are present, determine the cause
and correct it as soon as possible. Refer to Corrosion
is Present in the Troubleshooting section.
3. A thin, tar-like creosote layer may form on the firebox
walls and migrate toward the bottom of the firebox
where it could collect into a thicker layer. Normally
this layer will burn up as it collects on the bottom.
If it migrates to the bottom of the firebox and does
not burn up, it must be removed. Do not allow it
to cover or restrict air flow through the combustion
air outlets or bottom of the firebox. If larger, thick,
dry deposits form on the walls in the firebox, they
should be removed with a Wonder Bar or scraper.
Section 3 - Maintenance
Summary of Contents for e-Classic 1450 IR
Page 17: ...15 Section 1 Outdoor Furnace Installation...
Page 29: ...27 Section 1 Outdoor Furnace Installation Fig 30 Fig 31...
Page 30: ...28 Section 1 Outdoor Furnace Installation Fig 32 Fig 33...
Page 66: ...64 E CLASSIC 1450 WIRING DIAGRAM Section 6 General Information...
Page 67: ...65 Section 6 General Information E CLASSIC 1450 WIRING DIAGRAM OPTIONAL POWER IGNITION...
Page 69: ...67 NOTES...
Page 70: ...68 NOTES...
Page 71: ...69 NOTES...

