background image

Troubleshooting

156

When playing back scenes/slideshow with background music, the music track is not played 
back correctly.

- This can occur when you transfer the music files to a memory card after repeatedly recording 

and deleting scenes (fragmented memory). Save your recordings (

A

127) and initialize the 

memory card (

A

36). Then, transfer the music files first and only then transfer the video files.

- Music tracks will not play back correctly if the connection was interrupted while transferring the 

music files to a memory card. Delete the music tracks and transfer the music files again.

- The transfer rate of the memory card used is too slow. Use a recommended memory card 

(

A

33).

When playing scenes/a slideshow linked to external audio, the video playback is not correctly 
linked to the external player. 

- The volume of external player may be too low. Try increasing the volume of the external player.

Cannot divide scenes

- You cannot divide scenes recorded or edited using another device.
- The memory is full. Delete some recordings (

A

92, 123) to free some space.

Cannot copy scenes/photos

- You may not be able to copy scenes/photos recorded or edited using another device.

Cannot mark individual scenes/photos in the index screen with a checkmark 

!

- You cannot select more than 100 scenes/photos individually. Select the [All Scenes] or [All 

Photos] option instead of [Select].

Indicators and Onscreen Displays

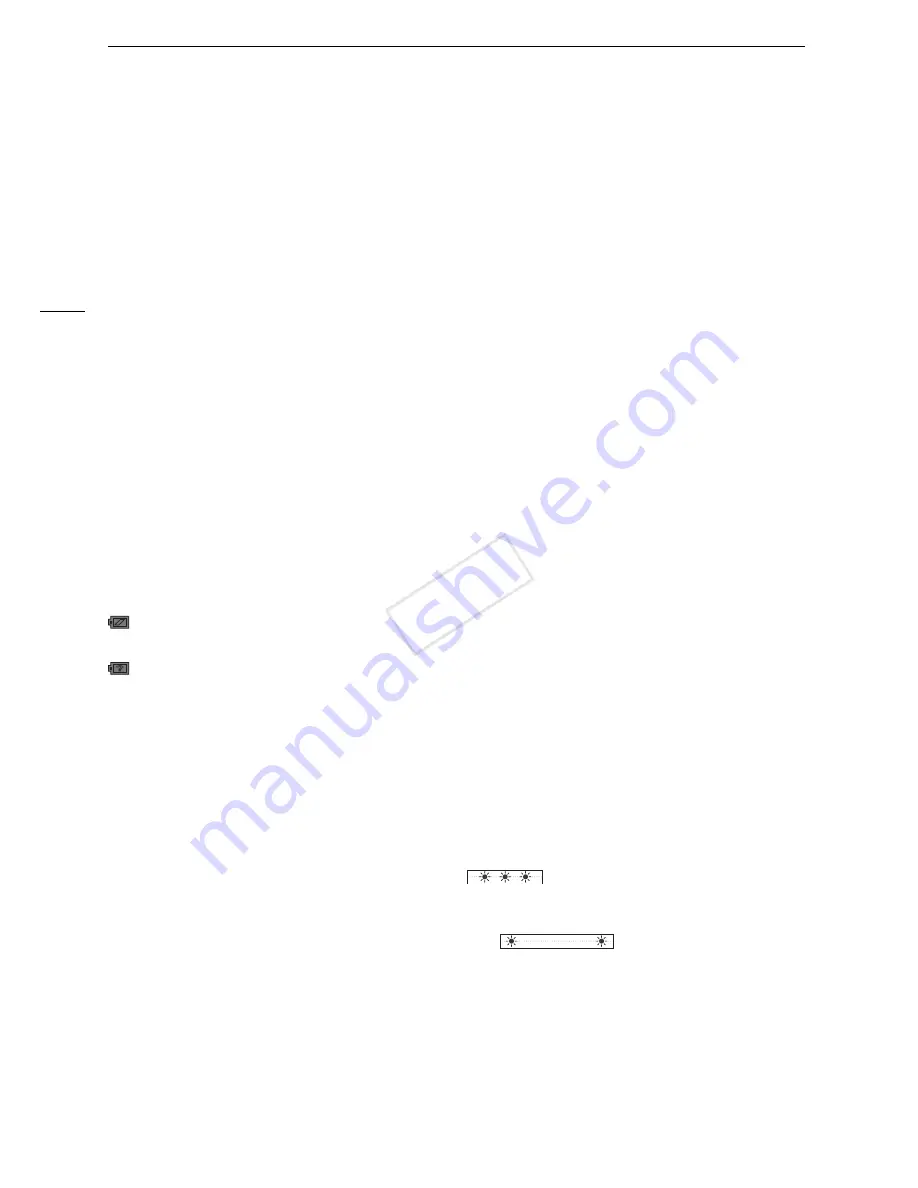
 lights up in red.

- Battery pack is exhausted. Replace or charge the battery pack.

 appears on the screen.

- The camcorder cannot communicate with the battery pack attached so the remaining battery 

time cannot be displayed.

6

/

7

 lights up in red.

- A memory card error occurred. Turn off the camcorder. Remove and reinsert the memory card. 

Initialize the memory card if the display does not change back to normal.

- The memory card is full. Replace the memory card or delete some recordings (

A

92, 123) to 

free some space on the memory card.

Even after stopping recording, the ACCESS indicator does not go off.

- The scene is being recorded in the memory. This is not a malfunction.

The red ON/OFF (CHG) indicator flashes rapidly (

 one flash at 0.5-second intervals). 

- Charging has stopped because the compact power adapter or the battery pack is faulty. 

Consult a Canon Service Center.

The red ON/OFF (CHG) indicator flashes very slowly (

 one flash at 2-second 

intervals). 

- The temperature of the battery pack is outside its operating range (approximately 0 – 40 °C 

(32 – 104 °F)). Remove the battery pack, warm it or let it cool down, as necessary, and try 
charging it again.

- Charge the battery pack in temperatures between approximately 0 °C and 40 °C (32 °F and 

104 °F).

- The battery pack is damaged. Use a different battery pack.

COP

Y

Summary of Contents for VIXIA HF G20

Page 1: ...PUB DIM 1067 000A English Français Español st HD Camcorder Instruction Manual Caméscope HD Manuel d instruction Videocámara HD Manual de Instrucciones COPY ...

Page 2: ...te the receiving antenna Increase the separation between the equipment and receiver Connect the equipment into an outlet on a circuit different from that to which the receiver is connected Consult the dealer or an experienced radio TV technician for help Use of shielded cable is required to comply with class B limits in Subpart B of Part 15 of FCC Rules Do not make any changes or modifications to ...

Page 3: ...and SDXC Logos are trademarks of SD 3C LLC Microsoft and Windows are trademarks or registered trademarks of Microsoft Corporation in the United States and or other countries Apple and Mac OS are trademarks of Apple Inc registered in the U S and other countries x v Color and the x v Color logo are trademarks HDMI the HDMI logo and High Definition Multimedia Interface are trademarks or registered tr...

Page 4: ... advanced image stabilization A 55 will let you shoot in a variety of situations in the field Moreover in full automatic mode Intelligent IS A 40 will select the optimal type of image stabilization for the recording situation Manual controls at your fingertips The focus ring helps you achieve the focus you are looking for Furthermore you can assign certain frequently used functions to a customizab...

Page 5: ...uch AE By simply touching the screen you can make dark areas in the picture appear brighter A 60 This operation is simple yet allows you to shoot with the desired exposure Added and improved functionality Other functions include two types of video scopes A 79 conversion to standard definition A 133 and Story Creator mode A 99 which allows you to create engrossing video stories COPY ...

Page 6: ...d recordings to your computer or a video sharing Web site Save or upload to the Web Standard Definition Convert your HD movies in the camcorder itself to standard definition files A 133 High Definition Use the supplied PIXELA s software A 127 133 Create discs Refer to the instruction manual of the device Depending on the device used correct playback may not be possible even if the device is AVCHD ...

Page 7: ...Manual Mode 42 Quick Start Function 44 Selecting the Video Quality Recording Mode 45 Selecting the Frame Rate 46 Focus Adjustment 47 Manual Focus 47 Autofocus 48 Face Detection 49 Touch Track 51 Zooming 52 Using the Zoom Lever or Wireless Controller 52 Using the Touch Screen s Zoom Controls 53 Soft Zoom Control 54 Digital Tele Converter 54 Advanced Image Stabilization 55 Automatic Gain Control AGC...

Page 8: ...ot Scenes and Photos from a Movie 97 Capturing a Video Snapshot Scene 97 Capturing Photos 98 6 Video Stories and Cinema Style 99 Using Story Creator to Create Video Stories 99 Creating a New Story 99 Recording a Scene within a Story 99 Recording Additional Scenes within an Existing Story 100 CINEMA Mode and Cinema Look Filters 101 Adding Decorations 103 Decorating Scenes while Recording 103 Decora...

Page 9: ...rd Definition from the Date Index Screen 133 Converting Scenes into Standard Definition from a Story by Rating 135 Converting Only Part of a Scene or Story 135 Uploading your Videos Wirelessly 136 Uploading Photos to the Web 137 10 Additional Information 138 Appendix Menu Options Lists 138 FUNC Panel 138 Setup Menus 141 Appendix Onscreen Icons and Displays 150 Troubleshooting 154 List of Messages ...

Page 10: ... the basic operating procedures POINTS TO CHECK Restrictions or requirements regarding the function described A Reference page number within this manual The following terms are used in this manual When not specified as memory card or built in memory the term memory by itself refers to both Scene refers to one movie unit from the point you press the Y button to start recording until you press again...

Page 11: ...ireless controller NOTES Once the countdown has begun any of the following actions will cancel the self timer Operating modes Brackets are used to refer to control buttons and menu options you will touch on the screen and to other onscreen messages and displays indicates that a function is available in the operating mode indicated and indicates that the function is not available For a detailed exp...

Page 12: ... the camcorder CA 570 Compact Power Adapter incl power cord BP 808 Battery Pack WL D89 Wireless Controller incl CR2025 lithium button battery Stylus Pen HTC 100 S High Speed HDMI Cable STV 250N Stereo Video Cable IFC 300PCU S USB Cable Lens hood with lens barrier Lens cap Startup Guide for PIXELA s Software COPY ...

Page 13: ...ents ImageBrowser EX Software for saving managing and editing your photos The supplied VIXIA CD ROM contains an automatic installer for ImageBrowser EX An Internet connection is required to fully install the software Music data Music files that can be used as background music during playback These music files are for exclusive use with the supplied PIXELA s software The disc cannot be played back ...

Page 14: ...2 BATT INFO battery info button A 153 4 Double memory card slot cover 5 Memory card slot 2 A 34 6 Memory card slot 3 A 34 7 Lens hood A 22 8 Lens barrier switch A 38 9 Focus ring A 47 10 COMPONENT OUT terminal A 116 117 11 AV OUT terminal A 116 118 headphones terminal A 73 10 11 7 9 8 2 1 3 4 5 6 Left side view COPY ...

Page 15: ...ilt in speaker A 88 2 REMOTE terminal For connecting commercially available remote controllers 3 HDMI OUT terminal A 116 117 4 USB terminal A 116 118 5 Grip belt A 24 6 MIC terminal A 76 111 1 5 6 2 3 4 Right side view COPY ...

Page 16: ...ecording button A 81 Assignable button 2 A 85 5 Viewfinder A 22 6 START STOP button A 38 7 Strap mount A 24 8 DC IN terminal A 20 9 LCD touch screen A 23 27 10 CUSTOM customizable button A 84 11 CUSTOM customizable dial A 84 12 Dioptric adjustment lever A 22 13 Battery attachment unit A 20 1 5 6 7 8 11 13 9 10 12 2 3 4 Front view Back view COPY ...

Page 17: ...rophone A 70 71 2 Zoom lever A 52 3 Mode switch A 28 4 Mini advanced shoe A 74 75 5 ACCESS indicator A 38 6 Eye cup A 22 7 POWER button 8 ON OFF CHG indicator A 20 Green ON Orange Standby A 44 Red Charging A 20 3 2 1 5 4 6 7 8 Top view COPY ...

Page 18: ...Names of Parts 18 1 Serial number 2 Tripod socket A 26 3 BATTERY RELEASE switch A 21 3 2 1 Bottom view COPY ...

Page 19: ...1 Press and hold for more than 2 seconds to switch between shooting and playback mode 3 MENU button A 30 141 4 DISP onscreen display button A 82 5 SET button 6 Ñ stop button A 87 7 PHOTO button A 38 8 Zoom buttons A 52 9 Navigation buttons Í Î Ï Ð 10 Ò play pause button A 87 1 7 8 9 10 2 3 4 5 6 COPY ...

Page 20: ...er adapter to the camcorder s DC IN terminal 4 Attach the battery pack to the camcorder Press the battery pack softly into the battery attachment unit and slide it forward until it clicks in place 5 Charging will start when the camcorder is turned off If the camcorder was on the green ON OFF CHG indicator will go out when you turn off the camcorder After a moment the ON OFF CHG indicator will turn...

Page 21: ... temperature or the battery pack s temperature is outside the range of approx 0 C to 40 C 32 F to 104 F charging will not start The battery pack will be charged only when the camcorder is off If the power supply was disconnected while charging a battery pack make sure the ON OFF CHG indicator has gone out before restoring the power supply If remaining battery time is an issue you can power the cam...

Page 22: ...e bottom of the lens 햲 and then turn the lens hood clockwise until it stops with a click 햳 Be careful not to deform the lens hood Make sure that the lens hood is aligned with the thread To remove the lens hood turn it counterclockwise Using the Viewfinder If it is difficult to use the LCD screen while the LCD backlight is on A 24 you can use the viewfinder You can also use the viewfinder when you ...

Page 23: ...ing the LCD panel 180 degrees can be useful in the following cases To allow the subject to monitor the LCD screen while you use the viewfinder To include yourself in the picture when recording with the self timer To allow the camcorder to be operated with the wireless controller from the front NOTES About the LCD and viewfinder screens The screens are produced using extremely high precision manufa...

Page 24: ...djust the brightness of the LCD screen with the q LCD Brightness setting or dim it with the q LCD Screen Dimmer setting to use in places where the light from the LCD screen can be a nuisance For details about how to take care of the touch screen refer to Handling Precautions A 165 Cleaning A 168 Grip Belt and Straps Fasten the grip belt Adjust the grip belt so that you can reach the zoom lever wit...

Page 25: ...ium button battery with the side facing up 3 Insert the battery holder To use the wireless controller Point the wireless controller at the camcorder s remote sensor when you press the buttons You can rotate the LCD panel 180 degrees to use the wireless controller from the front of the camcorder NOTES When the camcorder cannot be operated with the wireless controller or when it can only be operated...

Page 26: ...Preparing the Camcorder 26 Using a Tripod You can mount the camcorder on a tripod but do not use tripods with mounting screws longer than 6 5 mm 0 26 in as this may cause damage to the camcorder COPY ...

Page 27: ...m the camcorder will recognize as the main subject of the scene etc Drag While applying pressure swipe your finger up and down or left and right across the screen Used to scroll menus to browse through index screen pages or to adjust slider controls like the volume IMPORTANT The camcorder uses a pressure sensitive touch screen Press firmly when using touch operations In the following cases you may...

Page 28: ...will be the same currently used for recording You can also press and hold on the wireless controller for more than 2 seconds to switch between recording and playback mode Operating mode Mode switch Operation Let the camcorder take care of all the settings while you concentrate on recording A 39 This operating mode is suitable if you just prefer not to bother with detailed camcorder settings Enjoy ...

Page 29: ...h FUNC to access the FUNC panel and then touch the function you want to set or adjust You may need to drag your finger up and down the screen to find the control button of the desired function In mode access to functions is limited Edit Panel Touch Edit to display a panel showing available operations copying deleting etc and then touch the operation you want to perform Operating modes Operating mo...

Page 30: ...nge selection bar Menu items not available appear grayed out You can touch any menu item on the screen to bring it directly into the selection bar 5 When the desired menu item is inside the selection bar touch the orange frame on the right 6 Touch the desired option and touch X You can touch X to close the menu at any time NOTES For brevity s sake references in the text to settings in the setup me...

Page 31: ...ollow the order you selected 6 Touch 24H to use 24 hour clock or leave it unselected to use 12 hour clock AM PM 7 Touch OK to start the clock and close the setup screen NOTES You can adjust the date and time later on with the q Date Time setting When you do not use the camcorder for about 3 months the built in rechargeable lithium battery may discharge completely and the date and time setting may ...

Page 32: ...amcorder to match the time of your home location or that of your travel destination 1 Open the Time Zone DST screen FUNC MENU q Time Zone DST Touching FUNC is necessary only when performing the procedure in a recording mode 2 Touch to set the home time zone or to set the time zone of your destination when you are traveling 3 Touch Í or Î to set the desired time zone If necessary touch to adjust fo...

Page 33: ... cards with other devices such as digital recorders computers and card readers make sure that the external device is compatible with SDXC cards For information about the compatibility of SDXC cards contact the computer operating system or memory card manufacturer IMPORTANT If you use an SDXC memory card with a computer OS that is not SDXC compatible you may be prompted to format the memory card In...

Page 34: ...ory card springs out pull it all the way out IMPORTANT Observe the following precautions while the ACCESS indicator is flashing Failure to do so may result in permanent data loss Do not disconnect the power source or turn off the camcorder Do not remove the memory card Turn off the camcorder before inserting or removing a memory card Inserting or removing the memory card with the camcorder on may ...

Page 35: ...n memory you can choose to use only memory card 2 for relay recording 6 or use both memory cards 6 7 1 Insert a memory card that contains no video recordings into the card slot of the memory card you want to use for relay recording When relay recording from the built in memory memory card slot 2 or both memory card slots When relay recording from memory card 2 memory card slot 3 only 2 Open the Re...

Page 36: ...y delete all the recordings it contains At the time of purchase the built in memory comes pre initialized and contains music files for use as background music and images for use with the image mix function image mix frames 1 Power the camcorder using the compact power adapter Do not disconnect the power source or turn off the camcorder until the initialization is completed 2 Open the initializatio...

Page 37: ...ed To transfer music files from the supplied VIXIA CD ROM to the memory card Windows users Use the supplied software VideoBrowser For details refer to the Software Guide PDF file of the supplied PIXELA s software Mac OS users Use Finder to transfer music files from the MUSIC folder on the supplied VIXIA CD ROM to the memory card Refer to About the music files A 178 for the folder structure of the ...

Page 38: ...camcorder is operating correctly Preparing to Record 1 Attach a charged battery pack to the camcorder A 20 2 Turn on the camcorder 3 Select the memory for recording A 34 To use relay recording A 35 insert a memory card into memory card slot 2 or both memory card slots To use double slot recording A 36 insert memory cards into both memory card slots 4 Open the lens barrier Set the lens barrier swit...

Page 39: ...on the scene rating option in recording mode A 109 To take photos Touch PHOTO A green icon g will appear momentarily on the screen and the ACCESS indicator will flash as the photo is recorded You can record photos simultaneously while recording a movie In that case the green icon will not appear Instead the Ð icon will appear momentarily in the upper right of the screen You can also press Z on the...

Page 40: ...nd lighting conditions etc It will then adjust various settings focus exposure color image stabilization image quality among others selecting the best settings for the scene you want to shoot The Smart AUTO icon will change to one of the icons in the Smart AUTO icons table A 41 Intelligent IS Intelligent IS allows the camcorder to select the best image stabilization option based on your shooting m...

Page 41: ...twork Always verify that Eye Fi cards have been approved in the country region of use See also Using an Eye Fi Card A 136 Smart AUTO icons 1 The icon in parentheses appears under backlight conditions 2 This icon will appear under tele macro conditions Tele macro is activated automatically when you zoom toward the telephoto end and close in on the subject Tele macro allows you to get closer shots o...

Page 42: ...iles The photo size 1920x1080 and quality cannot be changed At this size a 1 GB memory card can hold approximately 670 photos However the actual number of photos that can be recorded will vary depending on the subject and shooting conditions Photos cannot be recorded while the digital zoom is activated during double slot recording or while fading in or fading out a scene When you need to record fo...

Page 43: ...y loss or corruption of data If supported recordings were made on an Eye Fi card in memory card slot 3 wireless upload will start automatically after setting the camcorder to playback mode if you are within the range of a configured network Always verify that Eye Fi cards have been approved in the country region of use See also Using an Eye Fi Card A 136 NOTES About the power saving mode If q Powe...

Page 44: ...rns back green and the camcorder is ready to record You can also pull out the viewfinder to start recording with the LCD panel closed IMPORTANT Do not disconnect the power source during standby mode while the ON OFF CHG indicator is lit in orange NOTES The camcorder will not enter standby mode while the ACCESS indicator is on or flashing while the setup menus are being displayed or while using the...

Page 45: ...he content of the scenes The camcorder retains the last setting used even if you set the camcorder to mode MXP scenes will be converted to an image quality similar to that of FXP scenes Operating modes Approximate recording times Default value 1 Recorded in 1920 x 1080 resolution Movies recorded using other recording modes are recorded in 1440 x 1080 resolution 2 At the time of purchase the built ...

Page 46: ...te to PF24 or convert the movies to standard definition using the supplied software VideoBrowser Operating modes 60i Standard 60 fields per second interlaced Standard frame rate of NTSC analog TV signals PF30 Shooting at 30 frames per second progressive Use this frame rate to easily edit your recordings for example to post them on the Web PF24 Shooting at 24 frames per second progressive Using thi...

Page 47: ...automatically You have the option to further adjust the focus manually as necessary 4 If necessary turn the focus ring to further adjust the focus The center of the screen will be magnified to help you focus more easily You can also turn off this function with the p Focus Assistance setting The focusing distance displayed will change as you adjust the focus You can change the units used for the di...

Page 48: ...controls FUNC Focus 2 Touch w For the black white setting Touch Off or On For the peaking color Touch Red Blue or Yellow 3 Touch K 4 Touch O Peaking is activated and edges are highlighted You can turn the focus ring on this screen or touch X to hide the focus controls Touch O again to turn off the peaking effect NOTES The peaking effect and black white picture will not appear in your recordings Au...

Page 49: ...f a window Autofocus may not work well on the following subjects or in the following cases In such case focus manually Reflective surfaces Subjects with low contrast or without vertical lines Fast moving subjects Through dirty or wet windows Night scenes Face Detection The camcorder automatically detects people s faces and uses this information to select the optimal focus and exposure settings Fac...

Page 50: ... is detected and use manual focus for all other scenes The camcorder will also adjust the brightness when focusing automatically on the subject s face Set an assignable button to Face Only AF A 85 and press the button appears on the screen NOTES The camcorder may mistakenly detect the faces of non human subjects In such case turn face detection off In certain cases faces may not be detected correc...

Page 51: ...ble frame will appear around the subject and track it as it moves Touch Cancel to remove the frame and cancel the tracking NOTES Touching somewhere with a color or pattern unique to the subject will make it easier to track However if there is another subject in the vicinity that shares similar characteristics to the selected subject the camcorder may start tracking the incorrect subject Touch the ...

Page 52: ...e zoom buttons on the wireless controller By default the zoom lever operates at a variable speed press gently for a slow zoom press harder for faster zooms Setting the Zoom Speed You can set the zoom speed for the zoom lever and wireless controller To set the zoom lever s zoom speed For the zoom lever first set the overall zoom speed to one of three levels Next select whether the zoom lever operat...

Page 53: ... Measured from full wide angle to full telephoto When the zoom speed is too fast approximately 2 seconds end to end the camcorder will have more trouble focusing automatically while zooming Using the Touch Screen s Zoom Controls 1 Display the zoom controls on the touch screen FUNC ZOOM The zoom controls appear on the left side of the screen 2 Touch the zoom controls to operate the zoom Touch anywh...

Page 54: ...ouch X 3 Open the zoom controls FUNC ZOOM 4 Touch f digital tele converter and then touch X The center of the screen will be enlarged approximately 2 times and the f icon will appear Touch f again before closing the screen to deactivate the digital tele converter NOTES You can attach the optional tele converter and use it in conjunction with this function to increase the effect The digital tele co...

Page 55: ...de angle Å Standard Compensates for a lower degree of camcorder shake such as when shooting while remaining stationary and is suitable for shooting natural looking scenes Ì Off Use this setting when the camcorder is mounted on a tripod Powered IS After setting an assignable button to È Powered IS A 85 you can use Powered IS to make the image stabilization even more powerful Powered IS is most effe...

Page 56: ...The smaller the AGC limit the darker the picture but the less noise it will contain POINTS TO CHECK Select a recording program other than the Special Scene recording programs or n Manual Exposure 1 Open the AGC limit adjustment screen FUNC x AGC Limit n Manual Touch m Automatic to remove the AGC limit 2 Touch Ï or Ð to set the AGC limit You can also drag your finger along the dial 3 Touch X The se...

Page 57: ...rogram icon Options Default value Available shutter speed settings Available shutter speed settings when the frame rate is set to PF24 or 24P Available aperture value settings Because p ND Filter is set to k Automatic by default ND filter settings will be available for aperture values F4 0 and higher Operating modes Programmed AE The camcorder automatically adjusts the aperture and shutter speed t...

Page 58: ...cker select Shutter Pri AE and set the shutter speed to 1 100 Aperture Pri AE The actual range of values available for selection will vary depending on the initial zoom position When setting a numeric value aperture or shutter speed the number displayed will flash if the aperture value or shutter speed is not appropriate for the recording conditions In such case select a different value During exp...

Page 59: ...the control button of the setting you wish to adjust 3 Touch Ï or Ð to set the desired value You can also drag your finger along the dial The exposure will change according to the setting s new value Repeat steps 2 and 3 to adjust other settings Before touching X you can also use the zebra pattern see below and waveform monitor A 79 4 Touch X NOTES If you set q Custom Key Dial to l Manual Exposure...

Page 60: ... exposure adjustment screen FUNC y Exposure 2 Touch a subject that appears inside the y frame The Touch AE mark I will flash and the exposure will be adjusted automatically so the area you touched will be correctly exposed You have the option to further adjust the exposure manually as necessary Depending on the subject you may want to use the Highlights setting as described below You can touch n i...

Page 61: ...o normal Touch AE settings To use backlight correction When recording in situations in which the subject is constantly backlit you can use backlight correction to make the entire picture brighter especially dark areas This will take precedence over the p Auto Backlight Correction setting which is useful in situations in which the subject is not constantly backlit 1 Open the BLC Always On screen FU...

Page 62: ... The camcorder will retain the custom white balance even if you turn it off Options Default value NOTES When you select a custom white balance Set p Digital Zoom to j Off Reset the white balance when you change locations or the lighting or other conditions change Depending on the light source Šmay keep flashing The result will still be better than with à Automatic Operating modes à Automatic The ...

Page 63: ...se ups Subjects in a single color sky sea or forest Under mercury lamps certain types of fluorescent lights and LED lights Depending on the type of fluorescent light optimal color balance may not be obtained with Fluorescent or À Fluorescent H If the color looks unnatural select à Automatic or a custom white balance setting COPY ...

Page 64: ...g program and then touch X Options Default value Operating modes úPortrait The camcorder uses a large aperture to achieve a sharp focus on the subject while blurring the background ûSports To record sports scenes such as tennis or golf ü Night Scene To record nightscapes with lower noise ýSnow To record in bright ski resorts without the subject being underexposed þBeach To record on a sunny beach ...

Page 65: ...y days or in shaded places Check the image on the screen Œ Low Light Moving subjects may leave a trailing afterimage Picture quality may not be as good as in other modes White points may appear on the screen Autofocus may not work as well as in other modes In such case adjust the focus manually Š Fireworks To avoid camcorder blur blur due to the camcorder moving we recommend using a tripod œSpotli...

Page 66: ...trast or Brightness Select OFF to turn off the image effects 3 Touch Ï or Ð or drag your finger along the dial to adjust the effect level levels richer colors sharper image stronger contrast brighter image levels shallower colors softer image softer contrast darker image To adjust other parameters touch K to return to the image effects screen Touch the desired control button and repeat step 3 4 To...

Page 67: ... In record pause mode touch PHOTO or press Z on the wireless controller The camcorder will record the photo after a 10 second countdown The countdown appears on the screen 2 seconds when using the wireless controller NOTES Once the countdown has begun any of the following actions will cancel the self timer Pressing Y when recording movies Pressing Z on the wireless controller or touching PHOTO on ...

Page 68: ...ech Best for recording human voices and dialog Forest and Birds To record birds and scenes in forests The camcorder clearly captures sound as it spreads Noise Suppression To record scenes while reducing noise from wind passing vehicles and similar ambient sound Ideal for recording at the beach or in places with a lot of noise Custom Setting Allows you to adjust the audio settings to your liking Th...

Page 69: ...en Touch m Automatic to return the camcorder to automatic audio recording levels 2 Touch and hold Ï or Ð to adjust the audio recording level as necessary As a guideline adjust the audio recording level so that the audio level meter will go to the right of the 12 dB mark only occasionally When p Audio Mix is set to i On two audio level indicators will appear the top one INT for the built in microph...

Page 70: ...2 Touch the desired option and then touch X Options Default value NOTES Except when using the audio mix function an external microphone overrides the built in microphone In the following cases the built in microphone s directionality cannot be changed When an external microphone is connected to the MIC terminal with p Audio Mix set to j Off When an external microphone is attached to the mini advan...

Page 71: ... Custom Setting A 68 1 Open the Auto Wind Screen screen FUNC MENU p Auto Wind Screen 2 Touch the desired wind screen level and then touch X Touch j Off à to turn off the auto wind screen NOTES Some low frequency sounds will be suppressed along with the sound of wind When recording in surroundings unaffected by wind or if you want to record low frequency sounds we recommend setting Auto Wind Screen...

Page 72: ...the external source to the MIC terminal 2 Open the MIC Terminal Input screen FUNC MENU p MIC Terminal Input 3 Touch Þ External Audio or ß Microphone and then touch K This step is not necessary after connecting the optional WM V1 Wireless Microphone 4 Activate the audio mix Audio Mix i On 5 Adjust the audio mix balance as necessary Touch INT more of the sound from the built in microphone or EXT mor...

Page 73: ...the AV Headphones screen FUNC MENU q AV Headphones Touching FUNC is necessary only when performing the procedure in a recording mode 2 Touch Ó Headphones and then touch K 3 Connect the headphones to the AV OUT terminal 4 Back in the menu touch Volume 5 Touch Ô or Õ to adjust the volume and then touch X You can also drag your finger along the Headphones bar Ó will appear on the screen To adjust the...

Page 74: ...d use the accessories refer also to the instruction manual of the accessory used 1 Open the mini advanced shoe cover 2 Attach the optional accessory to the mini advanced shoe When a compatible accessory is attached to the mini advanced shoe º will appear on the screen NOTES Accessories designed for the Advanced Accessory Shoe cannot be used with this camcorder Look for video accessories bearing th...

Page 75: ...se the optional SM V1 Surround Microphone with this camcorder for the first time you will need to update the camcorder s firmware using the memory card supplied with the SM V1 Attach the optional SM V1 Surround Microphone or DM 100 Directional Stereo Microphone to the mini advanced shoe Refer to Using the Mini Advanced Shoe A 74 º will appear on the screen For details about using the optional exte...

Page 76: ...ding levels may vary An external microphone can be used also in mode but the function of the terminal cannot be changed in this mode Change the setting in advance in one of the other operating modes 1 Connect the external microphone to the MIC terminal 2 Open the MIC Terminal Input screen FUNC MENU p MIC Terminal Input 3 Touch ß Microphone and then touch X If necessary activate and adjust the audi...

Page 77: ...ach the optional video light to the mini advanced shoe Refer to Using the Mini Advanced Shoe A 74 º will appear on the screen when you turn on the optional video light ON or AUTO For details about using the optional video light refer to the instruction manual of the accessory used The optional VFL 2 Video Flash Light cannot be used as a flash with this camcorder Operating modes COPY ...

Page 78: ... Bars Test Tone screen FUNC MENU r Color Bars Test Tone 2 Touch the desired option and then touch X Options Default value Operating modes j Off Select this option if you do not intend to use the color bars or audio reference signal Color Bars Displays a standard SMPTE color bar pattern Color Bars Tone In addition to the color bar pattern an audio reference signal is output COPY ...

Page 79: ...posure using the dial at the bottom of the screen or by touching inside the y frame A 60 You can see the results immediately in the waveform monitor Displaying the Waveform Monitor during n Manual Exposure Recording Program 1 Open the n Manual Exposure screen FUNC Rec Programs n Manual Exposure 2 Touch P waveform monitor The waveform monitor will appear in a window on the screen Touch the window t...

Page 80: ...ideo Snapshot Alternatively you can set an assignable button to Video Snapshot A 85 In that case press the assignable button and continue to step 3 2 Touch i On A blue border appears on the screen Touch j Off to return to normal video recording mode 3 Press Y The camcorder records for a few seconds the blue frame serves as a visual progress bar and then automatically returns to record pause mode W...

Page 81: ...OTES The camcorder will not record the full 3 seconds prior to pressing Y if the button was pressed within 3 seconds of having turned on pre recording or having finished the previous recording Any of the following actions will deactivate the pre recording function Leaving the camcorder without any operation for 1 hour Changing the position of the mode switch Pressing T Activating video snapshot Op...

Page 82: ...ot remove control buttons FUNC PHOTO etc and onscreen displays that were turned on manually for example onscreen markers or the audio level meter 2 In these modes pressing D has the same effect as touching the screen During single photo view and while playing back a scene the playback controls are displayed only momentarily Operating modes About the Data Code With every scene or photo recorded the...

Page 83: ...r appears in green To fade in out Press Y in record pause mode Û to start recording with a fade in Press Y while recording Ü to fade out and pause the recording NOTES When you apply a fader not only the picture but also the sound will fade in or out Faders cannot be used in the following cases While using the Old Movies cinema look filter in mode When recording scenes with decorations When recordi...

Page 84: ...the audio level indicator and then use the CUSTOM dial to adjust the audio recording level Tv Av When you set the recording program to Shutter Pri AE or Aperture Pri AE you can adjust the shutter speed or aperture value with the CUSTOM dial l Manual Exposure When you set the recording program to n Manual Exposure repeatedly press C to toggle between the aperture value shutter speed and gain Next u...

Page 85: ...function NOTES Even if an assignable button was set to one of the following functions in or mode the button will be disabled if you set the camcorder to mode È Powered IS BLC Always On Face Only AF Ä WB Priority or AF MF Operating modes È Powered IS Turns Powered IS on off A 55 BLC Always On Turns backlight correction on off A 61 Face Only AF Turns face only autofocus on off A 50 é Story Creator A...

Page 86: ...ttings 7 screen FUNC MENU q Backup Menu Settings 7 3 Touch Save and then touch Yes The current settings are saved to the memory card 4 Touch OK and then touch X Loading Menu Settings from a Memory Card 1 Insert a memory card with menu settings into memory card slot 3 2 Open the Backup Menu Settings 7 screen FUNC MENU q Backup Menu Settings 7 3 Touch Load and then touch Yes After the camcorder s cu...

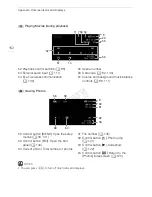
Page 87: ... page move it toward S to show 6 scenes per page Operating modes Memory being read Recording date Division line between recording dates Drag your finger left for the next index page Drag your finger right for the previous index page Open the G Index Selection screen A 91 3D Flip View A 90 Scene s timeline A 96 While browsing through index pages a scroll bar will appear at the bottom of the screen ...

Page 88: ...he playback controls 2 Touch Ý drag your finger along the Speaker Volume bar to adjust the volume and touch K When q AV Headphones is set to Ó Headphones adjust the Headphone Volume bar instead Jump to the beginning of the scene Double tap to jump to the previous scene Jump to the beginning of next scene Pause the playback Fast playback backward forward Display the volume A 88 and background music...

Page 89: ...n only be played back at normal speed You can turn off the recording date and time display or change the information displayed with the s Data Code setting Depending on the recording conditions you may notice brief stops in video or sound playback between scenes During fast slow playback you may notice some anomalies blocky video artifacts banding etc in the playback picture The speed indicated on...

Page 90: ... large number of recordings Recording date Drag your finger left to go to the next date with recordings Drag your finger up and down to browse through the scenes recorded in the displayed date Drag your finger right to go to the previous date with recordings Return to the date index screen Current scene Total number of scenes recorded on the selected date Touch the scene in the front to play it ba...

Page 91: ... Scenes organized by story A 107 Photos Photos index screen z SD Movies only when a memory card is selected Scenes that were converted to standard definition to upload them to the Web A 133 Two playback modes the date index screen vs the gallery In the date index screen you can find all the movies you have recorded conveniently organized by recording date When you play back scenes from the date in...

Page 92: ... Delete 3 Touch the desired option When you select Select perform the following procedure to select the individual scenes you want to delete before touching Yes 4 Select Yes Touch Stop to interrupt the operation while it is in progress Some scenes may be deleted nevertheless The selected scenes are deleted 5 Touch OK To select individual scenes 1 Touch on the individual scenes you want to delete A...

Page 93: ...ting 1 Open the information screen of the story that contains the scenes you want to delete G ê Gallery Bring the desired story to the front Story Details 2 Open the rating selection screen Edit Story Delete 3 Touch one or more of the rating buttons to select all the applicable scenes A grayed out rating button indicates that no scenes in the story have been given that particular rating Touch the ...

Page 94: ...deleted scenes cannot be recovered Deleting a story permanently deletes all the scenes it contains When deleting scenes scenes will be removed from the date index screen and from any stories in the gallery they may have belonged to regardless of the method used to delete them Save copies of important scenes before deleting them A 127 Observe the following precautions while the ACCESS indicator is ...

Page 95: ...t to the end of the scene will appear as a new scene in the index screen NOTES When advancing reversing frames while dividing the scenes the interval between frames is about 0 5 seconds If the scene cannot be divided at the point where you paused the playback advance reverse a frame and then divide the scene During the playback of a scene that was divided you may notice some anomalies in the pictu...

Page 96: ...rame of the scene Below it the timeline ruler shows frames taken from the scene at fixed intervals 3 Touch the desired frame in the timeline ruler to start playing back the scene from that point To change the interval between frames 1 Touch 6 sec 2 Select the desired interval and then touch K Operating modes Touch twice to return to the index screen Previous next scene Drag your finger left along ...

Page 97: ...he playback NOTES A video snapshot scene can be captured only during playback it cannot be captured during playback pause mode The captured video snapshot scene is saved to the same memory that contains the source scene Video snapshot scenes cannot be captured from any of the following types of scenes Scenes shorter than 1 second Scenes that were edited using the supplied software VideoBrowser and...

Page 98: ...e photo 4 Touch Ñ to stop the playback IMPORTANT If photos and video snapshot scenes with compatible cards only were captured onto an Eye Fi card in memory card slot 3 wireless upload will start automatically if you are within the range of a configured network Always verify that Eye Fi cards have been approved in the country region of use See also Using an Eye Fi card A 136 NOTES The data code of ...

Page 99: ... memory already contains other stories the story selection screen will appear In that case touch New Story 2 Select the desired theme Drag your finger left right to browse through the themes and touch the thumbnail of the desired theme A list of the suggested categories story scenes for the selected theme will appear 3 Drag your finger up down to select a category and touch OK 4 In the confirmatio...

Page 100: ...recording and double slot recording are not available Recording Additional Scenes within an Existing Story 1 Start Story Creator mode FUNC é Story Creator Alternatively you can set an assignable button to é Story Creator A 85 2 Select the story to which you want to add new scenes The list of story scenes will appear The orange frame on the right will show how many scenes you have recorded in each ...

Page 101: ...fferent adjustment options than the other cinema look filters The selected cinema look filter will be applied and its number will appear on the control button To select the effect level of Cinema Standard 1 Open the parameter selection screen w ON 2 Touch Color Depth Softening Filter Key Brightness or Contrast 3 Touch the desired level or touch Ï or Ð to adjust the parameter You can also drag your...

Page 102: ... the effect on the screen NOTES Photos cannot be recorded while the camcorder is set to mode 1 Cinema Standard 2 Vivid 3 Dream 4 Cool 5 Nostalgic 6 Sepia 7 Old Movies 8 Memory 9 Dramatic B W Filter number will appear on the control button Filter name Preview the effect on the screen Select the effect level Brief description onscreen guidance COPY ...

Page 103: ...e scenes as they are being recorded during playback or when converting them to standard definition Decorating Scenes while Recording 1 Open the decoration screen FUNC Ò Decoration When q Autostart Decoration is set to i On default value the decoration screen will open automatically also when you stow the LCD panel with the touch screen facing out 2 Use a tool from the toolbar as explained in the f...

Page 104: ...ur decorations in action Toolbar Ó Pens and Stamps Select the type of pen or stamp and its color You can also save a canvas or load a previously saved canvas Animated Stamps Select animated stamps to add to your decoration Ø Captions Add the date date and time story title or story theme category as a caption that will be included in the recording Ü Image Mix Choose one of 27 different frames to ad...

Page 105: ...red location To use image mix 1 Open the Select Image screen Ü ON 2 Touch or to select a different image mix frame You can touch one of the memory icons at the bottom of the screen to read image mix frames saved in the built in memory only when recording on or playing back scenes from a memory card 3 Touch K to mix the selected frame with the live video Mixing Your Own Images with Live Video You c...

Page 106: ... the playback controls 3 Touch Ò to open the decoration screen 4 Decorate the scene using the tools from the toolbar as explained in the previous section In playback mode the decorations will not be saved with the original recording NOTES Initializing a memory will erase any Pens and Stamps drawing canvas and image files you may have saved The image mix frames that come pre installed in the built ...

Page 107: ...he Play by Rating screen Story Details Play by Rating 4 Touch the desired rating and touch K twice 5 Touch the story s thumbnail to start the playback All applicable scenes will be played back from the first scene to the last When playback ends the camcorder will return to the gallery During the playback of a story other than Unsorted or Video Snapshot touch the screen and then touch ë to display ...

Page 108: ... permanent data loss Do not open the double memory card slot cover Do not disconnect the power source or turn off the camcorder Do not change the camcorder s operating mode NOTES If playback of a scene in the gallery is interrupted you cannot resume playback at the point it stopped The story will start over from the beginning the next time you play it back COPY ...

Page 109: ... a scene touch X and then touch Off This will also leave the current the scene unrated Rating Scenes from the List of Scenes 1 Open the list of scenes of the story that contains the scenes you want to rate G ê Gallery Bring the desired story to the front Scene List 2 In the Scene List screen drag your finger up down to select the scene you want to rate 3 Touch the orange box on the right to open t...

Page 110: ... card you will need to transfer the music tracks to the memory card in advance See the NOTES section A 112 1 Open the gallery or date index screen G ê Gallery or y Date 2 Open the Select Music screen MENU s Select Music i On 3 Touch Í or Î to select the desired music track 4 Adjust the mix balance between the original sound and the background music Touch y more of the original sound or Û more of t...

Page 111: ...nal 2 Open the gallery or date index screen G ê Gallery or y Date 3 Open the External Audio Input screen MENU s External Audio Input 4 Touch i On Ü 5 Adjust the audio input as necessary Start the music playback on the external player and adjust its volume according to the onscreen indications Touch External Player Link to link the video playback to the start end of the music from the external play...

Page 112: ... it is initialized To transfer music files from the supplied VIXIA CD ROM to the memory card Windows users Use the supplied software VideoBrowser For details refer to the Software Guide PDF file of the supplied PIXELA s software Mac OS users Use Finder to transfer music files from the MUSIC folder on the supplied VIXIA CD ROM to the memory card Refer to About the music files A 178 for the folder s...

Page 113: ...uch Copy or Move 4 Select the destination Drag your finger right left to select the desired story and touch its thumbnail Then drag your finger up down to select the desired category and touch the orange frame on the right number of scenes And last drag your finger up down to move the orange bar within the category to select the position of the scene 5 Touch Set and then touch Yes Touching Set is ...

Page 114: ...reen of the story whose thumbnail you want to change G ê Gallery Bring the desired story to the front Story Details 2 Open the Story Thumbnail screen Edit Story Story Thumbnail 3 Locate the frame you want to use as the story s thumbnail Playback controls will appear on the screen A 88 Use any special playback modes fast slow playback frame reverse advance as necessary to locate the desired image 4...

Page 115: ...tory Edit Title 3 Use the virtual keyboard to change the title 4 Touch OK and then touch K twice to return to the gallery NOTES We recommend using the supplied stylus pen to enter characters When you save recordings on a computer with the supplied software VideoBrowser using the option to join and import music and video files from the gallery some special characters in the story s title will be ch...

Page 116: ...erminal 2 AV OUT Terminal Access Open the LCD panel and terminal cover Sound from the built in speaker will be muted while the STV 250N Stereo Video Cable is connected to the camcorder Adjust the volume on the connected TV 3 HDMI OUT Terminal Access Open the side terminal cover The HDMI OUT terminal offers a high quality digital connection that combines audio and video in a single convenient cable...

Page 117: ...er HTC 100 S High Speed HDMI Cable supplied HDMI mini connector HDMI connector standard About the HDMITM connection The HDMI High Definition Multimedia Interface connection is a convenient all digital connection using a single cable for both video and audio When you connect the camcorder to an HDTV equipped with an HDMI terminal you can enjoy video and audio playback at the highest quality The HDM...

Page 118: ...ails refer to the Software Guide PDF file of the supplied PIXELA s software Connection Composite Video Type Analog Quality Standard definition Output only Connect to a standard TV or a VCR with audio video input terminals Change the following settings on the camcorder s TV Type according to the TV set widescreen or 4 3 if the TV cannot automatically detect and change the aspect ratio q AV Headphon...

Page 119: ... x v Color A 145 on an HDTV compatible with this standard additional settings may be required on the connected HDTV Refer to the TV s instruction manual We recommend powering the camcorder using the compact power adapter Connection When you play back your 16 9 movies on standard TV sets with a 4 3 aspect ratio the TV set will switch automatically to widescreen mode if it is compatible with the Vid...

Page 120: ... right to browse through the photos one by one To return to the index screen from single photo view 1 Touch the screen to display the playback controls 2 Touch f Operating modes Memory being read Drag your finger left for the next index page Drag your finger right for the previous index page Open the G Index Selection screen A 91 While browsing through index pages a scroll bar will appear at the b...

Page 121: ...n touch K IMPORTANT Observe the following precautions while the ACCESS indicator is on or flashing Failing to do so may result in permanent data loss Do not open the double memory card slot cover Do not disconnect the power source or turn off the camcorder Do not change the camcorder s operating mode The following image files may not be displayed correctly Images not recorded with this camcorder I...

Page 122: ...in single photo view 4 Touch the screen to display the playback controls then touch Ð to start the slideshow 5 Start the music playback on the external player Slideshow linked to the external audio 3 Start the music playback on the external player Playback will start from the first photo in the index screen Photos will be displayed continuously until the music stops When the external audio input s...

Page 123: ...wing procedure to select the individual photos you want to delete before touching Yes Touch Stop to interrupt the operation while it is in progress Some photos will be deleted nevertheless 4 Touch OK To select individual photos 1 Touch on the individual photos you want to delete A checkmark will appear on the photos you touch The total number of selected photos will appear next to the icon Touch a...

Page 124: ...r left right until the desired date appears in the title bar 2 Open the screen to copy scenes Edit Copy 7 or Copy 6 7 3 Touch the desired option and then touch Yes When you select Select perform the following procedure to select the individual scenes you want to copy before touching Yes Touch Stop to interrupt the operation while it is in progress 4 Touch OK To select individual scenes 1 Touch on ...

Page 125: ...5 Touch Yes Touch Stop to interrupt the operation while it is in progress The selected scenes are copied 6 Touch OK and then touch K Copying a Single Photo 1 In single photo view select the photo you want to copy Check that you are viewing photos recorded in the built in memory or on memory card 2 or 6 appears next to the photo number 2 Touch the screen to display the playback controls 3 Open the ...

Page 126: ...he ACCESS indicator is on or flashing Failing to do so may result in permanent data loss Do not open the double memory card slot cover Do not disconnect the power source or turn off the camcorder Do not change the camcorder s operating mode If supported recordings are copied onto an Eye Fi card in memory card slot 3 wireless upload will start automatically if you are within the range of a configur...

Page 127: ...flet and follow the instructions in the Software Guide PDF file to install the supplied PIXELA s software Connecting the Camcorder to a Computer 1 Power the camcorder using the compact power adapter If the camcorder is connected to the computer while it is powered only by the battery pack previously saved video files cannot be transferred back to the camcorder and music files cannot be transferred...

Page 128: ...D ROM into the computer s disc drive 2 Windows Open the drive into which you inserted the CD ROM using Windows Explorer Mac OS Use Finder and click the CD ROM icon 3 Click Double click the Disc_Setup icon 4 Follow the onscreen instructions to select your area continent country region and language Available options will vary depending on your country region 5 In the main installer panel click Easy ...

Page 129: ...o the computer Refer to relevant sections in the ImageBrowser EX User Guide IMPORTANT When the camcorder is connected to a computer Do not open the double memory card slot cover and do not remove the memory cards Do not access change or delete any of the camcorder s folders or files directly from the computer as this may result in permanent data loss Always use only the supplied software to save y...

Page 130: ...P allowing you to transfer photos JPEG only simply by connecting the camcorder to a computer using the supplied USB cable without having to install the supplied software ImageBrowser EX If you connect the camcorder to the computer while it is set to mode the process of creating scene thumbnails will start automatically If your intention was to save photos to the computer you can touch Skip to stop...

Page 131: ...e scenes you want to copy Select an option other than All for PC only Camcorder When the connection is successfully established USB Connection appears on the screen Recording Details will vary depending on the device used so be sure to refer to the instruction manual of the digital video recorder In Standard Definition You can copy your movies by connecting the camcorder to a VCR or a digital vide...

Page 132: ...back By default onscreen displays will be embedded in the output video signal You can change this using the q Output Onscreen Displays setting 5 External recorder Start recording when the scene you wish to copy appears stop recording when it ends 6 Camcorder Stop playback COPY ...

Page 133: ...nes recorded on a specific date drag your finger left right until the desired date appears in the title bar 4 Press W to convert all the scenes recorded in the selected date Alternatively touch Edit Convert HD SD 7 or Convert HD SD 6 7 and select one of the options for converting multiple scenes You can convert all the scenes recorded on the date shown in the control button select individual scene...

Page 134: ...touch The total number of selected scenes will appear next to the icon Touch a selected scene to remove the checkmark To remove all checkmarks at once touch Remove All Yes 2 After selecting all the desired scenes touch OK To select the bit rate step 5 Using a higher bit rate will result in better video quality for the converted scenes while a lower bit rate will result in smaller file sizes and fa...

Page 135: ... the tab built in memory or 6 tab memory card 2 2 Open the Play by Rating screen Story Details Play by Rating 3 Touch the desired rating and then touch K 4 Press W and continue the conversion to standard definition from step 5 in the previous procedure A 133 NOTES When converting scenes from a story All the scenes are merged into one converted SD movie If the converted SD movie is too large it wil...

Page 136: ...ading from the Eye Fi card A 157 IMPORTANT Using an Eye Fi Card This product is not guaranteed to support Eye Fi card functions including wireless transfer In case of an issue with an Eye Fi card please check with the card manufacturer Also note that an approval is required to use Eye Fi cards in many countries or regions Without approval use of the card is not permitted If it is unclear whether t...

Page 137: ...ch on the Eye Fi card is not in the LOCK position This menu option will appear only when using an Eye Fi card Uploading Photos to the Web With the supplied software ImageBrowser EX you can upload your photos to Facebook after saving them on your computer Additionally you can use CANON iMAGE GATEWAY to make photo albums and more After saving your photos on a computer A 128 refer to the relevant sec...

Page 138: ...ade Cloudy Fluorescent À Fluorescent H É Tungsten  Color Temperature Æ Set 1 Ç Set 2 z z 62 x AGC Limit m Automatic n Manual z z 56 Focus Touch AF frame D manual focus Toggle on or off O peaking Toggle on or off w settings Peaking and B W Peaking Color When D is on SET focus preset P edge monitor When SET is on ON return to preset focus position z z 47 y Exposure Touch AE frame n manual adjustmen...

Page 139: ... or off Ý pause live video z z ß minimize toolbar z z z é Story Creator 2 Story themes New Story z z z 99 Video Snapshot 2 i On j Off z z z 80 v Review Recording 1 z z 43 Control Button Date Index Screen SD Movies Index Screen Playback Pause A Copy 7 1 Copy 6 7 1 date Select All Scenes 124 Convert HD SD 7 1 Convert HD SD 6 7 1 date Select All Scenes 133 Delete or date Select All Scenes This Scene ...

Page 140: ...ordings on memory card 3 7 tab Delete or by scene rating This Scene This Scene 92 Delete Story 2 z 94 Story Thumbnail 2 z 114 Edit Title 2 z 115 Copy z 113 Move z 113 Divide z 95 Rating É Ê Ë Ì unrated Í others 109 Control Button Index Screen Single Photo View A Copy 7 Copy 6 7 Select All Photos z 125 Delete z 123 Control Button Edit Story from the Story Details screen Edit Scene from the Scene Li...

Page 141: ...ant AF Medium AF Normal AF z z 48 Focus Assistance 1 2 i On j Off z z Face Detection Tracking i On j Off z z 49 Auto Backlight Correction i On j Off z z 61 Auto Slow Shutter 2 i On j Off z z ND Filter k Automatic j Off z z Conversion Lens 2 Tele converter Wide converter j Off z z Fader Setting 1 Black Screen White Screen z z 83 Onscreen Markers j Off 3 Level White 4 Level Gray 5 Grid White 6 Grid ...

Page 142: ...n adjusting the aperture Depending on the selected setting ND1 2 ND1 4 or ND1 8 will appear on the screen next to the aperture value Conversion Lens When you attach to the camcorder the optional TL H58 Tele converter or WD H58W Wide converter set the appropriate conversion lens setting The camcorder will then optimize the image stabilization and adjust the minimum object distance The minimum objec...

Page 143: ...ed Camera Data Displays the aperture f stop and shutter speed used when recording the scene or photo TV Type When you connect the camcorder to a TV using the supplied STV 250N Stereo Video Cable select the setting according to the type of TV in order to display the picture in full and in the correct aspect ratio 4 3 TV TV sets with 4 3 aspect ratio Wide TV TV sets with 16 9 aspect ratio When the T...

Page 144: ...t in memory indicates actually usable space It may be slightly smaller than the nominal built in memory capacity listed in the specifications Menu item Setting options n CINEMA y A Self Timer i On j Off z z 67 Video Snapshot Length 1 2 C 2 sec D 4 sec F 8 sec Story Length Based Toggle on or off z z 80 97 C 2 sec D 4 sec F 8 sec z Rate Scenes Recording 1 2 i On j Off z z 109 Rec Media for Movies 1 ...

Page 145: ...01 to 9900 and stored in folders containing up to 100 files Folders are numbered from 101 to 998 m Reset File numbers will restart from 101 0101 every time you insert a new memory card n Continuous File numbers will continue from the number following that of the last file recorded with the camcorder If the memory card you insert already contains a file with a larger number a new file will be assig...

Page 146: ...h Volume ø Low Volume j Off z z z z Wireless Remote Control 1 i On j Off 0 z z z z Powered IS Button Î Press and Hold Ï Toggle On Off z z Custom Key Dial ä Mic Level Tv Av l Manual Exposure x AGC Limit y Exposure j Off z z 84 Assign Button 1 1 È Powered IS BLC Always On Face Only AF é Story Creator Video Snapshot Ä WB Priority AF MF j Off z z 85 Assign Button 2 1 È Powered IS BLC Always On Face On...

Page 147: ...playback image on a TV Focus Preset Speed Z Fast Normal Slow z z Autostart Decoration 1 i On j Off z z 103 Power Saving Mode 1 Auto Power Off j Off i On z z z z Quick Start Standby Off 10 min 20 min 30 min Initialize Built in Mem 6 Mem Card A 7 Mem Card B z z z z 36 Complete Initialization Toggle on or off Time Zone DST 1 home time zone or travel time zone New York list of world time zones DST adj...

Page 148: ...S function on and off Set WB Priority You can press an assignable button set to Ä WB Priority to switch between the current white balance and the white balance setting selected for Set WB Priority Focus Ring Direction Changes the direction the focus ring needs to be turned Focus Ring Response Selects the sensitivity of the response when operating the focus ring Focus Preset Speed Determines the sp...

Page 149: ...controller The remote control of the TV can only be used to play back movies or photos or mode only If the camcorder is connected to the TV while it is set to or mode depending on the TV used turning off the TV will automatically turn off the camcorder even if it is recording at the time We recommend not connecting more than 3 HDMI CEC compatible devices at a time HDMI 1080p Output If set to i On ...

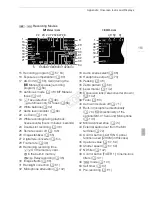
Page 150: ...e detection frame A 49 4 Touch Track frame A 51 5 Control button PHOTO Take a photo A 39 98 6 Control button ë Return to the list of story scenes A 99 7 Memory operation A 153 8 Intelligent IS A 40 9 Remaining battery time A 153 10 Zoom A 53 11 Recording mode A 45 12 Current story scene category A 99 13 Recommended scene length A 99 14 Control button Last FUNC panel function used Ò Decoration A 10...

Page 151: ... 55 27 Digital tele converter A 54 28 Frame rate A 46 29 Remaining recording time 6 7 On the memory card In the built in memory Relay recording A 35 30 Image effects A 66 31 Backlight correction A 61 32 Microphone attenuator A 142 33 Audio scene select A 68 34 Headphone output A 73 35 Peaking A 48 36 Zebra pattern A 59 37 Level marker A 142 38 Conversion lens Tele converter shown A 142 39 Fader A ...

Page 152: ...ication A 136 55 Scene number 56 Data code A 82 143 57 Volume and background music balance controls A 88 111 Viewing Photos 58 9 60 61 62 56 59 63 64 58 Control button MENU Open the setup menus A 30 141 59 Control button Edit Open the Edit panel A 140 60 Current photo Total number of photos 61 File number A 145 62 Control button h Photo jump A 121 63 Control button Ð Slideshow A 122 64 Control but...

Page 153: ... in red Replace or charge the battery pack When you attach an empty battery pack the power may turn off without displaying Depending on the conditions under which the camcorder and the battery pack are used the actual battery charge may not be indicated accurately When the camcorder is off press B to display the charge status of a battery pack The Intelligent System will display the charge status ...

Page 154: ... not recommended by Canon for use with this camcorder cannot be charged using this camcorder If you are using a battery pack recommended by Canon for use with this camcorder there may be a problem with the camcorder or battery pack Consult a Canon Service Center A noise can be heard from the compact power adapter A faint sound can be heard while the compact power adapter is connected to a power ou...

Page 155: ... the memory A 36 Movies or photos cannot be recorded properly This may occur as movies and photos are recorded deleted over time Save your recordings A 127 and initialize the memory A 36 Cannot record a photo while recording movies You cannot take photos in mode while the digital zoom is activated A 142 while fading in or fading out a scene A 83 or while using double slot recording A 36 After usin...

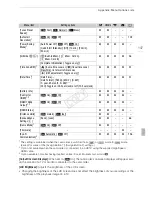
Page 156: ...k You cannot select more than 100 scenes photos individually Select the All Scenes or All Photos option instead of Select Indicators and Onscreen Displays lights up in red Battery pack is exhausted Replace or charge the battery pack appears on the screen The camcorder cannot communicate with the battery pack attached so the remaining battery time cannot be displayed 6 7 lights up in red A memory c...

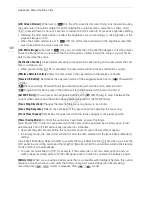
Page 157: ...nsors when recording under some types of fluorescent mercury or sodium lamps To reduce the symptoms set the recording program to Programmed AE or Shutter Pri AE A 57 This is not a malfunction Viewfinder picture is blurred Adjust the viewfinder with the dioptric adjustment lever A 22 No picture appears on the viewfinder Pull out the viewfinder to activate it No picture will be output to the viewfin...

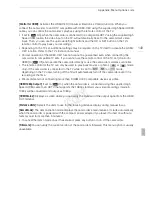
Page 158: ... the camcorder to playback mode or remove the WM V1 Opening the LCD panel may help when the wireless connection is not strong enough During wireless transfer wireless communication may stop when the wireless signal conditions worsen appears onscreen Perform wireless transfer in a place with good signal conditions Contact the card manufacturer s customer care The wireless communication status icon ...

Page 159: ...otos in the built in memory copy them to the memory card in advance A 126 List of Messages Accessing the memory card Do not remove the memory card You opened the double memory card slot cover while the camcorder was accessing the memory card or the camcorder started accessing the memory card as you opened the double memory card slot cover Do not remove the memory card until this message disappears...

Page 160: ... management data log is full Save your recordings A 127 and initialize the memory A 36 Transfer back the backup files and try dividing the scene again Use the supplied software VideoBrowser to save the scene and divide it on the computer Cannot enter standby mode now The camcorder cannot enter standby mode if the remaining battery charge is too low Charge or replace the battery pack A 20 Cannot lo...

Page 161: ...em persists use a different memory card Cannot record movies in the built in memory Initialize only using the camcorder The camcorder s built in memory was initialized using a computer Initialize the built in memory with this camcorder A 36 Cannot record movies on this memory card Movies cannot be recorded on a 64 MB or smaller memory card Use a recommended memory card A 33 Cannot record movies on...

Page 162: ...mcorder To be able to write back scenes and to transfer music files to the camcorder power the camcorder using the compact power adapter and only then connect it to the computer using the supplied USB cable File name error The folder and file numbers have reached their maximum value Set r File Numbering to Reset and delete all the photos on the memory card A 123 or initialize it A 36 Initialize on...

Page 163: ...r created stories in any one given memory Delete some stories A 94 or change the recording memory for movies A 34 Scene recorded using another device Cannot divide the scene Scenes that were not recorded with this camcorder cannot be divided with this camcorder Scene recorded using another device Cannot play back the scene Scenes that were not recorded with this camcorder cannot be played back Sel...

Page 164: ...Set the mode switch to n mode or E mode to use them Too many photos Disconnect the USB cable Disconnect the USB cable Try using a memory card reader or decrease the number of photos on the memory card to fewer than 2 500 photos Windows or 1 000 photos Mac OS If a dialog box appeared on the computer screen close it Disconnect the USB cable and restore the connection after a short while Total play t...

Page 165: ...lectromagnetic fields such as above TVs near plasma TVs or mobile phones Do not point the lens or viewfinder at strong light sources Do not leave the camcorder pointed at a bright subject Do not use or store the camcorder in dusty or sandy places The camcorder is not waterproof avoid also water mud or salt If any of the above should get into the camcorder it may damage the camcorder and or the len...

Page 166: ...Use the time shown on the screen as an approximation Regarding the use of non Canon battery packs For your safety battery packs that are not genuine Canon battery packs will not be charged even if you attach them to this camcorder or to the optional CG 800 Battery Charger We recommend using genuine Canon battery packs bearing the Intelligent System mark If you attach to the camcorder battery packs...

Page 167: ...rcuit Wipe the battery with a clean dry cloth to ensure proper contact For California USA only The lithium battery included contains Perchlorate Material special handling may apply See www dtsc ca gov hazardouswaste perchlorate for details Disposal When you delete movies or initialize the memory only the file allocation table is altered and stored data is not physically erased When you dispose of ...

Page 168: ...oving the camcorder rapidly between hot and cold temperatures may cause condensation water droplets to form on its internal surfaces Stop using the camcorder if condensation is detected Continued use may damage the camcorder Condensation may form in the following cases When the camcorder is moved quickly from cold to warm places When the camcorder is left in a humid room When a cold room is heated...

Page 169: ...k on a TV Screen You can only play back your recordings on TVs compatible with the NTSC system NTSC is used in the following regions countries Americas All of North America and Central America most Caribbean islands except in French territories like Guadeloupe and Martinique most of South America except in Argentina Brazil and Uruguay Asia Only in Japan the Philippines South Korea Taiwan and Myanm...

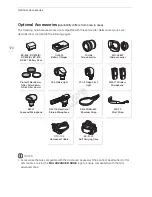
Page 170: ...VANCED SHOE logo to ensure compatibility with the mini advanced shoe Availability differs from area to area VL 5 Video Light VFL 2 Video Flash Light WM V1 Wireless Microphone BP 808 BP 809 B BP 809 S BP 819 BP 827 Battery Pack CG 800 Battery Charger TL H58 Tele converter WD H58W Wide converter Protect Filter 58 mm ND4L Filter 58 mm ND8L Filter 58 mm SM V1 Surround Microphone DM 100 Directional Ste...

Page 171: ... given in the following table are approximate and vary according to charging conditions and initial charge of the battery pack Recording and playback times given in the following tables are approximate and vary according to recording mode and charging recording or playback conditions The effective usage time of the battery pack may decrease when recording in cold surroundings when using the bright...

Page 172: ...min 455 min FXP 335 min 355 min 205 min 220 min 460 min XP 345 min 370 min 210 min 225 min 470 min SP 345 min 370 min 210 min 225 min 475 min LP 345 min 370 min 210 min 225 min 475 min Battery pack Recording mode Recording maximum Recording typical Playback LCD Viewfinder LCD Viewfinder LCD BP 808 BP 809 MXP 105 min 115 min 65 min 65 min 145 min FXP 105 min 115 min 65 min 65 min 150 min XP 110 min...

Page 173: ...otector filters help you to control difficult lighting conditions VL 5 Video Light This video light enables you to record brightly in color even in dark places It attaches to the camcorder s mini advanced shoe for cable free operation VFL 2 Video Flash Light This video flash light allows you to record photos and movies even at night or in dark places It attaches to the camcorder s mini advanced sh...

Page 174: ...ced shoe It can be used as directional microphone monaural or stereo microphone SC 2000 Soft Carrying Case A handy camcorder bag with padded compartments and plenty of space for accessories This mark identifies genuine Canon video accessories When you use Canon video equipment we recommend Canon brand accessories or products bearing the same mark COPY ...

Page 175: ...0 frame rate are converted and recorded on the memory as 60i Recording Media Built in memory 32 GB SD SDHC SD High Capacity or SDXC SD eXtended Capacity memory card not included Maximum Recording Time 32 GB built in memory MXP mode 2 hr 55 min FXP mode 4 hr 10 min XP mode 5 hr 45 min SP mode 9 hr 35 min LP mode 12 hr 15 min Commercially available 8 GB memory card MXP mode 40 min FXP mode 1 hr XP m...

Page 176: ...s Terminals AV OUT Terminal 3 5 mm minijack output only dual purpose terminal also for headphones stereo output Video 1 Vp p 75 Ω unbalanced Audio 10 dBV 47 kΩ load 3 kΩ or less USB Terminal mini B USB 2 0 Hi Speed USB COMPONENT OUT Terminal proprietary mini D terminal Luminance Y 1 Vp p 75 Ω Chrominance PB PR 350 mV 75 Ω 1080i D3 compatible output only HDMI OUT Terminal HDMI mini connector output...

Page 177: ... Power Adapter Power supply 100 240 V AC 50 60 Hz Rated output consumption 8 4 V DC 1 5 A 29 VA 100 V 39 VA 240 V Operating temperature 0 40 C 32 104 F Dimensions 52 x 29 x 90 mm 2 1 x 1 1 x 3 5 in Weight 135 g 4 8 oz BP 808 Battery Pack Battery type Rechargeable lithium ion battery compatible with Intelligent System Rated voltage 7 4 V DC Operating temperature 0 40 C 32 104 F Battery capacity 890...

Page 178: ...1 WAV to MUSIC_99 WAV About the image files for the Image Mix function The specifications of image files that can be used with the image mix function are as follows Image size 1920x1080 pixels File type Baseline JPEG Color sampling 4 2 2 or 4 2 0 Image files are saved in the memory under the following folders Sample image mix frames can be found in the MY_PICT folder of the supplied VIXIA CD ROM I...

Page 179: ...ONENT OUT terminal 116 117 Condensation 168 Connections to external devices 117 Copying recordings to a memory card 124 CUSTOM button 84 CUSTOM dial 84 D Data code 82 143 Date and time 31 Decoration 103 Deleting Movies 92 Photos 123 Digital tele converter 54 Dividing scenes 95 Double slot recording 36 E Edge monitor 79 Edit panel 29 139 Editing stories 113 Error messages 159 Exposure compensation ...

Page 180: ... Recording mode 45 Recording programs 57 59 64 Recording time 45 Relay recording 35 Remote sensor 25 Resetting all camcorder settings 157 Reviewing recordings 43 S Saving recordings Transferring to a computer 127 Using external video recorders 131 Scan reverse recording 144 Selecting the memory for playback 91 for recording 34 Self timer 67 Serial number 18 Setup menus 30 141 Shutter speed 57 59 S...

Page 181: ...181 W Waveform monitor 79 White balance 62 Wide angle 52 Wireless controller 19 25 Z Zebra pattern 59 Zoom 52 Digital zoom 142 Soft zoom control 54 Zoom speed 52 COPY ...

Page 182: ...handling accident improper maintenance or failure to follow operating instructions B If the Equipment is defective as a result of leaking batteries sand dirt or water damage C If defects or damages are caused by the use of unauthorized parts or by service other than by Canon USA s factory service centers or authorized service facilities D If the Equipment is used for commercial or industrial use T...

Page 183: ...nish of the Equipment media nor does it apply to Equipment purchased outside Canada If the Equipment contains a hard disk drive Canon Canada recommends that data stored on that drive be duplicated or backed up to prevent its loss in the event of a failure or other malfunction of such drive TO OBTAIN WARRANTY SERVICE Ship your Equipment in its original carton box or equivalent properly packed fully...

Page 184: ...is au Canada seulement MÉXICO CANON MEXICANA S DE RL DE CV Blvd Manuel Ávila Camacho No 138 Piso 17 Col Lomas de Chapultepec C P 11000 México D F México CANON U S A INC NEW JERSEY OFFICE 100 Jamesburg Road Jamesburg NJ 08831 USA CENTRO Y CANON LATIN AMERICA INC SURAMÉRICA 703 Waterford Way Suite 400 Miami FL 33126 USA ASIA CANON HONGKONG COMPANY LTD 19 F The Metropolis Tower 10 Metropolis Drive Hu...

Page 185: ......

Page 186: ......

Page 187: ......

Page 188: ......

Page 189: ......

Page 190: ......

Page 191: ...ring it after use Note that the lens cap and the lens hood with lens barrier cannot be used simultaneously Français Informations importantes à propos du pare soleil avec cache objectif et du bouchon d objectif Pare soleil avec cache objectif Le pare soleil avec cache objectif fourni est efficace pour la réduction de la lumière parasite qui peut causer des reflets ou des images fantômes De plus fer...

Page 192: ......

Page 193: ......

Page 194: ......

Page 195: ......

Page 196: ......

Reviews: