


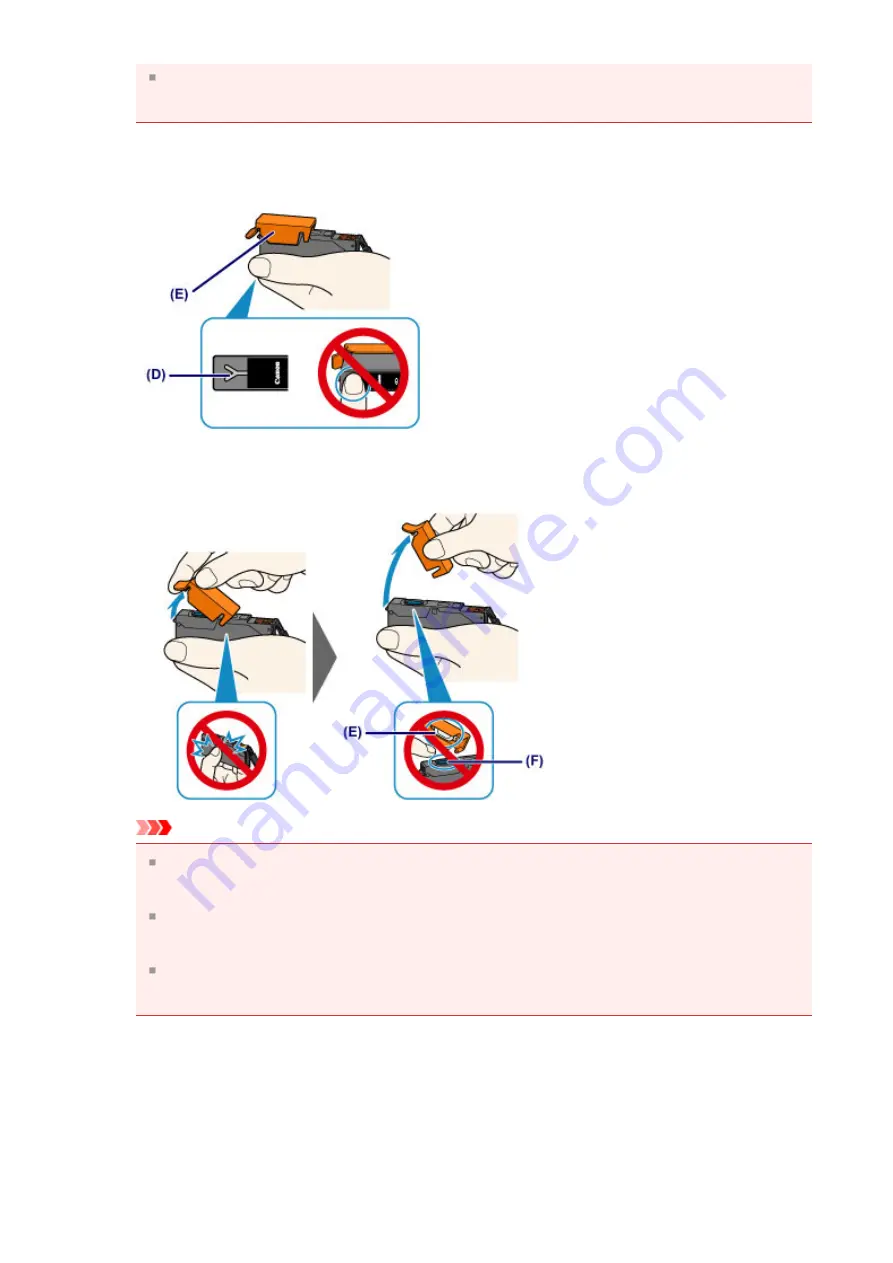
If the orange tape remains on the Y-shape air hole
(D)
, ink may splash or the
machine may not print properly.
(2)
Hold the ink tank with the orange protective cap
(E)
pointing up while
being careful not to block the Y-shape air hole
(D)
.
(3)
Lift up the tab on the orange protective cap
(E)
to remove it off
GENTLY.
Important
Do not push the sides of the ink tank. If you push the sides of the ink tank with
the Y-shape air hole
(D)
blocked, ink may splash.
Do not touch the inside of the orange protective cap
(E)
or the open ink port
(F)
.
The ink may stain your hands if you touch them.
Do not reattach the protective cap
(E)
once you have removed it. Discard it
according to the local laws and regulations regarding disposal of consumables.
6.
Install the new ink tank.
(1)
Insert the front end of the ink tank into the print head at a slant.
Make sure that the position of the ink tank matches the label.
147
Summary of Contents for PIXMA MG5500 Series
Page 69: ...69 ...
Page 89: ...Safety Guide Safety Precautions Regulatory and Safety Information 89 ...
Page 96: ...Main Components Front View Rear View Inside View Operation Panel 96 ...
Page 111: ...Loading Paper Originals Loading Paper Loading Originals 111 ...
Page 143: ...Replacing an Ink Tank Replacing an Ink Tank Checking the Ink Status 143 ...
Page 208: ...Language selection Changes the language for messages and menus on the LCD 208 ...
Page 216: ...Information about Network Connection Useful Information about Network Connection 216 ...
Page 262: ...5 Delete Deletes the selected IP address from the list 262 ...