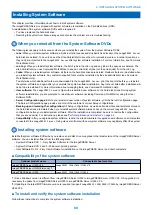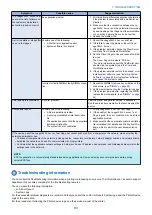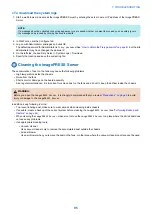
Conditions to verify
Part and additional page references
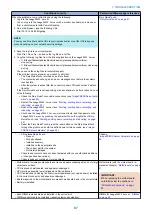
When the problem occurs, collect logs by doing the following:
1. Log into the
imagePRESS Server
.
You can log into the
imagePRESS Server
with a monitor, keyboard, and mouse, or
from a client computer with Remote Desktop.
2. On a web browser, type the following URL:
http://10.10.100.2:8080/getlog
NOTE:
You may need to either add the URL to your trusted sites list, or set the URL to bypass
proxy depending on your network security settings.
3. Save the log file to your local system.
Click File > Save As..., and save the log file as a .txt file.
4. Copy the following log files from the following location on the
imagePRESS Server
:
• C:\Glance\GlanceUpdatesMonitor\daemon\glanceupdatesmonitorser
vice.out.log
• C:\Glance\GlanceUpdatesMonitor\daemon\glanceupdatesmonitorser vice.wrap-
per.log
You can send these log files to technical support.
If the problem occurs at power up or reboot, verify that:
• The Fiery QuickTouch is turned on and functional.
• The system does not hang, and no error messages occur before the systems
reaches Idle.
• After the system reaches Idle, the connector panel LCD touch screen has func-
tionality.
If the Fiery QuickTouch is not responding or does not power up after a reboot, do one
of the following:
• Check the Fiery QuickTouch cable connections (see
• Restart the
imagePRESS Server
“Starting, shutting down, restarting, and
)
• Reboot the
imagePRESS Server
“Starting, shutting down, restarting, and
)
• Shut down the
imagePRESS Server
, wait one minute, and then power on the
imagePRESS Server
by pressing the power button on the right side of Fiery
QuickTouch. (see
“Starting, shutting down, restarting, and rebooting” on page
• Reset the Fiery QuickTouch: press the reset button on the Fiery QuickTouch
through the pinhole, and hold the button down for two seconds. (see
PRESS Server hardware” on page 29
)
Fiery QuickTouch,
•
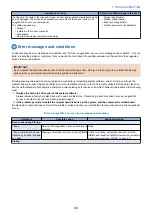
• All replaceable parts are:
• Present
• Properly aligned
• Installed securely
• Installed on the appropriate site
• The correct part for the system
• Not visibly damaged
• Chassis and contents have not been tampered with (no unauthorized additions
or changes have been made).
• Chassis does not contain any foreign objects.
Chassis,
“imagePRESS Server hardware” on page
29
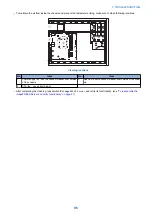
• Motherboard, including components and traces, appears undamaged, and no foreign
objects are evident.
• CPU is present, well-seated, and appears undamaged.
• CPU cooling assembly is well-aligned and firmly attached.
• CPU fan required (including fan cable) is well-positioned (not upside down), installed
in the correct connector, and appears undamaged.
• Boards required on the motherboard are present, well-seated, and in the correct slots.
• Battery is installed.
Motherboard (with the motherboard re-
placement dongle),
IMPORTANT:
When replacing the motherboard,
carefully review the cautions on
“Motherboard cautions” on page
45
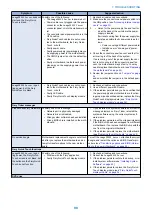
• Each DIMM is well-seated and installed in the correct slot.
• DIMM connectors are not oxidized (reseating removes oxidation).
DIMMs for
imagePRESS Server
.
7. TROUBLESHOOTING
87
Summary of Contents for ImagePRESS Server H350 V2
Page 8: ...Introduction 1 Introduction 2 Specifications 7 ...
Page 17: ...INSTALLING HARDWARE 2 Installing Hardware 11 ...
Page 26: ...USING THE IMAGEPRESS SERVER 3 Using the imagePRESS Server 20 ...
Page 35: ...REPLACING PARTS 4 Replacing parts 29 ...
Page 86: ...INSTALLING SYSTEM SOFTWARE 6 Installing System Software 80 ...
Page 91: ...TROUBLESHOOTI NG 7 Troubleshooting 85 ...
Page 104: ...INSTALLATION PROCEDURE 8 Installation 98 Removable HDD Kit B5 108 ...


