


S
ERVICE
P
ROCEDURES
45
T
O
REMOVE
THE
POWER
SUPPLY
When you handle electronic components, follow electrostatic discharge (ESD) precautions
(see
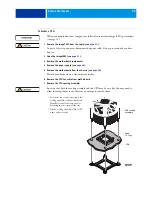
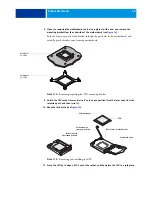
1 Remove the imagePASS from the copier (see
As part of this step, you must disconnect the power cable. Do not proceed until you have
done so.
2 Open the imagePASS (see
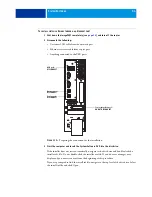
3 Disconnect the following
• The two power supply cables connected to the motherboard (see
)
• The power supply cable connected to the hard disk drive (see
and
)
• The black and white cables connected to the power switch (see
)
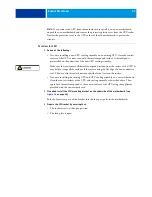
4 Make note of the cable ties and how cables are draped. Carefully cut the cable ties that secure
the power supply cables to the chassis.
5 Disconnect the power supply from the chassis and connector panel (two chassis screws and
three external screws). Lift out the power supply.
You may need to remove the DIMM to access the bottom chassis screw.
T
O
INSTALL
THE
POWER
SUPPLY
When you handle electronic components, follow electrostatic discharge (ESD) precautions
(see
1 Insert the power supply into the chassis and install the two chassis screws and three external
screws.
2 Use cable ties to drape the cables and secure them to the chassis.
3 Connect power cables to the hard disk drive and to the motherboard at PW1 and PW2 (see
4 Reassemble the imagePASS and verify functionality (see


