


Chapter 4: Unit Management
Upgrading the Software
phn-3963_004v000
Page 4-62
9.
If the IP address family is configured to be IPv6, enter the IPv6 address of the PC or laptop you
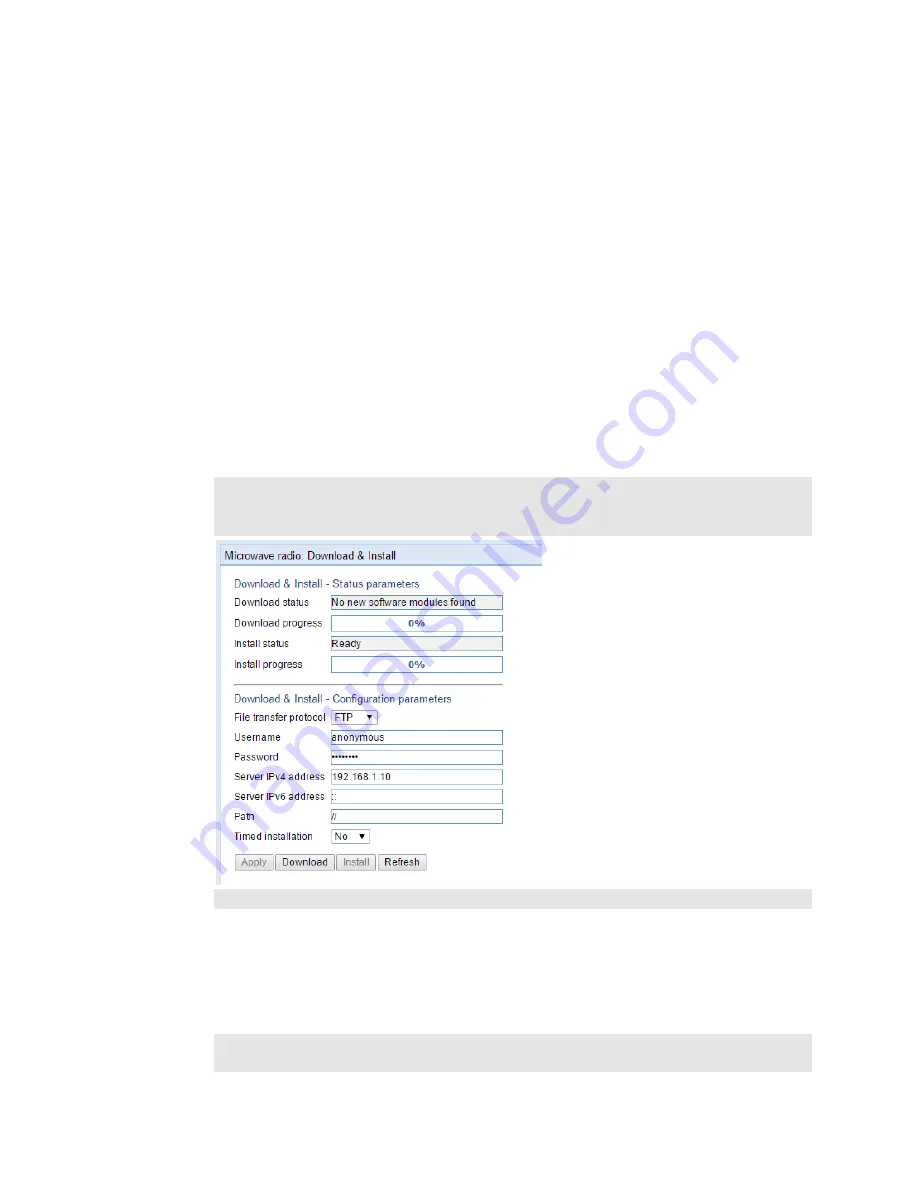
are using as the FTP/SFTP server in the Server IPv6 Address field. See
Version for Initiating Communications
10.
In the Path field, enter the directory path from which you are downloading the files. Enter the
path relative to the FTP user's home directory, not the absolute path. To leave the path blank,
enter //.
11.
To configure a timed installation, in the Timed installation field, select Yes. Otherwise, select
No. For more information on timed installations, see
Configuring a Timed Installation
12.
Click Apply to save your settings.
13.
Click Download. The download begins. You can view the status of the download in the
Download & Install - Status Parameters section of the Download & Install page. See
Download & Install Status Parameters
14.
Once the download has been completed, verify that the version you want to install has been
downloaded. You can check the downloaded version for each component by viewing the
Downloaded Version
column in the Versions page. See
Viewing Current Software Versions
Important Note – If upgrading from version 7.9 or earlier:
•
Before you proceed to install the software, repeat the download process even if
Download Success is displayed in the Download status field, until the unit
displays the message No new software modules found.
•
In case of failure, wait at least 30 minutes and repeat the software download.
15.
Click Install. The installation begins. You can view the status of the installation in the Download
& Install - Status Parameters section of the Download & Install Download & Install page. See
Table 11 Download & Install Status Parameters
Upon completion of the installation, the system performs an automatic reset.
Important Notes:
•
DO NOT reboot the unit during the software installation process. As soon as the
process is successfully completed, the unit will reboot itself.


