2-10 SmartCell ZX-250 User Guide
Installing the Switch
Switch Installation and Setup
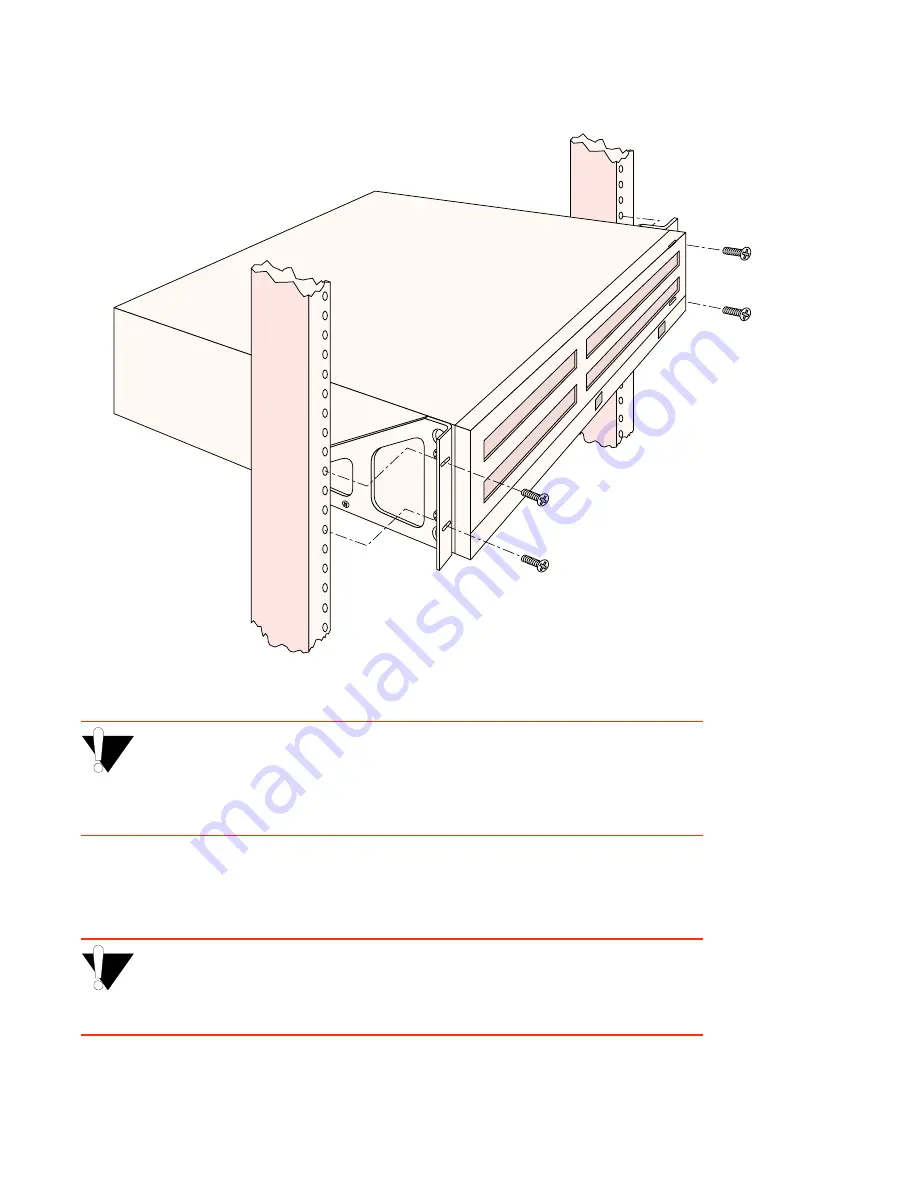
Figure 2-8 After brackets are attached, mount the switch in the rack.
%
"¤›apm
The mounting brackets must be attached to the switch before mounting the
switch on the rack. Each switch must be mounted to the rack with all four (4)
screws. Every switch must be supported by its own brackets. DO NOT stack a
unit directly on top of a mounted switch. DO NOT use rack-mounted shelves
that interfere with air flow.
T•
Insert the supplied power cord into the 3-prong power receptacle on the back of the switch.
Q•
+•Ö}ÊÍ…iÊ«œÝiÀÊVœÀ`ʈ˜ÍœÊ>Ê>˜Ê
"+
ÊœÖÍ•iÍÊÍ…>ÍÊ>VVi«ÍÃÊφ«Àœ˜}Ê«•Ö}ð
%
"¤›apm
The SmartCell ZX-250r switch must be attached to a grounded 3-prong outlet.
Ensure that the outlet has a proper safety ground. Do not defeat the safety
ground by using a 2-prong adapter or extension cord. Doing so voids the new
product warranty.
Summary of Contents for SmartCell ZX-250
Page 12: ...xii SmartCell ZX 250 User Guide Table of Contents...
Page 16: ...xvi SmartCell ZX 250 User Guide List of Tables...
Page 18: ...1 2 SmartCell ZX 250 User Guide Introduction...
Page 46: ...3 8 SmartCell ZX 250 User Guide Creating an Emulated LAN IP Over ATM and LANE...
Page 92: ...4 46 SmartCell ZX 250 User Guide Performing Hardware Maintenance Switch Administration...
Page 98: ...5 6 SmartCell ZX 250 User Guide Troubleshooting Congestion Troubleshooting...
Page 110: ...A 12 SmartCell ZX 250 User Guide Acronyms...
Page 124: ...C 8 SmartCell ZX 250 User Guide Managing the SmartCell ZX 250 Agent Support...


