1
INTRODUCTION
Thank you for purchasing the B&W CDM™SNT
speakers.
Founded in 1966, B&W has always striven for
perfect sound reproduction in its products. To this
end, the company has invested heavily in
research and development in order to maintain
its position at the forefront of acoustic design.
Through the years, B&W has introduced many
advanced features and techniques. Although
many of these have been developed initially for
the more expensive models, our “waterfall”
design policy has seen them incorporated,
wherever possible, elsewhere in the product
range.
Features to be found in the CDM™NT Series
include cabinets with contoured edges to reduce
sound diffraction (the radiation of sound waves
from sharp edges that interfere with and blur the
direct sound from the drive units). An integral
part of the CDM™NT range is the use of
Kevlar® cone bass/midrange drive units for
lowest coloration and maximum definition. The
treble units incorporate Nautilus™ tube
technology, which eliminates resonances behind
the dome diaphragm.
It is important to spend time setting up the
speakers, as care spent on the installation
process will reap the reward of many hours of
listening pleasure. Reading this manual fully will
help you obtain the best from your audio system.
B&W distributes to over 65 countries worldwide
and maintains a network of dedicated
distributors who will be able to help should you
have any problems your dealer cannot resolve.
Their mailing addresses can be found on the
web site or by calling B&W direct.
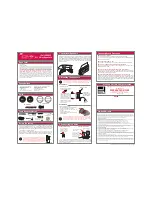
UNPACKING
(Figure 1)
•Fold the carton flaps right back and invert the
carton and contents
•Lift the carton clear of the contents
•Remove the inner packing from the product
•We suggest you retain the packing for future
use.
Check in the carton for:
•8 Self adhesive rubber pads
•1 International warranty.
CONNECTIONS
(Figures 2 & 3)
All connections should be made with the
equipment switched off.
There are 2 pairs of terminals at the back of the
speaker which permit bi-wiring if desired. On
delivery, the separate pairs are connected
together with high-quality links for use with a
single 2-core cable. For single cable connection,
leave the links in place and use either pair of
terminals on the speaker.
Ensure the positive terminal on the speaker
( and coloured red) is connected to the
positive output terminal of the amplifier and
negative (marked – and coloured black) to
negative. Incorrect connection can result in poor
imaging and loss of bass.
To bi-wire, remove the links by loosening the
terminal caps and use a separate 2-core cable
from the amplifier to each pair of terminals. This
can improve the resolution of low-level detail.
Observe the correct polarity as before. When bi-
wiring, incorrect connection can also impair the
frequency response.
Ask your dealer for advice when choosing
cable. Keep the total impedance below the
maximum recommended in the specification and
use a low inductance cable to avoid attenuation
of the highest frequencies.
POSITIONING
Ascertain the optimum position for the speaker
before fixing the mounting bracket to the wall.
Stray magnetic fields
The speaker drive units create stray magnetic
fields that extend beyond the boundaries of the
cabinet. We recommend you keep magnetically
sensitive articles (television and computer
screens, computer discs, audio and video tapes,
swipe cards and the like) at least 0.5m from the
speaker.
For this reason, the CDM™SNT is only suitable
for use as a centre speaker when using either
projection, plasma or LCD screens which are not
affected by stray magnetic fields.
Home Theatre
As a surround speaker:
There are two main ways of presenting surround
information. Older movie soundtracks, where the
surround information was recorded on only one
channel, benefited from a very ambient, all-
enveloping presentation from the surround
speakers, with little attempt to portray precise
imaging to the sides and rear. More modern
5.1 channel recordings of both movies and
audio have discrete left and right surround
channels, which can convey more precise
imaging. However, images to the sides and rear
are not generally as precise as can be obtained
from the front. Sustained tones can be more
readily positioned between the speakers than
percussive sounds, which have a tendency to
collapse towards the speakers. It is also difficult
to maintain image position for all listeners if the
listening area is a significant proportion of the
area between the five speakers. Image stability
depends on getting the right balance between
all five speakers and the “hot spot” effect is even
more marked than for 2-channel audio.
With this in mind, your success in recreating the
producer’s intentions for the surround field will
depend to a great extent on domestic constraints
– how free you are to position the speakers in
an ideal position and how large an audience
you want to cater for, relative to the size of the
room.
There is no industry standard for the angle
subtended by the surround speakers at the
listening position, but most recordings are made
with the surround speakers positioned between
110˚ and 130˚ from front centre. Place the
speakers against the wall within this range of
angles, initially on a temporary support that
raises the tweeters approximately to ear height.
This will define whether you position the
speakers on the side or rear wall. If you listen in
high-backed chairs, or if the speakers are
otherwise obscured, it may be advantageous to
raise them higher. Satisfactory results can be
obtained with them up to approximately 60cm
(2 feet) above ear height.
With all speakers positioned for initial listening
tests, listen to a wide variety of programme
material – 5.1 channel audio, action and small
scale movies – and sit in all likely listening
positions. Pay particular attention to the surround
information and the stability of the images.
If the imaging is unsatisfactory, for example if it
becomes too one sided at the extremes of the
listening area, or if you cannot place the
speakers within the preferred range, you may be
better off aiming for a more diffuse sound field.
This can give more acceptable results in difficult
situations. Try moving the speakers so they are
more off-axis to the listeners. It may also be
advantageous to raise the speakers well above
ear height. (figure 5)
Once you have found the optimum position, fix
the speaker permanently in position.
As a front centre speaker:
If using a projection television with an
acoustically transparent screen, place the
speaker behind the centre of the screen.
Otherwise position it directly above or below the
screen, whichever is closest to ear level.
As a front left and right speaker:
Space the speaker between 0.5m (20 in) and
1m (40 in) from the side of the screen.
If the centre speaker is behind an acoustically
transparent screen, position the left and right
front speaker as nearly as possible at the same
height. If the centre speaker is above or below
the screen, the height of the left and right
speaker should be between the height of the
centre speaker and the centre of the screen.
For greatest realism in home theatre installations
it is important to balance the speakers and
adjust the acoustic image to match the size of
the screen. With smaller screens it may be more
realistic to have the left and right speakers closer
together than you might for audio alone.
Adjust the levels of the three front speakers to get
a smooth transition of sounds as they pan across
the screen. Adjust the level of the surround
speakers so that, except for special effects, your
attention is not unduly attracted to them.
Sit in all likely listening positions when deciding
on the optimum levels.
Consult your decoder manual for further
information on how to set the levels.
Summary of Contents for CDM SNT
Page 1: ...Owner s Manual CDM SNT...
Page 15: ...13 CDM SNT 5 1 110 130 60 5 1 5 0 5 1 4 1 5...
Page 22: ...20 acoustically transparent 50 1 home theatre balance surround 0 tweeter 4 1 5 15 tweeter...
Page 26: ...24...
Page 27: ...25...
Page 28: ...26...