13
960H H.264 DVR User Manual
SECTION 2: HARDWARE OVERVIEW AND SETUP
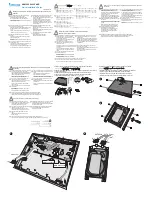
For attaching bracket
to DVD-R/W (flat-head,
fine-thread screws (4))
For attaching bracket to
HDD (pan-head, medium-
thread screws (4))
For attaching bracket
to chassis (pan-head,
course-thread screws)
Mounting Brackets (one pair per drive)
Screw types
To install an HDD, carefully follow the procedure below . Although this procedure is illustrated for a 16-channel DVR, it is identical for
a 4- or 8-channel DVR .
CAUTION
Follow recommended electrostatic discharge (ESD) guidelines while performing this procedure. Install the HDD in a static-free
environment, wearing a certified ESD wrist strap. If a static free environment and ESD wrist strap is not available, touch the bare
metal of the DVR chassis frequently when installing the drive to dissipate the static charge naturally generated on your skin and
clothing.
1 .
If your DVR is powered on, use the menu system to perform a System Shutdown .
a .
Right click anywhere on the live view screen, then click
SYSTEM SHUTDOWN
in the pop-up menu (see “3 .1 Starting
the system for the first time” on page 18), or click the SYSTEM SHUTDOWN icon on the task bar .
b .
Follow the on-screen instructions for shutting down the system .
2 .
Disconnect the power adapter from the back of the DVR .
3 .
Remove the top cover from the DVR by removing the three cover screws on the back of the chassis, and the two on each side .
See the drawing below .


