


4. Getting Started
4. Start Projector Toolset and make a connection with the projector. For more information, see the Projector Toolset user guide.
5. Select tab
Update settings
.
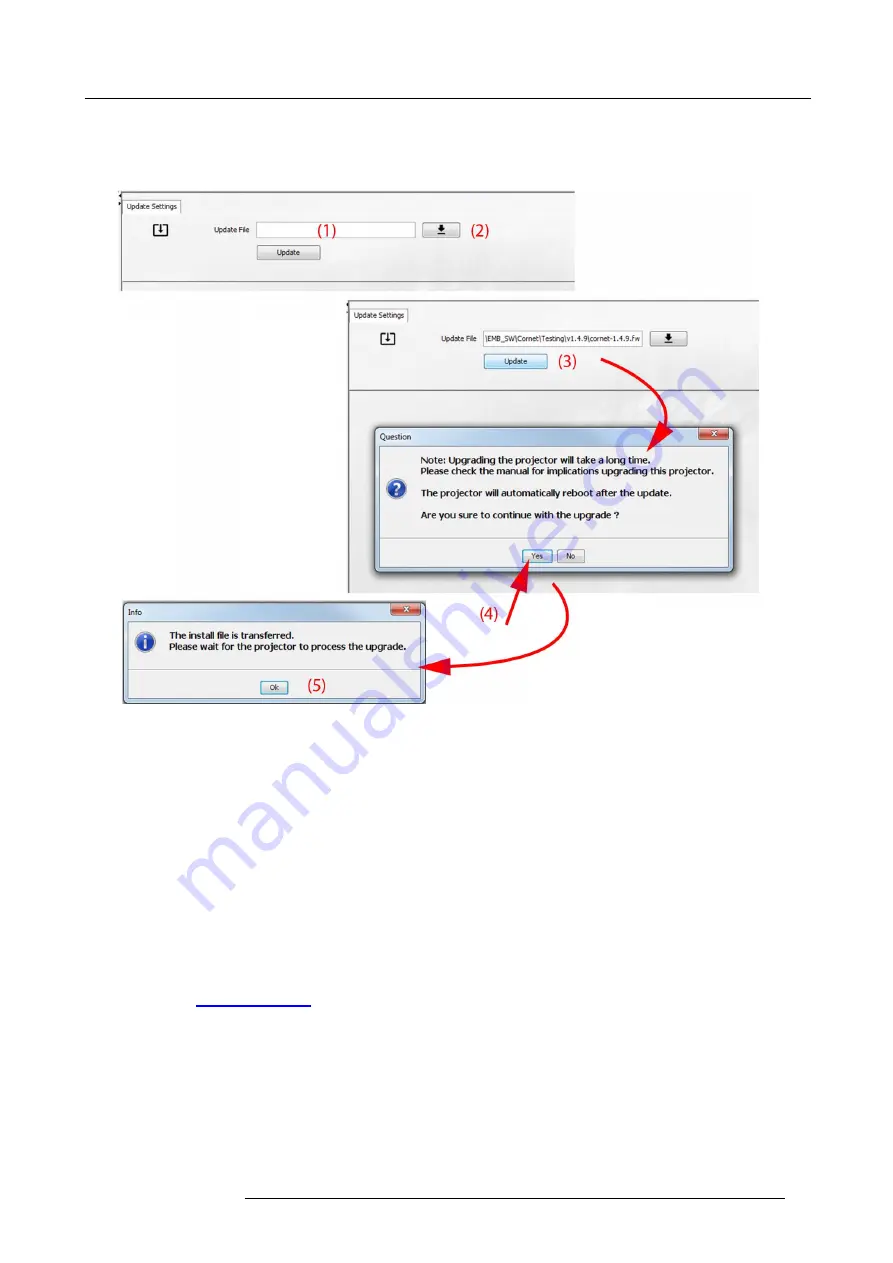
6. Fill out the path to the update
fi
le (1)
Image 4-10
Update Pulse projector
Or,
click on the path selection icon (2) to open a browser window.
7. Browse to the desired update package (format .fw) and click
Select Update Package
.
The path will be
fi
lled out in the input
fi
eld next to
Update File
.
8. Click
Update
(3).
The update starts. This action can take a long time. A message is displayed.
9. Click
Yes
to continue (4).
The update
fi
le will be transferred to the projector and installed. The projector will reboot.
A message is displayed. Click Ok to clear the message.
How to update the software if the projector isn’t connected to the network
1. Power on the projector. Wait until the
Power on/off
button is either lit white or blue.
2. Download the latest
fi
rmware
fi
le ( format .fw) from Barco’s website. The
fi
rmware can be downloaded for free from Barco’s web-
site, (URL:
http://www.barco.com
). Click on
myBarco
and log in to get access to secured information. Registration is necessary.
If you are not yet registered, click on
New to myBarco
and follow the instructions. With the created login and password, it is
possible to log in where you can download the software.
3. Place the
fi
rmware
fi
le on a clean USB
fl
ash drive.
Note:
Make sure the
fl
ash drive is FAT32 compatible & no other
fi
les are on the
fl
ash drive.
4. Plug the
fl
ash drive in the USB port on the Communication Panel.
The update
fi
le will be transferred to the projector and installed. The projector will reboot when completed.
R5906151 XDL 17/04/2018
37
Summary of Contents for XDL-4K75
Page 1: ...XDL User Manual R5906151 00 17 04 2018...
Page 4: ......
Page 16: ...1 Safety 12 R5906151 XDL 17 04 2018...
Page 22: ...2 Pulse Remote Control Unit 18 R5906151 XDL 17 04 2018...
Page 46: ...5 Graphic User Interface GUI 42 R5906151 XDL 17 04 2018...
Page 58: ...7 GUI Image 54 R5906151 XDL 17 04 2018...
Page 82: ...8 GUI Installation 78 R5906151 XDL 17 04 2018...
Page 96: ...9 GUI System Settings 92 R5906151 XDL 17 04 2018...
Page 98: ...10 Status menu 94 R5906151 XDL 17 04 2018...
Page 104: ...11 Maintenance procedures 100 R5906151 XDL 17 04 2018...


