


5. Getting started
5. GETTING STARTED
5.1
Start up
How to start up the projector ?
1. Press the Standby button on the RCU or the local keypad (image 5-1)
The last selected source is displayed
9
0
EN
T ER
M EN
U
B A C K
D I G I
Z O O M
PH
A SE
PA
U SE
PI P
L O G O
Image 5-1
5.2
Creating your personal PiP Layout
As an example: the layout to be created must contain :
- one video source : composite video
- one data source : RGBHV
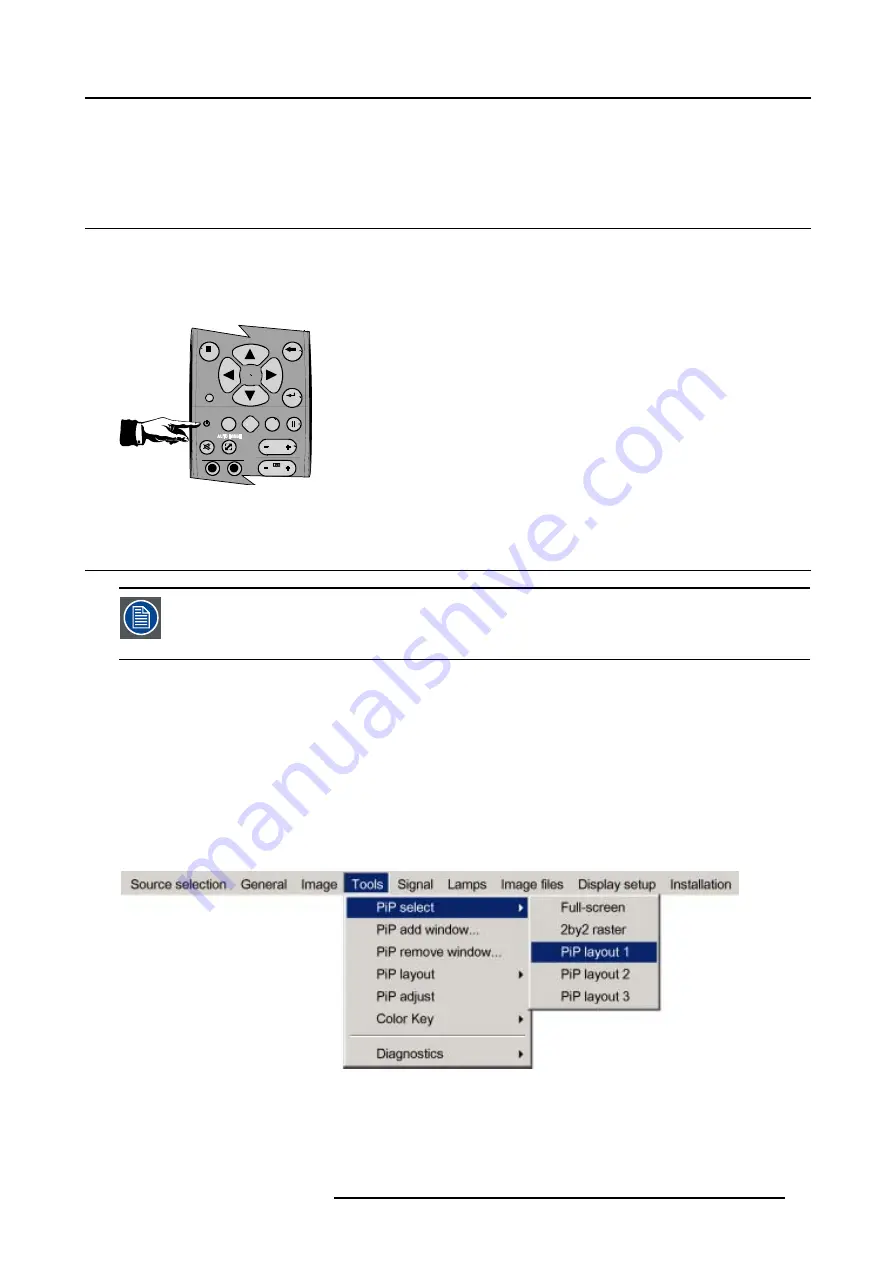
How to create a new layout based on an existing layout ?
1. Select an existing custom layout (non factory) from the
PiP select
menu (image 5-2)
2. Add the video window from the
PiP add window
menu by selecting the desired composite video source (image 5-3, image 5-4)
Note:
You can only use one (2 in case of an optional video input) video source i.e. if the layout already contains a video source,
it will be impossible to add another (different) video input .
3. Follow the instruction wizard (size, position, order)
4. Repeat the previous steps to add the RGB source
5. Save the PiP layout in the
PiP layout/Save as
menu by typing a new name
See image 5-5.
Image 5-2
R5976874 ID PRO R600/R600+ 21/09/2006
27
Summary of Contents for iD PRO R600+
Page 1: ...iD PRO R600 R600 Owners Manual R9010350 R9010351 R5976874 01 21 09 2006 ...
Page 6: ......
Page 10: ...Table of contents 4 R5976874 ID PRO R600 R600 21 09 2006 ...
Page 32: ...4 Setup 26 R5976874 ID PRO R600 R600 21 09 2006 ...
Page 36: ...5 Getting started 30 R5976874 ID PRO R600 R600 21 09 2006 ...
Page 65: ...6 Advanced Image 6 48 R5976874 ID PRO R600 R600 21 09 2006 59 ...
Page 112: ...6 Advanced 106 R5976874 ID PRO R600 R600 21 09 2006 ...
Page 168: ...11 Standard Image Files 162 R5976874 ID PRO R600 R600 21 09 2006 ...
Page 172: ...12 Troubleshoot 166 R5976874 ID PRO R600 R600 21 09 2006 ...
Page 176: ...13 Maintenance 170 R5976874 ID PRO R600 R600 21 09 2006 ...


