105
601–426 /15
F70 Series
Image 7–12
2.
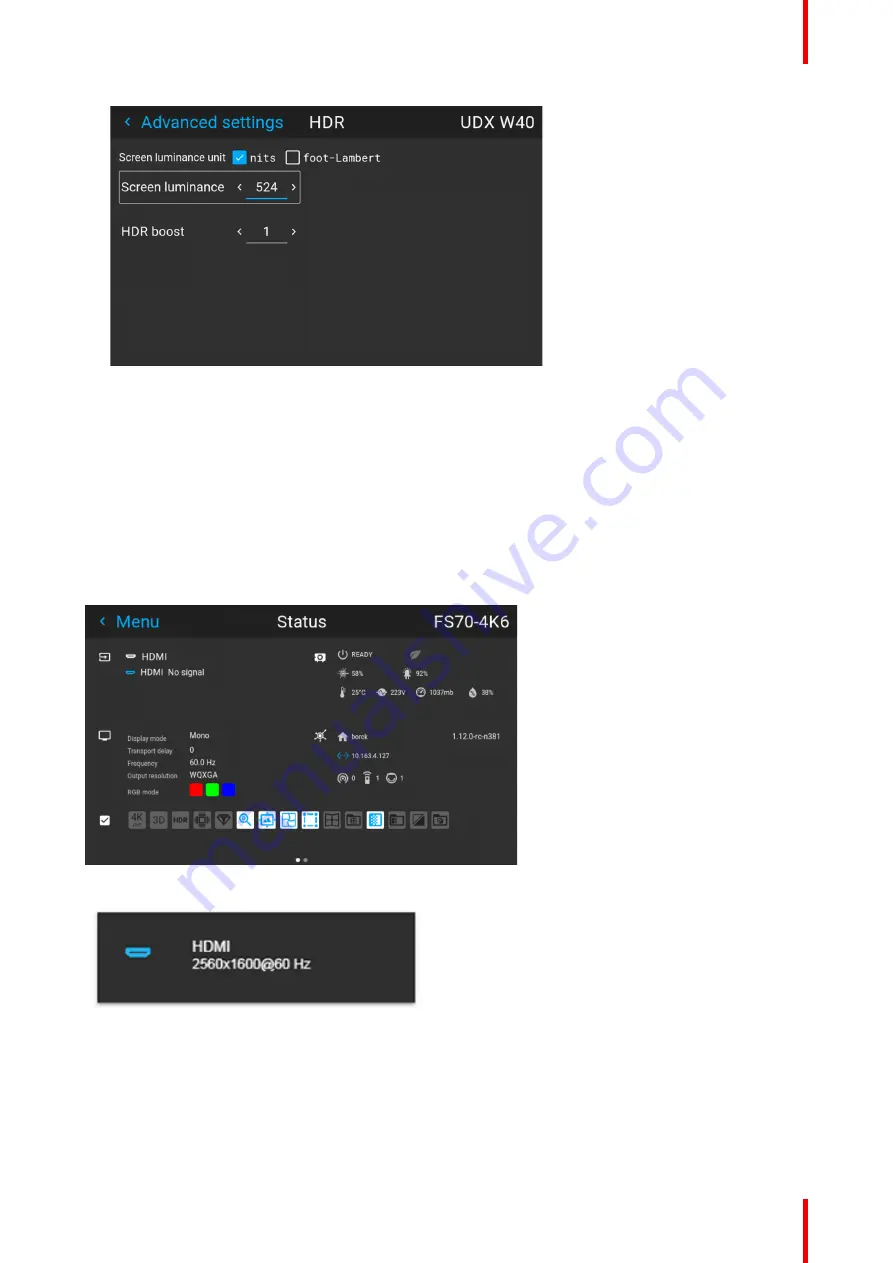
Select the desired Unit (nits or foot-lambert).
3.
Enter the Screen luminance (either in nits or foot-lambert).
4.
Alter the HDR boost if necessary. You can modify this value to somewhere between 0.8 and 1.2.
7.8.7 HDR Status.
About HDR status
When an active source is HDR, an icon is visible in the status menu.
The HDR icon will also be visible in the “Source signal popup” icon in the lower right corner on the screen.
Image 7–13 HDR Icon.
Image 7–14 Source signal popup icon.
7.8.8 Night vision
About
When using e.g. displayport 1 as daylight image input, and displayport 2 as night vision input, this option make
it possible to swap these two channels in the image processing in order to synchronize with the NV goggles.
Summary of Contents for F70 Series
Page 1: ...ENABLING BRIGHT OUTCOMES User Manual F70 Series...
Page 10: ...601 426 15 F70 Series 10...
Page 60: ...601 426 15 F70 Series 60 Lenses Handling and features...
Page 82: ...601 426 15 F70 Series 82 Getting started...
Page 88: ...601 426 15 F70 Series 88 Source menu...
Page 162: ...601 426 15 F70 Series 162 System settings menu...
Page 166: ...601 426 15 F70 Series 166 GUI Status menu...
Page 170: ...601 426 15 F70 Series 170 3D...
Page 171: ...171 601 426 15 F70 Series 13 1 Upgrade procedure 172 Upgrade projector firmware 13...
Page 182: ...601 426 15 F70 Series 182 Technical Specifications...
Page 191: ...191 601 426 15 F70 Series C 1 DMX chart Basic 192 C 2 DMX chart Extended 193 DMX Chart C...
Page 216: ...601 426 15 F70 Series 216 Index...
Page 217: ......


