


R5900120 /01
CX-50 Gen2
60
5.1 Pairing
Pairing of the Buttons with the Base Unit
To be able to use a Button it should be assigned to the Base Unit you are using. This process is called pairing.
All Buttons will need to be updated and paired before use.
In case you buy additional Buttons or when a Button should be assigned to another Base Unit, the Button
needs to be paired (again). The Button software update runs in the background and will not impact users while
using the system. When downgrading or updating to an older version of the Base Unit software the Button
need to paired manually to update their software.
A Button can only be paired to one Base Unit at a time.
The Button will always make connection to the Base Unit it was last paired to.
Pairing a Button can be done in two ways:
•
by plugging the Button to the Base Unit.
•
by using the Button Manager application running on your laptop.
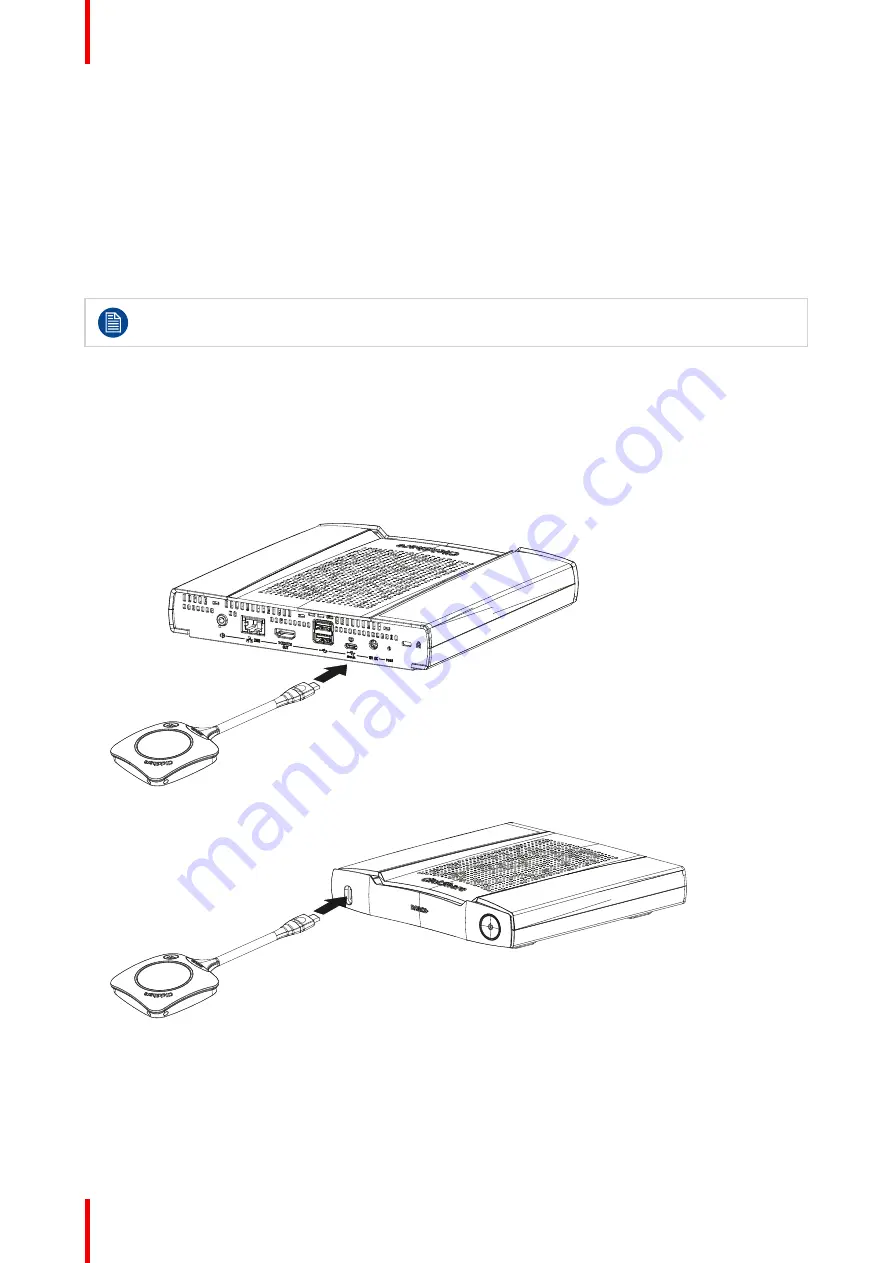
To pair a Button to the Base Unit by plugging in
1.
Insert the Button in the USB type-C
TM
port available on the back or front side on the Base Unit you are
using.
Image 5–1
Image 5–2
The Base Unit LED is blinking while the Button LED fills up a circle. This means pairing is in progress.
The Base Unit automatically checks whether the software of the Button is up to date. If not, the Base Unit
updates the Button software. This may take more time.
Summary of Contents for CX-50 Gen2
Page 1: ...ENABLING BRIGHT OUTCOMES Installation manual CX 50 Gen2...
Page 2: ......
Page 10: ......
Page 14: ...R5900120 01 CX 50 Gen2 14...
Page 15: ...15 R5900120 01 CX 50 Gen2 Introduction 1...
Page 28: ...R5900120 01 CX 50 Gen2 28 Getting started...
Page 58: ...R5900120 01 CX 50 Gen2 58 CX 50 Gen2 Installation...
Page 119: ...119 R5900120 01 CX 50 Gen2 Firmware updates 7...
Page 121: ...121 R5900120 01 CX 50 Gen2 Troubleshooting 8...
Page 143: ......


