background image


28 


28 

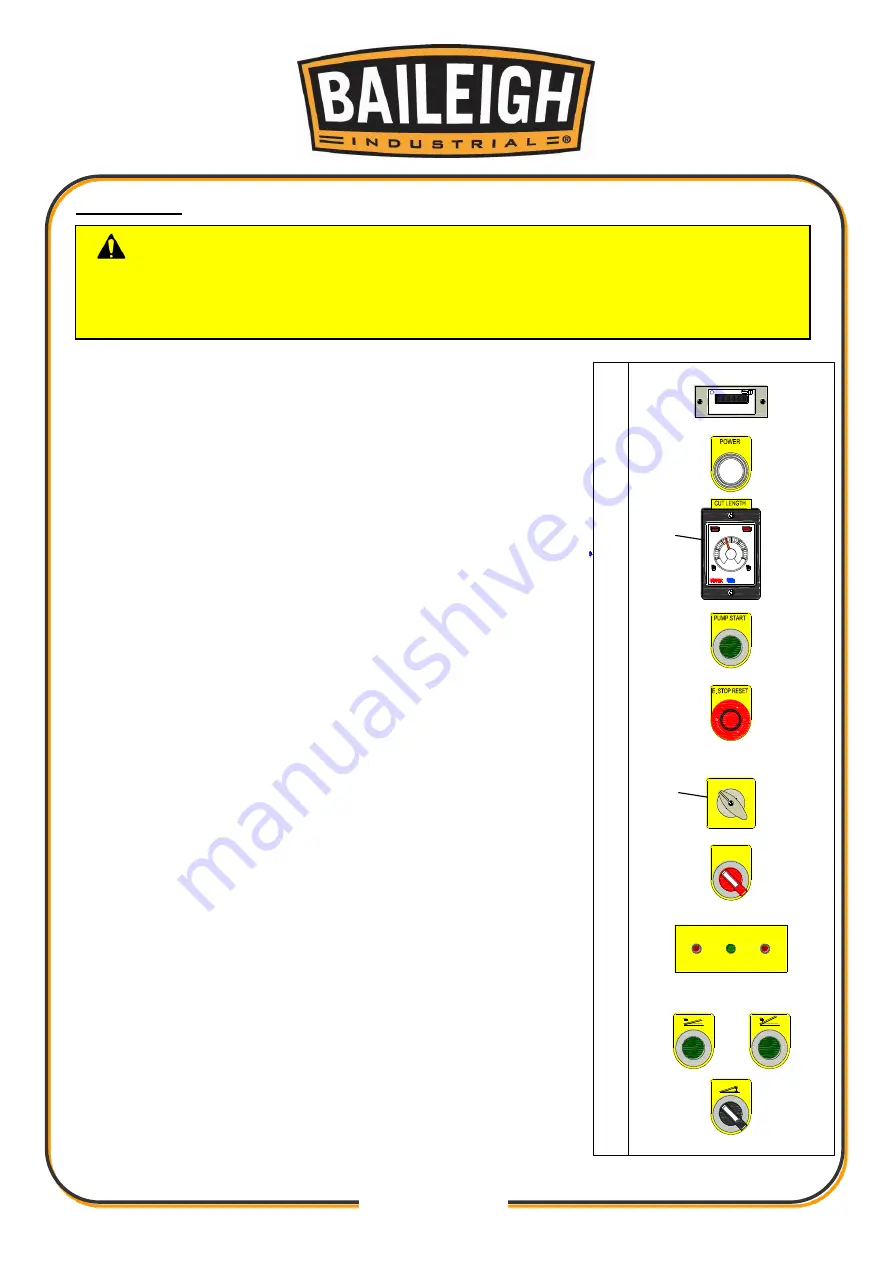
Single Mode 


When performing a cut in the 

SIN

 mode, pressing the foot 

pedal will complete one full shear cycle. 
 
1.  Place the 3-position selector switch (

E

) in the 

SIN


(singular) position. 

2.  Clear the shear table. 

3.  Turn on the main power to start the machine. 

4.  Re-set the emergency stop button, and start the hydraulic 

pump. 

5.  The upper blade will automatically rise to the upper limit. 

6.  Set the CUT LENGTH timer (

F

). 

7.  Load and position the material to be cut. 

8.  Check that the cutting area has only the material to be cut 

and step down on the footswitch. The upper blade will 
lower to cut the material and automatically return the 
upper limit position. The blade will stop until the foot pedal 
is released and pressed again. 

9.  The COUNTER will accumulate the number of strokes 

automatically. 


CAUTION: 

Always wear proper eye protection with side shields, safety 

footwear, and leather gloves to protect from burrs and sharp edges. 
Keep hands and fingers clear of the shearing blade and clamping cylinders. 
When handling large heavy sheets make sure they are properly supported. 

0

0.5

1.0

1.5

2.0

2.5

3.0

X1

X10

S

M

UP

PW

TIMER

STPY-M3

SIN

INCH

AUTO

OFF

LAMP

ON

OFF

ON

MILD STEEL T.S  64000psi

20GA

10 GA

3/16"

28GA

10GA

STAINLESS T.S 100000psi

14 GA

HAUPTSCHALTER         MAIN SWITCH

OFFNEN  IN

0-STELLUNG

OPEN  IN

OFF - POSITION

O

Summary of Contents for SH-8008HD

Page 1: ...L INC IS PROHIBITED Baileigh Industrial Inc does not assume and hereby disclaims any liability for any damage or loss caused by an omission or error in this Operator s Manual resulting from accident n...

Page 2: ...NE 16 Electrical Enclosure Switch and Button Functions 20 Blade Gap Adjusting Handle 23 Manual Back Gauge 24 Squaring Arm 25 Material Support Arm 25 Connecting cable to pedestal 26 Light Beam Shearing...

Page 3: ...42 HOLD DOWN CYLINDER PARTS IDENTIFICATION 43 ELECTRICAL ENCLOSURE BACK PANEL 44 ELECTRICAL COMPONENT IDENTIFICATION 45 ELECTRICAL PARTS LIST 46 Additional Electrical Components 46 ELECTRICAL SCHEMATI...

Page 4: ...e to Seller of any suspected defect in the Goods prior to the expiration of the warranty period The original end user must also obtain a RGA from Seller prior to returning any Goods to Seller for warr...

Page 5: ...urther remedies provided under this Agreement or at law or equity Attorney s Fees In the event legal action is necessary to recover monies due from Buyer or to enforce any provision of this Agreement...

Page 6: ...tion of the functional parts of the machine Capacity charts Set up and start up instructions Machine operation Scheduled maintenance Parts lists GENERAL NOTES After receiving your equipment remove the...

Page 7: ...es a hazard or unsafe practice that will result in severe Injury or Death Safety signs with signal word DANGER or WARNING are typically near specific hazards General precautions are listed on CAUTION...

Page 8: ...or limbs if placed in machine NEVER place your hand or any part of your body in this machine HYDRAULIC HOSE FAILURE Exercise CAUTION around hydraulic hoses in case of a hose or fitting failure PROTEC...

Page 9: ...rge industrial tool DO NOT use a tool for a purpose for which it was not intended 10 Dress appropriate DO NOT wear loose fitting clothing or jewelry as they can be caught in moving machine parts Prote...

Page 10: ...prescriptions If there is any doubt DO NOT operate the machine 20 DO NOT touch live electrical components or parts 21 Be sure all equipment is properly installed and grounded according to national st...

Page 11: ...safety catch will prevent the door from opening Hazard Signs WARNING Before opening the door to work on electrical circuits turn the main disconnect switch OFF Also turn off and Lock Out the electric...

Page 12: ...ubber Pads Industrial Grade Hydraulics 3 Axis Bearing System for Top Carriage Selector Switch for Single Inch or Auto Mode Operation Full Length Finger Guard 4 Fluorescent Bulb for Shadow Line Lightin...

Page 13: ...uick changes of direction Locate the machine where it is to be installed and lower slowly until it touches the floor CAUTION Lifting and carrying operations should be carried out by skilled workers su...

Page 14: ...unted for before discarding any packing material WARNING If any parts are missing do not plug in the power cable or turn the power switch on until the missing parts are obtained and installed correctl...

Page 15: ...12 12 figure 4 Manual Back Gauge Back Gauge Washers and bolts Squaring Arm with Scale and Material Stop Dog Pedestal with Foot Pedal and Emergency Stop Switch Front Supports with Material Stop Dog...

Page 16: ...ON OFF ON MILD STEEL T S 64000psi 20GA 10 GA 3 16 28GA 10GA STAINLESS T S 100000psi 14 GA 107 00 113 00 25 00 81 75 54 75 37 38 103 00 2 00 23 75 3 75 2 870mm 2 076mm 635mm 2 718mm 2 616mm 50 8mm 1 3...

Page 17: ...to be fed into the machine make sure that they will not extend into any aisles Cleaning Your machine may be shipped with a rustproof waxy oil coating and grease on the exposed unpainted metal surfaces...

Page 18: ...s DO NOT move the ground wire E Improper rotation can severely damage the hydraulic pump WARNING Baileigh Industrial is not responsible for any damage caused by wiring up to an alternative 3 phase pow...

Page 19: ...16 16 GETTING TO KNOW YOUR MACHINE I D E H J K A C O O P...

Page 20: ...17 17 Note Shown with guard removed For identification purposes only Note Lamp fixture shown removed from machine and flipped over B AC F G L N M...

Page 21: ...18 18 Note Shown with material drop off shields and back gauge removed Note Your machine may appear slightly different from the above photos W X Y Z AA Q R S T U V AB...

Page 22: ...flow to manifold M Oil Site Gauge Shows level of oil in tank N Hydraulic Oil Fill Cover Remove cover to fill tank or access strainer O Emergency Stop Button Press to stop all machine functions P Disco...

Page 23: ...itch is ON a safety catch will prevent the door from opening WARNING Before opening the door to work on electrical circuits turn the main disconnect switch OFF Also turn off and Lock Out the electrica...

Page 24: ...t length timer determines how soon the top blade starts returning to the up position For a narrow piece of material set the number on the timer low 0 to 5 For a wider piece increase the number on the...

Page 25: ...turns the green fluorescent lamp on or off The main disconnect must be on RAKE ANGLE POSITION INDICATOR LIGHTS As the rake angle changes these lights indicate what gauge material the rake angle is se...

Page 26: ...spring loaded pin and rotate 90 Move the handle over the size of the material you will be shearing and release the pin The correct blade gap is now set This gap must be held parallel along the full l...

Page 27: ...sary gently tap them in from side to side Once in place secure with the bolts and washers shown in fig 14 To use the back gauge loosen the two adjustable handles which are attached to the guide blocks...

Page 28: ...remove the two bolts AD Back off both bolts AE a bit Set the arm onto the 6mm pin and replace bolts AD Note DO NOT tighten at this time Using bolts AE square the arm to the blade and then tighten bolt...

Page 29: ...ccurate cut Note Shown with guard removed For identification purposes only Material Hold down There are 12 hold down cylinders F along the length of the blades For operator safety the yellow guard mus...

Page 30: ...OWER lamp B will be illuminated Start Hydraulic Pump Motor 1 Verify that the inlet and outlet valves on the hydraulic tank are open 2 Clear the shear table 3 Turn on the main power to start the machin...

Page 31: ...pper blade will lower to cut the material and automatically return the upper limit position The blade will stop until the foot pedal is released and pressed again 9 The COUNTER will accumulate the num...

Page 32: ...upper limit position and repeat the cycle until the foot pedal is released The blade will return to the upper limit position and stop until the foot pedal is pressed again 9 The COUNTER will accumula...

Page 33: ...on the footswitch The upper blade will lower to cut the material as long as the foot pedal is depressed When the pedal is released during the down cycle the blade will stop at that position When the b...

Page 34: ...TOR LED WILL BE ON WHEN IT IS IN THAT POSITION WHEN REACHING MAXIMUM ANGLE 1 4 MILD STEEL NO FURTHER ADJUSTMENT IS POSSIBLE PUMP MOTOR IS ON OFF ON TURN THIS SWITCH ON REPEATEDLY TO DECREASE THE PUSH...

Page 35: ...ESS E STOP BUTTON TO OFF SWITCH TO INCH POSITION OFF LAMP ON OFF ON SWITCH TO OFF TURN THIS SWITCH TO OFF SIN INCH AUTO TURN CUTTING MODE SELECTOR RED LIGHT ON TURN DISCONNECT SWITCH TO OFF POSITION S...

Page 36: ...ibitive lubricant to all non painted surfaces Roller Lubrication Lubricate the machines roller wheels monthly or as necessary using the grease gun provided There are two grease fittings on each side a...

Page 37: ...an sometimes indicate an incorrect level reading Do a visual inspection with the oil fill cap removed as well A shortage of hydraulic oil will cause hydraulic system breakdown to major mechanical comp...

Page 38: ...tiple usable edges If you have not already used both cutting edges on the top blade you can rotate it end for end to expose a sharp edge The bottom blade has four usable edges After all edges have bee...

Page 39: ...secure with the bolts and washers 8 Re attach the shadow wire Adjust so that the wire is taut and as close to the blade as possible without touching 9 Re mount the yellow safety guard 10 Set the blade...

Page 40: ...l four cutting edges or replace the blade with a new one 6 When in position secure the blade with the bolts and washers 7 Mount the 2 ball transfer tables and the squaring arm 8 Set the blade gap arm...

Page 41: ...38 38 HYDRAULIC SCHEMATIC 1 2 3 4 6 7 12 8 10 13 14 15 16 17 18 13 A B C D D P T S2 S3 BPG PG M TOP BLADE S5 S4 3 4PT 3 4PT 3 4PT 3 4PT 3 4PT 1 2PT 3 8PT 1 4PT 3 8PT 5 T 3 4PT 11 9 S1...

Page 42: ...39 39 MANIFOLD BLOCK OPERATION SOLENOID S1 S2 S3 S4 S5 HOLD DOWN DOWN HOLD DOWN UP TOP BLADE ANGLE LARGE TOP BLADE ANGLE SMALL PG 7 BPG 8 D A P 6 S1 2 S2 S3 3 S5 S4 4 1 5 T B D C 9...

Page 43: ...Valve S DSG 03 3C60 24 S2 50 7 Solenoid Valve 4WE6H60 8 Over center Valve CB2A33HL 9 Check Shuttle Valve CSAB XXN 10 Pilot to Close Check Valve CC2A3050N 11 Check Valve CV12W 4 1 12 Modular Pilot Ope...

Page 44: ...41 41 HYDRAULIC CYLINDER EXPLODED VIEW 14 1 2 3 4 5 6 7 8 9 10 11 12 13 15 16 17 18 19 20 21 22 23 24...

Page 45: ...Nut 7 Clevis Rod End 8 Link Shaft Up 9 Socket Head Screw 5 16 x 75 Long 10 Washer 11 Socket Head Screw 3 8 x 1 00 Long 12 Link Shaft Down 13 Washer 14 Socket Head Screw 3 8 x 1 00 Long 15 Bearing Fish...

Page 46: ...43 43 HOLD DOWN CYLINDER PARTS IDENTIFICATION 1 2 3 4 5 6 7 8 9 1 2 3 4 5 6 7 8 9 Rubber Pad Hex Screw 5 16 x 75 Cover Cylinder Body Inner Rod Spring Washer Washer Hex Screw 5 16 x 75...

Page 47: ...44 44 ELECTRICAL ENCLOSURE BACK PANEL...

Page 48: ...R8 R7 R6 R5 R4 R3 R2 R1 T2 MS X3 X2 X1 1 TB 2 TB 3 TB TR OL1 0 0 5 1 0 1 5 2 0 2 5 3 0 X1 X10 S M UP PW TIMER STPY M3 SIN INCH AUTO OFF LAMP ON OFF ON MILD STEEL T S 64000psi 20GA 10 GA 3 16 28GA 10GA...

Page 49: ...1BD T1 On Delay Timer STPY M3 5A 250V 3 SEC T2 On Delay Timer STPN M3 5A 250V 3 SEC TB1 Transfer Bus 4P 60A TB2 Transfer Bus 3P 60A TB3 Transfer Bus 12P 15A TB4 Transfer Bus 4P 30A TB5 Transfer Bus 12...

Page 50: ...7 47 ELECTRICAL SCHEMATIC Sheet 1 _ 2 1 R L M PBr PF 3 10A 220V 24V 110V 0V TR PF 1 2A PF 2 1A CS 2 TB4 TB4 4 FAN LAMP MAIN MOTOR 15HP 4P RHN 80KP 47A 3Ph 3W R S T MC N CU 40 SCB P1 25 3 OL 1 220V 60H...

Page 51: ...LIMIT SINGLE STROKE CONTINUOUS STROKE FOOT SWITCH STROKE TIMER CUT LENGTH TOP BEAM DOWN TOP BEAM UP CONTINUOUS TIMER ANGLE ADJ ANGLE ADJ 24 VAC R4 R1 R2 R3 T 1 R5 R6 T 2 R7 R8 R9 PB1 PB2 PB1 OL1 MC T...

Page 52: ...51 x3 X 2 52 PB3 53 BLADE ANGLE ADJUSTMENT BLADE ANGLE MINIMUM LIMIT SR1 8 12 TB5 TB5 SR2 8 12 TB5 TB5 TB5 10 TB5 11 54 R6 R4 55 CUT QUANTITY DIRECTIONAL VALVE 57 R8 R9 R5 R7 R8 R9 SV1 TB3 TB3 11 12...

Page 53: ...0 ELECTRICAL WIRE TERMINALS L M TB5 TB4 TB3 4 7 18 23 35 36 44 47 48 53 2 1 3 LS 1 LS 1 LS 2 X E L R 1 4 10 64 63 62 61 58 57 X L 1 2 3 4 5 t U V W TB2 TB1 MAIN PUMP 15Hp 4p 3Ph 3W 220V 60Hz E R S T R...

Page 54: ...2 Idler sprocket 20T Hardened Teeth 3 Bottom sprocket Hardened Teeth 4 Roller chain 5 Grease fitting 6 Roller wheel 7 Roller wheel bearing 8 Bearing wheel 9 Shadow wire by the foot 10 Hold down rubbe...

Page 55: ...he breaker to ON position Check and replace fuse s Replace switch Replace transformer Motor is ON but machine will not move Motor turning in the wrong direction Not enough hydraulic oil Solenoid valve...

Page 56: ...lve Replace pump Contact dealer for service Adjust the correct pressure setting of the valve Excessive hydraulic noise Motor turning in wrong direction Pump worn out Not enough oil Ball valves on hydr...

Page 57: ...54 54 NOTES...

Page 58: ...55 55 NOTES...

Page 59: ...56 56 NOTES...

Page 60: ...INC 1455 S CAMPUS AVENUE ONTARIO CA 91761 PHONE 920 684 4990 FAX 920 684 3944 BAILEIGH INDUSTRIAL LTD UNIT 1 FULLWOOD CLOSE ALDERMANS GREEN INDUSTRIAL ESTATE COVENTRY CV2 2SS UNITED KINGDOM PHONE 44 0...

Reviews: