14
AutoView 200/400 Installer/User Guide
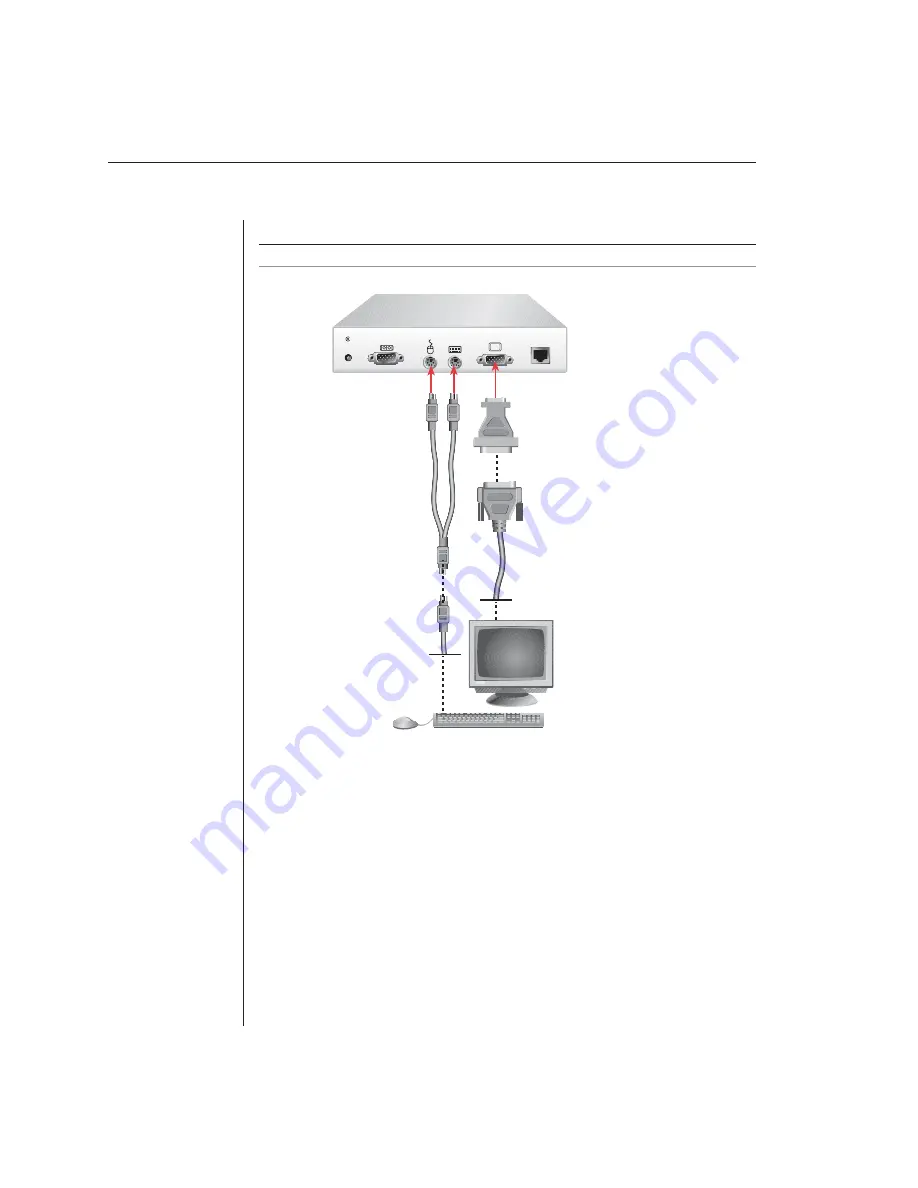
To connect an extended access Sun user station (AutoView 400 only):
NOTE:
This requires a VAK-1 adaptor kit available from Avocent.
Figure 2.4: Extended Access Sun User Station Installation
1.
Plug a standard CAT 5 cable (up to 500 feet) into the RJ-45 modular jack on
the rear of the AutoView. Avocent C5T or P5T cable is strongly recommended
to achieve best performance and maximum distance. If you use a different
CAT 5 cable, ensure it is terminated to the EIA (TIA) 568 B standard.
2.
Route the CAT 5 cable to the location where you intend to place the
secondary monitor, keyboard and mouse.
3.
If your monitor uses a 13W3 plug, attach the 15HDD male adaptor into the
monitor port of your LongView receiver and the monitor cable into your VAK-1
adaptor. Otherwise plug the monitor directly into the LongView receiver.
4.
Plug the ends of the 6-pin miniDIN VAK-1 keyboard/mouse adaptor into
the corresponding ports on your LongView receiver, then plug the Sun
keyboard/mouse cable into the VAK-1 adaptor.
REMOTE I/O
RECEIVER
–––+
24VDC
.5A
LongView
Sun User Station
VAK-1 Video Adaptor
13W3 Video Connector
Keyboard/Mouse
Connector
VAK-1 Keyboard/
Mouse Adaptor
Summary of Contents for AutoView 200
Page 1: ...AutoView 200 400 Installer User Guide...
Page 6: ......
Page 7: ...Contents 1 Product Overview Features and Benefits 3 Compatibility 6 Safety Precautions 6...
Page 8: ......
Page 14: ......
Page 24: ...18 AutoView 200 400 Installer User Guide...
Page 26: ......
Page 42: ...36 AutoView 200 400 Installer User Guide...
Page 44: ......
Page 48: ...42 AutoView 200 400 Installer User Guide...
Page 50: ......
Page 57: ...Appendices 51...


