14
Aviat Networks
Chapter
4.
Eclipse Edge Configuration and Diagnostics
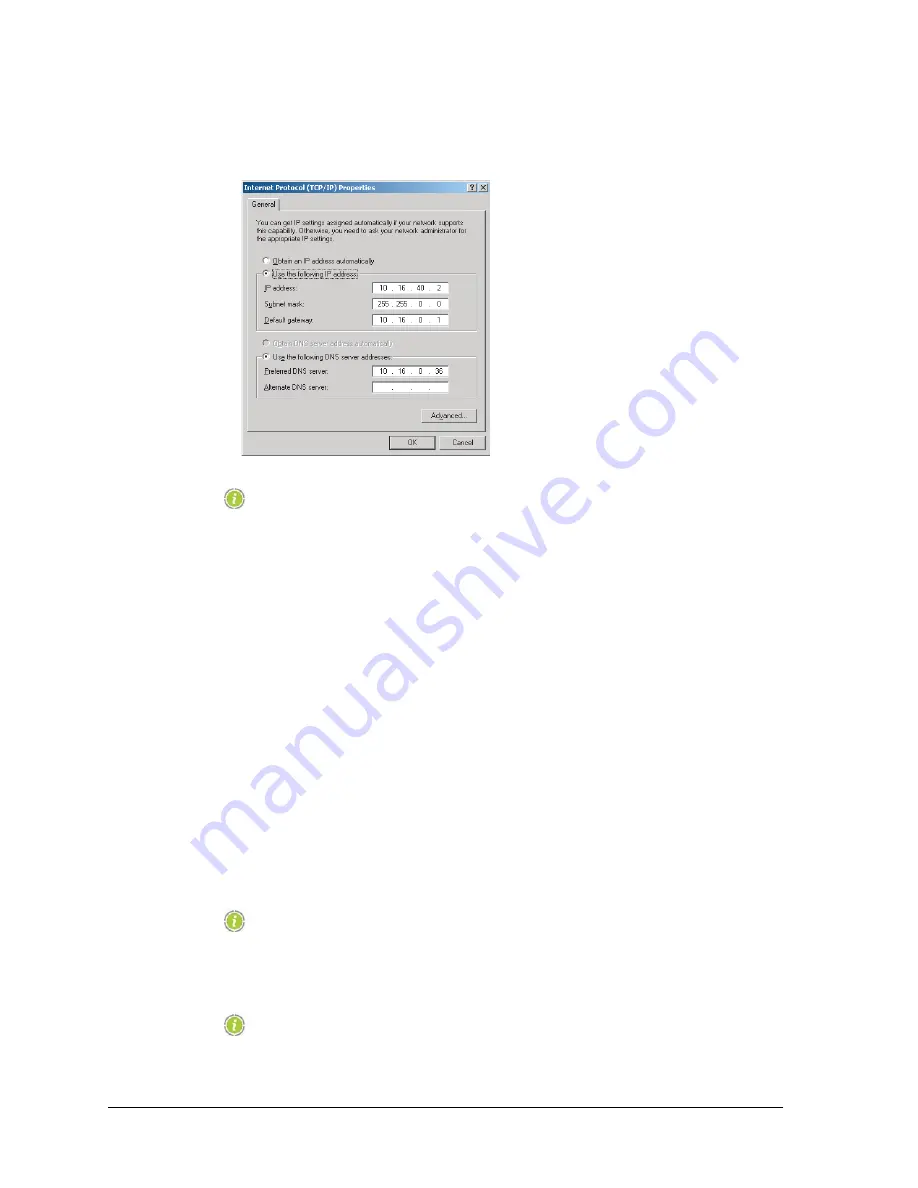
5. Click
Properties.
The Internet Protocol (TCP/IP) Properties window is displayed.
NOTE:
Before making any change to the settings in this window, record and
retain the existing settings, which may pertain to your company
LAN.
6. Select
Use the following IP address
.
7. In the IP address field enter a LAN compatible IP address for the radio:
• The network portion of the IP address must be the same as the radio you are
connecting to. The network portion is determined from the subnet mask. Except
in circumstances where sub-netting is used this network portion will be indicated
by subnet mask octets of 255.... In the example above the network portion is 10.16
(subnet mask of 255.255.0.0).
• The host portion of the IP address must be set so that your PC is seen as a different
connection on the radio LAN. It must NOT be set to the same host number as the
radio you are connecting to.
• The subnet mask must be set to be the same as the radio you are connecting to.
Refer to
Example - Changing TCP/IP Properties on page 15
for guidance.
8. To enable viewing of other Eclipse terminals on the network, set the default
gateway to the IP address of the Eclipse radio to which you are physically
connecting.
NOTE:
Existing settings for a DNS server may be ignored.
9. Click
OK
, then
OK
again to confirm the settings and exit.
NOTE:
This procedure must be repeated when physically connecting to
other Eclipse terminals in the network.
Summary of Contents for ECLIPSE EDGE
Page 1: ...ECLIPSE EDGE Version 5 USER MANUAL 260 668080 001...
Page 2: ......
Page 3: ...Eclipse Edge Microwave Radio System User Manual Software Version 5 0 March 2013...
Page 14: ...16 Aviat Networks INDEX...
Page 18: ......
Page 26: ...8 Aviat Networks Chapter 1 Health and Safety...
Page 272: ...36 Aviat Networks Chapter 3 Eclipse Edge Installation...
Page 273: ......


