


TD 92483GB
2008-06-05/ Ver. B
Installation and Operation Manual
UPAC- Unite Packet for Messaging and Alarm
68
12.1.4 Import the Language
When the file is translated, it must be imported to the UPAC. Click “Browse” to locate the
translated file and click the “Import” button.
The name of the translated language (the language “id” attribute) will appear as a link in
the Existing Language list and can be downloaded for editing purposes.
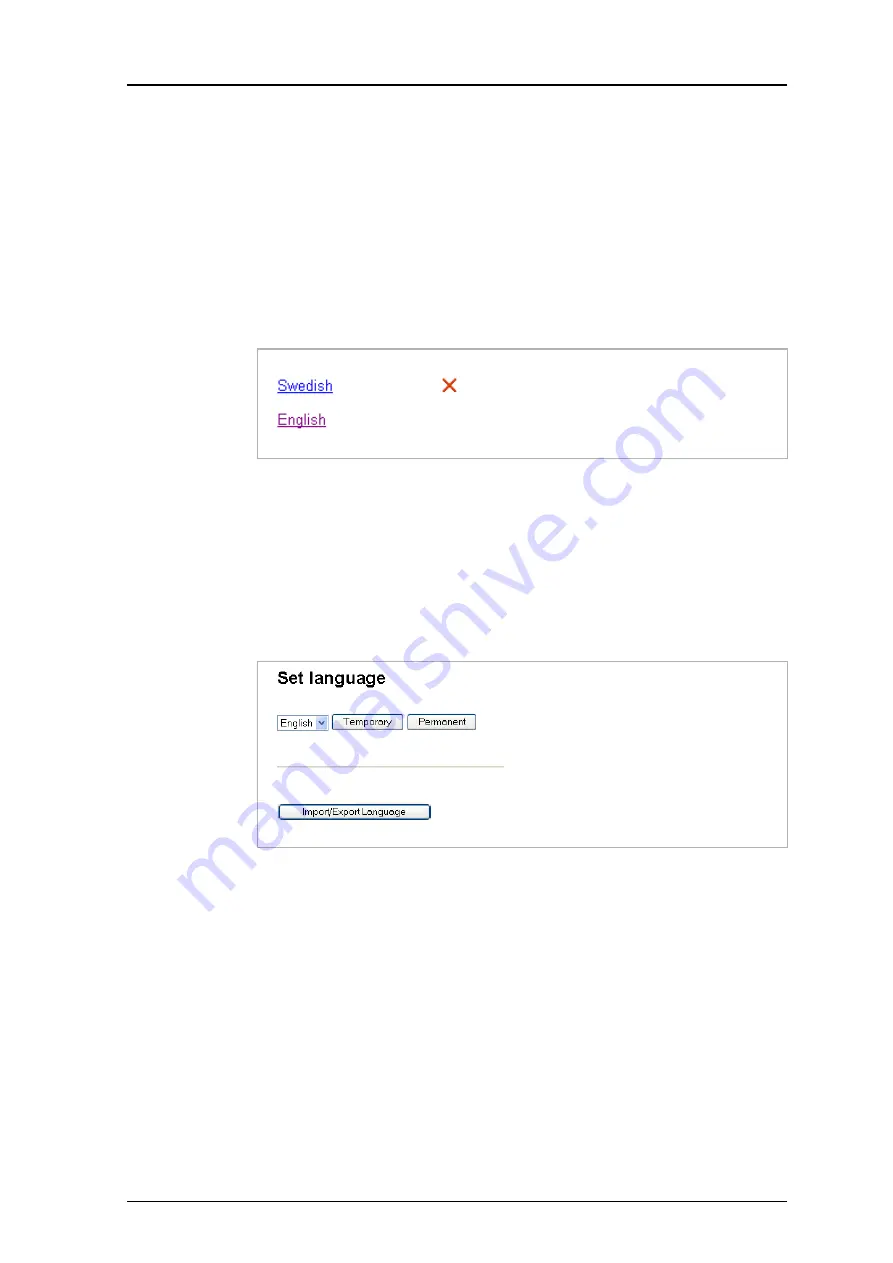
12.1.5 Delete Language
On the
Translation
page, click the “Delete” symbol to the right of the language you want
to remove, see below. Note that it is not possible to remove the default language.
12.1.6 Select Language
Translated languages (the language “id” attribute) are shown together with the default
language “English” in the language drop-down list in the
Language
page.
1
Click “Configuration” on the start page.
2
Enter User name and Password and click “OK”
3
Select Other Settings > Set language in the left menu on the
UPAC Configuration
page.
4
Select language in the drop- down list and click “Permanent”.
To change language for this session only, i.e. for this browser window until closed,
click “Temporary”.
12.2 Customize the User Interface (GUI)
UPAC has 5 Mb disk space on the FTP area and about 1.6 Mb is dedicated for the user
interfaces. The free space can be used for storing files and folders, for example, a
customized user interface for sending messages.
12.2.1 Files for Translation/Editing
1
Log on to UPAC with an FTP client, for example, Internet Explorer. Fill in the UPAC
host name in the address field “ftp://xxx.xxx.xxx.xxx”.
Figure 91.
Figure 92.


