background image

E-23

E-22

English

customising the 

remote

NOTE

On the following pages, a single ‘blink’ of 
the remote’s power LED is indicated by 
the symbol 

*

.

Code learning

The supplied remote comes with a 
complete library of pre-programmed 
codes. After you have set up the remote 
for your device, you may find that there 
are one or more functions on your original 
remote which do not have a place on 
the keypad. For convenience, the remote 
offers a Code Learning feature that allows 
you to copy up to 16 functions from an 
original remote control onto the remote 
keypad.
Before you start, make sure that:


<

The original remote control is working 
correctly.


<

The remotes are not pointing at your 
device.


<

The remotes have fresh batteries.


<

The remotes are not in direct sunlight 
or under strong fluorescent lights.

NOTE

Learned functions are mode-dependent. 
You could assign up to eight different 
functions to a single key – a separate 
learned function for each mode.

Direct code setup (Method 1)

The first method is to program the remote 
with the 3-digit code number for the 
device you wish to control – see “device 
code tables”. Make a note of the suggested 
number or numbers – the most popular 
code is listed first. Now power on the 
device. 

1.  Press the Device key for the product 

you want to set up, together with the 

1

 key. Hold down both buttons for 

three seconds until the LED stays lit.

2.  You are now in setup mode, and you 

can release the buttons.

3.  Enter a 3-digit code for the device.
4.  If the 3-digit code number you 

entered is correct for the device, it will 
turn off. If  it doesn’t turn off, enter the 
next code number from your list until 
the device does turn off.

5.  Once you have found the correct 

code, press the Device key again. 
The LED blinks three times 

***


to confirm that the code has been 
successfully stored.

Library search setup (Method 2)

Library search allows you to scan through 
all the codes contained in the remote’s 
memory. It can take a lot longer than the 
previous method, so only use this method 
if:


<

Your device does not respond to the 
remote after you have tried all the 
codes listed for your brand.


<

Your brand is not listed at all in the 
Device Code tables.

1.  Press the Device key for the product 

you want to set up, together with the 

1

 key. Hold down both buttons for 

three seconds until the LED stays lit.

2.  Point the remote control at the 

product you wish to control and 
press the 

'

 or 

,

 button on the 

navigation pad. Each time the 

'

 or 

,

 button is pressed, the code counts 

up (or down) one code number with a 
signal to power off the device.

3.  Continue pressing the up or down 

button, in approximately one second 
intervals, until the device turns off. 
(DO NOT alternate the up and down 
button – you need to move in only 
one direction.)

4.  To store the correct code, press the 

Device key again. The LED blinks three 
times 

***

 to confirm that the 

code has been successfully stored.

Learning setup (Method 3)

The third method involves ‘teaching’ the 
Arcam remote from the original remote 
for the device. The two remotes should be 
facing each other, approximately 10 cm 
apart.

1.  Press the Device key for the product 

you want to set up, together with the 

3

 key. Hold down both buttons for 

three seconds until the LED stays lit.

2.  Press the button on the Arcam remote 

that you want to assign a command 
to. The LED blinks once 

*

 indicating 

that the remote is ready to learn the 
command.

3.  Press and hold the appropriate key on 

the other remote until the LED blinks 
twice 

**

. This indicates the Arcam 

remote has learned the command 
from your other remote.

4.  Continue learning the commands 

from your other remote by pressing 
the next button on the remote and 
repeating steps 2 and 3. 

5.  Once the remote has learned all the 

selected commands, press and hold 
the Device key you used to enter 
learning together with the Numeric 

3


key to store the learned commands.

NOTE

If the Arcam remote LED blinks five times 

*****

 there was an error in the 

learning process.
The 

AMP

 and 

RADIO

 keys do not learn 

commands.

Important notes


<

Once you start a Code Learning 
session, you have approximately ten 
seconds to conduct each step. Any 
longer, and a timeout means that 
you’ll have to start the process again.


<

The Learning feature is mode-specific 
– you can copy one feature 

per mode


onto a key


<

The remote can learn approximately 
16 functions in total.


<

To replace a learned function, simply 
assign a new function to the same key.


<

Learned functions are retained when 
you change batteries.


<

If Code Learning fails, try altering the 
distance between the two remotes; 
make sure that the ambient light is 
not too bright.

Deleting the learned data

To delete all the learned data for a 
device:

1.  Press the Device key for the product 

you want to set up, together with the 

3

 key. Hold down both buttons for 

three seconds until the LED stays lit.

2.  Press and hold down the Device key 

for the product that you want to erase, 
together with the 

4

 key for three 

seconds until the LED blinks twice 

**

.

3.  If any further key press is not made for 

30 seconds after the LED blinks twice 

**

, the remote leaves erase mode 

without deleting the learned data.

4.  If you press the Device key one more 

time within 30 seconds after LED 
blinks twice 

**

, you can finish 

the erase mode deleting all the data 
learned on the Device. The LED blinks 
three times 

*** 

to confirm.

To delete the learned data for a key for 
a device:

1.  Press the Device key for the product 

you want to set up, together with the 

3

 key. Hold down both buttons for 

three seconds until the LED stays lit.

2.  Press and hold down the key on which 

you want to delete the data for three 
seconds. The LED blinks twice 

**

If any further key press is made, the 
remote escapes from erase mode 
without deleting the learned data.

3.  If any further key press is not made 

for 30 seconds, the LED blinks twice 

**

, the remote get out of the erase 

mode automatically without deleting 
the learned data.

4.  If you press the Device key together 

with the 

3

 key again within 30 

seconds after the LED blinks twice, 
all the data learned for that Device is 
deleted and you leave erase mode. 
The LED blinks three times 

***


in confirmation.

Reading stored code 

numbers

1.  Press the Device key for the product 

that you want to set up together with 
the 

4

 key. Hold down both keys for 

three seconds until the LED blinks.

2.  Press the 

INFO

 key and count the 

number of blinks (

*

=1, 

**

=2, 

***

=3, etc.). There is a time 

gap between digits. (Note that 
‘0’ is represented by ten blinks: 

**********

.)

Locking/Unlocking a 

specific device mode

When you first unpack your remote and 
insert the batteries, it is able to control 
certain Arcam components automatically 
(e.g. Amplifiers, Tuners and Disc Players). 
We achieve this by programming specific 
Arcam device codes onto the relevant 
device mode keys, then locking the device 
modes so you don’t reprogram them 
inadvertently. 
If you want to override these locked 
default settings – to control a third-party 
amplifier, for example – you will first need 
to unlock AMP mode before setting up the 
remote using one of the learning methods 
described on the previous page.

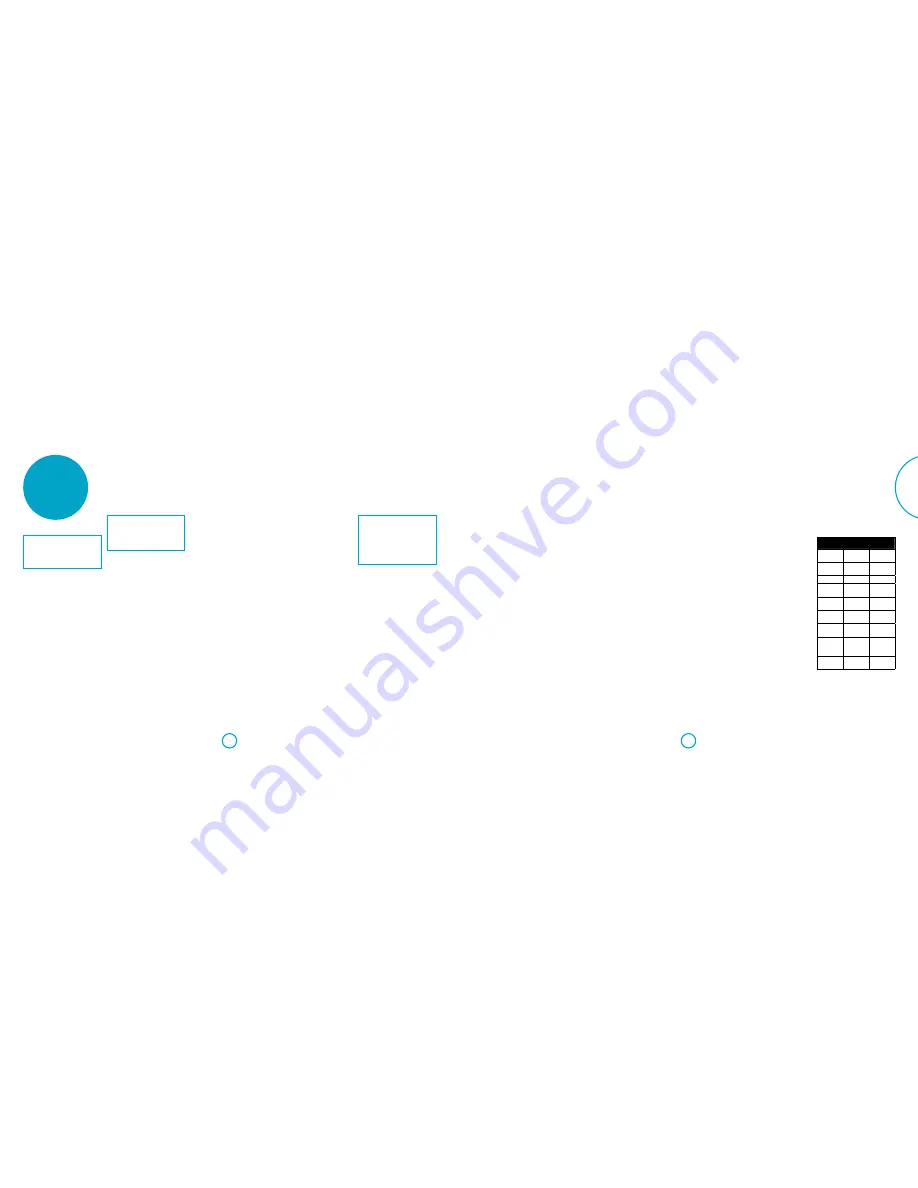
The factory default settings are:

Device 

mode

Default 

status

Default 

codes

AMP

Locked

001 (Arcam 
code 16)

AV

Unlocked

Code 
learning only

SAT

Unlocked

128 (Sky+)

PVR

Unlocked

018 (Humax 
9300)

GAME

Unlocked

Code 
learning only

LINE

Unlocked

Code 
learning only

AUX

Unlocked

Code 
learning only

STB

Unlocked

030 (Bush, 
Goodmans, 
Grunding)

TV

Unlocked

108 (Philips 
TV)

Summary of Contents for SOLO MUSIC

Page 1: ...Handbook Solo movie music Manuel Solo movie music Handbuch Solo movie music Handleiding Solo film muziek Manual Solo movie music Руководство Solo movie music Manuale Solo movie music 手册 Solo movie music ...

Page 2: ......

Page 3: ...Handbook Solo movie music English ...

Page 4: ...We hope that your Solo movie music will give you years of trouble free operation In the unlikely event of any fault or if you simply require further information about Arcam products our network of dealers will be happy to help you Further information can also be found on the Arcam website at www arcam co uk The Solo movie music development team welcome contents safety E 4 before you begin E 6 over...

Page 5: ... à ce que la population ne puisse y être exposée à une distance de moin de 20 cm Installer les antennes de facon à ce que le personnel ne puisse approcher à 20 cm ou moins de la position centrale de l antenne La FCC des éltats unis stipule que cet appareil doit être en tout temps éloigné d au moins 20 cm des personnes pendant son functionnement safety Important safety instructions 1 Read these ins...

Page 6: ...cables We recommend the use of high quality screened cables that are designed for the particular application Other cables will have different impedance characteristics that will degrade the performance of your system for example do not use cabling intended for video use to carry audio signals All cables should be kept as short as is practically possible It is good practice when connecting your equ...

Page 7: ...ituations e g while the disc is displaying a copyright notice Play Pause Press the 4 button to start pause playback Skip backward forward Press the 0 buttons to skip backward forward video chapters on BD DVD disc or audio tracks on an audio disc Power Turn the Solo on or off top panel M U T E M E N U O K D I S P L A Y Disc System Menu Accesses disc menu if BD DVD present Accesses the Solo system m...

Page 8: ...nalogue device See Line in on page E 12 IR IN Connect an external remote control device See Infrared connection on page E 13 BT and Wi Fi Connect the supplied BT and Wi Fi antennae See Bluetooth Wi Fi antenna on page E 14 Speaker outputs Connect the speakers to these terminals See speakers on page E 15 R L 8Ω LOAD IMPEDANCE RECOMMENDED SPEAKER OUTPUTS audio video connections Introduction Before co...

Page 9: ...or further details Serial connection This connector is used with control devices having an RS232 serial port for example Crestron and AMX touch screen controllers Network connection The Solo can be connected to your network using either a wired or wireless connection Wireless connection In order to connect to your Wi Fi network the supplied Wi Fi antenna needs to be connected to the Solo and the u...

Page 10: ...ker placement Speaker cables The speakers should be connected to the Solo using good quality high purity copper cables Solid core cables or those with surface only conductors are particularly suitable Bell wire and very cheap speaker cables should be avoided as they significantly degrade the sound quality Connections to the speaker terminals should always be tight whether using bare wires spade co...

Page 11: ...n Operating your Solo Introduction This section explains the basic opration of the Solo Note that it may be necessary to configure the Solo correctly for optimum performance Details regarding system setttings can be found in settings menu on page E 28 Switching on Switch the unit on by pressing the power button The status LED glows green when the unit is powered up If the power button is pressed o...

Page 12: ...in subdued lighting conditions Power LED blinks Short blinks indicate a valid key press Multiple short blinks convey information such as a device code or signal the beginning and successful completion of a programming sequence The symbol is used in the manual to indicate a power LED blink Timeouts and unassigned keys Time out After 30 seconds the remote exits the programming state and returns to n...

Page 13: ...o an audio streaming device the keys below are used to navigate music tracks 9 Selects the previous next track in the current playlist 4 Play current track Pause current track Network media USB commands When using the network client the keys below are used to navigate music files in AMP device mode Navigates the files on screen OK selects plays the highlighted file 9 Selects the previous next trac...

Page 14: ...te by pressing the next button on the remote and repeating steps 2 and 3 5 Once the remote has learned all the selected commands press and hold the Device key you used to enter learning together with the Numeric 3 key to store the learned commands NOTE If the Arcam remote LED blinks five times there was an error in the learning process The AMP and RADIO keys do not learn commands Important notes O...

Page 15: ...k selection Some discs contain multiple audio streams such as a standard Dolby Digital 5 1 soundtrack and a high definition Dolby TrueHD surround soundtrack The audio stream can be changed during playback The secondary audio e g director s commentary of Blu Ray Discs if present can also be changed if alternatives are available Note Audio language is changed using the settings menu see Language on ...

Page 16: ... available in all locations This section deals with tuner operation for information on setting up the tuner and installing aerials see DAB DAB and FM aerial on page E 14 When a tuner input is selected the OSD shows a list of radio presets plus an information panel giving all available information about the current frequency for FM or station for DAB DAB The front panel will also give the same info...

Page 17: ... Deep Colour processing applied to the HDMI video output You can select Auto or Off If this option is set to Auto and your TV supports Deep Color the screen displays colours at 30 36 or 48 bit accuracy compared to the 24 bit accuracy of standard colour Check the documentation that came with your TV to see if your TV supports Deep Colour All system HDMI interconnect cables must be Deep Colour compa...

Page 18: ...consult your router s user manual on instructions on how to enable WPS or how enter the required PIN Information Select and press OK to view or set the network connection parameters Connection Test When your player tests your Internet connection it sends pings an IP address Press OK to run a network test This will also configure the wired network settings automatically if they have not been config...

Page 19: ...n press OK Parental Control Parental control settings can be used to prevent the viewing of material inappropriate for children According to the level set a disc may be stopped or have certain scenes cut or substituted with alternative scenes depending on the disc To set the parental control level 1 Select Settings Security Parental Control 2 Enter your pasword using the remote control numeric but...

Page 20: ... start menu of the BD player if applicable When playing a BD DVD the Solo selects Dolby Pro Logic sometimes BD DVD discs contain material at either the beginning or the end of the main movie that is not in full 5 1 format but in two channel or Dolby Pro Logic decoding Hum on the analogue input all cables are making a good connection If necessary withdraw the cable from the connector and plug it fu...

Page 21: ...ues are typical unless otherwise stated Solo movie 5 1 Continual improvement policy Arcam has a policy of continual improvement for its products This means that designs and specifications are subject to change without notice Continuous power output per channel 2 channels driven 1kHz 0 2 THD 8Ω 4Ω 80W 125W Residual noise hum A wtd 300µV Stereo line inputs Maximum input 2 1V rms Input impedance 10kΩ...

Page 22: ...l individually obtain patent licenses in effect making the program proprietary To prevent this we have made it clear that any patent must be licensed for everyone s free use or not licensed at all The precise terms and conditions for copying distribution and modification follow TERMS AND CONDITIONS FOR COPYING DISTRIBUTION AND MODIFICATION This License applies to any program or other work which co...

Page 23: ... BE LIABLE TO YOU FOR DAMAGES INCLUDING ANY GENERAL SPECIAL INCIDENTAL OR CONSEQUENTIAL DAMAGES ARISING OUT OF THE USE OR INABILITY TO USE THE PROGRAM INCLUDING BUT NOT LIMITED TO LOSS OF DATA OR DATA BEING RENDERED INACCURATE OR LOSSES SUSTAINED BY YOU OR THIRD PARTIES OR A FAILURE OF THE PROGRAM TO OPERATE WITH ANY OTHER PROGRAMS EVEN IF SUCH HOLDER OR OTHER PARTY HAS BEEN ADVISED OF THE POSSIBI...

Page 24: ...E 42 ...

Page 25: ...Manuel Solo movie music Français ...

Page 26: ... des années de plaisir acoustique avec votre Solo movie music Dans l éventualité peu probable où une panne surviendrait ou si vous recherchez simplement des informations supplémentaires sur les produits Arcam les représentants de notre réseau de revendeurs se feront un plaisir de vous aider D autres informations sont disponibles sur notre site web d Arcam à l adresse www arcam co uk L équipe de dé...

Page 27: ... l énergie Câbles de branchement Il est recommandé d utiliser des câbles blindés de haute qualité conçus pour ce genre d application L utilisation d autres câbles dont les caractéristiques d impédance diffèrent risque d affecter les performances de votre système Par exemple n utilisez pas de câble conçu pour un usage vidéo pour le transport des signaux audio Les câbles doivent être aussi courts qu...

Page 28: ... Appuyez sur la touche pour lancer mettre en pause la lecture Saut avant arrière Appuyez sur les touches 0 pour aller directement au début à la fin de chapitres vidéo sur un disque BD DVD ou de pistes audio sur un disque audio Alimentation Allume ou éteint l Solo panneau supérieur M U T E M E N U O K D I S P L A Y Menu Disque Système Accède au menu du disque si un BD DVD est présent Accède au menu...

Page 29: ...âble phono stéréo venant d un appareil analogique Voir Line in on page F 10 IR IN Permet de connecter un dispositif de télécommande externe Voir Connexion infrarouge on page F 11 BT et WiFi Permet de connecter les antennes BT et WiFi fournies Voir Antenne Bluetooth WiFi on page F 12 Sorties enceintes Permet de brancher les haut parleurs à ces bornes Voir enceintes on page F 13 R L 8Ω LOAD IMPEDANC...

Page 30: ...giciel par USB on page F 33 pour plus de détails Connexion série À utiliser avec des périphériques de commande disposant d un port de série RS232 contrôleurs tactiles AMX et Crestron par exemple Connexion réseau L Solo peut être connectée à votre réseau en utilisant une connexion filaire ou sans fil Connexion sans fil L antenne WiFi fournie doit être branchée à l Solo et les paramètres du sans fil...

Page 31: ... particulièrement appropriés Les fils téléphoniques et les câbles de haut parleurs très bon marché doivent être évités car ils dégradent considérablement la qualité sonore Les connexions aux bornes de haut parleurs doivent toujours être bien ajustées que ce soit en utilisant des fils nus des connecteurs embrochables ou des fiches banane mais n utilisez pas d outils comme des pinces des clés plates...

Page 32: ...gurer l Solo correctement pour obtenir des performances optimales Les détails concernant les paramètres du système peuvent être trouvés à menus de configuration on page F 26 Mise en marche Appuyez sur la touche d alimentation POWER pour allumer l appareil Le voyant devient vert lorsque l appareil est mis sous tension Si vous appuyez sur la touche power ou si vous débranchez l appareil lorsque l ap...

Page 33: ...ression d une touche valide Si le voyant clignote rapidement plusieurs fois cela indique l acheminement d informations un code d appareil par exemple ou le démarrage et la fin d une séquence de programmation Sur ce manuel le symbole indique un clignotement de voyant Délais expirés et touches non attribuées Temps d expiration au bout de 30 secondes la télécommande quitte le mode de programmation et...

Page 34: ...e de la piste actuelle Pause de la piste actuelle Commandes du média réseau USB Lors de l utilisation du client réseau les touches ci dessous permettent de parcourir les fichiers de musique en mode périphérique AMP Parcourir les fichiers à l écran OK sélectionne lance la lecture du fichier en surbrillance 9 Sélectionne la piste précédente suivante sur la liste de lecture en cours 4 Lecture de la p...

Page 35: ...fois que la télécommande a appris toutes les commandes sélectionnées appuyez longuement sur la touche de périphérique que vous avez utilisée pour effectuer un apprentissage avec la touche Numérique 3 pour enregistrer les commandes apprises REMARQUE Si le voyant de la clignote cinq fois une erreur s est produite dans le processus d apprentissage Les touches AMP et RADIO n apprennent pas de commande...

Page 36: ...ignez une option et appuyez sur OK pour la sélectionner ou appuyez sur la touche POP UP pour quitter ce menu Sélection de la piste audio Certains disques comprennent plusieurs pisets audio par exemple une piste audio classique Dolby Digital 5 1 et une piste audio surround haute définition Dolby TrueHD Vous pouvez changer de piste audio durant la lecture Vous pouvez également choisir une piste audi...

Page 37: ...ons de base comme l entrée le volume le décodeur audio et l adresse IP de l appareil écouter la radio L Solo est équipée de tuners FM et DAB DAB radio numérique Les émissions DAB DAB ne sont pas disponibles partout Cette rubrique détaille le fonctionnement du tuner Pour de plus amples informations sur la configuration du tuner et l installation des antennes Voir Antenne DAB DAB et FM on page F 12 ...

Page 38: ...to HDMIDeepColor Réglage du niveau de traitement Deep Color appliqué à la sortie vidéo HDMI Vous pouvez sélectionner Auto ou Off Si cette option est réglée sur Auto et que votre téléviseur accepte le Deep Color l écran affichera les couleurs avec une exactitude de 30 36 ou 48 bit exactitude de couleur standard 24 bit Consultez les documents livrés avec votre téléviseur pour savoir si votre télévis...

Page 39: ...de connexion réseau Connection Test Lorsque votre lecteur teste la connexion internet il envoie une adresse IP Appuyez sur OK pour effectuer un test du réseau Ceci permet également de configurer automatiquement les paramètres de réseau s ils n étaient pas déjà configurés et si la configuration automatique DHCP n est pas prise en charge par le réseau Si ce test échoue vérifiez les connexions de vot...

Page 40: ...eau mot de passe pour confirmer puis appuyez sur OK Parental Control La configuration du contrôle parental permet d éviter que des enfants puissent voir du contenu ne convenant pas à leur âge Selon le niveau défini un disque pourra être bloqué ou certaines scènes du disque pourront être coupées ou remplacées par d autres scènes selon le disque Pour régler le niveau du contrôle parental 1 Sélection...

Page 41: ...s soit en début soit en fin du film principal qui n est pas en format 5 1 mais en décodage deux canaux ou Dolby Pro Logic Bourdonnement sur l entrée analogique tous les câbles sont correctement connectés Si nécessaire retirer le câble du connecteur et branchez le à nouveau à fond mettez hors tension avant de le faire les connexions à l intérieur du connecteur du câble de la source sont brisées ou ...

Page 42: ...s sauf mention contraire Solo movie 5 1 Politique d amélioration continue Arcam améliore continuellement ses produits Les conceptions et les spécifications peuvent donc faire l objet de modifications sans préavis Puissance de sortie continue par canal Piloté par 2 canaux 1 kHz 0 2 DHT 8 Ω 4 Ω 80 W 125 W Bruit résiduel et bourdonnement A réf 300 µV Entrées de ligne stéréo Entrée maximum 2 1 VRMS Im...

Page 43: ...de deux ans il vous faut payer les frais de pièces et de main d œuvre La garantie ne couvre en aucun cas les frais de transport Réclamations sous garantie Cet équipement doit être renvoyé dans son emballage d origine au revendeur auprès duquel il avait été acheté Il doit être expédié par l intermédiaire d un transporteur réputé pas par la poste Aucune responsabilité ne peut être acceptée durant le...

Reviews: