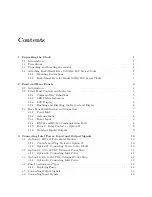
Contents
1
Unpacking the Clock
1.1
Introduction . . . . . . . . . . . . . . . . . . . . . . . . . . . . . . . . . . . . . . . . .
1.2
Precautions . . . . . . . . . . . . . . . . . . . . . . . . . . . . . . . . . . . . . . . . .
1.3
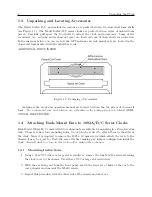
Unpacking and Locating Accessories . . . . . . . . . . . . . . . . . . . . . . . . . . .
1.4
Attaching Rack-Mount Ears to 1093A/B/C Series Clocks . . . . . . . . . . . . . . .
1.4.1
Mounting Instructions . . . . . . . . . . . . . . . . . . . . . . . . . . . . . . .
1.4.2
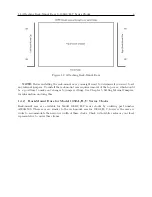
Rack-Mount Ears for Model 1092A/B/C Series Clocks . . . . . . . . . . . . .
2
Front and Rear Panels
2.1
Introduction . . . . . . . . . . . . . . . . . . . . . . . . . . . . . . . . . . . . . . . . .
2.2
Front Panel Controls and Indicators . . . . . . . . . . . . . . . . . . . . . . . . . . .
2.2.1
Command Key Definitions . . . . . . . . . . . . . . . . . . . . . . . . . . . . .
2.2.2
LED Status Indicators . . . . . . . . . . . . . . . . . . . . . . . . . . . . . . .
2.2.3
LCD Display . . . . . . . . . . . . . . . . . . . . . . . . . . . . . . . . . . . .
2.2.4
Enabling and Disabling the Keypad and Display . . . . . . . . . . . . . . . .
2.3
Rear Panel Identification and Connectors . . . . . . . . . . . . . . . . . . . . . . . .
2.3.1
Power Inlet . . . . . . . . . . . . . . . . . . . . . . . . . . . . . . . . . . . . .
2.3.2
Antenna Input . . . . . . . . . . . . . . . . . . . . . . . . . . . . . . . . . . .
2.3.3
Event Input . . . . . . . . . . . . . . . . . . . . . . . . . . . . . . . . . . . . .
2.3.4
RS-232 and RS-485 Communication Ports . . . . . . . . . . . . . . . . . . . .
2.3.5
Form C, Relay Contacts – Option 93 . . . . . . . . . . . . . . . . . . . . . . .
2.3.6
Standard Inputs/Outputs . . . . . . . . . . . . . . . . . . . . . . . . . . . . .
3
Connecting Inlet Power, Input and Output Signals
3.1
Option 07, IEC-320 Power Inlet Module . . . . . . . . . . . . . . . . . . . . . . . . .
3.1.1
Cordsets and Plug Styles for Option 07
. . . . . . . . . . . . . . . . . . . . .
3.1.2
Option 07, Connecting Power to the 1093B . . . . . . . . . . . . . . . . . . .
3.2
Option 08, 10 to 60 VDC Terminal Power Strip . . . . . . . . . . . . . . . . . . . . .
3.2.1
Option 08, Connecting Inlet Power . . . . . . . . . . . . . . . . . . . . . . . .
3.3
Option 10, 110 to 350 VDC Terminal Power Strip
. . . . . . . . . . . . . . . . . . .
3.3.1
Option 10, Connecting Inlet Power . . . . . . . . . . . . . . . . . . . . . . . .
3.4
Fuse Locations and Types . . . . . . . . . . . . . . . . . . . . . . . . . . . . . . . . .
3.4.1
Replacing Fuses . . . . . . . . . . . . . . . . . . . . . . . . . . . . . . . . . . .
3.5
Connecting Output Signals
. . . . . . . . . . . . . . . . . . . . . . . . . . . . . . . .
3.6
Connecting Input Signals
. . . . . . . . . . . . . . . . . . . . . . . . . . . . . . . . .
Summary of Contents for 1092A
Page 4: ...iv ...
Page 18: ...xviii LIST OF TABLES ...
Page 129: ...C 10 Option 20A Four Fiber Optic Outputs 111 Figure C 7 Option 20A Jumper Locations ...
Page 131: ...C 11 Option 27 8 Channel High Drive 113 Figure C 8 Option 27 Jumper Locations ...
Page 148: ...130 Options List Figure C 10 Option 29 Connector Signal Locations ...


