MRO 3 & 4 MANUAL
12
98-0140
Rev. F
CAUTION:
Mixing chlorine and hydrogen peroxide/peroxyacetic acid causes a toxic
chemical reaction. Never allow them to mix! Do not use chlorine to
disinfect the system!
8.
Use only the exact amount of PAA disinfectant solution and in proper dilution during
disinfection of the system.
9.
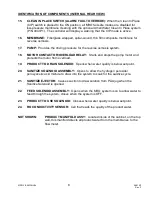
It is important to test for PAA in the Product Water For Dialysis after rinsing during
disinfection of the system. Do not use the system until all traces of the disinfecting
solution in the Product Water For Dialysis are less than 3 PPM.
CAUTION:
Never operate the MRO connected to dialysis machines if the water
conductivity exceeds the set point, indicating Poor Quality!
10. Always maintain water flow and pressure to avoid damage to the pump.
11.
Minimum feed pressure is 20 PSI (while the MRO is in operation, with flow). Maximum
feed pressure is 90 PSI.
WARNING:
The Clean In Place Switch, located inside the cabinet on the back of the
controller, must be in the OFF position during normal operation. If the
Clean In Place Switch is left in the ON position during normal operation,
all MRO fail-safe modes will be disabled, and damage to the MRO or injury
to the patient may occur.
12. Minimize the opportunities for bacterial growth between uses!
CAUTION:
To minimize bacterial growth, operate the MRO for 5 minutes in “FLUSH”
and then 5 minutes with the FLUSH VALVE in “OPERATION” before
connecting to a dialysis machine and using for dialysis.
Whenever the MRO is not used for a period of several hours, and connected to a Direct Feed
Loop, the “Membrane Flush Feature” of the MRO should be programmed to be active when
in the STANDBY mode.
Whenever the MRO is not used for a period of several hours, and connected to a Storage
Tank of a Central System, the “Membrane Flush Feature” of the MRO should be programmed
to be active when in the OPERATE mode. This feature will flush the MRO when the Storage
Tank is full and the water level is maintained at the Tank Full High float switch by diverting
the Product Water to drain. See section 6 for programming the flush modes.
Before determining a bacteria count, the MRO should be PLACED in FLUSH for 5 minutes
(fully opened reject flow control knob), and then placed in OPERATE for 5 – 10 more minutes
after a period of non-use, but before taking a sample of the PRODUCT WATER. Bacteria are
known to increase in population when water is not moving.
Summary of Contents for MRO3
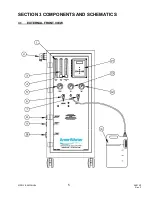
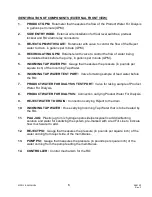
Page 8: ...MRO 3 4 MANUAL 5 98 0140 Rev F SECTION 3 COMPONENTS AND SCHEMATICS 3 1 EXTERNAL FRONT VIEW...
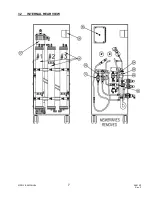
Page 10: ...MRO 3 4 MANUAL 7 98 0140 Rev F 3 2 INTERNAL REAR VIEW...
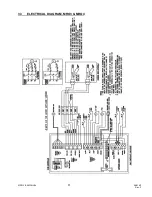
Page 12: ...MRO 3 4 MANUAL 9 98 0140 Rev F 3 3 ELECTRICAL DIAGRAM MRO3 MRO4...
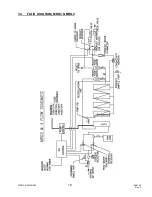
Page 13: ...MRO 3 4 MANUAL 10 98 0140 Rev F 3 4 FLUID DIAGRAM MRO3 MRO4...
Page 34: ...MRO 3 4 MANUAL 31 98 0140 Rev F FIGURE 6 2...
Page 35: ...MRO 3 4 MANUAL 32 98 0140 Rev F FIGURE 6 3...
Page 52: ...MRO 3 4 MANUAL 49 98 0140 Rev F SECTION 11 MRO3 4 SPARE PARTS LISTING...


