70
the whole video brightness is OK but the contrast is not correct. Please note the video may become hazy
if the value is too low. If this value is too high, the dark section may lack brightness while the bright
section may over expose. The recommended value ranges from 40 to 60.
•
Sharpness: This slider is used to adjust the sharpness of the video. The value ranges from 0 to 100. The
larger the value is, the clearer the edges are and vice versa. Note: The higher the value, the higher
likelihood of picture noise occurring. The default value is 50 and the recommended value ranges from 40
to 60.
To revert to default settings, click the Default button near the bottom left hand corner. To confirm settings,
click the Save button near the bottom right hand corner. To cancel any modifications, click the Cancel button
near the bottom right hand corner. To apply the settings, click the Apply button near the bottom right hand
corner. After completing the setup please click the save button to go back to the previous menu.
4.10.1.2 Encode
4.10.1.2.1 Encode
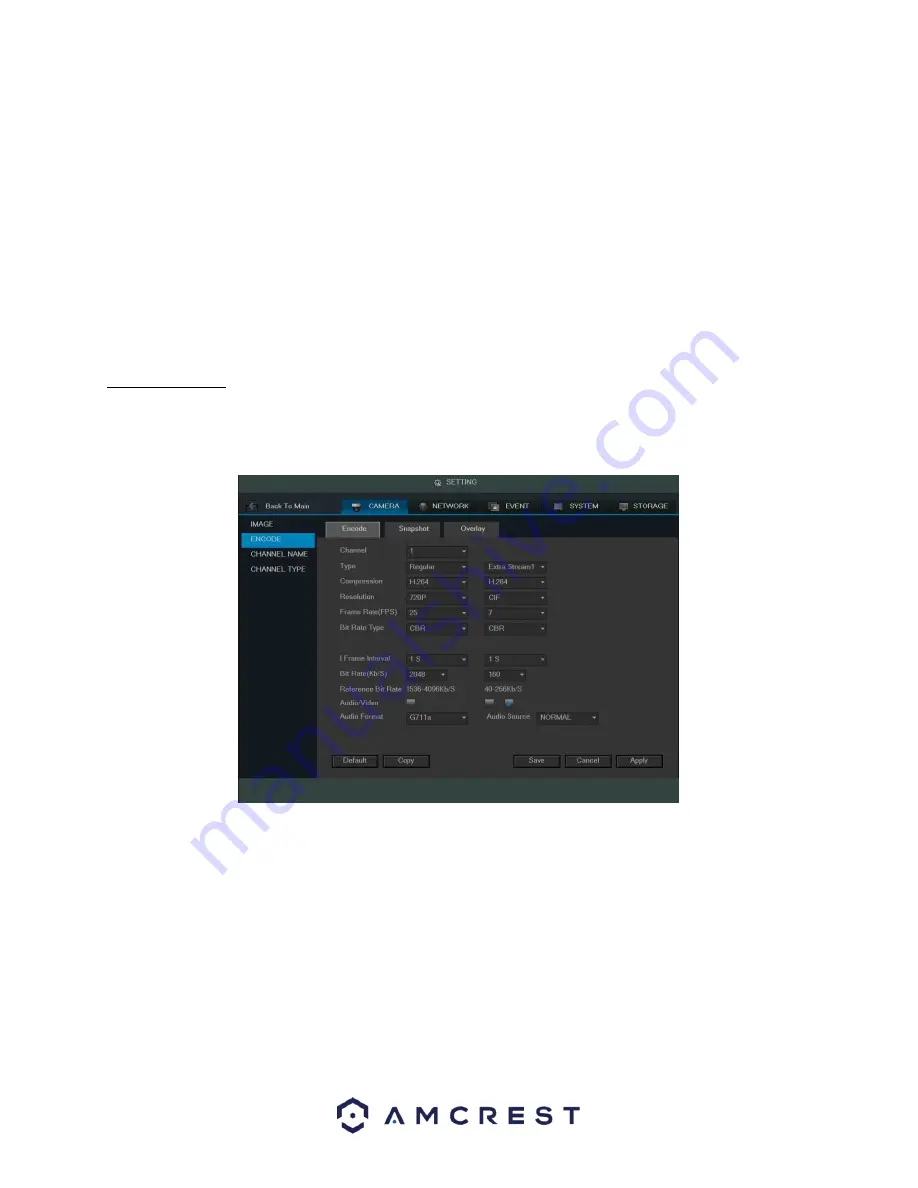
This tab is used to set the video encoding settings for each channel. See below for a screenshot of the tab:
Below is an explanation of the fields on the Encode settings screen:
•
Channel: This dropdown box allows the user to select a channel from the dropdown list to modify.
•
Type: This dropdown box allows the user to select one of 3 channel types: regular, motion detect, and alarm.
Various encode parameters can be for different record types.
•
Compression: This dropdown box allows the user to select a compression protocol. The system supports
H.264 and MJPEG video compression protocols.
•
Resolution: This dropdown box allows the user to set the resolution. The system supports various resolutions
and they can be selected from this dropdown list.
•
Frame Rate: This dropdown box allows the user to select a frame rate. Frame rate settings range from 1f/s to
25f/s in NTSC mode and 1f/s to 30f/s in PAL mode.
Summary of Contents for AMDVTENL8
Page 1: ...1 Amcrest 1080p Lite AMDVTENL8 DVR User Manual...
Page 7: ...7 This page is left blank intentionally...
Page 14: ...14...
Page 25: ...25 2 Connect a USB mouse to the front of the DVR...
Page 65: ...65...


