228 • Schlage • L-Series service manual
L9000-Series electrified installation instructions
L9000-Series electrified installation instructions
L-Series Electrified Lock
All installations should be in accordance with local electrical codes and national electrical code, NFPA 70.
L909X-Series and LM929X-
Series electrified locks offer
selection between one of
two modes, EL or EU.
Select the appropriate mode
for the installation using the
mode select switch located
on the mortise chassis.
EL, electrically locked
(fail safe):
Outside knob/lever or both
outside and inside knobs/
levers (depending on
function) will lock when
power is applied. In the
event of power failure, the
opening will be unlocked.
EU, electrically unlocked
(fail secure):
Outside knob/lever or both
outside and inside knobs/
levers (depending on
function) will unlock when
power is applied. In the
event of power failure, the
opening will be locked.
Note: When mode is switched (from EL to EU or EU to EL) the lock requires a complete lock/unlock power cycle to synchronize to
the proper mode.
IMPORTANT! Connection of L-Series electrified mortise locks to a supply circuit containing electromagnetic devices (i.e., solenoid based)
is
not
recommended
. If used, the resulting transient voltages could damage the lock. The transient voltage must be carefully suppressed at the equipment
producing it before connecting the lock to the same circuit. A varistor rated at 35 V (peak recurrent) may be used for transient voltage protection.
Troubleshooting
If lock does not operate.
• Ensure the lock is powered with DC power. Do not use AC power.
• Ensure the input voltage is between 10.8 and 26.4 volts DC.
L-Series Request-to-Exit (RX) Lock
RX utilizes a microswitch inside the lock case to detect rotation of the inside knob/lever. The switch then signals the use of the opening to the security system.
The RX is a removable module located on the bottom edge of the lock chassis. The module must be properly positioned to detect inside knob/lever
rotation. If not properly positioned, the lock and/or microswitch may be damaged.
Note:
RX is not applicable with LM929X-Series locks.
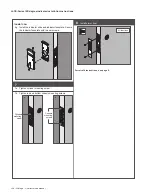
RX module installation
1. The microswitch must be on the same side of the door as the
handing screw (facing the inside of the door).
2. Install the RX switch module as shown.
Change lock handing with RX
1. If the RX module is installed, remove the RX module.
2. Remove the handing screw.
3. Rotate the latch 180
°
(if necessary).
4. Reinstall the handing screw on the appropriate side.
5. Reinstall the RX module with the microswitch on the same side as
the handing screw.
Electrical rating:
3 A, 125 V AC; 2 A, 30 V DC
L-Series Electrified Locks
L909X-Series Electrified Mortise Lock,
LM929X-Series Electrified Two-Point Lock
Wiring Instructions and Specifications
Handing screw
RX module
screws
Microswitch
Blue (NO)
Yellow (NC)
Green
(common)
WARNING
Warnings indicate potentially hazardous conditions, which if not
avoided or corrected, may cause death or serious injury.
WARNINGS
L909X
LM929X
Mode select
switch
Electrified hinge/
EPT (not furnished)
12 or 24 V DC
Install varistor
here if used
(not furnished)
Switch
(not furnished)
Power supply
12 or 24 VDC
(not furnished)
Lock to hinge/EPT
harness (not furnished)
Electrical Requirements:
The L909X and LM929X-Series electrified locks
are powered by DC power only.
Do not use AC power.
• Voltage: 12 or 24 VDC (maximum 26.4 V,
minimum 10.8 V)
• Peak current:
0.4 amps
• Holding current: 0.010 amps
• Operating temperature: -22°F to 140°F
(-30°C to 60°C)
Note: Either lock wire may be attached to either power
supply terminal (+ or -).
Maximum Total Wire Length
AWG
14
16
18
20
Voltage
12 V
500'
(152 m)
300'
(91 m)
200'
(61 m)
100'
(30 m)
24 V
Up to 1000' 304 m
WARNING
L9091/93/95, L9493/95 and LM9291/93/95 functions lock both inside and
outside levers. Locking both levers will prevent normal egress from the
inside and will prevent the intended operation of an emergency exit.
Summary of Contents for Schlage D Series
Page 1: ...Schlage Manuals 2016...
Page 2: ...D Series Service manual...
Page 3: ......
Page 4: ......
Page 5: ......
Page 6: ......
Page 7: ......
Page 8: ......
Page 9: ......
Page 10: ......
Page 11: ......
Page 12: ......
Page 13: ......
Page 14: ......
Page 15: ......
Page 16: ......
Page 17: ......
Page 18: ......
Page 19: ......
Page 20: ......
Page 21: ......
Page 22: ......
Page 23: ......
Page 24: ......
Page 25: ......
Page 26: ......
Page 27: ......
Page 28: ......
Page 29: ......
Page 30: ......
Page 31: ......
Page 32: ......
Page 33: ......
Page 34: ......
Page 35: ......
Page 36: ......
Page 37: ......
Page 38: ......
Page 39: ......
Page 40: ......
Page 41: ......
Page 42: ......
Page 43: ......
Page 45: ...Schlage small format cores Service manual...
Page 46: ......
Page 48: ......
Page 49: ...Schlage SFIC service manual 5...
Page 58: ......
Page 59: ......
Page 62: ......
Page 64: ......
Page 107: ......
Page 109: ...Everest full size cylinder Service manual...
Page 110: ......
Page 129: ...B Series Service manual...
Page 130: ......
Page 150: ...22 Schlage B Series service manual Locks...
Page 165: ...Options and Parts Schlage B Series service manual 37 Notes...
Page 166: ...38 Schlage B Series service manual Options and Parts Notes...
Page 167: ......
Page 169: ...ND Series Service manual...
Page 270: ...L Series Service manual...
Page 271: ......
Page 293: ...24 Schlage L Series service manual...
Page 359: ...90 Schlage L Series service manual...
Page 444: ...Schlage L Series service manual 175...
Page 499: ...230 Schlage L Series service manual...
Page 500: ......
Page 502: ...AL Series Service manual...
Page 503: ......
Page 505: ......
Page 542: ...A Series Service manual...
Page 543: ......
Page 545: ......
Page 572: ......


