


ALIEN HERO INSTRUCTION MANUAL
105
Last Revised 16/10/2013
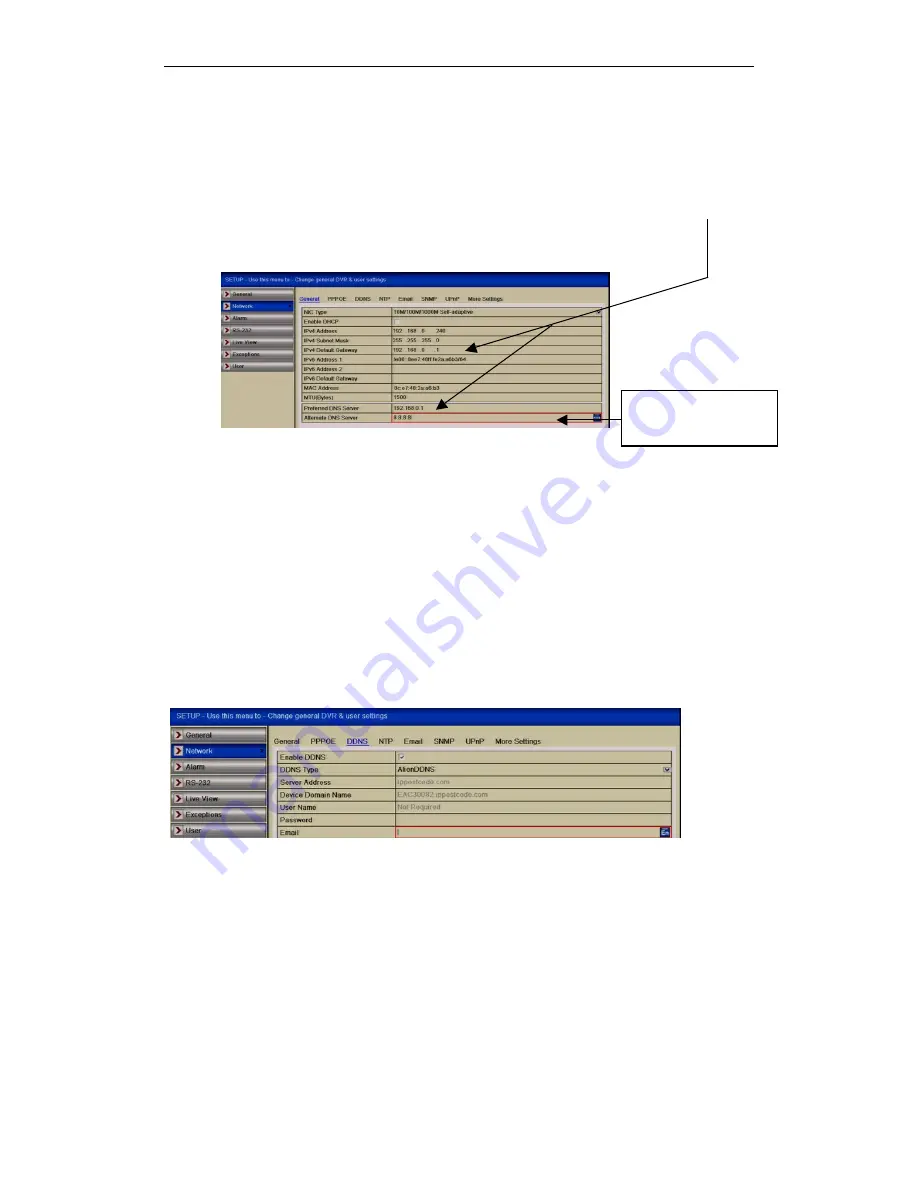
Step 1. Enter a DNS Server Address
1. Navigate in the DVR’s menu to the DNS entry; Menu > Setup > Network >
Preferred DNS Server
2. Enter the appropriate Preferred DNS Server address (ideally your router’s Default
Gateway address). Whilst in the networking menu, check the Gateway field = your
router’s internal address should be the same.
3. Enter the appropriate Alternate DNS Server address: 8.8.8.8
Figure 9.3a DNS Server Settings Interface
Step 2. Enable AlienDDNS
1. Enter the DVR’s menu: Menu > Setup > Network > DDNS
2. Tick the DDNS checkbox
3. Ensure AlienDDNS is selected in the DDNS Type field
4. Leave the password field blank (This is entered in Step 3)
5. Enter a valid email address into the email field (you will receive an email)
6. Click Apply
The DVR should connect to ippostcode.com requesting a ‘new’ DNS record for itself,
the server should respond with ‘Record Created’ and send you an email containing a
password.
Figure 9.3b DDNS Settings Interface
Step 3. Enter your Alien DDNS Password
1. Enter the password from the email into the Alien DDNS ‘password’ entry field
2. Click Apply
The DVR should connect again, this time issuing an ‘update’ DNS request using the
password, if successful the server responds with an ‘Update successful’ message,
otherwise it returns an error message, eg: ‘Invalid password’, please check and try
again. This update should take approximately 20 seconds.
8.8.8.8 is Google’s
public DNS server