Appendix B: Rack mount configuration
126
3
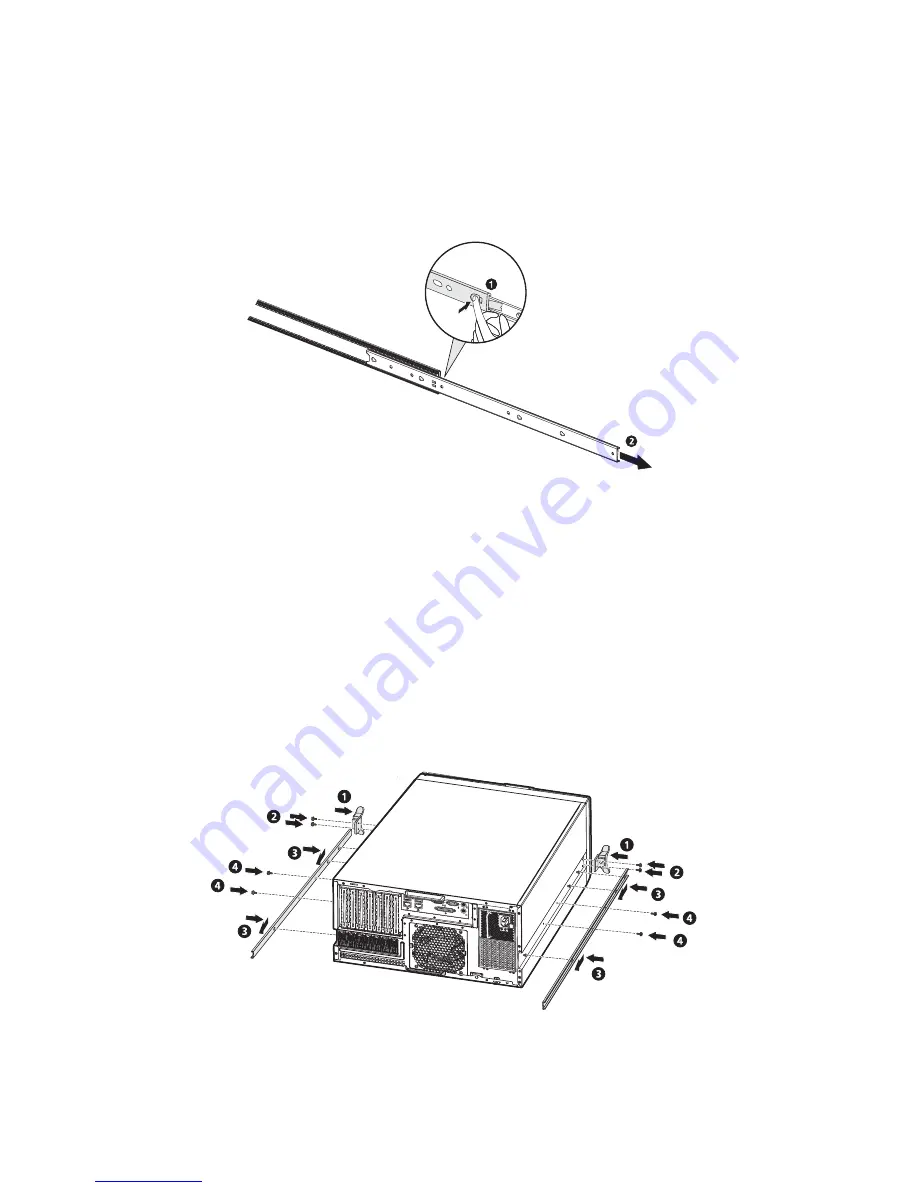
Remove the inner rails from the mounting rails.
(1) Extend the inner rail from the mounting rail until the rail
release latch is exposed.
(2) Depress the release latch
(1)
and slip the inner rail out
(2)
.
Do the same thing to the other mounting rail.
4
Attach the rack handles and inner rails to the server.
(1) Align the screw holes on the rack handles with those on the
server.
(2) Secure the rack handles with two U#6-32 x 6.4 screws each.
(3) Insert the pegs on the server with the notches on the
mounting rails, then slide the mounting rails backward to seat
them properly.
(4) Secure the mounting rails to the server with two M4 x 5 screws
each.
Summary of Contents for Altos G540 Series
Page 1: ...Acer Altos G540 Series User s Guide ...
Page 10: ...x ...
Page 11: ...1 System tour ...
Page 24: ...1 System tour 14 System boards Mainboard ...
Page 34: ...1 System tour 24 ...
Page 35: ...2 System setup ...
Page 44: ...2 System setup 34 ...
Page 45: ...3 System upgrade ...
Page 78: ...3 System upgrade 68 ...
Page 79: ...4SystemBIOS ...
Page 108: ...4 System BIOS 98 ...
Page 109: ...5 System troubleshooting ...
Page 120: ...5 System troubleshooting 110 ...
Page 121: ...Appendix A Server management tools ...
Page 129: ...Appendix B Rack mount configuration ...
Page 130: ...This appendix shows you how to set up the Altos G540 server in a rack mount configuration ...


