OPERATION
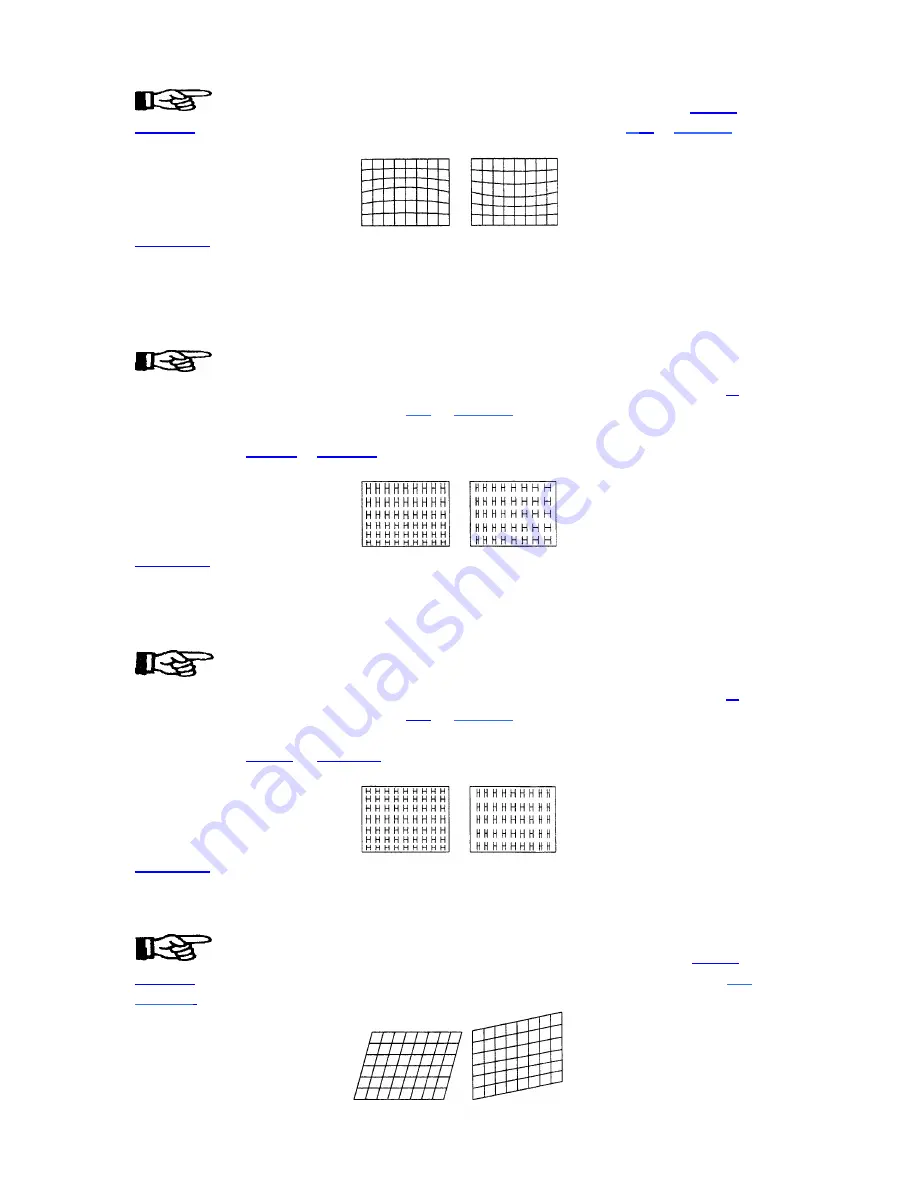
To adjust H bow, select Bow from the Geometry menu then press
LEFT
or
RIGHT
until the image appears as desired. To adjust V Bow, press
U
P
or
DOWN
until
the center of the picture is as curved or as straight as desired.
GEOM 7
C Linearity
The C Linearity function corrects for gradual non-linearity between the top and bottom or
left and right sides of the display image. Examples are shown below. In the first example
the top of the image increases in vertical size while the bottom decreases in vertical size.
In the second example the right side of the image increases in horizontal size while the
left side decreases in horizontal size.
Select C Linearity from the Geometry menu. It is best to have a screen full of
characters displayed. Or use one of the internal test patterns available by pressing
#.
If
there is a vertical non-linearity, press
UP
or
DOWN
until the characters at the top,
middle, and bottom of the screen have the same vertical size. If there is a horizontal non-
linearity, press
LEFT
or
RIGHT
until the characters at the left, middle, and right of the
screen have the same horizontal size.
GEOM 8
S Linearity
The S Linearity function corrects for vertical and horizontal non-linearities which extend
from the center of the display to the top and bottom or left and right. Examples are shown
below. Notice how the top and bottom or left and right characters are much smaller in
size than the center characters.
Select S Linearity from the Geometry menu. It is best to have a screen full of
characters displayed. Or use one of the internal test patterns available by pressing
#.
If
there is a vertical non-linearity, press
UP
or
DOWN
until the characters at the top,
middle, and bottom of the screen have the same vertical size. If there is a horizontal non-
linearity, press
LEFT
or
RIGHT
until the characters at the left, middle, and right of the
screen have the same horizontal size.
GEOM 9
Skew
The Skew function adjusts the display image so that the sides of an image appear to be
leaning to one side and/or shifted up or down. The two displays below demonstrate skew
adjustment.
To adjust H Skew, select Skew from the Geometry menu then use
LEFT
and
RIGHT
until the image is slanted from side to side as desired. For V Skew, press
UP
or
DOWN
to slant up or down.
3-24
Summary of Contents for Model 9
Page 1: ......
Page 44: ...INSTALLATION SETUP Figure 2 29 ACON Installation Examples 2 38...
Page 104: ...Physical Dimensions 5 5...
Page 105: ...5 6...
Page 113: ...A p p e n d i x B B 1...
Page 114: ...B 2...
Page 115: ...C 1...
Page 116: ...C 2...
Page 117: ...D 1...
Page 118: ...D 2...
Page 119: ...E 1...
Page 120: ...F 1...
Page 121: ...F 2...
Page 122: ...F 3...
Page 123: ...F 4...
Page 124: ...F 5...
Page 125: ...F 6...
Page 126: ...F 7...
Page 127: ...F 8...
Page 128: ...F 9...
Page 129: ...F 10...
Page 130: ...G 1...
Page 131: ...Index 1...
Page 132: ...Index 2...


![NEC MT800[1].PART1 User Manual preview](http://thumbs.mh-extra.com/thumbs/nec/mt800-1-part1/mt800-1-part1_user-manual_250403-1.webp)

