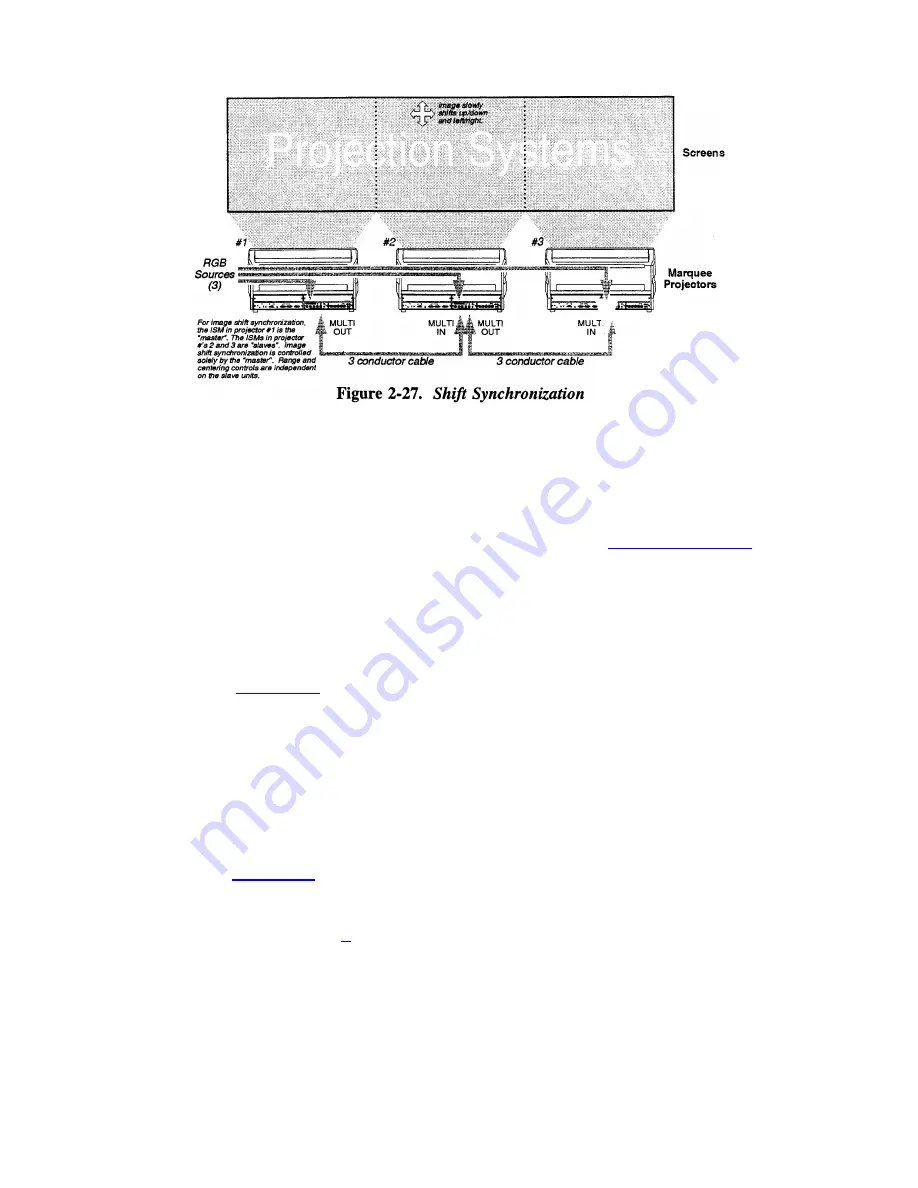
INSTALLATION & SETUP
ISM Setup >
Set up the ISM as follows:
Note: If a
new
source is connected after the ISM has been set up, setup may again be
required for the
new
source.
Step 1
Turn on the projector. With a source connected to the ISM, press
SOURCE 0 then 2
to
select it. Make sure the source image is displayed on screen. At the front of the ISM, turn
the H RANGE and V RANGE controls fully counter-clockwise. Also set the
FAST/SLOW switch to SLOW. Adjust the H CENT and V CENT controls to their mid-
point positions.
Step 2
Adjust both the horizontal and vertical phase to center the image within the visible
display area (
PIC then 1
). Next, reduce the left, right, top and bottom blanking levels as
much as possible to maximize the visible display area.
Adjust the H CENT and V CENT controls to center the image within the display raster.
To clearly see the raster edges, set the brightness control on the display device to
maximum. There should be a small gap around the image so that there is enough room
within the raster area to allow the image to shift vertically and horizontally without being
cut off at any time. See Figure:
2-28 below. If required, you can decrease the external
source image width (without changing the raster size) by setting the retrace time to short
versus long (
PIC then 8
). Note however that the actual gap which may be achieved is
dependant on the source signal.
Tip: Display a cross hatch
(
#
)
to
view
the raster limits at the source frequency.
2-35
Summary of Contents for Model 9
Page 1: ......
Page 44: ...INSTALLATION SETUP Figure 2 29 ACON Installation Examples 2 38...
Page 104: ...Physical Dimensions 5 5...
Page 105: ...5 6...
Page 113: ...A p p e n d i x B B 1...
Page 114: ...B 2...
Page 115: ...C 1...
Page 116: ...C 2...
Page 117: ...D 1...
Page 118: ...D 2...
Page 119: ...E 1...
Page 120: ...F 1...
Page 121: ...F 2...
Page 122: ...F 3...
Page 123: ...F 4...
Page 124: ...F 5...
Page 125: ...F 6...
Page 126: ...F 7...
Page 127: ...F 8...
Page 128: ...F 9...
Page 129: ...F 10...
Page 130: ...G 1...
Page 131: ...Index 1...
Page 132: ...Index 2...


