


Illustration
Action
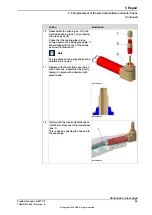
xx2200000339
Reassemble the M16 screw (pos. 7),
connecting the piston rod and piston rod
coupling (pos. 8). Use thread locking fluid
- Loctite 243 and tighten the screw with
tightening torque 100 Nm.
12
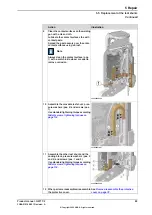
Assemble the washers (pos. 1), the insu-
lation washers (pos. 3) and the insulation
sleeves (pos. 4) onto the screws (pos. 1).
13
Place the insulation plate (pos. 6) and the
electrode adapter (pos. 5) in alignment
to the piston rod coupling (pos. 8).
14
Reassemble the screws (pos. 1) incl.
washers and sleeves. Tighten the screws
with a maximum torque of 9.8 Nm.
15
xx2200000338
Reconnect the LeanID connectors.
16
See
Remove/reassemble the protective
When parts are reassembled, reassemble
the protective cover.
17
Product manual - GWT C9
93
3HAA010198-001 Revision: A
© Copyright 2022 ABB. All rights reserved.
5 Repair
5.6 Replacement of the actuator
Continued
Summary of Contents for GWT C9
Page 1: ...ROBOTICS Product manual GWT C9 ...
Page 62: ...This page is intentionally left blank ...
Page 124: ...This page is intentionally left blank ...
Page 126: ......
Page 127: ......


