Chapter 9 Routing
XMG3512-B10A User’s Guide
127
The following table describes the labels in this screen.
9.3 The DNS Route Screen
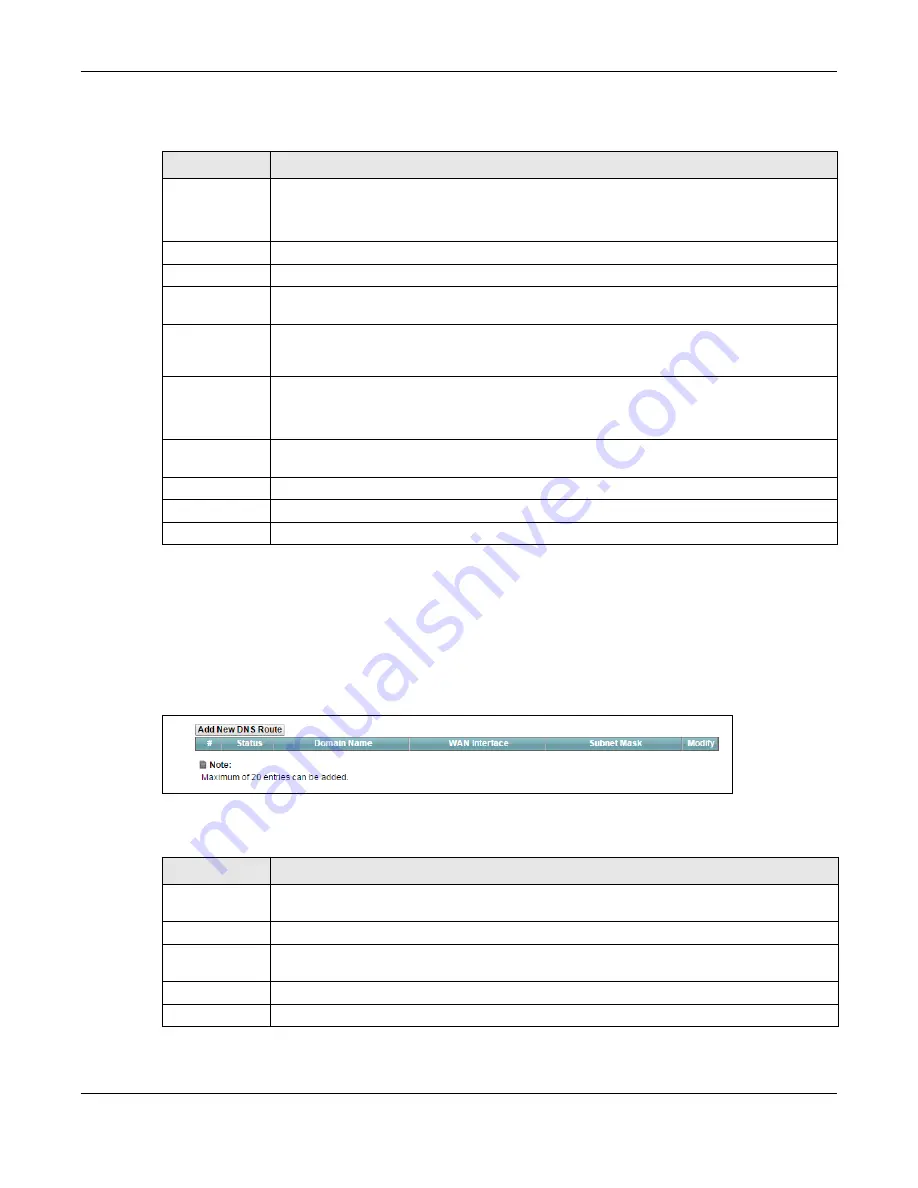
Use this screen to view and configure DNS routes on the XMG. Click
Network Setting > Routing > DNS
Route
to open the
following
screen.
Figure 62
Network Setting > Routing > DNS Route
The following table describes the labels in this screen.
Table 38 Routing: Add/Edit
LABEL
DESCRIPTION
Active
This field allows you to activate/deactivate this static route.
Select
Enable
to activate the static route. Select
Disable
to deactivate this static route without
having to delete the entry.
Route Name
Enter a descriptive name for the static route.
IP Type
Select whether your IP type is
IPv4
or
IPv6
.
Destination IP
Address
Enter the IPv4 or IPv6 network address of the final destination.
IP Subnet Mask
If you are using IPv4 and need to specify a route to a single host, use a subnet mask of
255.255.255.255 in the subnet mask field to force the network number to be identical to the host
ID. Enter the IP subnet mask here.
Use Gateway IP
Address
The gateway is a router or switch on the same network segment as the device's LAN or WAN
port. The gateway helps forward packets to their destinations.
If you want to use the gateway IP address, select
Enable
.
Gateway IP
Address
Enter the IP address of the gateway.
Use Interface
Select the WAN interface you want to use for this static route.
OK
Click
OK
to save your changes.
Cancel
Click
Cancel
to exit this screen without saving.
Table 39 Network Setting > Routing > DNS Route
LABEL
DESCRIPTION
Add New DNS
Route
Click this to add a new DNS route.
#
This is the index number of a DNS route.
Status
This field displays whether the DNS route is active or not. A yellow bulb signifies that this DNS route
is active. A gray bulb signifies that this DNS route is not active.
Domain Name
This is the host name or domain name of the DNS route entry.
WAN Interface
This is the WAN connection through which the XMG forwards DNS requests for this domain name.
Содержание XMG3512-B10A
Страница 14: ...14 PART I User s Guide ...
Страница 23: ...Chapter 1 Introducing the XMG XMG3512 B10A User s Guide 23 Figure 8 Wall Mounting Example ...
Страница 33: ...Chapter 3 Quick Start XMG3512 B10A User s Guide 33 Figure 16 Quick Start Result Summary ...
Страница 56: ...56 PART II Technical Reference ...
Страница 139: ...Chapter 10 Quality of Service QoS XMG3512 B10A User s Guide 139 Figure 71 Classification Setup Add Edit ...
Страница 249: ...249 PART III Appendices Appendices contain general information Some information may not apply to your device ...
Страница 279: ...Appendix D Legal Information XMG3512 B10A User s Guide 279 Environmental Product Declaration ...


