Chapter 2 Tutorials
NVG2053 User’s Guide
29
4
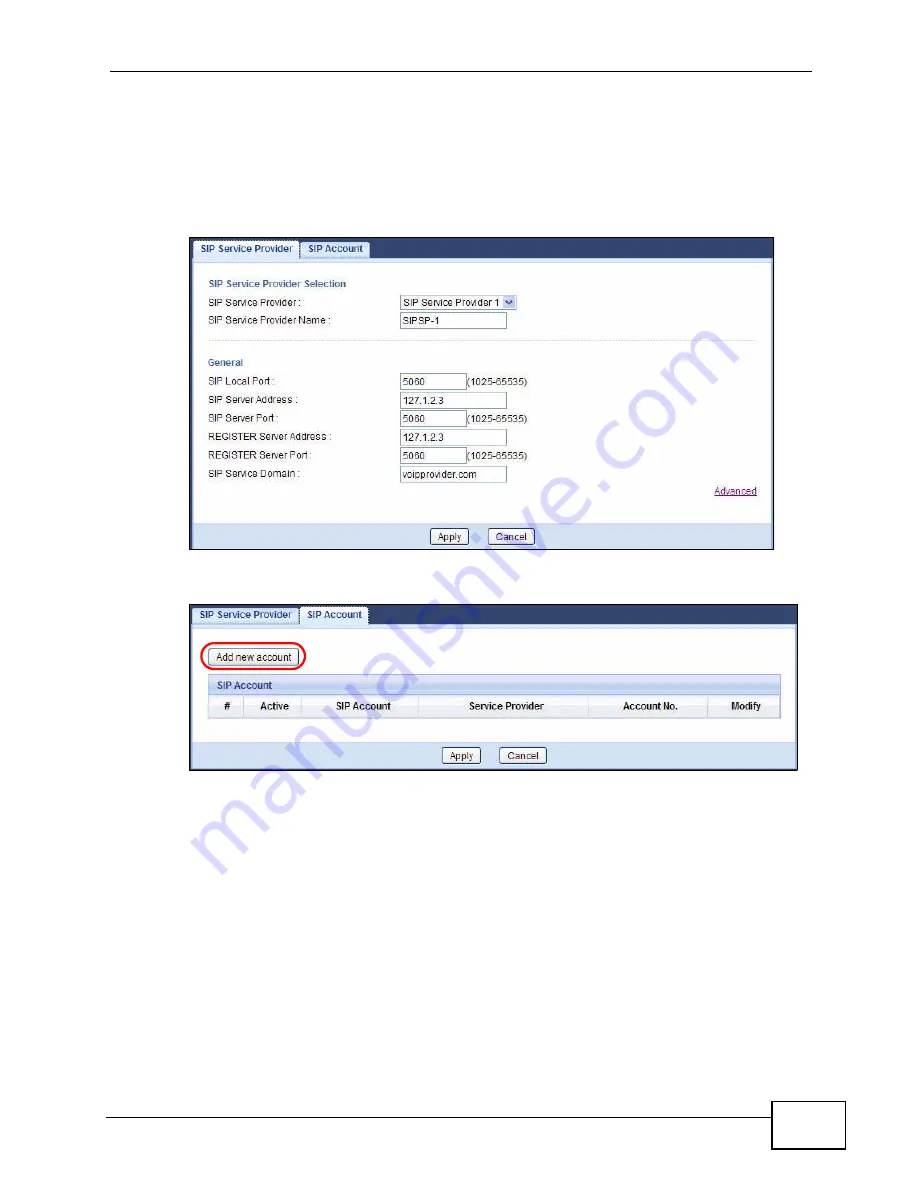
Enter the SIP server address (“127.1.2.3” in this example).
5
Repeat the SIP server address in the REGISTER Server Address field.
6
Enter the SIP server domain (“voipprovider.com” in this example) which is the part
after the @ symbol in your SIP account. Click Apply.
7
Click VoIP > SIP > SIP Account to enter your SIP account information.
8
The NVG2053 allows you to set up multiple SIP accounts. Click the Add new
account button and then select SIP1 to configure the first SIP account.
9
Select the name of the SIP service provider profile you just configured.
10
Select the checkbox to enable the SIP account on the NVG2053. If you do not
select this option, then you cannot use the settings configured here for the
selected SIP account.
11
Enter the SIP number (“12345678” in this example) which is the part before the @
symbol in your SIP account.
Содержание NVG2053
Страница 2: ......
Страница 8: ...Safety Warnings NVG2053 User s Guide 8...
Страница 10: ...Contents Overview NVG2053 User s Guide 10...
Страница 18: ...Table of Contents NVG2053 User s Guide 18...
Страница 19: ...19 PART I User s Guide...
Страница 20: ...20...
Страница 26: ...Chapter 1 Getting to Know Your NVG2053 NVG2053 User s Guide 26...
Страница 67: ...67 PART II Technical Reference...
Страница 68: ...68...
Страница 74: ...Chapter 5 Status Screens NVG2053 User s Guide 74...
Страница 80: ...Chapter 6 Monitor NVG2053 User s Guide 80...
Страница 130: ...Chapter 10 DHCP Server NVG2053 User s Guide 130...
Страница 144: ...Chapter 12 Network Address Translation NAT NVG2053 User s Guide 144...
Страница 150: ...Chapter 14 Static Route NVG2053 User s Guide 150...
Страница 166: ...Chapter 16 Firewall NVG2053 User s Guide 166...
Страница 200: ...Chapter 18 USB Service NVG2053 User s Guide 200...


