VX-6E O
PERATING
M
ANUAL
16
T
RANSMISSION
Once you have set up an appropriate frequency inside one of the 144 MHz, or 430 MHz
Amateur bands on which the
VX-6E
can transmit, you’re ready to go on the air! These are
the most basic steps; more advanced aspects of transmitter operation will be discussed later.
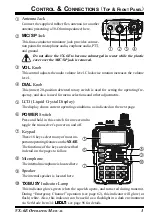
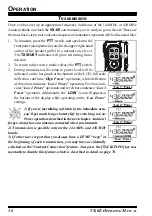
1. To transmit, press the
PTT
switch, and speak into the
front panel microphone (located in the upper right-hand
corner of the speaker grille) in a normal voice level.
The
TX/BUSY
indicator will glow red during trans-
mission.
2. To return to the receive mode, release the
PTT
switch.
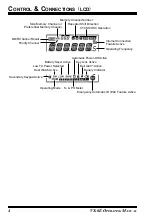
3. During transmission, the relative power level will be
indicated on the bar graph at the bottom of the LCD; full scale
deflection confirms “
High Power
” operation, while deflection
of three bars indicates “
Low 1 Power
” operation. Five bars indi-
cates “
Low 2 Power
” operation and seven bars indicates “
Low 3
Power
” operation. Additionally, the “
LOW
” icon will appear at
the bottom of the display while operating on the “
Low Power
”
settings.
1) If you’re just talking to friends in the immediate area,
you’ll get much longer battery life by switching to Low
Power operation, described in the next chapter. And don’t
forget: always have an antenna connected when you transmit.
2) Transmission is possible only on the 144 MHz, and 430 MHz
bands.
3) If other users report that you always have a DTMF “beep” at
the beginning of each transmission, you may have accidentally
switched on the “Internet Connection” feature. Just press the [ (LK)TXPO] key mo-
mentarily to disable this feature, which is described in detail on page 70.
O
PERATION
“L
OW
1” P
OWER
“L
OW
2” P
OWER
“L
OW
3” P
OWER
“H
IGH
” P
OWER
Содержание VX-6E
Страница 86: ...VX 6E OPERATING MANUAL 84 MISCELLANEOUS SETTINGS NOTE ...
Страница 110: ...VX 6E OPERATING MANUAL 108 NOTE ...

