QLS-8100 Xe
2-9
2
Insert the water cooling drives into the mounting bracket. The wires and
water tubing must face toward the printer.
3
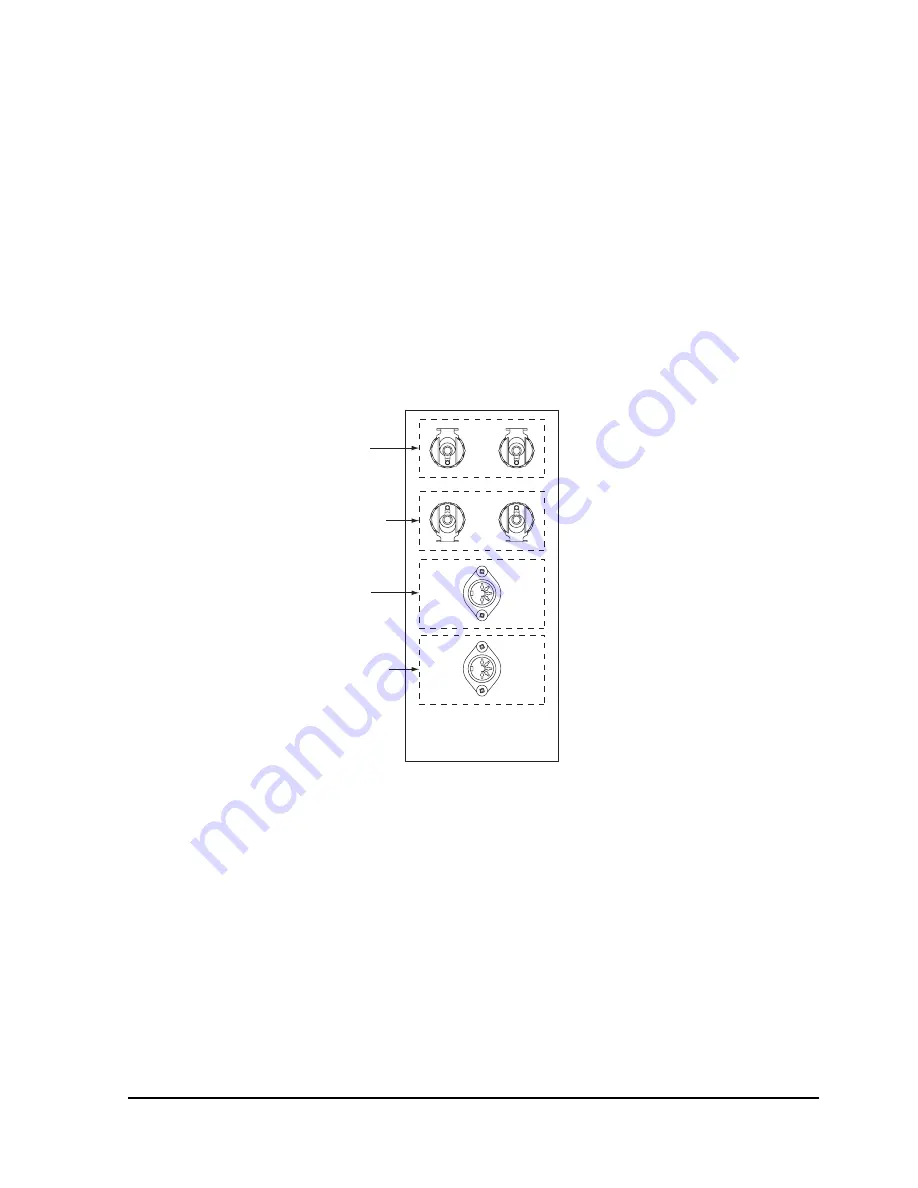
Connect the water tubes for each cooling drive to the printer. Then
connect the power cord for each cooling drive to the printer.
The top cooling drive water tubes connect to the top water connectors on
the printer. Likewise, the water tubes from the bottom drive connect to
the lower water connectors. Push firmly on the connectors to snap them
into place.
The top cooling drive power cord connects to the top power connector
on the printer. Likewise, the power cord from the bottom drive connects
to the lower power connector.
Top Water Cooling Drive
Water Tube Connectors
Top Water Cooling Drive
Power Connector
Bottom Water Cooling Drive
Power Connector
Bottom Water Cooling Drive
Water Tube Connectors
4
Use the Mounting Screws to fasten the water cooling drives into the
mounting bracket. Two screws are used for each drive.
Содержание QLS-8100XE
Страница 2: ......
Страница 14: ...1 4 Quick start ...
Страница 19: ...QLS 8100 Xe 2 5 Side view ...
Страница 46: ...3 14 Loading media and calibration ...
Страница 149: ...QLS 8100 Xe A 1 Appendix A Physical Data ...
Страница 153: ...QLS 8100 Xe B 1 Appendix B Specifications ...
Страница 156: ...B 4 Specifications ...
Страница 157: ...QLS 8100 Xe C 1 Appendix C Replacement Parts ...
Страница 160: ...C 4 Replacement parts ...
Страница 161: ...QLS 8100 Xe D 1 Appendix D Color QuickLabel 99 Pro setup ...
Страница 166: ...D 6 Color QuickLabel 99 Pro setup ...
Страница 167: ...QLS 8100 Xe E 1 Appendix E Windows Printer Driver Setup ...
Страница 175: ...QLS 8100 Xe F 1 Appendix F Format error codes ...
Страница 180: ...F 6 Format error codes ...
Страница 181: ...QLS 8100 Xe G 1 Appendix G Menu Structure ...
Страница 182: ...G 2 Menu Structure ...


