


2-10
Physical setup
5
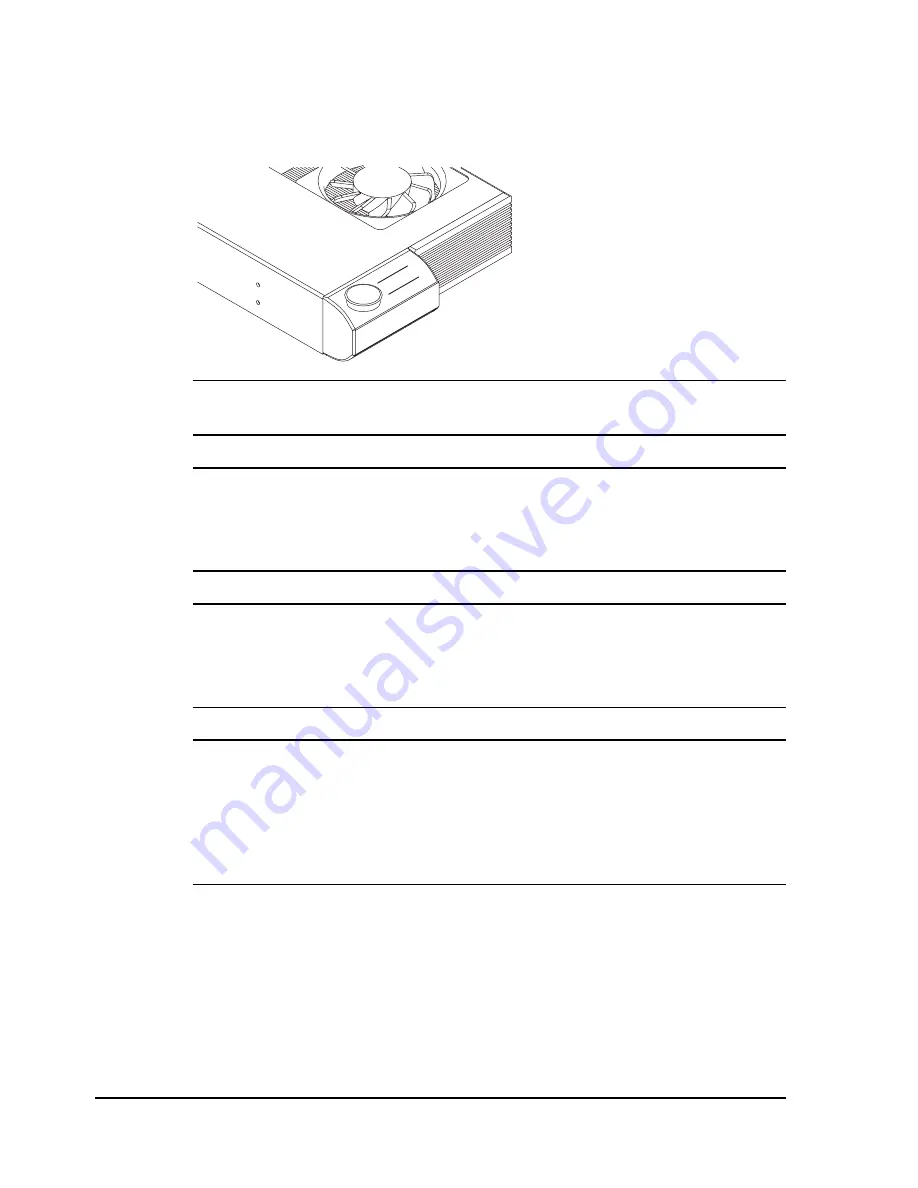
Remove the reservoir cap from each cooling drive, and then fill them
with the supplied distilled water. Ensure that the water level is between
the HIGH and LOW indicators. Then replace the reservoir caps.
HIGH
LOW
Warning:
Only use non-conductive, distilled water. Other liquid can
cause oxidation or corrosive damage to the cooling mechanism.
Note:
Once the remaining setup processes in this chapter are complete,
and the printer power is turned on, check the water level. The water
level may lower due to the liquid entering the printer. It may be
necessary to add more water to the reservoirs.
Note:
During printer operation, the water level must stay between the
HIGH and LOW indicators. If the water level is below the LOW
indicator, the cooling system will become ineffective. It is recommended
that you check the water level periodically and add water if necessary.
Warning:
If the printer will be shipped to another location, it is necessary
to uninstall the water cooling system and purge the remaining water
from the printer.
For more information about uninstalling the water cooling system, refer
to
Chapter 7: Maintenance and Repair
.
Содержание QLS-8100XE
Страница 2: ......
Страница 14: ...1 4 Quick start ...
Страница 19: ...QLS 8100 Xe 2 5 Side view ...
Страница 46: ...3 14 Loading media and calibration ...
Страница 149: ...QLS 8100 Xe A 1 Appendix A Physical Data ...
Страница 153: ...QLS 8100 Xe B 1 Appendix B Specifications ...
Страница 156: ...B 4 Specifications ...
Страница 157: ...QLS 8100 Xe C 1 Appendix C Replacement Parts ...
Страница 160: ...C 4 Replacement parts ...
Страница 161: ...QLS 8100 Xe D 1 Appendix D Color QuickLabel 99 Pro setup ...
Страница 166: ...D 6 Color QuickLabel 99 Pro setup ...
Страница 167: ...QLS 8100 Xe E 1 Appendix E Windows Printer Driver Setup ...
Страница 175: ...QLS 8100 Xe F 1 Appendix F Format error codes ...
Страница 180: ...F 6 Format error codes ...
Страница 181: ...QLS 8100 Xe G 1 Appendix G Menu Structure ...
Страница 182: ...G 2 Menu Structure ...


